
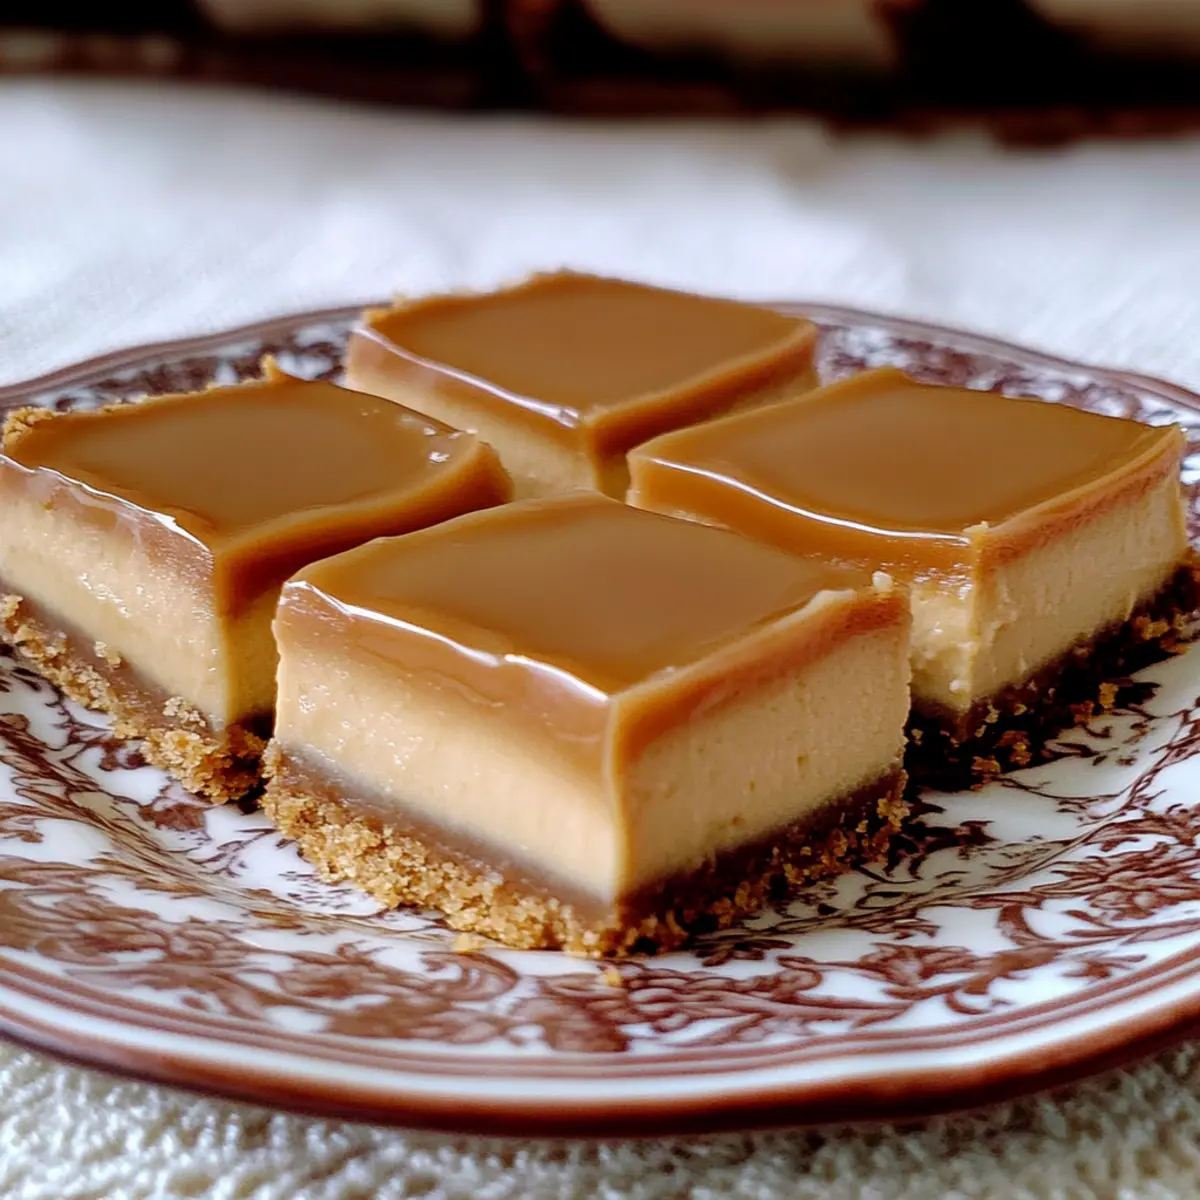
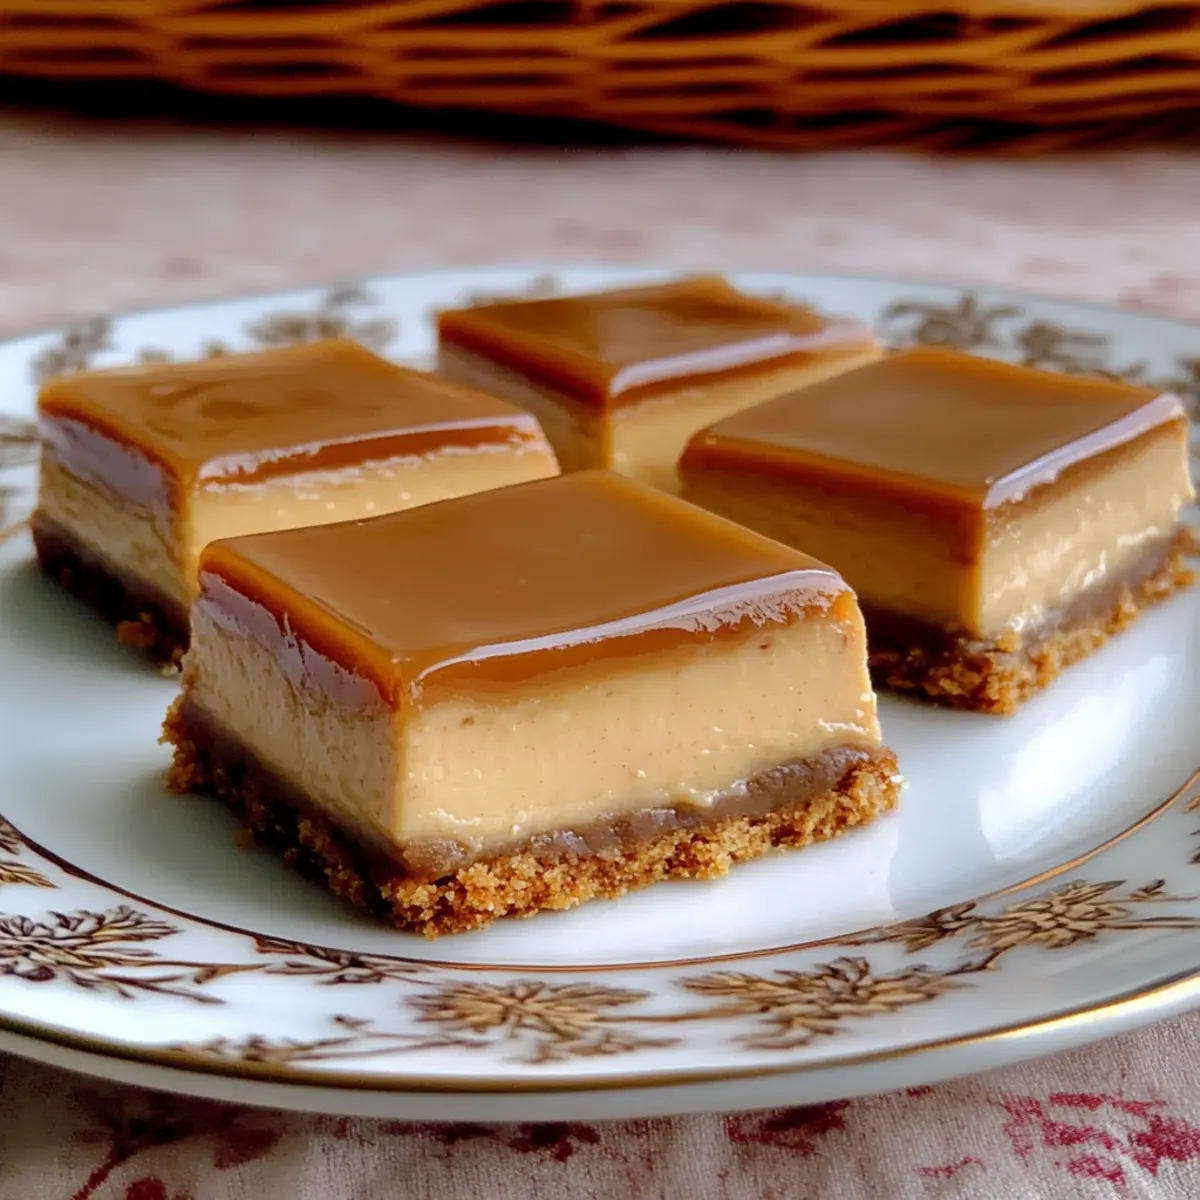
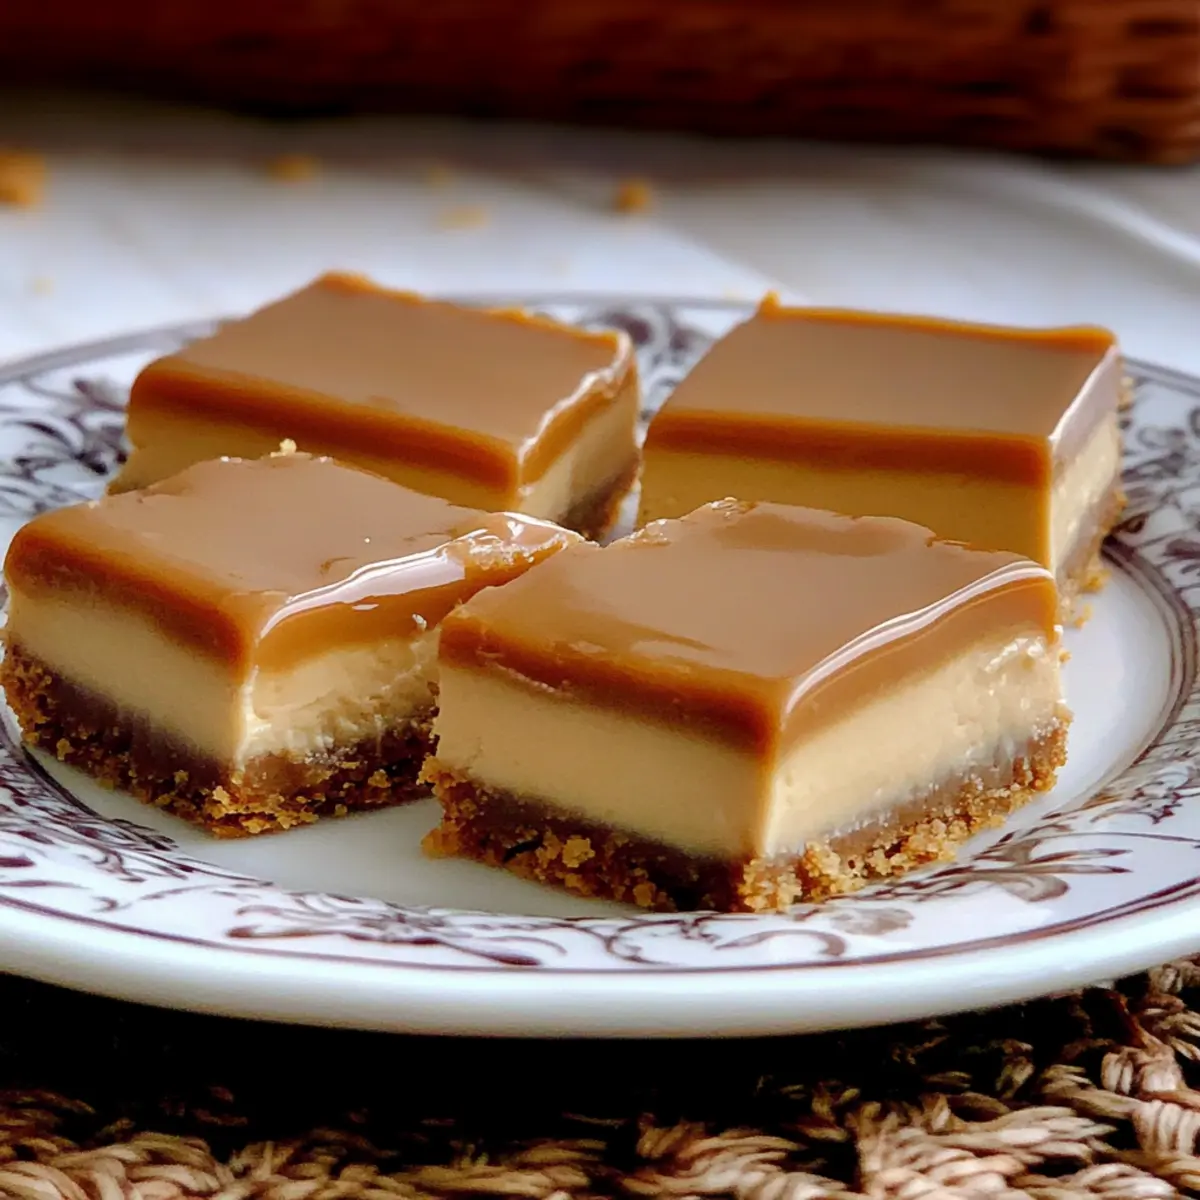
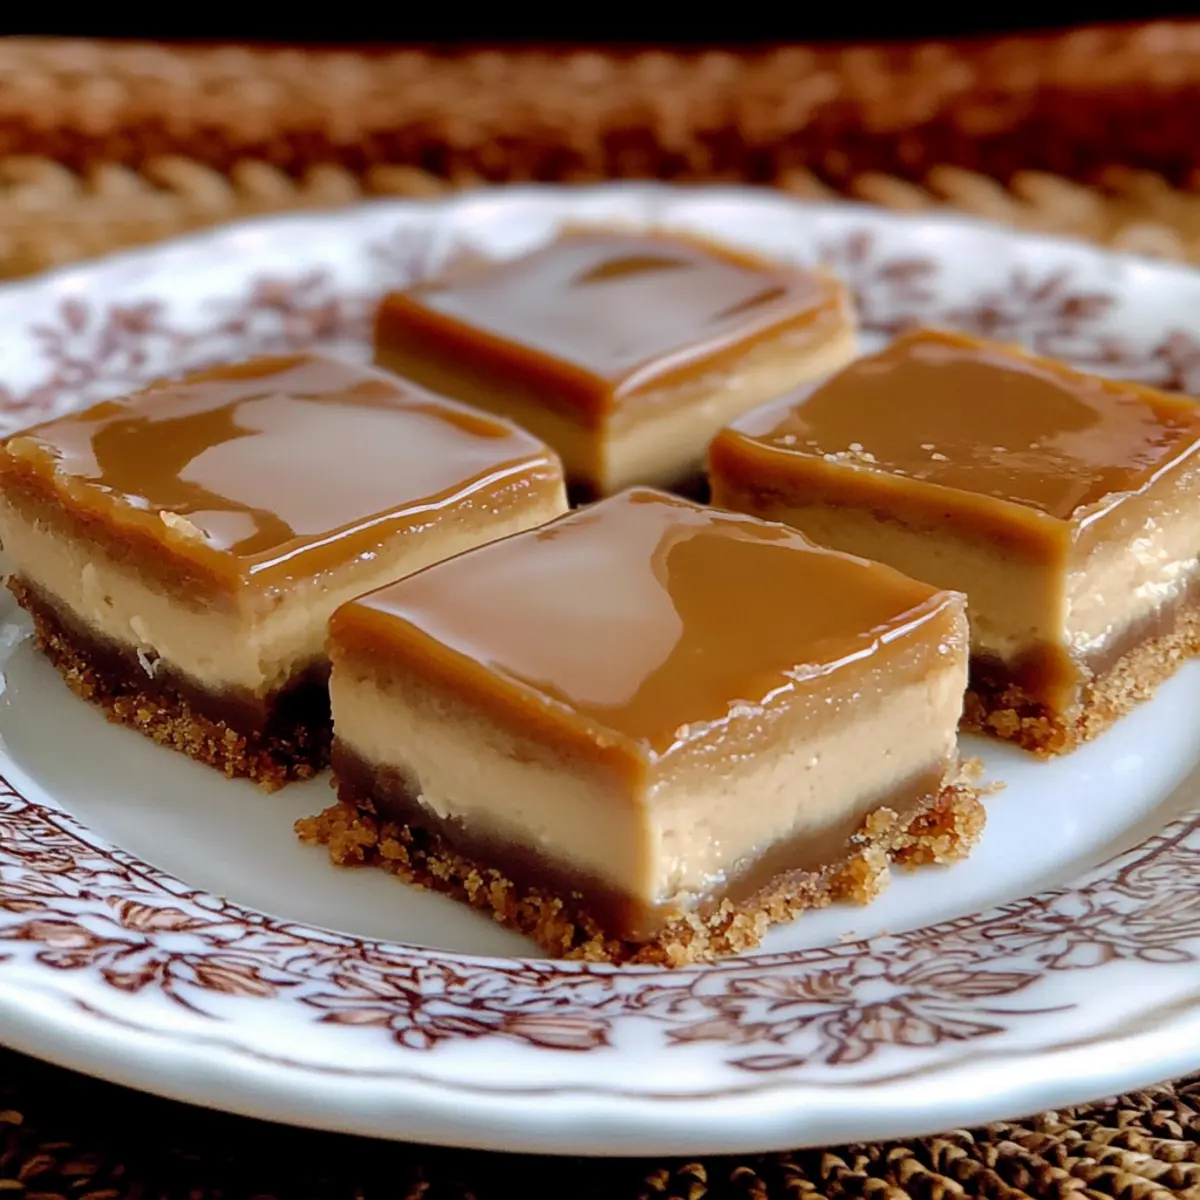
Have you ever stumbled upon a dessert so rich and creamy that it instantly transports you to a cozy café in South America? That’s the magic of these Dulce de Leche Cheesecake Bars! They promise an easy, delightful endeavor in the kitchen, requiring no special pans to whip up this luscious treat. With a perfectly crunchy graham cracker crust supporting a velvety filling, every layer is kissed by the sweet embrace of homemade dulce de leche and just a hint of Fleur de Sel. Not only do they make for a mouthwatering dessert that’s bound to impress your guests, but they’re also a straightforward recipe that even novice bakers can conquer. Are you ready to indulge in this sweet journey?
Why Are These Cheesecake Bars Irresistible?
Rich, Decadent Flavor: The combination of creamy cheesecake and sweet dulce de leche creates an indulgent taste sensation that will have you coming back for more.
Easy to Make: With no special pans required, this recipe is a breeze to whip up, making it perfect for both seasoned bakers and kitchen newbies alike.
Perfect for Any Occasion: Whether it’s a casual family dinner or a festive gathering, these bars are sure to impress your guests and be the centerpiece of dessert.
Versatile Recipe: Want to get creative? You can swap out the flavor of the cream cheese or add fresh fruit for an exciting twist. If you’re looking for another delightful treat, don’t miss my Fried Strawberry Cheesecake recipe!
Quick Prep and Chill Time: With a straightforward prep process and a short chill time, you’ll be enjoying these delectable bars in no time.
Dulce de Leche Cheesecake Bars Ingredients
• For the Crust
- Graham Cracker Crumbs – Provides a sweet, crunchy base; you can substitute with crushed digestive biscuits for a different flavor.
- Sugar – Sweetens the crust and filling; brown sugar adds a richer taste.
- Cinnamon – Enhances flavor; optional, or swap with nutmeg for a unique twist.
- Butter – Binds the crust; use unsalted butter or coconut oil for a dairy-free option.
• For the Filling
- Cream Cheese – The star ingredient for creaminess; make sure it’s softened for easy mixing.
- Dulce de Leche – Infuses the filling with sweetness; you can use either store-bought or homemade for the ultimate flavor.
- Eggs – Provide structure; consider one extra-large egg if scaling down the recipe.
- Vanilla Extract – Adds depth to the filling; opt for pure extract for the best flavor.
• Topping
- Heavy Cream – Mixed with dulce de leche for a smooth topping; half-and-half can be a substitute if needed.
These Dulce de Leche Cheesecake Bars promise a delightful dessert experience packed with rich flavors and easy preparation!
Step‑by‑Step Instructions for Dulce de Leche Cheesecake Bars
Step 1: Crust Preparation
Preheat your oven to 350°F (175°C) and lightly spray a 13 x 9 x 2-inch pan with nonstick spray. In a mixing bowl, combine graham cracker crumbs, sugar, and cinnamon, pouring in the melted butter until everything is well mixed. Press this mixture evenly into the bottom of the prepared pan, ensuring it’s tightly packed. Bake for 10 minutes until golden brown, then remove and let it cool completely.
Step 2: Filling Preparation
In a food processor, blend the softened cream cheese and sugar until the mixture is creamy and smooth. Gradually add in the dulce de leche, mixing until fully incorporated. Next, add the eggs one at a time, blending briefly after each addition to ensure they’re well combined. Finish the filling with a splash of vanilla extract, mixing until smooth. Carefully spread this luscious filling over your cooled crust.
Step 3: Bake the Cheesecake Bars
Place the pan in the preheated oven and bake the dulce de leche cheesecake bars for about 38 minutes. Keep an eye on them—the edges should appear set while the center is slightly puffed and still has a gentle wiggle. Once baked, remove them from the oven and allow the bars to cool completely at room temperature.
Step 4: Topping Preparation
In a microwave-safe bowl, combine the remaining dulce de leche with heavy cream. Heat the mixture in 10-second intervals, stirring in between until it’s melted and smooth. Pour this glossy topping over the cooled cheesecake filling, using a spatula to spread it evenly across the surface. Once done, refrigerate the entire pan for about 1 hour to allow it to set and chill.
Step 5: Serving the Bars
When the cheesecake bars have chilled, it’s time to cut them. Carefully slice into 24 bars, taking care to make straight cuts for a clean presentation. Just before serving, sprinkle a pinch of Fleur de Sel over each bar to enhance that rich caramel flavor of the dulce de leche. Enjoy your scrumptious dulce de leche cheesecake bars with friends and family!
What to Serve with Dulce de Leche Cheesecake Bars
These decadent bars create the perfect sweet ending, inviting you to build a delightful dessert experience worthy of every celebration.
-
Fresh Berries: The tartness of strawberries or raspberries contrasts beautifully with the rich cheesecake, adding a burst of freshness.
-
Vanilla Ice Cream: A scoop of vanilla ice cream adds a creamy, cool element that complements the warm, caramel notes of the bars.
-
Espresso or Coffee: A strong cup of coffee or espresso elevates the flavors, cutting through the sweetness with its bold, rich profile.
-
Chocolate Sauce Drizzle: For a chocolate lover’s twist, a warm chocolate sauce drizzled over the bars enhances the flavor and decadence.
-
Whipped Cream: A light dollop of freshly whipped cream provides an airy texture that balances the rich cheesecake and dulce de leche.
-
Nutty Topping: Toasted pecans or walnuts sprinkled on top add a delightful crunch and nutty flavor that pairs wonderfully with the cheesecake.
Imagine serving these bars alongside any of these delightful accompaniments, and watch your guests’ faces light up with joy!
Dulce de Leche Cheesecake Bars Variations
Feel free to get creative with these cheesecake bars and make them your own with just a few simple adjustments!
-
Fruit-Studded: Layer in pureed fruits like raspberries or mango before adding the topping for a burst of freshness. It adds a delightful tartness to balance the sweetness.
-
Chocolate Lovers: Mix in mini chocolate chips into the filling or top with a chocolate ganache instead of the dulce de leche for a fun twist on flavors.
-
Nutty Crunch: Add crushed nuts, like pecans or walnuts, to the crust for an added texture and flavor boost. The crunch complements the creamy filling beautifully.
-
Spiced Up: Incorporate spices like cardamom or ginger into the filling or crust for a warm, aromatic twist that elevates the dessert experience.
-
Dairy-Free Delight: Use coconut cream in place of cream cheese and substitute with dairy-free butter for a delicious plant-based version. Your dairy-free friends will appreciate it!
-
Caramel Swirl: Spoon a little extra dulce de leche into the filling and gently swirl it before baking to create beautiful marbled bars that look as good as they taste.
-
Almond Joy: Substitute a bit of cream cheese with almond-flavored cream cheese, and sprinkle toasted coconut on top for an exotic twist; it’s a tropical treat!
For more inspiration, why not try making some delicious Fried Strawberry Cheesecake sandwiches for a fun dessert option? Or indulge in the rich flavors of Chocolate Raspberry Cheesecake balls that pack a decadent punch!
Make Ahead Options
These Dulce de Leche Cheesecake Bars are ideal for meal prep, allowing you to enjoy rich, creamy dessert flavors without the last-minute rush! You can prepare the crust and the filling up to 24 hours in advance; simply store the crust in an airtight container in the fridge. When you’re ready to finish, spread the filling over the crust and bake as directed. After baking, refrigerate the bars for at least 1 hour to chill and set properly. To maintain their delicious texture, always slice the bars after they’ve cooled completely, and consider covering them with plastic wrap to prevent drying out. Preparing ahead ensures these sweet treats are just as delectable when you finally serve them!
Expert Tips for Dulce de Leche Cheesecake Bars
-
Cool Completely: Allow the cheesecake to cool fully before slicing. This prevents messy cuts and ensures a clean presentation.
-
Use a Lined Pan: Line your pan with parchment paper for easy removal and cutting of the bars. It will make your baking experience much smoother.
-
Cutting Technique: Use a sharp knife and wipe it clean between cuts for evenly shaped bars. This helps maintain the beautiful layers of your dulce de leche cheesecake bars.
-
Check for Doneness: When baking, look for the edges to be set but the center to slightly jiggle; this means your cheesecake is perfectly creamy and not overbaked.
-
Chill for Flavor: Refrigerating your bars for a full hour (or more) allows the flavors to meld beautifully, enhancing the overall taste and experience.
How to Store and Freeze Dulce de Leche Cheesecake Bars
Fridge: Store the cheesecake bars in an airtight container for up to 5 days. This keeps them fresh and ready to be enjoyed whenever a sweet craving strikes.
Freezer: For longer storage, wrap the bars tightly with plastic wrap and aluminum foil, then freeze for up to 2 months. Thaw in the fridge overnight before enjoying.
Reheating: If you prefer your bars slightly warm, reheat individual pieces in the microwave for about 10 seconds. This keeps the rich, creamy texture just right!
Serving Tip: Add a fresh sprinkle of Fleur de Sel on top before serving after storage for that delightful contrast of flavors in your dulce de leche cheesecake bars.
Dulce de Leche Cheesecake Bars Recipe FAQs
What type of dulce de leche should I use?
Absolutely! You can use store-bought dulce de leche for convenience, which can be found in most grocery stores. However, for an exquisite homemade flavor, I highly recommend making your own by slowly simmering sweetened condensed milk until it transforms into a rich caramel color. This method typically takes about 1-2 hours, and the result is a creamy, decadent topping that elevates your cheesecake bars.
How should I store the leftover cheesecake bars?
Very simply! After allowing your dulce de leche cheesecake bars to cool, store them in an airtight container in the refrigerator for up to 5 days. This helps maintain their freshness and creamy texture, meaning you can enjoy them anytime your sweet tooth kicks in!
Can I freeze these cheesecake bars?
Yes, you can! To freeze them, wrap each bar tightly in plastic wrap, followed by aluminum foil, to prevent freezer burn. They will stay fresh for up to 2 months! When you’re ready to enjoy them, simply transfer the desired number of bars to the refrigerator overnight to thaw, and they’ll be ready to delight your taste buds again.
What if my cheesecake bars crack on top during baking?
Don’t worry if that happens! Cracking is often a result of overbaking or sudden temperature changes. To minimize this, ensure to bake until the edges are set and the center is just slightly jiggly. After removing from the oven, let them cool gradually at room temperature before refrigerating. A gentle crack can always be covered with your topping, and they still taste divine!
Are these cheesecake bars suitable for those with allergies?
It’s wise to consider! If you have allergies, be mindful of using substitutions. The cream cheese can be replaced with a dairy-free alternative, and the butter can be swapped for coconut oil for a dairy-free option too. Always check ingredient labels if you’re concerned about allergens. Enjoying dessert should be safe and pleasurable for everyone!
Dulce de Leche Cheesecake Bars That Melt in Your Mouth
Ingredients
Equipment
Method
- Preheat your oven to 350°F (175°C) and lightly spray a 13 x 9 x 2-inch pan with nonstick spray. In a mixing bowl, combine graham cracker crumbs, sugar, and cinnamon. Pour in the melted butter and mix well. Press this mixture into the bottom of the prepared pan, ensuring it's tightly packed. Bake for 10 minutes until golden brown, then let it cool completely.
- In a food processor, blend the softened cream cheese and sugar until creamy. Gradually add in the dulce de leche, mixing until fully incorporated. Add the eggs one at a time, blending briefly after each addition. Add vanilla extract and mix until smooth. Carefully spread this filling over the cooled crust.
- Place the pan in the preheated oven and bake for about 38 minutes. The edges should be set and the center should have a gentle wiggle. Once baked, cool the bars completely at room temperature.
- In a microwave-safe bowl, combine the remaining dulce de leche with heavy cream. Heat in 10-second intervals, stirring until melted and smooth. Pour this topping over the cooled cheesecake filling, spreading it evenly. Refrigerate for about 1 hour to set and chill.
- Once chilled, slice into 24 bars for serving. Just before serving, sprinkle a pinch of Fleur de Sel over each bar to enhance the dulce de leche flavor.
Leave a Reply