
With a sprinkle of whimsy and a dash of creativity, Easter Basket Sugar Cookie Cups are here to brighten your spring celebrations! These delightful little treats, made from ready-to-bake sugar cookie dough, capture the essence of Easter in a fun, kid-friendly form that’s sure to be a hit at any gathering. Filled with a creamy vanilla buttercream and topped with colorful chocolate eggs, they’re not just adorable; they’re a breeze to whip up, making them perfect for last-minute dessert inspiration. These cookie cups offer the delightful crunch of a cookie with the softness of a homemade treat, all while inviting everyone to dive into a “nest” of sweet goodness. Who knew dessert could be this much fun? Ready to learn how to create these festive delights that will impress your friends and family? Let’s hop to it!
Why You’ll Love These Cookie Cups
Easy and Quick: With just a few ingredients and simple steps, these Easter Basket Sugar Cookie Cups are perfect for any home cook, no complex techniques needed!
Kid-Friendly Fun: Kids will love joining in to help create these delightful cups, allowing for creative expressions with frosting and toppings.
Festive Presentation: The bright colors and whimsical design will steal the show at your Easter gathering, making them a focal point for any dessert table alongside options like Baked Apple Cups.
Texture Perfection: Experience the contrast of the soft, chewy cookie cup with the fluffy buttercream and crispy chocolate eggs, creating an irresistible treat.
Make-Ahead Delight: These cookie cups can be made ahead of time, allowing you to relax and enjoy the celebration without the stress of last-minute baking.
Easter Basket Sugar Cookie Cups Ingredients
For the Cookie Cups
• Pillsbury Sugar Cookie Dough – This is the foundation for your cookie cups; opt for the flat package for easy cutting into squares.
• Butter – Adds creamy richness to your frosting; choose salted or unsalted based on your flavor preference.
For the Buttercream Frosting
• Powdered Sugar – Sweetens and thickens your buttercream; essential for achieving the right consistency.
• Heavy Whipping Cream – Vital for a light, fluffy frosting texture; don’t substitute it for best results.
• Vanilla Extract – Enhances the flavor of your buttercream, making it even more delicious.
• Salt – Optional; add only if you’re using unsalted butter for the frosting.
For Decoration
• Green Food Coloring – Tints the buttercream for that charming ‘nest’ look.
• Hershey’s Chocolate Eggs – Perfect for topping your cookie cups; alternatives include jelly beans or Reese’s Eggs for a fun twist.
These ingredients will come together to create festive Easter Basket Sugar Cookie Cups that are sure to brighten up any spring celebration!
Step‑by‑Step Instructions for Easter Basket Sugar Cookie Cups
Step 1: Preheat the Oven
Begin by preheating your oven to 350°F (175°C). While the oven heats, grab two 12-cup muffin pans and generously spray them with cooking spray. This ensures your Easter Basket Sugar Cookie Cups won’t stick. The pans should be ready and waiting for the cookie dough once the oven reaches the ideal temperature.
Step 2: Prepare the Cookie Dough
Open the flat package of Pillsbury Sugar Cookie Dough and separate it into squares. Place one square of dough into the center of each muffin cup, pressing down gently to ensure even spreading. This will form the base for your cookie cups. Bake in the preheated oven for 10-14 minutes, or until the tops are lightly golden.
Step 3: Create the Indentations
As soon as your sugar cookies are perfectly baked and remove them from the oven, it’s time to create the signature cup shape. Use a shot glass or a small cup to gently press down the center of each cookie while it’s still warm. This step will give your Easter Basket Sugar Cookie Cups that inviting nest appearance for the frosting.
Step 4: Cool the Cookie Cups
Once you’ve shaped all the cookie cups, let them cool in the pan for about 10 minutes. Afterward, carefully transfer them to a cooling rack to cool completely. Cooling is crucial; if you frost while they’re warm, the buttercream could melt right off your delightful cookie creations.
Step 5: Prepare the Buttercream Frosting
While the cookie cups are cooling, it’s time to whip up the frosting. In a mixing bowl, beat the butter until fluffy, around 2-3 minutes. Gradually add in the powdered sugar, mixing on low speed to minimize dust, until fully combined. Then, mix in the heavy whipping cream and vanilla extract until you reach a smooth and spreadable consistency.
Step 6: Color the Frosting
Once your buttercream is fluffy, add a few drops of green food coloring. Mix thoroughly until the desired ‘nest’ shade is achieved, creating a festive and fun look for your Easter Basket Sugar Cookie Cups. Don’t be afraid to add a bit more coloring for that vibrant pop!
Step 7: Frost the Cookie Cups
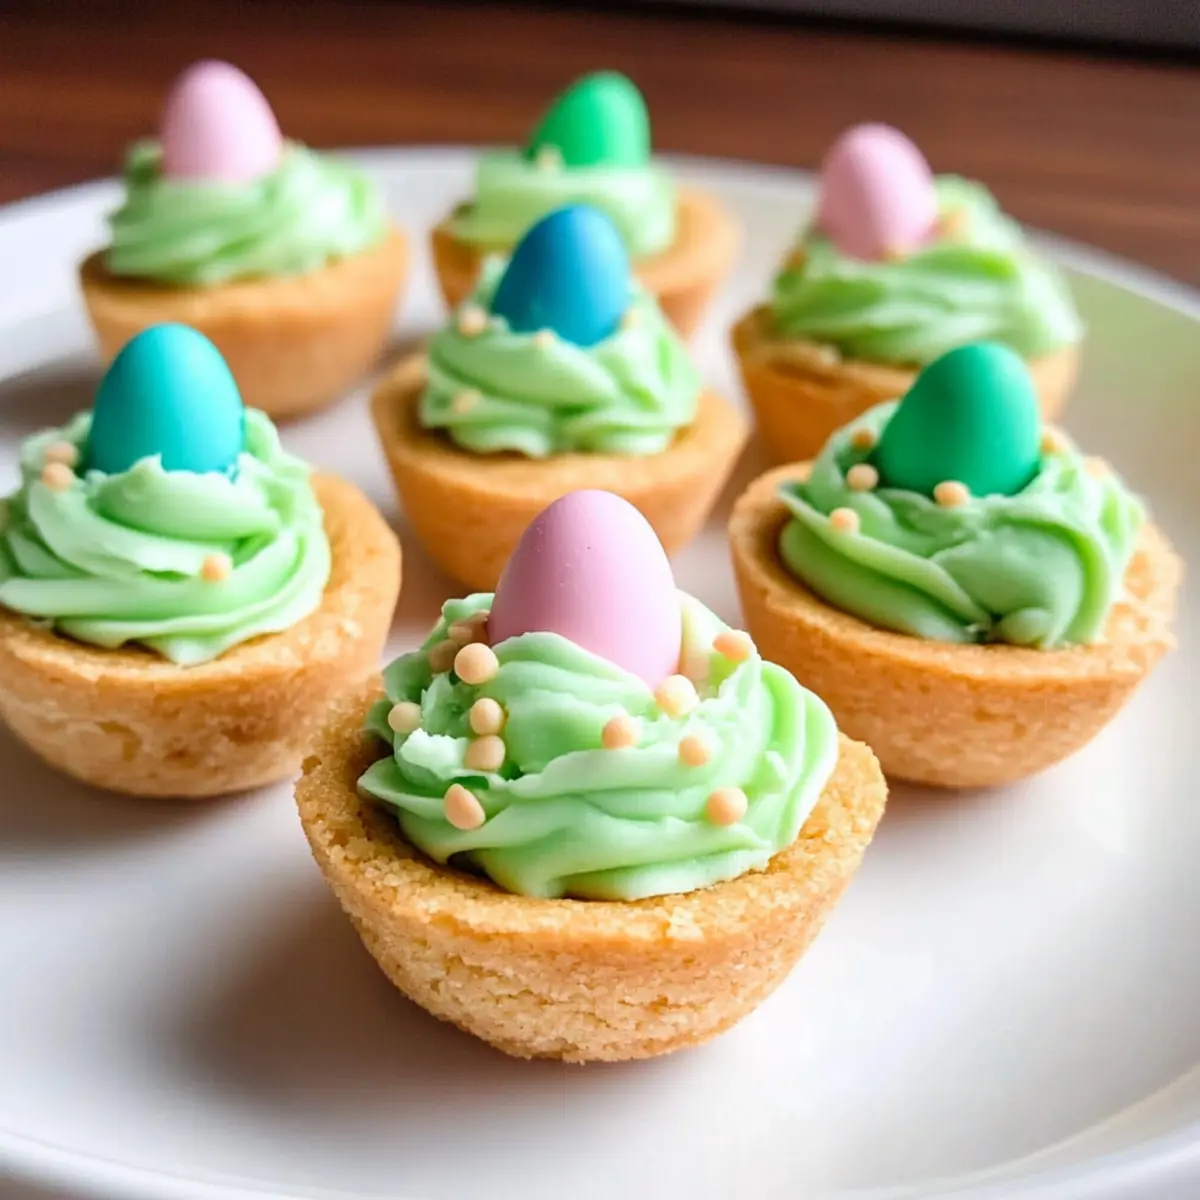
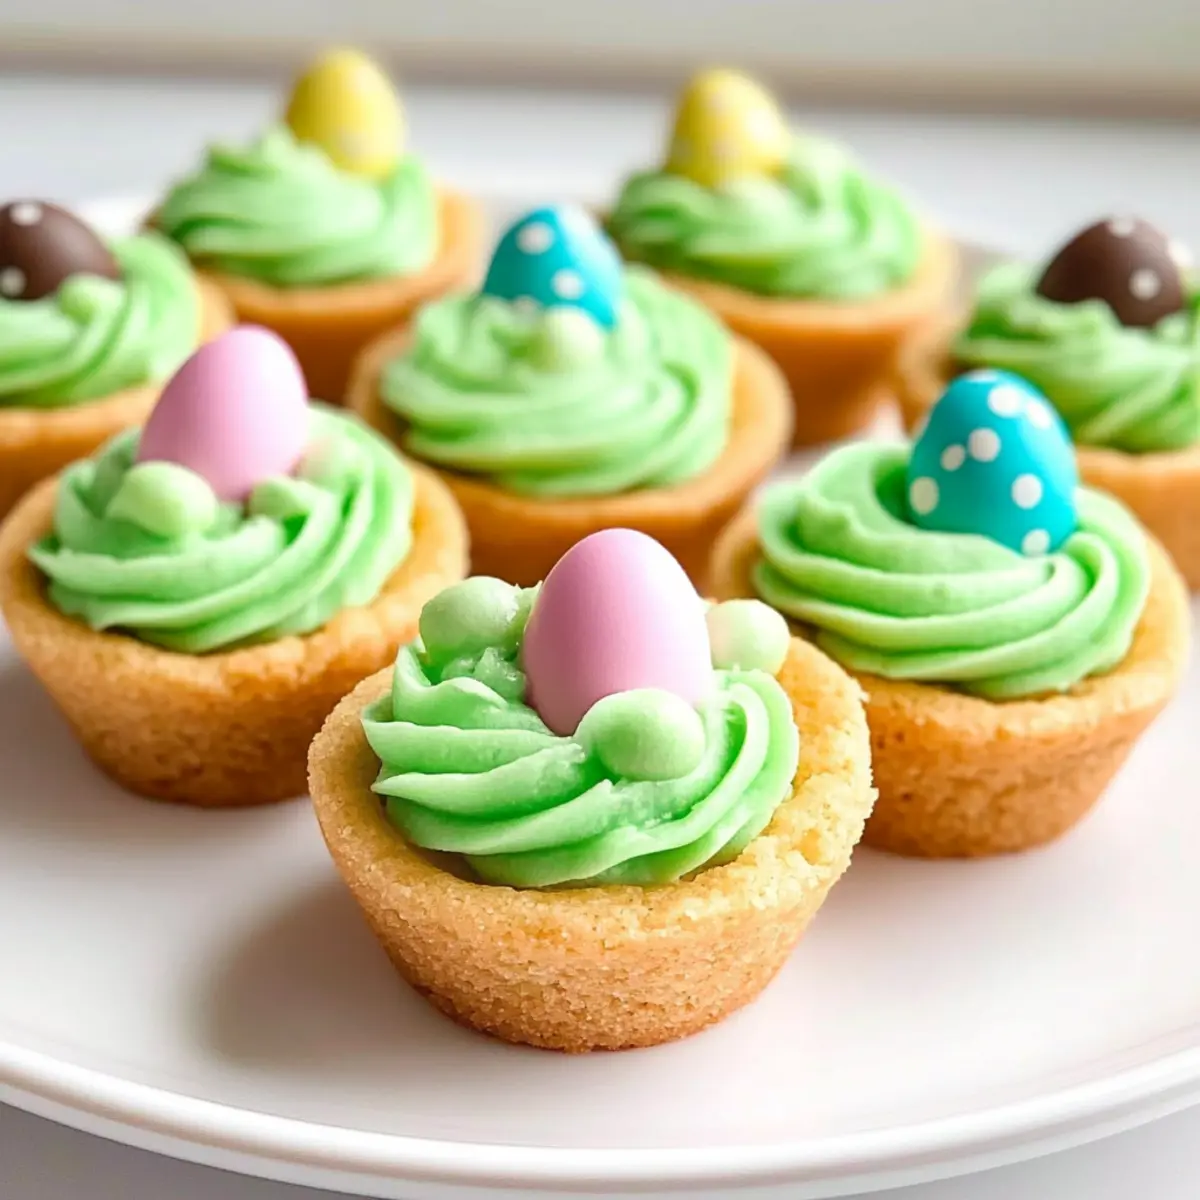
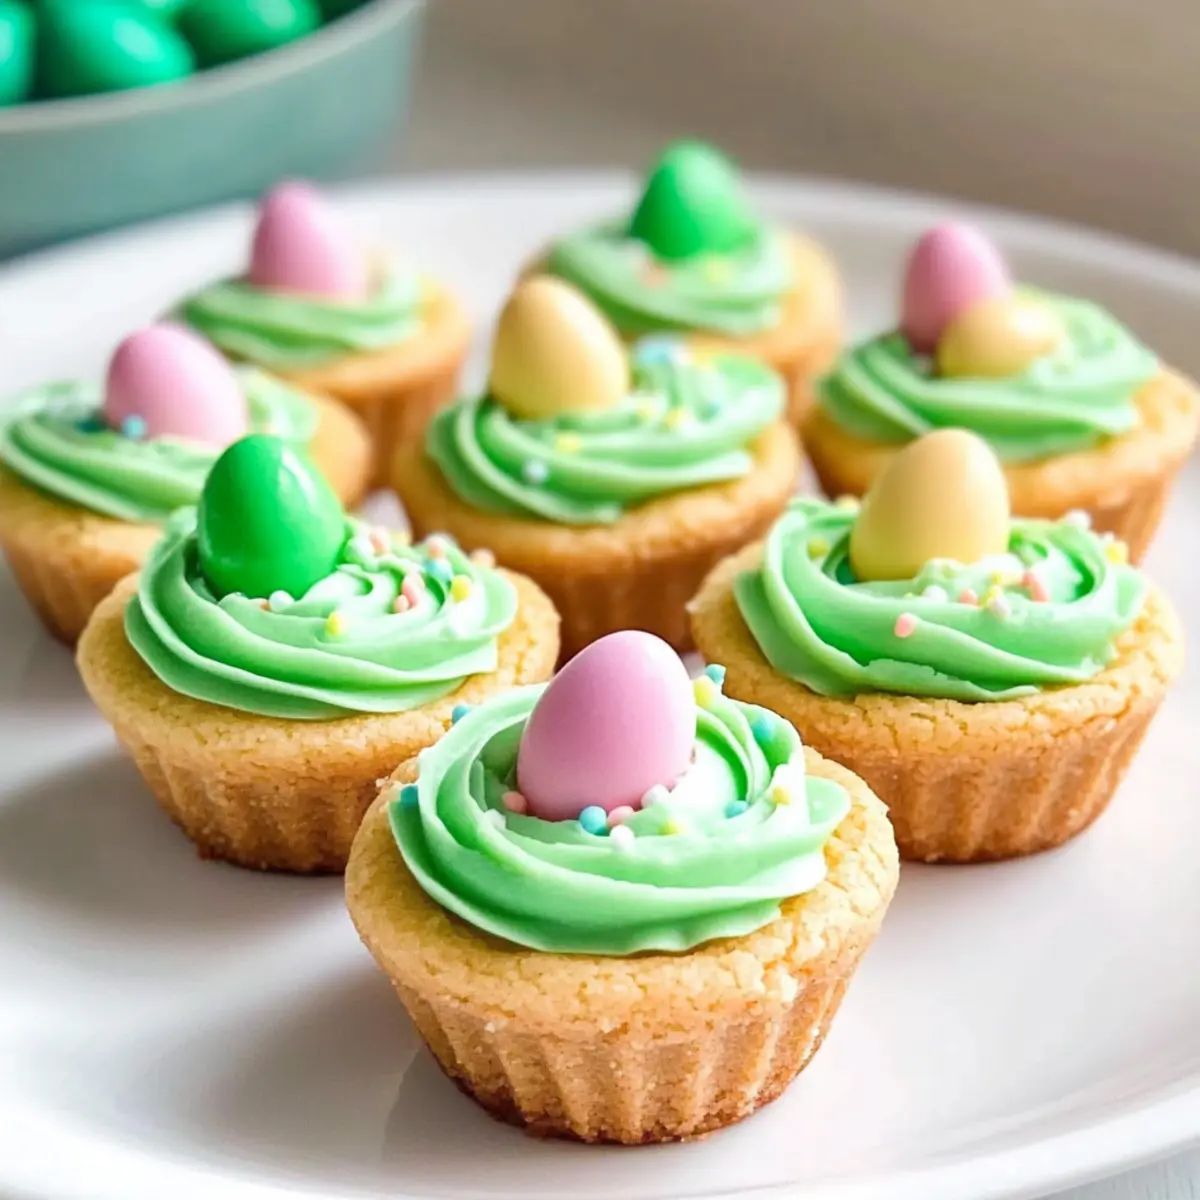
Now, it’s finally time to decorate! Using a piping bag with a large star tip or a Ziploc bag with a corner snipped off, pipe the green buttercream into each cooled cookie cup, letting it mound nicely. This will give your cups the look of little nests, perfect for showcasing the colorful eggs.
Step 8: Add the Chocolate Eggs
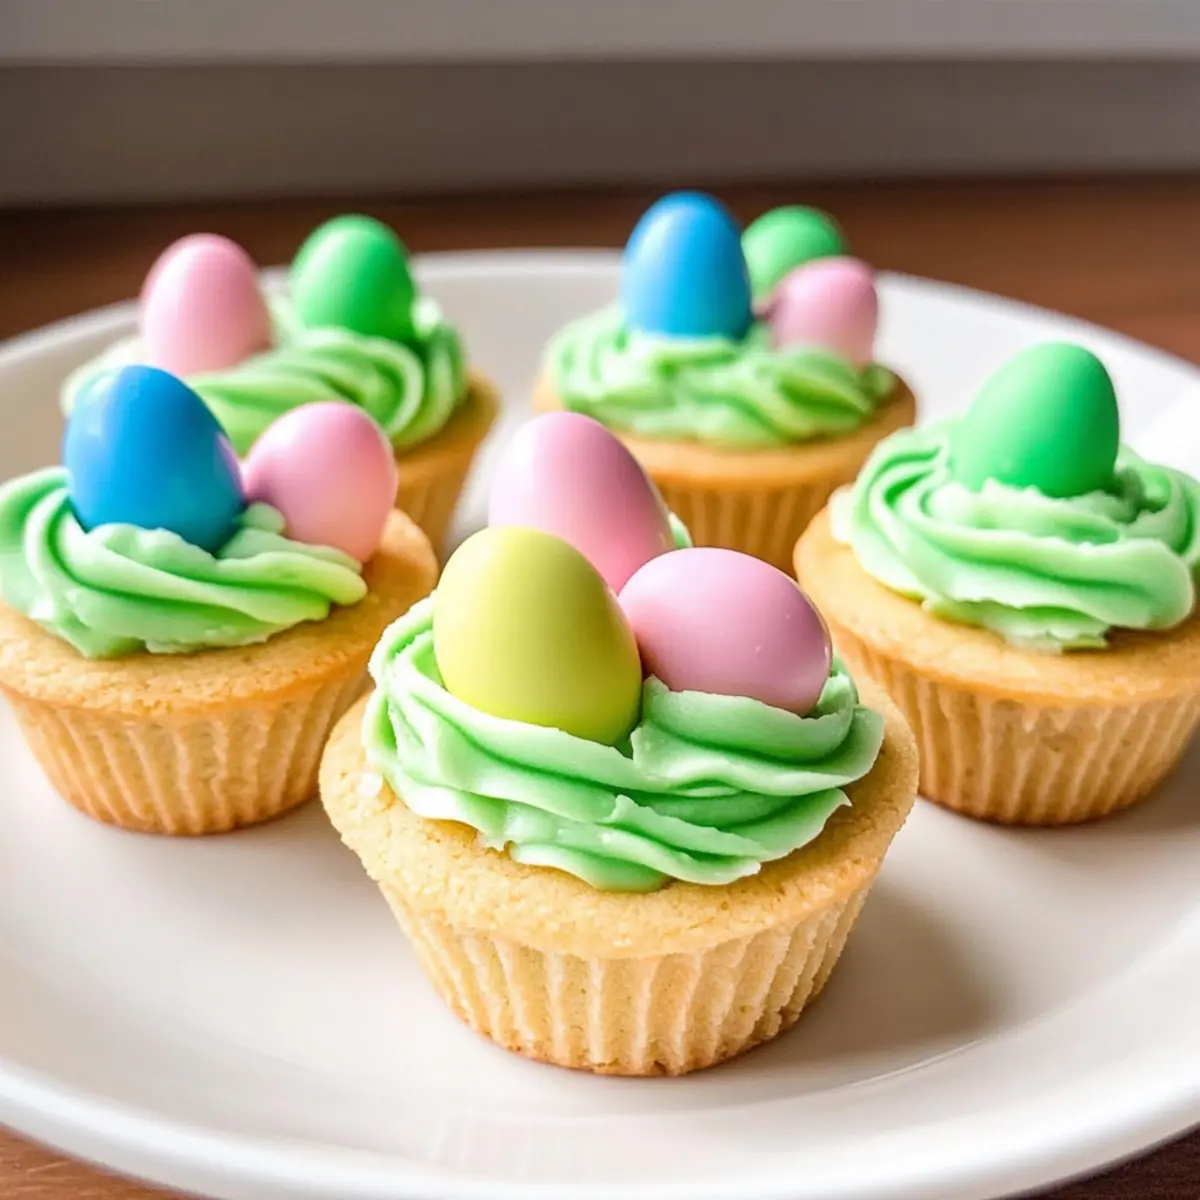
To finish your Easter Basket Sugar Cookie Cups, top each frosted cup with three Hershey’s Chocolate Eggs or your preferred candy. This adds a delightful touch and brings the festive theme to life. Arrange them beautifully on a platter for a stunning presentation at your Easter celebration.
Easter Basket Sugar Cookie Cups Variations
Get ready to unleash your creativity in the kitchen! These delightful cookie cups can easily be customized to suit your taste and occasion.
-
Colorful Frosting: Use different food colorings to match your theme, like pastel pink or lavender for a springtime delight.
Create a rainbow of colors for each cup, making them playful and extra appealing to kids! -
Candy Choices: Swap out Hershey’s Chocolate Eggs with jelly beans, Cadbury Mini Eggs, or Reese’s Eggs for unique flavors.
This way, you can cater to different preferences and create delightful surprises in every bite! -
Flavored Cookie Dough: Try using flavors like snickerdoodle or gingerbread instead of the traditional sugar cookie dough.
Each variation brings its own festive twist to your Easter celebration, elevating the flavor profiles. -
Nut-Free Delight: For those with nut allergies, ensure your butter is certified nut-free.
It keeps your treat safe for everyone without sacrificing taste! -
Vegan Option: Substitute the butter with margarine and use non-dairy cream to make a scrumptious vegan frosting.
Flavor with a touch of almond or maple extract for an exciting twist. -
Cheesecake Filling: Add a layer of no-bake cheesecake in place of the buttercream for an indulgent surprise inside.
This creamy filling will make the cookie cups even more decadent and delicious! -
Spice It Up: Incorporate a pinch of cinnamon or nutmeg into the cookie dough for an added warm flavor.
These spices meld beautifully, making your treats extra inviting and aromatic. -
Additional Toppings: Consider adding shredded coconut or crushed nuts on top of the frosting for extra texture.
It not only enhances the visual appeal but also adds delightful crunch with every bite, just like these Cheesecake Cookie Cups.
Feel free to mix and match these ideas! The expertise in the kitchen is all about experimentation, especially when making these whimsical Easter Basket Sugar Cookie Cups!
How to Store and Freeze Easter Basket Sugar Cookie Cups
Room Temperature: Keep unfrosted cookie cups in an airtight container at room temperature for up to 1 week to maintain their softness and flavor.
Fridge: If frosted with buttercream, store cookie cups in the refrigerator for up to 3 days. Bring to room temperature before serving to enhance the flavor and texture.
Freezer: Unfrosted cookie cups can be securely wrapped and frozen for up to 3 months. Thaw completely before frosting to maintain freshness.
Reheating: If desired, warm unfrosted cookie cups in the microwave for about 5-10 seconds to bring back that fresh-baked taste before decorating with creamy buttercream.
What to Serve with Easter Basket Sugar Cookie Cups
Elevate your springtime gatherings with delightful accompaniments that pair beautifully with these festive treats.
-
Fresh Fruit Salad: A vibrant mix of seasonal fruits adds a refreshing contrast to the sweet cookie cups, balancing flavors and textures.
-
Vanilla Ice Cream: Serve a scoop of vanilla ice cream on the side for a creamy, cool complement that perfectly contrasts the warm cookie cups.
-
Chocolate Milk: Rich and indulgent chocolate milk pairs wonderfully, enhancing the chocolate egg topping while keeping things fun and kid-friendly.
-
Lemonade: A light, zesty lemonade provides a refreshing tang that will brighten up your dessert experience and awaken those taste buds.
-
Mini Carrot Cupcakes: These petite cupcakes are a nod to traditional Easter flavors and create a whimsical dessert table when paired with your cookie cups.
-
Coffee or Tea: The warmth of a cup of coffee or herbal tea creates a cozy atmosphere, making your cookie cups even more enjoyable during family gatherings.
-
Chocolate Fondue: Set up a messy but fun chocolate fondue station for guests to dip fruits or even pieces of cookie cups for an interactive dessert experience.
These delightful pairings transform your Easter Basket Sugar Cookie Cups into a fabulous centerpiece for your spring celebrations!
Make Ahead Options
These Easter Basket Sugar Cookie Cups are a fantastic option for busy home cooks looking to save time during the holiday rush! You can prepare the cookie cups up to 24 hours in advance; simply bake and cool them before storing them in an airtight container at room temperature. The buttercream frosting can be made ahead as well and kept in the refrigerator for up to 3 days—just bring it to room temperature and re-whip before use. When you’re ready to serve, simply frost the cooled cookie cups and add the colorful chocolate eggs for that festive touch. This way, you can enjoy more time celebrating and less time baking!
Expert Tips for Easter Basket Sugar Cookie Cups
-
Proper Baking Time: Keep an eye on your cookie cups while baking; they should be lightly golden for the best texture. A common mistake is overbaking, which leads to tough cookies.
-
Indentation Technique: Quickly pressing down in the center of the cookies right after pulling them from the oven is key. If you wait too long, the cookies harden, and you won’t get that delightful cup shape.
-
Cooling is Key: Allow your cookie cups to cool completely before frosting. Adding frosting to warm cookies can cause it to melt and lose its shape.
-
Mixing Frosting: When making the buttercream, mix on low to avoid a powdered sugar cloud. Remember, the right consistency of your frosting is crucial for perfect piping on your Easter Basket Sugar Cookie Cups.
-
Coloring Fun: Have fun with coloring! Adjust the amount of green food coloring to enhance your frosting’s vibrant ‘nest’ look, making the final product more appealing to kids and guests alike.
Easter Basket Sugar Cookie Cups Recipe FAQs
What type of sugar cookie dough should I use?
For the best results, opt for Pillsbury Sugar Cookie Dough. I recommend using the flat package instead of the round log, as it’s much easier to separate into squares, making it perfect for creating your cookie cups.
How should I store leftover cookie cups?
Unfrosted cookie cups can be stored at room temperature in an airtight container for up to 1 week to maintain their flavor and texture. If frosted, enjoy them within 3 days for the best experience; store them in the fridge and bring them to room temperature before serving.
Can Easter Basket Sugar Cookie Cups be frozen?
Absolutely! You can freeze the unfrosted cookie cups for up to 3 months. Just wrap them tightly in plastic wrap or store them in a freezer-safe container. When you’re ready to enjoy, simply thaw them completely before frosting.
What if my cookie cups are too soft or break easily?
If your cookie cups are soft, it might be due to underbaking; ensure they’re lightly golden at the edges. If they break easily, allow them to cool completely before removing from the pan, as warm cookies can be fragile. If they still crumble, try lightly pressing the dough into the muffin tin next time for a sturdier base.
Can these cookie cups be made nut-free?
Yes! The ingredients listed are typically nut-free, but always check labels for allergen information, especially on store-bought items. If you’re using candies for topping, make sure they are also nut-free to keep the dessert safe for those with allergies.
How can I make these cookie cups look more festive?
You can add edible glitter for sparkle or use different colors of food coloring to tint the frosting. Incorporating other festive candies, like jelly beans or pastel chocolate eggs, adds an extra touch of whimsy to your Easter Basket Sugar Cookie Cups!
Easter Basket Sugar Cookie Cups: A Festive Delight to Share
Ingredients
Equipment
Method
- Preheat your oven to 350°F (175°C) and prepare two 12-cup muffin pans with cooking spray.
- Open the Pillsbury Sugar Cookie Dough and place one square into each muffin cup, pressing down gently.
- Bake the cookie cups for 10-14 minutes until lightly golden.
- After baking, use a shot glass to press down in the center of each cookie to create a cup shape.
- Let the cookie cups cool in the pans for about 10 minutes before transferring to a cooling rack.
- In a mixing bowl, beat the butter until fluffy, then gradually add powdered sugar, heavy whipping cream, and vanilla until smooth.
- Mix in green food coloring until desired shade is achieved.
- Frost each cooled cookie cup with the green buttercream using a piping bag.
- Top each frosted cup with three Hershey’s Chocolate Eggs to finish.
Leave a Reply