
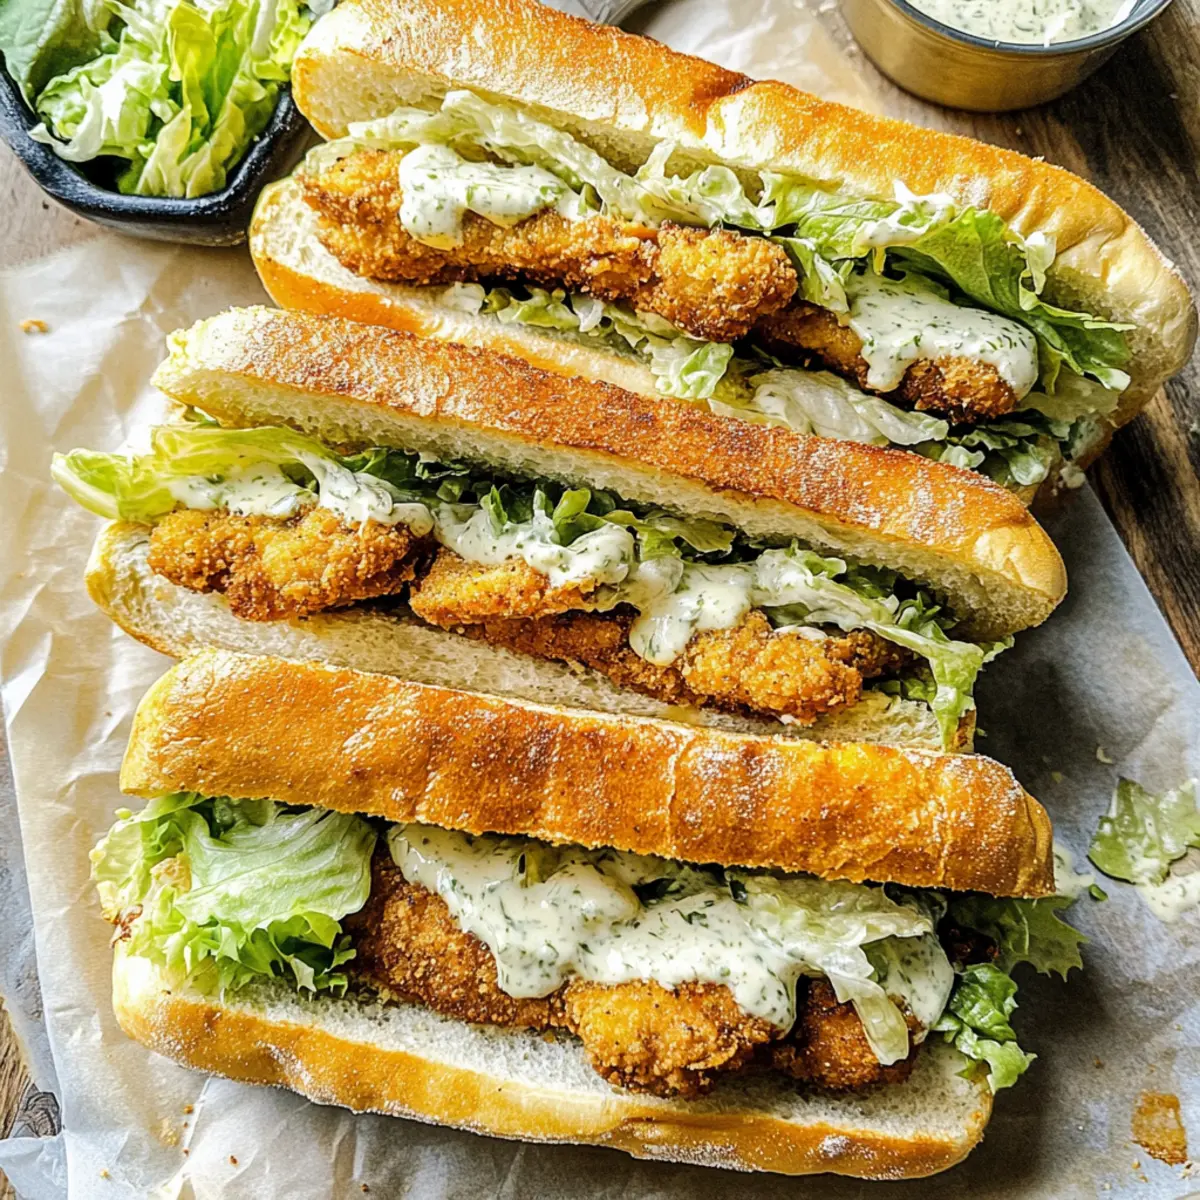
As I stood in my kitchen, the delightful aroma of garlic butter wafting through the air, it hit me: some meals are meant to be shared and savored. These Crispy Chicken Caesar Sandwiches embody that spirit perfectly. With juicy, seasoned chicken nestled in layers of fresh romaine and creamy Caesar dressing, all embraced by luscious garlic-buttered bread, this recipe transforms a classic salad into a hearty meal. You’ll love how this dish comes together in under 30 minutes, making it an ideal choice for busy days or laid-back weekends. Plus, it’s a guaranteed crowd-pleaser that satisfies any craving for homemade comfort food. Ready to take a bite of deliciousness? Let’s dive in!

Why are these Chicken Caesar Sandwiches special?
Quick & Easy: This recipe promises irresistible flavor without spending hours in the kitchen; it’s ready in under 30 minutes!
Flavor Explosion: The combination of crispy chicken, creamy Caesar dressing, and garlic-buttered bread creates a delicious medley of tastes that are simply unforgettable.
Crowd-Pleaser: Perfect for gatherings or family dinners, these sandwiches are sure to satisfy even the pickiest eaters – everyone loves a classic twist!
Versatile Ingredients: Customize to your liking with options like turkey or tofu and try different breads like ciabatta or gluten-free for any dietary needs.
Perfect Pairings: Serve with crispy potato chips or a fresh salad for a complete meal that’s both comforting and satisfying. Dive into a delightful experience with these mouthwatering Mediterranean Chicken Gyros or mix it up with Sticky Garlic Chicken Noodles for something new!
Chicken Caesar Sandwiches Ingredients
For the Chicken
• Chicken Breasts – The primary protein source; can substitute with turkey or tofu for variety.
• Egg – Binds breadcrumbs; use a flax egg for a vegan option.
• Garlic Powder – Adds flavor; fresh garlic can enhance the taste even more.
• Salt & Pepper – Essential seasonings; adjust to your taste preference.
• Breadcrumbs – Provides texture; panko is preferred for a crispy finish.
• Panko – Gives an extra crunchy element; omit for a softer crumb.
• Vegetable Oil – For frying; substitute with canola or peanut oil if needed.
For the Garlic Butter Bread
• Salted Butter – Essential for the garlic spread; unsalted butter works too.
• Fresh Garlic – Boosts flavor in garlic butter; feel free to adjust the amount.
For the Caesar Dressing
• Mayo – Base for the dressing; can be swapped for avocado for a healthier twist.
• Fresh Parsley – Enhances color and flavor; optional if not available.
• Parmesan Cheese – Adds richness to the dressing; nutritional yeast is a dairy-free alternative.
• Sour Cream/Greek Yogurt – Adds creaminess; can substitute with dairy-free yogurt.
• Lemon Juice – For brightness; lime juice can work in a pinch.
• Dijon Mustard – Provides a tangy kick; yellow mustard is a viable substitute.
• Anchovy Paste – Adds umami; can be omitted for a vegetarian version.
• Worcestershire Sauce – Deepens the flavor; ensure it’s vegetarian if needed.
• Romaine Lettuce – Freshness and crunch in the sandwich; spinach or kale can be a tasty substitute.
For Assembly
• Hoagies/Baguette – Your sandwich vessel; try ciabatta or gluten-free bread if desired.
This ingredient list will help you whip up delicious Chicken Caesar Sandwiches that will surely steal the show!
Step‑by‑Step Instructions for Chicken Caesar Sandwiches
Step 1: Prepare the Chicken Cutlets
Start by slicing the chicken breasts into thin cutlets and pound them gently if needed for an even cook. Dip each piece into a beaten egg mixture, then coat thoroughly with a blend of breadcrumbs and panko. Heat vegetable oil in a skillet over medium heat (about 350°F), and fry the chicken for 4-5 minutes per side, until golden brown and cooked through.
Step 2: Make Garlic Butter Bread
While the chicken fries, prepare the garlic butter. In a small bowl, mix softened salted butter with minced fresh garlic and chopped parsley until well combined. Spread this mixture generously onto the cut sides of your hoagies or baguette. Place them under a broiler set to 450°F for 3-4 minutes, until golden and fragrant, keeping a close eye to prevent burning.
Step 3: Prepare the Caesar Dressing
In a mixing bowl or jar, whisk together mayo, sour cream or Greek yogurt, lemon juice, Dijon mustard, anchovy paste, and Worcestershire sauce until smooth. Season the dressing with salt and pepper to taste, adding grated Parmesan for extra richness. This creamy Caesar dressing is vital for flavoring the romaine, so set it aside while you toss the salad.
Step 4: Toss the Romaine Salad
In a separate bowl, combine the chopped romaine lettuce and a generous 3-4 tablespoons of the prepared Caesar dressing. Toss the ingredients together until the lettuce is well-coated, ensuring every leaf receives the creamy goodness. This will create a fresh and crunchy filling that perfectly complements the crispy chicken in your Chicken Caesar Sandwiches.
Step 5: Assemble the Sandwiches
Once the chicken is cooked and golden, it’s time to build your sandwiches. On each toasted garlic-buttered hoagie, layer in the crispy chicken cutlets, followed by the dressed romaine salad. For added flavor, sprinkle some more Parmesan on top before placing the other half of the bread over the filling. Enjoy your freshly made Chicken Caesar Sandwiches immediately for the best crunch!

Expert Tips for Chicken Caesar Sandwiches
-
Fry Freshly Battered: Fry the chicken immediately after breading to retain maximum crispiness. This prevents the coating from becoming soggy.
-
Check Oil Temperature: Aim for an oil temperature of 350°F for optimal frying. A thermometer is your best friend to achieve that perfect golden color.
-
Avoid Oil Splatter: Gently slide the chicken into the hot oil rather than dropping it in, which helps minimize mess and keeps you safe from splatters.
-
Toast to Perfection: Toast the garlic-buttered bread just until golden, watching closely to avoid burning. Properly toasted bread enhances the overall flavor of your Chicken Caesar Sandwiches.
-
Assemble Just Before Serving: For the best texture and freshness, assemble your sandwiches right before eating. This keeps the bread crispy and the salad vibrant.
What to Serve with Chicken Caesar Sandwiches?
Transform your meal into a culinary delight by discovering the perfect side dishes that complement the rich flavors of your Chicken Caesar Sandwiches.
- Crispy Potato Chips: These salty, crunchy chips are the perfect salty companion, providing a satisfying crunch alongside your sandwich.
- Waffle Fries: Their unique shape and crispy texture make them a fun twist that pairs beautifully with the savory elements of the sandwich.
- Classic Caesar Salad: Keep with the theme! A light Caesar salad offers fresh, crisp greens with the same creamy dressing, delighting the palate.
- Garlic Bread: Rich, buttery, and infused with garlic, this side echoes the flavors of your sandwich and enhances the overall garlic experience.
- Coleslaw: A tangy, crunchy coleslaw adds a refreshing contrast and balances the richness of the creamy dressing, making every bite exciting.
- Roasted Vegetables: Seasoned roasted veggies bring a warm, earthy flavor that complements the savory chicken and creamy dressing.
- Iced Tea Lemonade: A refreshing beverage that cuts through the richness and enhances the meal, making it feel like a sunny picnic!
- Chocolate Chip Cookies: For a sweet finish, serve warm cookies that provide a nostalgic touch and end the meal on a comforting note.
Each of these pairings contributes a unique texture and flavor to elevate your dining experience!
Chicken Caesar Sandwiches Variations
Feel free to mix things up and make these Chicken Caesar Sandwiches your own with these delightful twists!
-
Dairy-Free: Substitute Parmesan cheese with nutritional yeast and dairy-free yogurt for the dressing to keep it creamy yet plant-based.
This choice doesn’t skimp on flavor, allowing everyone to savor the goodness. -
Grilled Shrimp: For a seafood twist, try using grilled shrimp in place of chicken for a light and zesty alternative.
The shrimp adds a unique flair that’s sure to impress. -
Gluten-Free: Swap out hoagies or baguettes with gluten-free bread options, ensuring everyone can enjoy this tasty treat.
There are so many flavors packed into this dish that no one will miss the gluten! -
Spicy Kick: Add a teaspoon of cayenne pepper or a drizzle of hot sauce to the dressing for an extra layer of flavor and heat.
Elevate your sandwich experience with a spicy surprise that makes every bite memorable! -
Vegetarian Option: Use crispy fried eggplant instead of chicken for a satisfying vegetarian alternative packed with flavor.
The eggplant holds onto the seasoning beautifully, making this sandwich a hit with veggie lovers. -
Herbed Mayo Twist: Blend in fresh herbs like dill or basil into the mayo for a fragrant dressing that adds freshness.
This herb-infused dressing creates a new taste sensation that still honors the classic Caesar. -
Sourdough Delight: Use a sourdough baguette instead of traditional hoagies for an added tang.
The earthy flavor of sourdough complements the richness of the Caesar dressing delightfully.
Explore these variations, and for more adventure in your meal planning, check out my Bang Bang Chicken Bowl or try the flavorful Street Corn Chicken for a vibrant twist on classic favorites!
Make Ahead Options
These Chicken Caesar Sandwiches are perfect for meal prep enthusiasts! You can prepare the chicken cutlets and garlic butter bread up to 24 hours in advance, keeping them fresh in the refrigerator. Simply bread and fry the chicken, then let it cool before storing it in an airtight container to maintain its crispy texture. The Caesar dressing can also be made ahead and refrigerated for up to 3 days; just give it a good stir before using. When you’re ready to enjoy your sandwiches, briefly reheat the chicken to restore its crunch, toast the garlic bread, and assemble with the freshly tossed salad for delicious results with minimal effort!
How to Store and Freeze Chicken Caesar Sandwiches
Fridge: Store leftover chicken and assembled sandwiches in an airtight container in the refrigerator for up to 3 days. Keep components separate to maintain crispness.
Freezer: If you need to store for longer, freeze the cooked chicken in a freezer-safe bag. It will last up to 3 months; thaw overnight in the fridge before reheating.
Reheating: To restore crispiness, reheat the chicken in a hot skillet for a few minutes. Assemble sandwiches fresh for the best flavor and texture with your Chicken Caesar Sandwiches.
Garlic Butter Bread: If you have leftovers, store in a sealed bag at room temperature for up to 2 days, or freeze for up to a month. Re-toast directly from frozen for a delightful crunch.
Chicken Caesar Sandwiches Recipe FAQs
How do I choose the best chicken breasts for this recipe?
Absolutely, choosing the right chicken is crucial! Look for fresh chicken breasts that are firm and plump, with no dark spots or unusual odors. Aim for free-range or organic options if possible, as they often provide better flavor and quality. If frozen, ensure they are fully thawed before cooking for even cooking.
What’s the best way to store leftover Chicken Caesar Sandwiches?
Store leftover chicken in an airtight container in the refrigerator for up to 3 days. For optimal texture, keep the chicken and the salad components separate to prevent the bread from becoming soggy. When ready to eat, reheat the chicken in a skillet to restore its crispiness, then assemble fresh.
Can I freeze the Chicken Caesar Sandwiches?
Yes! To freeze, place cooled cooked chicken in a freezer-safe bag and seal tightly. It can be frozen for up to 3 months. When ready to enjoy, thaw overnight in the refrigerator, then reheat in a skillet until crispy. Assemble your sandwiches with fresh ingredients right before serving for the best taste!
What should I do if my chicken isn’t crispy enough after frying?
If your chicken isn’t as crispy as you’d like, it could be due to the oil temperature being too low—aim for around 350°F. Additionally, frying right after breading helps maintain that crunch. If you find your chicken soggy, popping it in a hot oven for a few minutes can help crisp it back up while keeping it warm.
Are there any dietary concerns I should be aware of with this recipe?
Very! If you’re serving guests, it’s best to inquire about allergies, especially regarding common ingredients like eggs, dairy, and gluten. For an egg-free option, a flax egg works well, and for those avoiding dairy, you can substitute ingredients such as mayonnaise and yogurt with appropriate alternatives like avocado and dairy-free yogurt.
Can I prepare any components of this sandwich ahead of time?
Of course! You can make the garlic butter and the Caesar dressing a day in advance. Store them in separate airtight containers in the refrigerator. Just make sure to reheat the chicken and toast the bread just before serving to guarantee that delicious crunch and freshness in your Chicken Caesar Sandwiches.

Savory Chicken Caesar Sandwiches That Steal the Show
Ingredients
Equipment
Method
- Slice the chicken breasts into thin cutlets, pound gently, dip into a beaten egg, then coat with breadcrumbs and panko. Fry in heated vegetable oil for 4-5 minutes per side until golden brown.
- Mix softened salted butter with minced garlic and parsley. Spread onto the cut sides of hoagies and broil for 3-4 minutes until golden.
- Whisk together mayo, sour cream, lemon juice, mustard, anchovy paste, and Worcestershire sauce. Season to taste and add grated Parmesan.
- Combine chopped romaine and Caesar dressing, tossing until well-coated.
- Assemble sandwiches with crispy chicken cutlets, dressed romaine salad, and sprinkle more Parmesan before topping with the other half of bread.
Leave a Reply