
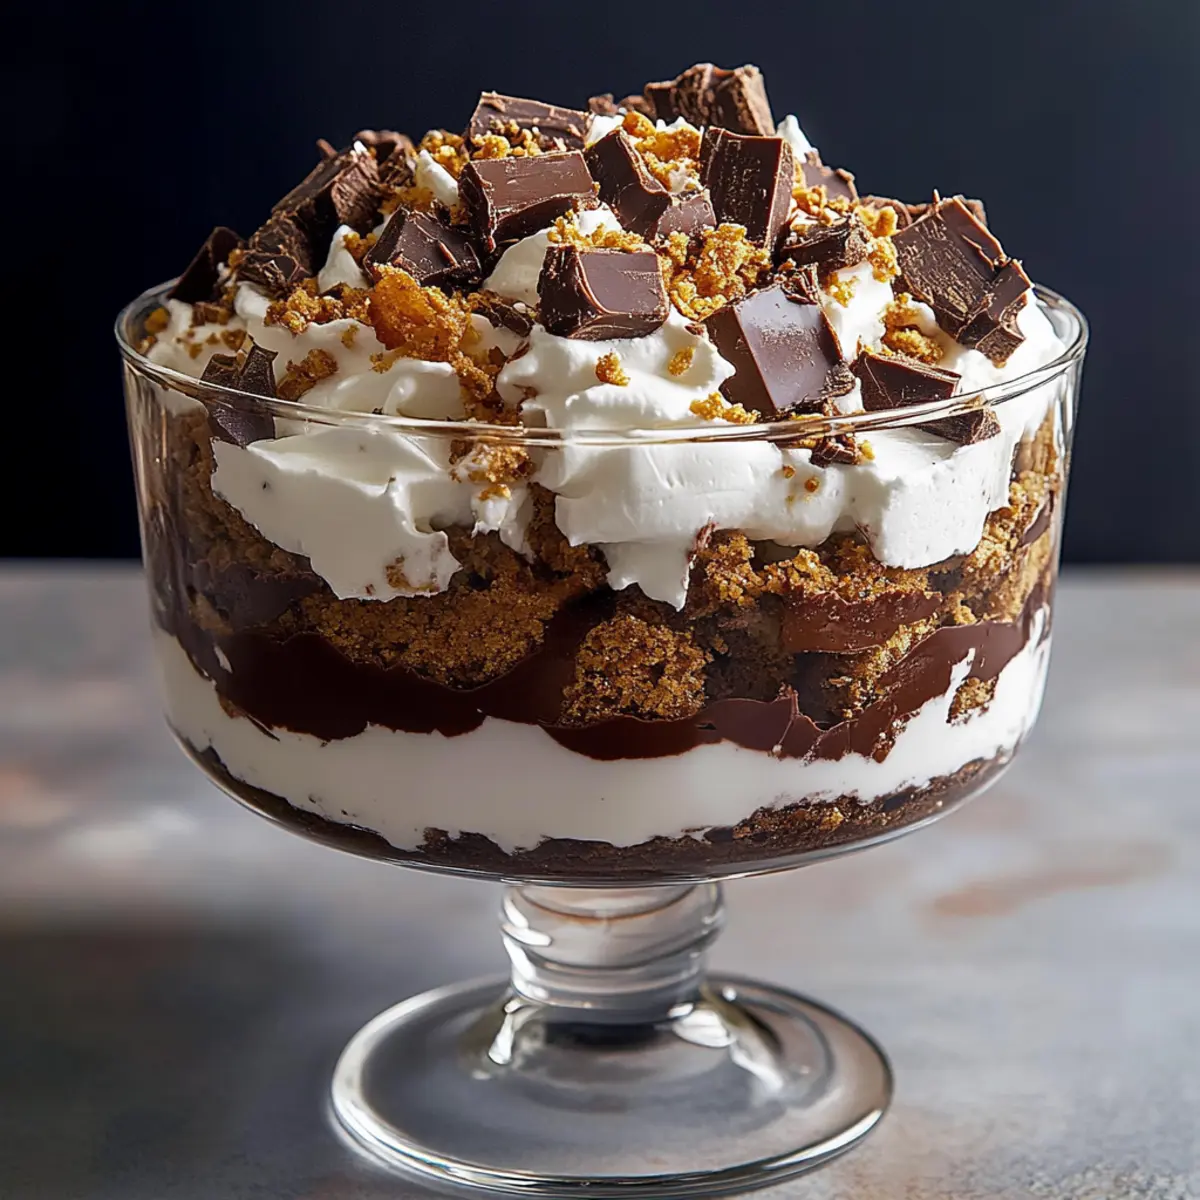
Every scoop of this Chocolate Toffee Trifle is like unwrapping a delightful surprise! As I layered the moist chocolate cake, creamy pudding, and crunchy toffee bits, I couldn’t help but think about its crowd-pleasing nature—perfect for gatherings or a cozy night in. This no-bake dessert is not only a breeze to whip up, but it’s also make-ahead friendly, making your life easier when entertaining guests. The delightful contrast of textures—from the soft cake to the airy whipped topping—will have everyone coming back for seconds. So, are you ready to create a dessert that embodies indulgence and simplicity all at once?
Why is Chocolate Toffee Trifle a Must-Try?
Decadence Awaits: Each bite of this Chocolate Toffee Trifle is like a celebration of flavors! Versatile Layers: Customize it easily with variations like caramel or mocha for unique twists. No-Bake Convenience: Forget the oven—this dessert comes together effortlessly, allowing you to enjoy more time with your loved ones. Crowd-Pleaser: Perfect for potlucks or family gatherings, it’s guaranteed to impress. Prepare it ahead of time and let the flavors meld for an unforgettable experience! For another easy make-ahead treat, check out these delicious 4-ingredient no-bake chocolate oat cookies.
Chocolate Toffee Trifle Ingredients
For the Cake
- Chocolate Cake Mix – This base layer provides moisture; feel free to use homemade brownies or a boxed mix for quick prep!
For the Pudding
- Instant Chocolate Pudding Mix – This creamy layer adds richness to your Chocolate Toffee Trifle; substitute with dark chocolate pudding for a bolder taste.
- Cold Milk – Essential to activate the pudding mix and achieve the right consistency for perfect creaminess.
For the Topping
- Whipped Topping (Cool Whip) – Lightens your dessert and adds an airy texture; for an elevated experience, try homemade whipped cream.
- Crushed Chocolate-Covered Toffee Bars (Heath or Skor) – These provide that crunchy element and sweet buttery flavor; you can swap with other crunchies like nuts or candies if desired.
Step‑by‑Step Instructions for Chocolate Toffee Trifle
Step 1: Prepare the Cake
Begin by preheating your oven according to the instructions on the chocolate cake mix box. Bake the chocolate cake for approximately 25 to 30 minutes, until a toothpick inserted into the center comes out clean. Once baked, allow the cake to cool completely on a wire rack before cutting it into 1-inch cubes, setting it aside for layering in your Chocolate Toffee Trifle.
Step 2: Make the Pudding
In a large mixing bowl, whisk together the instant chocolate pudding mix and cold milk for about 2 minutes. You’ll want the mixture to thicken and become smooth. After whisking, let the pudding sit for a few minutes to chill slightly. This creamy layer is essential for your trifle and will add a rich texture between the layers of cake.
Step 3: Layer the Trifle
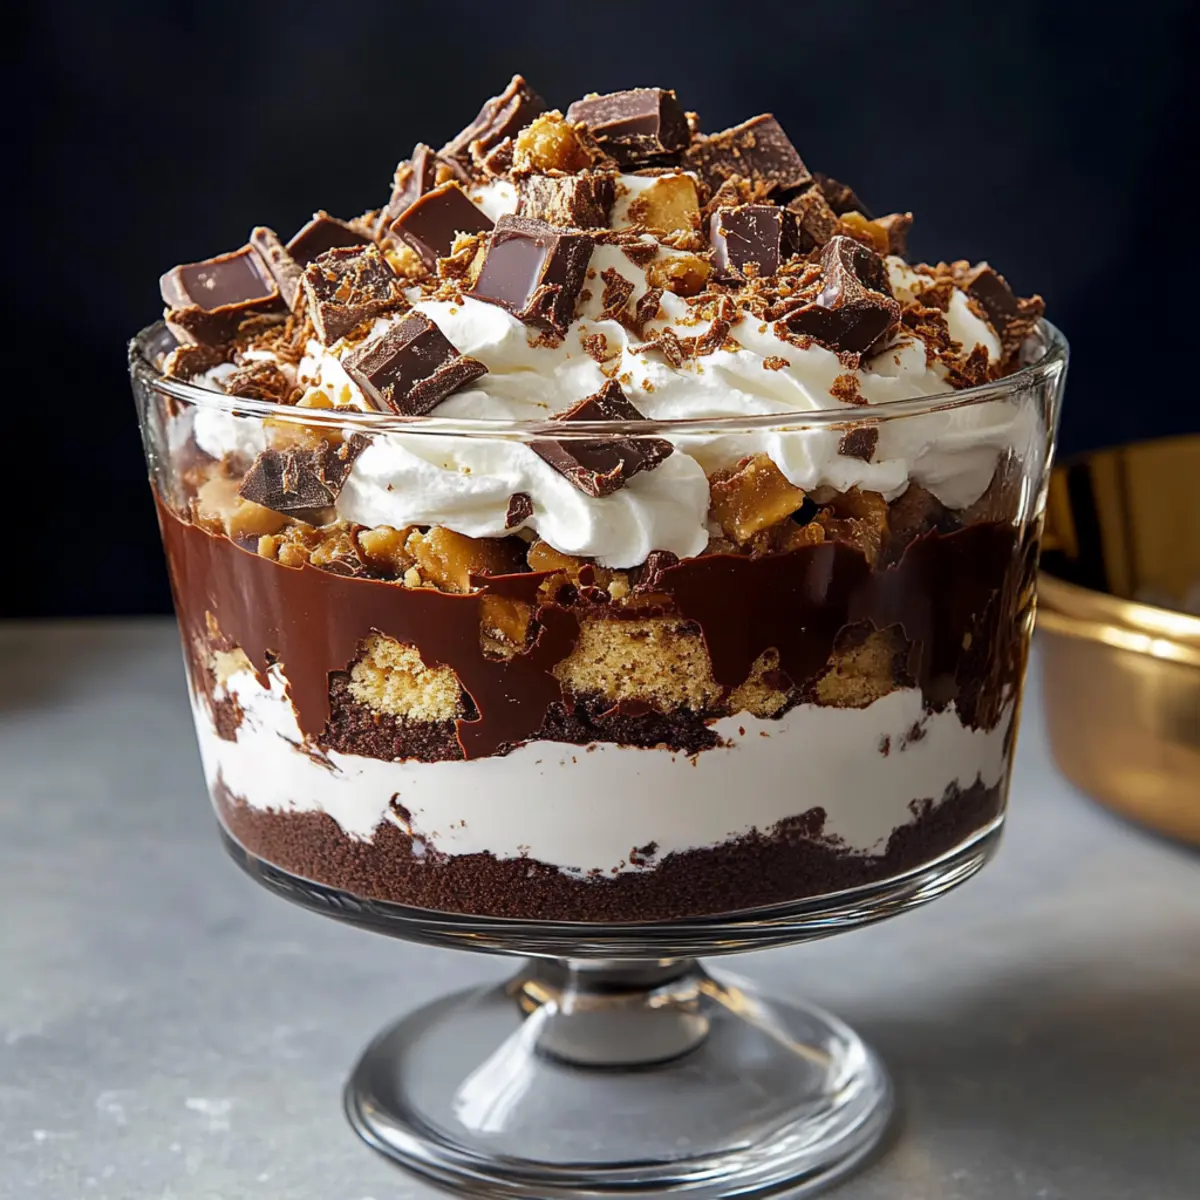
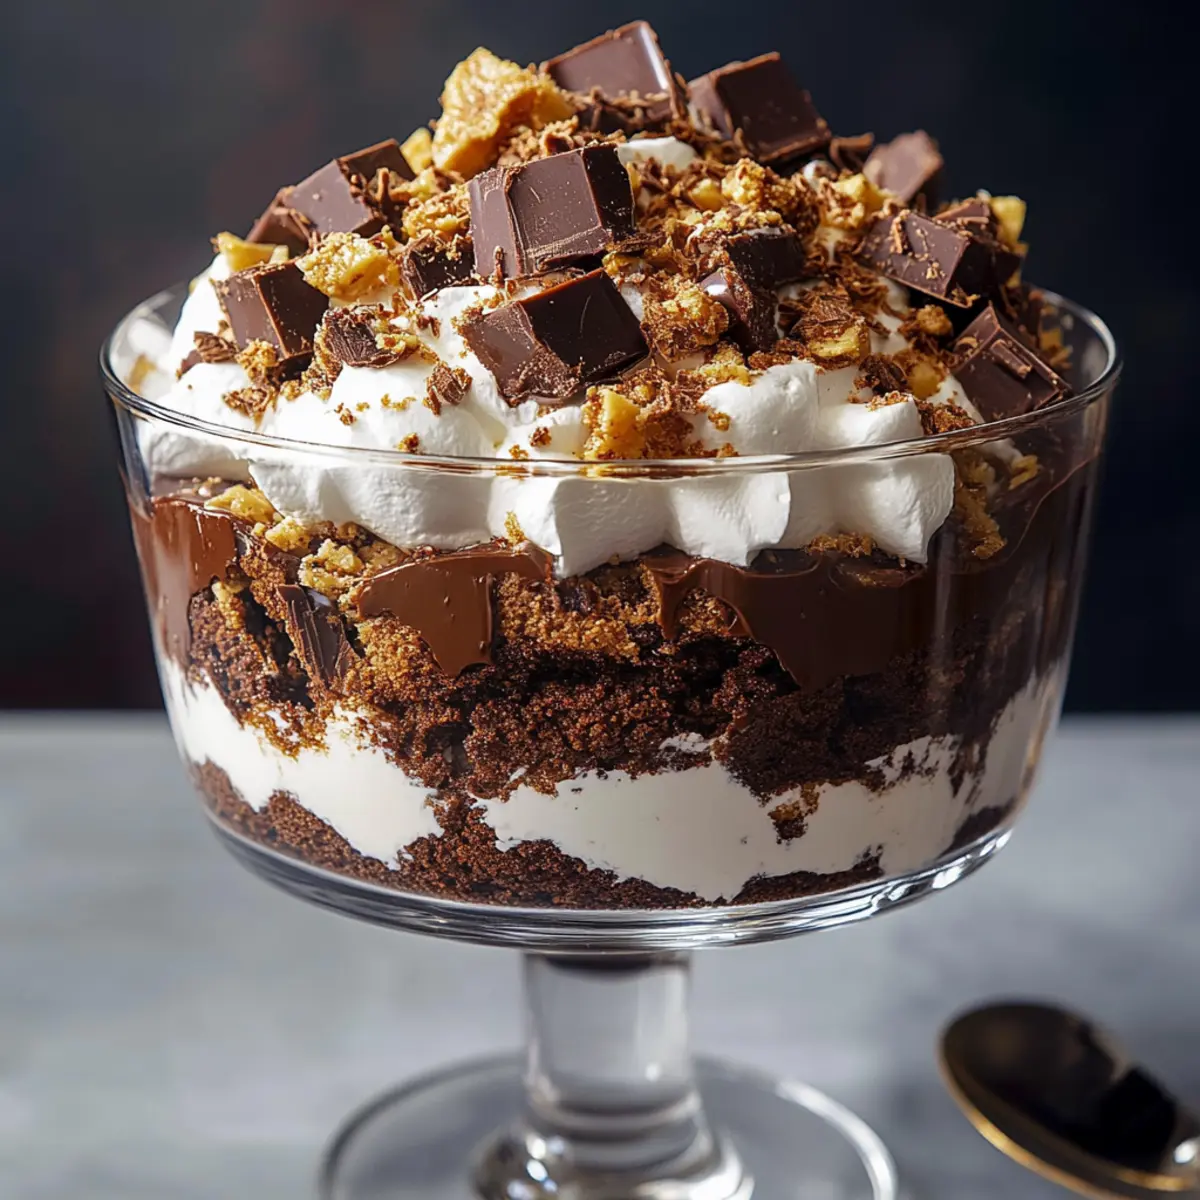
In a trifle dish, start building your masterpiece by placing half of the cake cubes on the bottom. Next, spoon half of the prepared chocolate pudding over the cake, ensuring it evenly covers the surface. Then, add half of the whipped topping, gently spreading it to maintain the beautiful layers. Sprinkle half of the crushed chocolate-covered toffee bars over the whipped topping, adding a delightful crunch.
Step 4: Repeat Layers
Continue layering by repeating the steps with the remaining ingredients. Add the rest of the cake cubes, followed by the remaining pudding and whipped topping. Finally, sprinkle the last of the crushed toffee bits on top to enhance your Chocolate Toffee Trifle with a delightful crunch and visual appeal. Be careful to layer gently to preserve the structure.
Step 5: Chill & Serve
Cover the assembled trifle with plastic wrap and refrigerate it for at least 1 hour, or up to 24 hours, to allow the flavors to meld beautifully. Chilling not only enhances the taste but also helps the layers set firm. When ready to serve, you can optionally garnish with chocolate curls for an extra touch of decadence, making it a stunning centerpiece at your gathering!
Make Ahead Options
These Chocolate Toffee Trifles are perfect for meal prep enthusiasts looking to save time during busy weeknights! You can prepare the cake and pudding up to 24 hours in advance; simply store the cake cubes in an airtight container to maintain freshness, and cover the pudding tightly to prevent a skin from forming. Layer the trifle as instructed, then refrigerate for at least 1 hour or overnight to let the flavors meld beautifully. When you’re ready to serve, just finish with the whipped topping and toffee bits for that delightful crunch. With this make-ahead method, you’ll have a show-stopping dessert that’s just as delicious and ready to impress your guests!
Expert Tips for Perfect Chocolate Toffee Trifle
-
Layer Neatly: Use a piping bag for the pudding and whipped cream layers to create a tidy, visually pleasing dessert.
-
Chill Well: Allow the trifle to chill for a minimum of 1 hour. This step enhances the flavor integration of your Chocolate Toffee Trifle.
-
Avoid Freezing: Don’t freeze the trifle, as it can negatively affect the texture of the pudding and whipped topping once thawed.
-
Ingredient Substitutions: Feel free to switch the chocolate pudding for dark chocolate or fudge for a more intense flavor profile.
-
Creative Variations: Experiment with different flavors, like adding caramel or mocha to customize the trifle to your tastes.
Chocolate Toffee Trifle Variations & Substitutions
Feel free to get creative with this Chocolate Toffee Trifle and tailor it to your taste preferences!
-
Caramel Toffee Trifle: Add a drizzle of caramel sauce between layers for a sweet twist.
-
Mocha Toffee Trifle: Stir a teaspoon of instant espresso powder into the pudding mix for a coffee kick. This rich flavor pairs beautifully with chocolate, making each scoop a delightful treat!
-
Peanut Butter Toffee Trifle: Layer some luscious peanut butter mousse in place of the whipped topping for a nutty addition. The combination of chocolate and peanut butter is always a crowd-pleaser!
-
Oreo Toffee Trifle: Replace some of the cake cubes with crushed Oreos for an indulgent flavor transformation. This introduces a delightful cookie crunch that complements the soft layers.
-
Dairy-Free Option: Swap milk with almond or oat milk and use a non-dairy whipped topping for a delicious dairy-free version, ensuring everyone can indulge!
-
Nutty Crunch: Add chopped nuts like pecans or walnuts in between layers for an added crunch. This earthy flavor enhances the dessert’s complexity!
-
Fruit Layering: Incorporate layers of fresh berries, like raspberries or strawberries, in between the cake and pudding layers for a refreshing contrast. Their tartness will balance the richness beautifully!
-
Flavor Infusion: Try infusing the whipped topping with flavored extracts, such as vanilla or almond, to elevate the dessert’s profile.
Don’t forget, if you’re looking for more no-bake delights, check out these tasty 4-ingredient no-bake chocolate oat cookies for a sweet treat that’s just as simple!
What to Serve with Chocolate Toffee Trifle
Indulging in a Chocolate Toffee Trifle sets the stage for a delightful gathering, where friends and family can savor every bite of this creamy, crunchy dessert.
- Fresh Berries: Juicy strawberries or raspberries contrast the trifle’s richness, adding a refreshing burst of flavor that balances the sweetness.
- Coffee or Espresso: A strong cup of coffee or espresso complements the chocolate beautifully, enhancing its depth while providing a warm note against the dessert’s creaminess.
- Whipped Cream: A dollop of freshly whipped cream on the side not only adds to the aesthetic but enhances the airy texture, creating a cloud-like experience for your guests.
- Chocolate-Covered Fruits: Chocolate-dipped strawberries or bananas can turn your dessert table into a chocolate lover’s dream, perfectly aligning with the trifle’s decadent theme.
- Vanilla Ice Cream: A scoop of rich vanilla adds a creamy contrast that enhances the layered flavors, making each spoonful feel indulgent and heavenly.
- Toasted Almonds: Adding a sprinkle of toasted almonds introduces a crunch that echoes the toffee bits in the trifle, enriching the dessert’s texture with nutty undertones.
- Mint Tea: A refreshing cup of mint tea can cleanse the palate, offering a soothing finish after the chocolate’s intensity, perfect for a cozy night in.
- Chocolate Sauce Drizzle: Serve a warm drizzle of chocolate sauce alongside; it invites diners to personalize their trifle, amplifying the chocolate experience!
How to Store and Freeze Chocolate Toffee Trifle
Refrigerator: Store any leftover Chocolate Toffee Trifle covered with plastic wrap or in an airtight container for up to 3 days. This keeps the layers fresh and delicious.
Make-Ahead: Feel free to assemble the trifle up to 24 hours in advance. Just keep it refrigerated until you’re ready to serve to ensure the best flavor melding.
Freezing: Avoid freezing the trifle, as the texture of the pudding and whipped topping will change upon thawing, affecting the dessert’s delightful layers.
Serving: When ready to serve, simply remove from the fridge and garnish with any extra toffee bits or chocolate curls for a beautiful presentation!

Chocolate Toffee Trifle Recipe FAQs
What kind of chocolate cake mix should I use?
You can use either a boxed chocolate cake mix for convenience or bake homemade brownies for a more personalized touch. If opting for a boxed mix, just follow the package instructions, which typically require simple ingredients like eggs and oil.
How long can I store the Chocolate Toffee Trifle?
Store your remaining Chocolate Toffee Trifle in the refrigerator, covered with plastic wrap or in an airtight container, for up to 3 days. This will keep the layers fresh and ensure a delightful experience each time you scoop!
Can I make Chocolate Toffee Trifle ahead of time?
Absolutely! You can assemble the trifle up to 24 hours in advance. Just make sure to keep it refrigerated until you’re ready to serve. This not only saves you time when entertaining but also allows the flavors to meld beautifully.
Should I freeze the Chocolate Toffee Trifle?
It’s best to avoid freezing your trifle, as the texture of the pudding and whipped topping can change significantly upon thawing. This may result in a less appealing dessert experience, so enjoy it fresh or chilled!
Can I substitute ingredients for dietary restrictions?
Yes, you can definitely customize your trifle! If you’re concerned about allergies, you could use dairy-free whipped topping and substitute the pudding with a non-dairy alternative. For a nut-free version, ensure the toffee and any additional toppings are nut-free, or you could experiment with crunchy candies that fit your needs. Just remember to check ingredient labels to ensure safety!
Decadent Chocolate Toffee Trifle that Everyone Will Love
Ingredients
Equipment
Method
- Preheat your oven according to the instructions on the chocolate cake mix box. Bake the chocolate cake for approximately 25 to 30 minutes, until a toothpick inserted into the center comes out clean. Once baked, allow the cake to cool completely on a wire rack before cutting it into 1-inch cubes, setting it aside for layering in your Chocolate Toffee Trifle.
- In a large mixing bowl, whisk together the instant chocolate pudding mix and cold milk for about 2 minutes. Let the pudding sit for a few minutes to chill slightly.
- In a trifle dish, start building your masterpiece by placing half of the cake cubes on the bottom. Spoon half of the prepared chocolate pudding over the cake, ensuring it evenly covers the surface. Add half of the whipped topping, gently spreading it. Sprinkle half of the crushed chocolate-covered toffee bars over the whipped topping.
- Continue layering by repeating the steps with the remaining ingredients. Add the rest of the cake cubes, followed by the remaining pudding and whipped topping. Sprinkle the last of the crushed toffee bits on top.
- Cover the assembled trifle with plastic wrap and refrigerate for at least 1 hour, up to 24 hours, to allow the flavors to meld beautifully. When ready to serve, optional garnish with chocolate curls.
Leave a Reply