
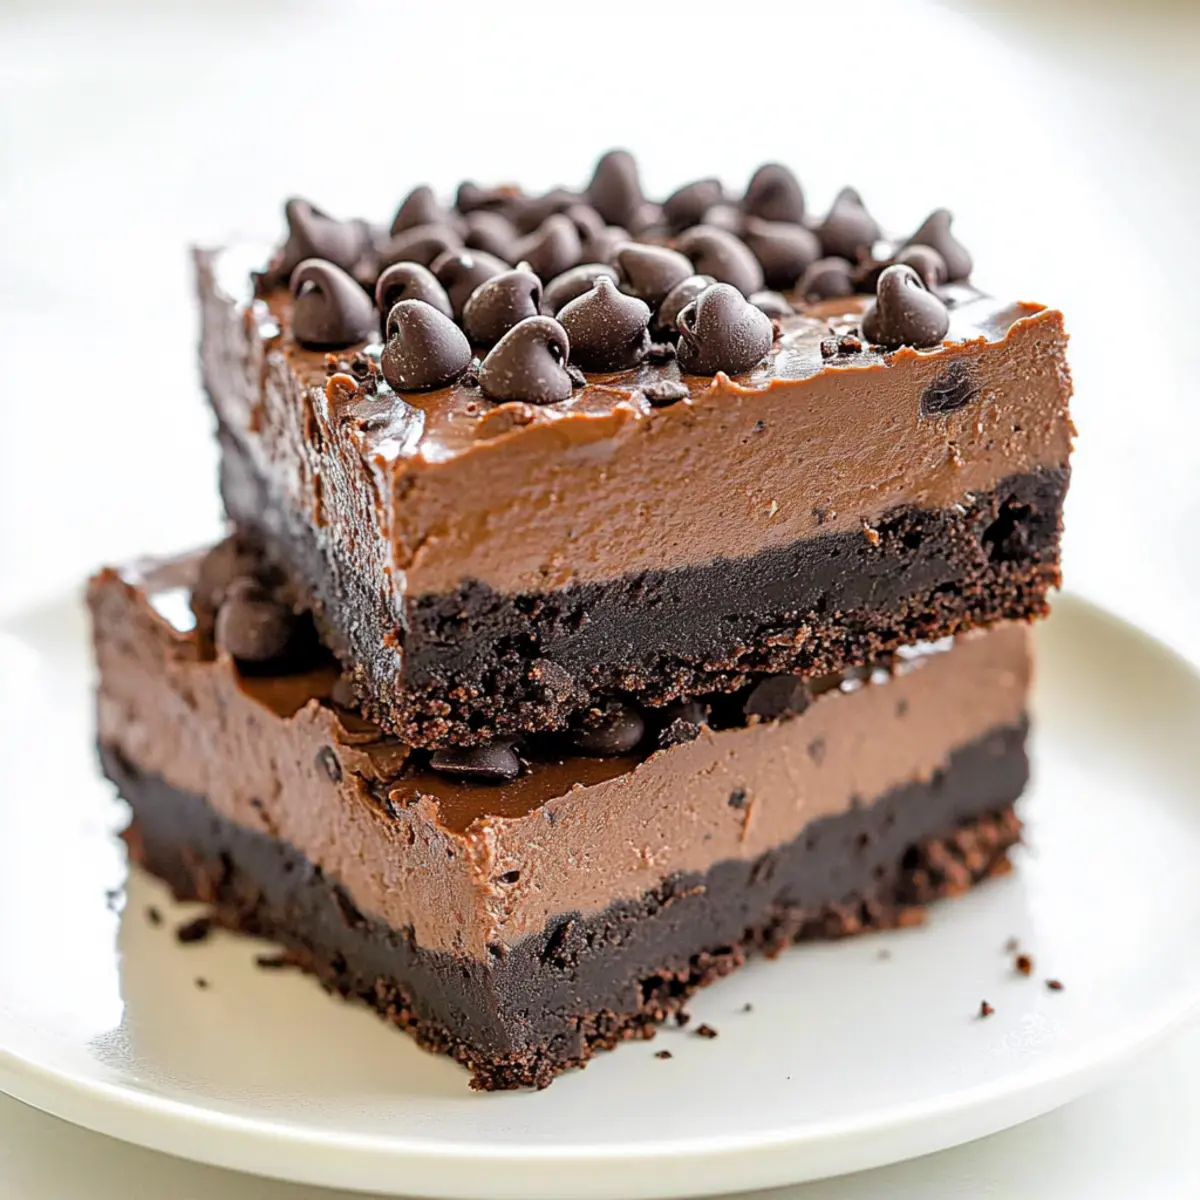
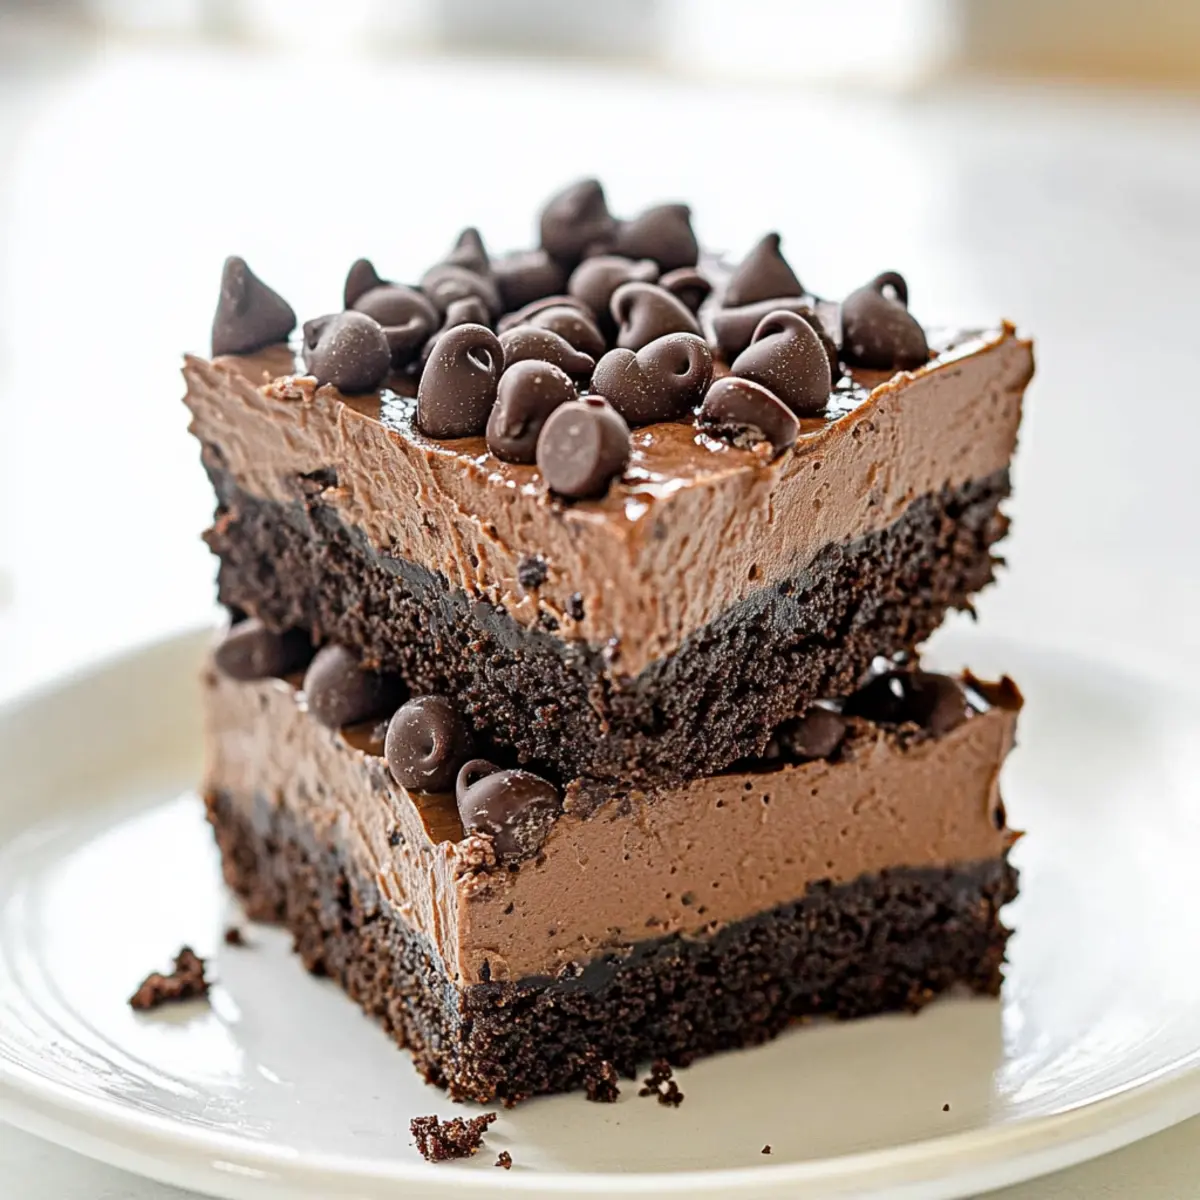
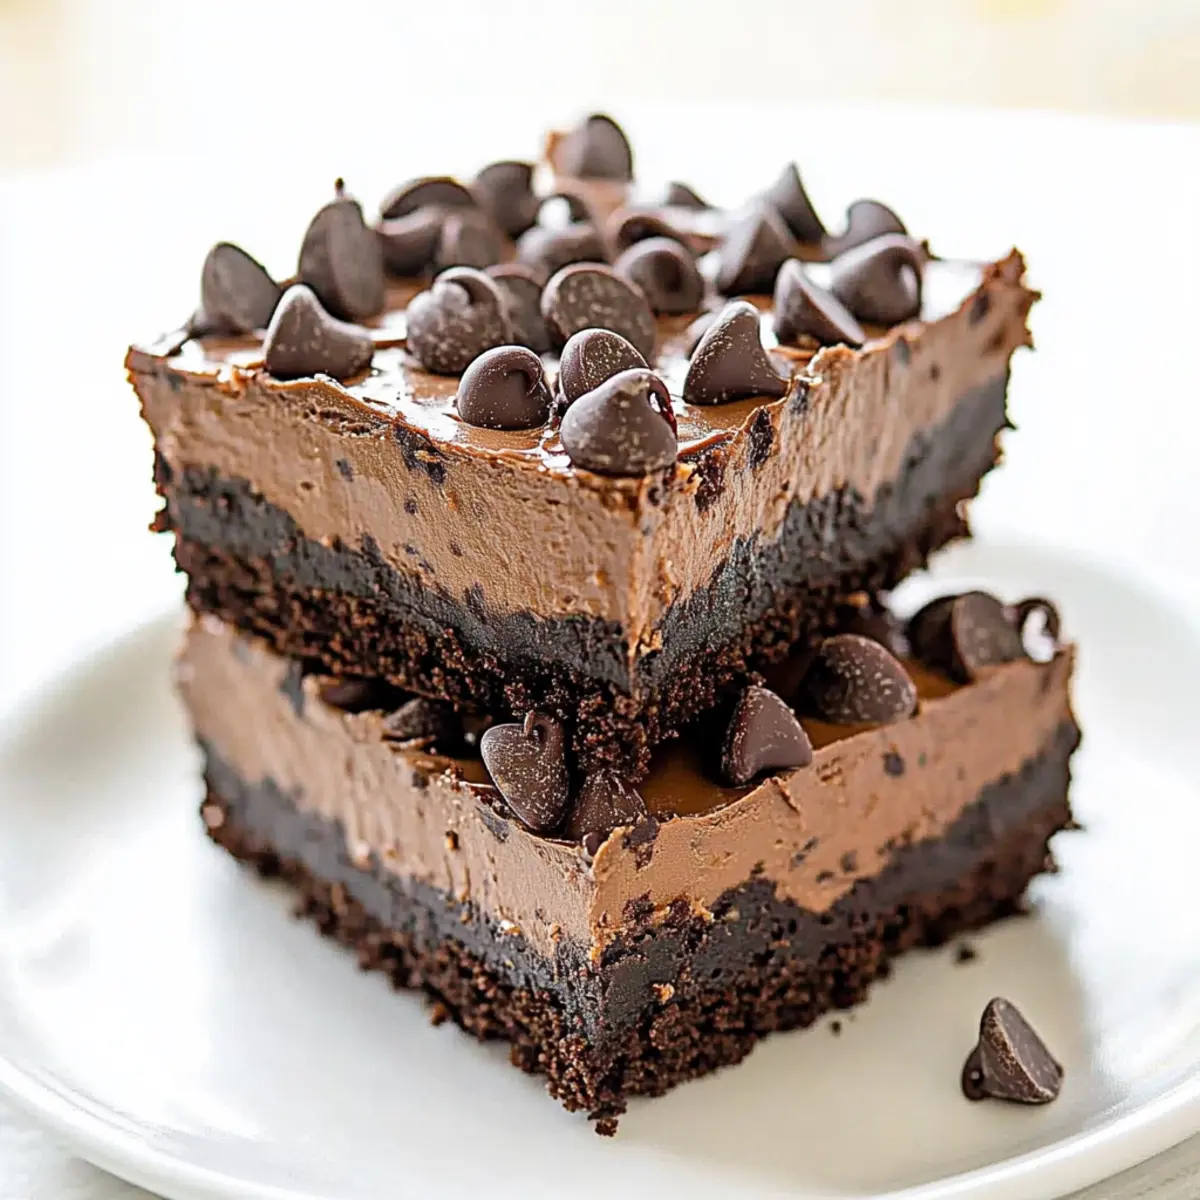
There’s something magical about lining a pan with foil and gathering ingredients that promise indulgence, isn’t there? When I decided to whip up these Death-by-Chocolate No-Bake Cheesecake Bars, I was immediately transported by the allure of a no-bake dessert that embodies pure chocolate bliss. With a crunchy Oreo cookie crust and an ultra-creamy filling, these easy-to-make bars are the ultimate delight for chocoholics. Best of all, they require no baking and can be prepped in mere minutes, making them perfect for surprising guests or treating yourself after a long day. Imagine biting into that rich, velvety texture, perfectly balanced with a touch of sweetness. Aren’t you excited to dive into this deliciousness and create your own chocolate masterpiece?
Why are these bars a chocoholic’s dream?
Decadent, creamy delight: Indulge in the rich, velvety texture that makes each bite feel like a luxurious treat.
No-bake magic: Effortlessly whip these bars together in minutes, perfect for hurried weeknights or last-minute gatherings.
Perfectly sweet: The balance of flavors with rich dark chocolate and a touch of sweetness will have you craving more.
Oreo crust perfection: Enjoy the satisfying crunch of an Oreo cookie crust that beautifully complements the creamy filling.
Versatile options: Customize flavors by swapping dark chocolate for milk chocolate, or add a hint of your favorite liqueur for a grown-up twist.
Don’t forget to check out our Fried Strawberry Cheesecake for another delicious dessert option!
Death-By-Chocolate No-Bake Cheesecake Bars Ingredients
For the Crust
• Oreo cookies – These create a sweet and crunchy base; use whole cookies without any preparation.
• Unsalted butter – This binds the crust together; substitute with margarine if needed.
For the Filling
• Dark chocolate – Provides a rich flavor; ensure it is of good quality for melting. Alternatively, use semisweet chocolate but avoid chocolate chips for the filling.
• Brick-style cream cheese – Essential for a creamy texture; do not use spreadable or whipped cream cheese.
• Heavy whipping cream – Adds richness and stability; opt for full-fat for the best results.
• Baileys Irish Cream or Kahlua (optional) – These add depth of flavor; omit for a non-alcoholic option or substitute with a splash of coffee.
• Salt – Enhances the overall chocolate flavor; adjust to taste.
For the Topping
• Mini semi-sweet chocolate chips – Use these for decoration and added texture on top.
Indulge in these Death-by-Chocolate No-Bake Cheesecake Bars, and let your dessert dreams come true!
Step‑by‑Step Instructions for Death-By-Chocolate No Bake Cheesecake Bars
Step 1: Prepare the Pan
Start by lining a 9×9 inch square baking pan with aluminum foil, letting the foil overhang slightly for easy removal later. Lightly spray the foil with cooking spray to ensure the bars release effortlessly once set. This crucial first step lays the foundation for your Death-by-Chocolate No-Bake Cheesecake Bars.
Step 2: Make the Crust
In a food processor, blend whole Oreo cookies until they reach fine crumb texture. Meanwhile, melt unsalted butter and dark chocolate together in a microwave-safe bowl at 30-second intervals, stirring until smooth. Combine the melted mixture with the cookie crumbs and stir until well mixed. Press this mixture evenly into the prepared pan to form a solid crust.
Step 3: Prepare the Filling
In a mixing bowl, beat the brick-style cream cheese until it’s fluffy and creamy, about 2 minutes. In a separate saucepan, melt the remaining dark chocolate with the heavy whipping cream over low heat, stirring until fully combined. Remove from heat and pour into the cream cheese mixture, blending until smooth and well incorporated. If desired, add a splash of Baileys Irish Cream or Kahlua and a pinch of salt for a deeper flavor.
Step 4: Assemble the Bars
Carefully pour the silky filling over the cooled crust, using a spatula to spread it evenly. This filling is the crowning glory of your Death-by-Chocolate No-Bake Cheesecake Bars, so take your time to ensure it reaches all corners of the pan. Once evenly distributed, sprinkle mini semi-sweet chocolate chips generously across the top for added texture and sweetness.
Step 5: Chill
Cover the pan tightly with plastic wrap to prevent condensation and place it in the refrigerator. Chill the bars for at least 3 hours, or overnight if possible, to allow the filling to set perfectly. After chilling, the bars should be firm to the touch and ready to be sliced into squares for serving.
Storage Tips for Death-By-Chocolate No-Bake Cheesecake Bars
Fridge: Keep your cheesecake bars in an airtight container in the refrigerator for up to 10 days. This will help maintain their creamy texture and delicious flavor.
Freezer: For longer storage, you can freeze the bars wrapped tightly in plastic wrap and then placed in a freezer-safe container for up to 2 months. Thaw in the fridge before serving.
Reheating: These bars are best enjoyed chilled, so there’s no need to reheat. Simply slice and serve directly from the fridge or thawed out of the freezer for a delightful dessert that’s ready to enjoy!
Make-Ahead: Perfect for preparing in advance! You can make these Death-by-Chocolate No-Bake Cheesecake Bars several days before your event, allowing flavors to meld and creating a sweeter experience.
What to Serve with Death-by-Chocolate No-Bake Cheesecake Bars
There’s nothing quite like crafting a complete dessert experience that leaves a lasting impression on your taste buds and warms the heart.
- Fresh Berries: The tartness of strawberries or raspberries adds a vibrant contrast, balancing the rich chocolate beautifully.
- Whipped Cream: A dollop of lightly sweetened whipped cream enhances creaminess, allowing the bars’ flavors to shine and inviting a little decadence.
- Coffee: A steaming cup of brewed coffee pairs perfectly, highlighting chocolate notes and providing a comforting sense of warmth after each bite.
- Mint Chocolate Chip Ice Cream: The coolness of this ice cream offers delightful contrast, creating a refreshing twist to the indulgent bars.
- Toasted Nuts: Chopped walnuts or pecans sprinkled on top add crunch and a nutty flavor that complements the smooth filling.
- Chocolate Drizzle: A simple drizzle of melted chocolate elevates the visual appeal and accentuates the richness of the cheesecake bars for an elegant touch.
Each pairing brings a unique texture or flavor to the table, setting the stage for a truly memorable dessert experience!
Make Ahead Options
These Death-by-Chocolate No-Bake Cheesecake Bars are a fantastic choice for busy home cooks looking to save time during the week! You can prepare the crust and filling up to 24 hours in advance to streamline your dessert-making process. Simply follow the initial steps to make the crust and filling, then assemble them and cover the pan tightly with plastic wrap to prevent air exposure, which helps maintain that creamy texture and rich flavor. Refrigerate until you’re ready to serve. When it’s time to indulge, chill for a few hours or overnight, then slice into bars. You’ll have a delightfully decadent treat ready with minimal effort!
Expert Tips for Death-By-Chocolate No-Bake Cheesecake Bars
• Use Quality Chocolate: Always opt for good-quality dark chocolate to ensure a rich flavor in your filling. Avoid chocolate chips, as they don’t melt well for this recipe.
• Don’t Rush the Chilling: Allow your cheesecake bars to chill for at least 3 hours, better yet, overnight. This ensures they set properly and the flavors meld beautifully.
• Check Your Cream Cheese: Make sure to use brick-style cream cheese. Spreadable or whipped varieties can lead to a soft filling that won’t hold up.
• Avoid Overmixing: When combining the chocolate and cream cheese, mix just until smooth. Overmixing can incorporate air, leading to a lighter texture instead of the desired dense richness.
• Customization Options: Feel free to experiment with flavors! Swap out the dark chocolate for milk chocolate or add different liqueurs for a unique twist on the classic Death-by-Chocolate experience.
Death-By-Chocolate No-Bake Cheesecake Bars Variations
Feel free to explore these delightful variations that allow you to put your spin on this already luxurious dessert!
- Milk Chocolate: Swap dark chocolate for milk chocolate to create a sweeter profile that’s equally indulgent.
- Nutty Flavor: Add finely chopped nuts such as walnuts or pecans to the crust for an added crunch and flavor dimension.
- Coffee Twist: Incorporate coffee or espresso powder into the filling for a delightful mocha flavor that will awaken your taste buds.
- Fruit Infusion: Layer fresh berries on top of the filling before chilling for a burst of freshness alongside the rich chocolate.
- Dairy-Free: Use dairy-free cream cheese and coconut cream in place of heavy whipping cream for a deliciously vegan option.
- Caramel Drizzle: Top the bars with a drizzle of salted caramel to elevate the sweetness and add a hint of savory flavor.
- Mint Chocolate: Stir in a few drops of peppermint extract to the filling for a refreshing minty twist that’ll have your guests swooning.
If you’re feeling adventurous, you might also enjoy exploring our delicious Fried Strawberry Cheesecake for another way to indulge in a creamy treat! Or why not try exploring some Ingredient Bake Chocolate goodness? The possibilities are endless, so don’t hesitate to let your creativity shine!
Death-by-Chocolate No-Bake Cheesecake Bars Recipe FAQs
What kind of chocolate should I use for the filling?
Absolutely go for high-quality dark chocolate to ensure a rich flavor in your Death-by-Chocolate No-Bake Cheesecake Bars. Avoid chocolate chips, as they don’t melt well for this recipe. If you prefer a sweeter option, semisweet chocolate works too, but always opt for a bar or block chocolate for melting rather than chips.
How should I store the cheesecake bars?
You can keep your cheesecake bars in an airtight container in the refrigerator for up to 10 days. This is the best way to maintain their creamy texture and delicious flavor. If you have leftovers (though they might not last long!), ensure they are sealed properly to avoid any odors from other foods.
Can I freeze the cheesecake bars?
Yes! For longer storage, wrap the bars tightly in plastic wrap, then place them in a freezer-safe container. They can be frozen for up to 2 months. When you’re ready to enjoy them, simply thaw in the fridge overnight before serving. It’s a great way to keep some decadent treats on hand!
What if the filling is too soft?
If you find that your filling is too soft, don’t worry! Just give it more chilling time in the refrigerator. Ideally, you want to chill it for at least 3 hours, but overnight is even better. If you’re in a pinch, you can also add a bit more cream cheese to firm it up, but an extended chill is usually enough for a perfect set.
Are there any dietary considerations I should be aware of?
Yes, definitely! If you’re serving these bars to people with dietary restrictions, note that the recipe contains dairy and gluten. You can make these bars gluten-free by using gluten-free Oreo cookies. If anyone is lactose intolerant, look for dairy-free cream cheese and heavy cream alternatives. Always check the labels to ensure they meet all requirements!
Can I make these bars ahead of time?
Very! In fact, I highly recommend preparing these Death-by-Chocolate No-Bake Cheesecake Bars a couple of days before your event. Not only does this save time, but it also allows the flavors to meld beautifully. Just be sure to keep them covered in the fridge until you’re ready to serve!

Decadent Death-By-Chocolate No Bake Cheesecake Bars You'll Love
Ingredients
Equipment
Method
- Start by lining a 9x9 inch square baking pan with aluminum foil, letting the foil overhang slightly for easy removal later. Lightly spray the foil with cooking spray.
- In a food processor, blend whole Oreo cookies until they reach fine crumb texture. Melt unsalted butter and dark chocolate together in a microwave-safe bowl until smooth. Combine with cookie crumbs and press into the prepared pan.
- Beat the brick-style cream cheese until fluffy. Melt the remaining dark chocolate with the heavy whipping cream over low heat, then combine with cream cheese, blending until smooth. Add Baileys or Kahlua and salt if desired.
- Pour the filling over the crust, spreading evenly. Sprinkle mini chocolate chips across the top.
- Cover the pan with plastic wrap and refrigerate for at least 3 hours, or overnight. Once set, slice into squares for serving.
Leave a Reply