
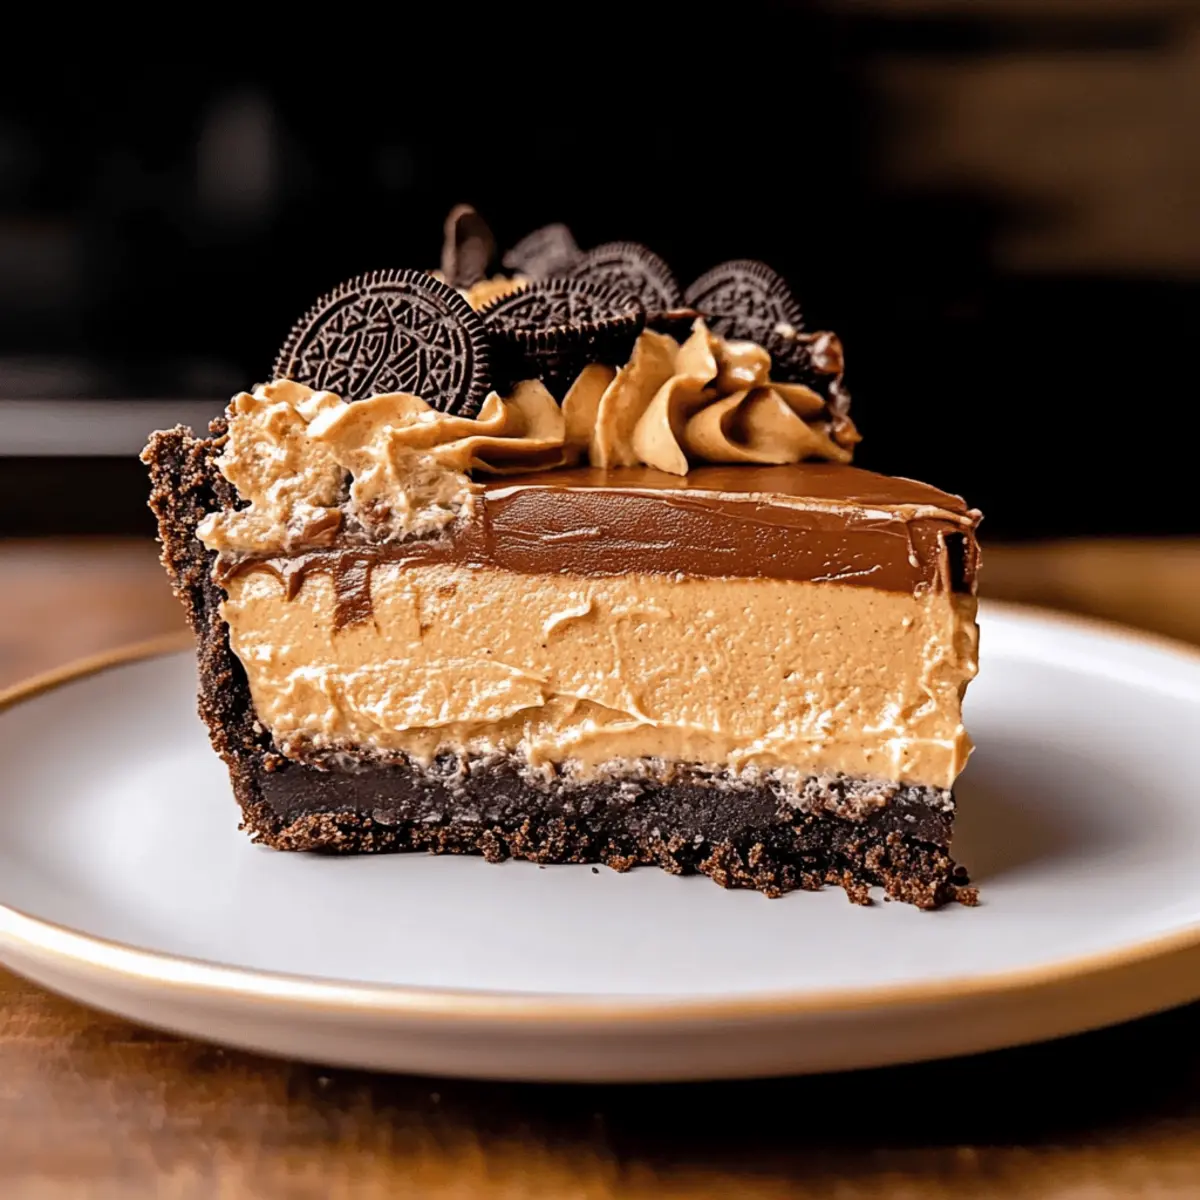
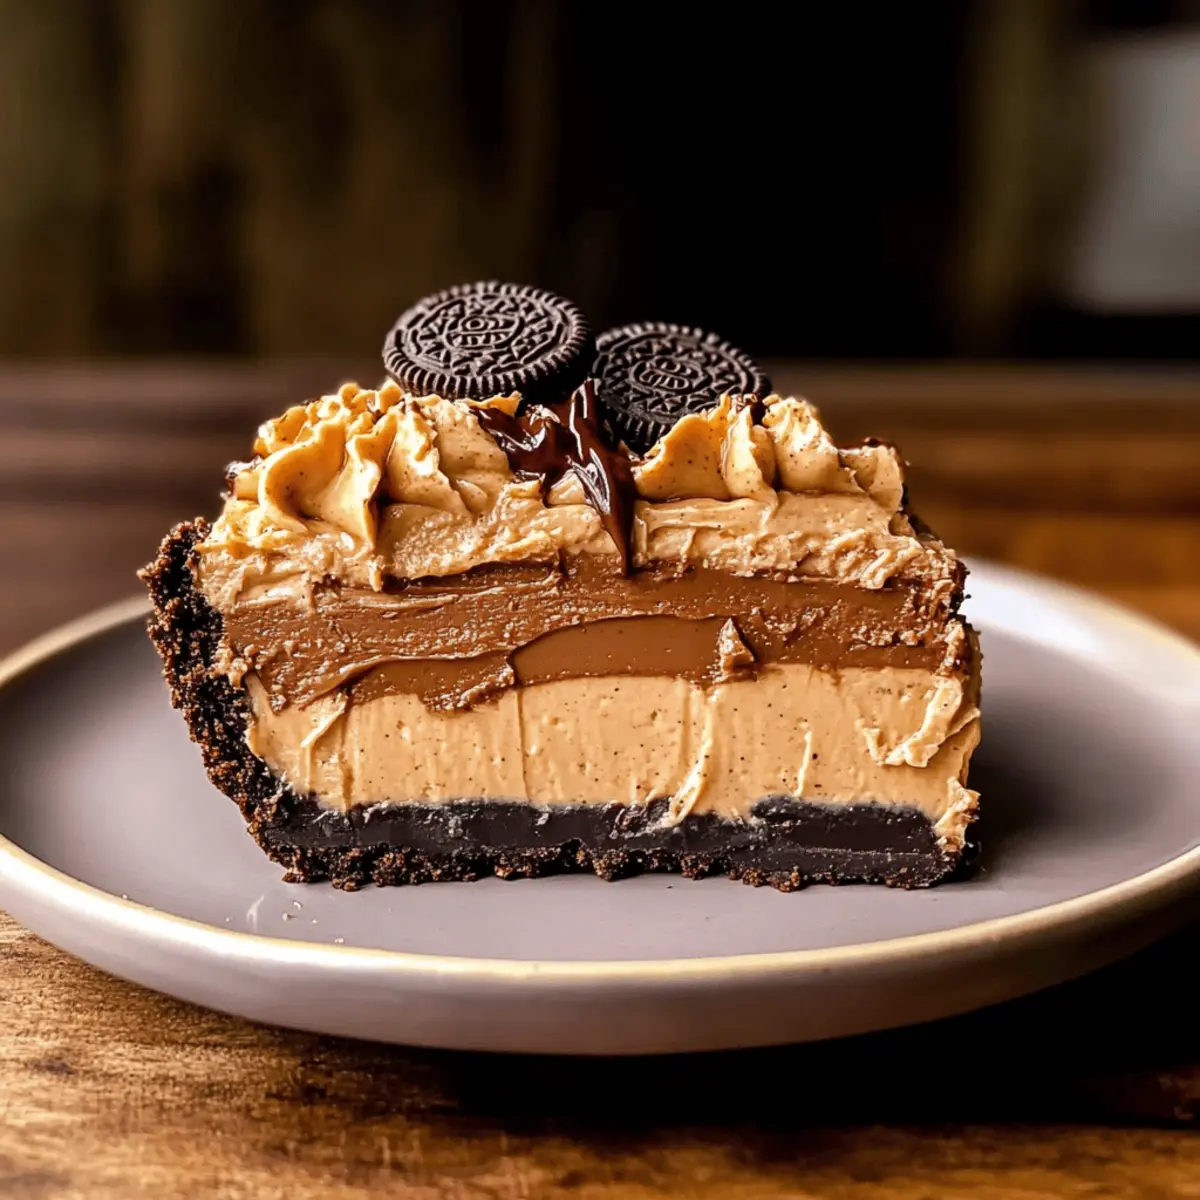
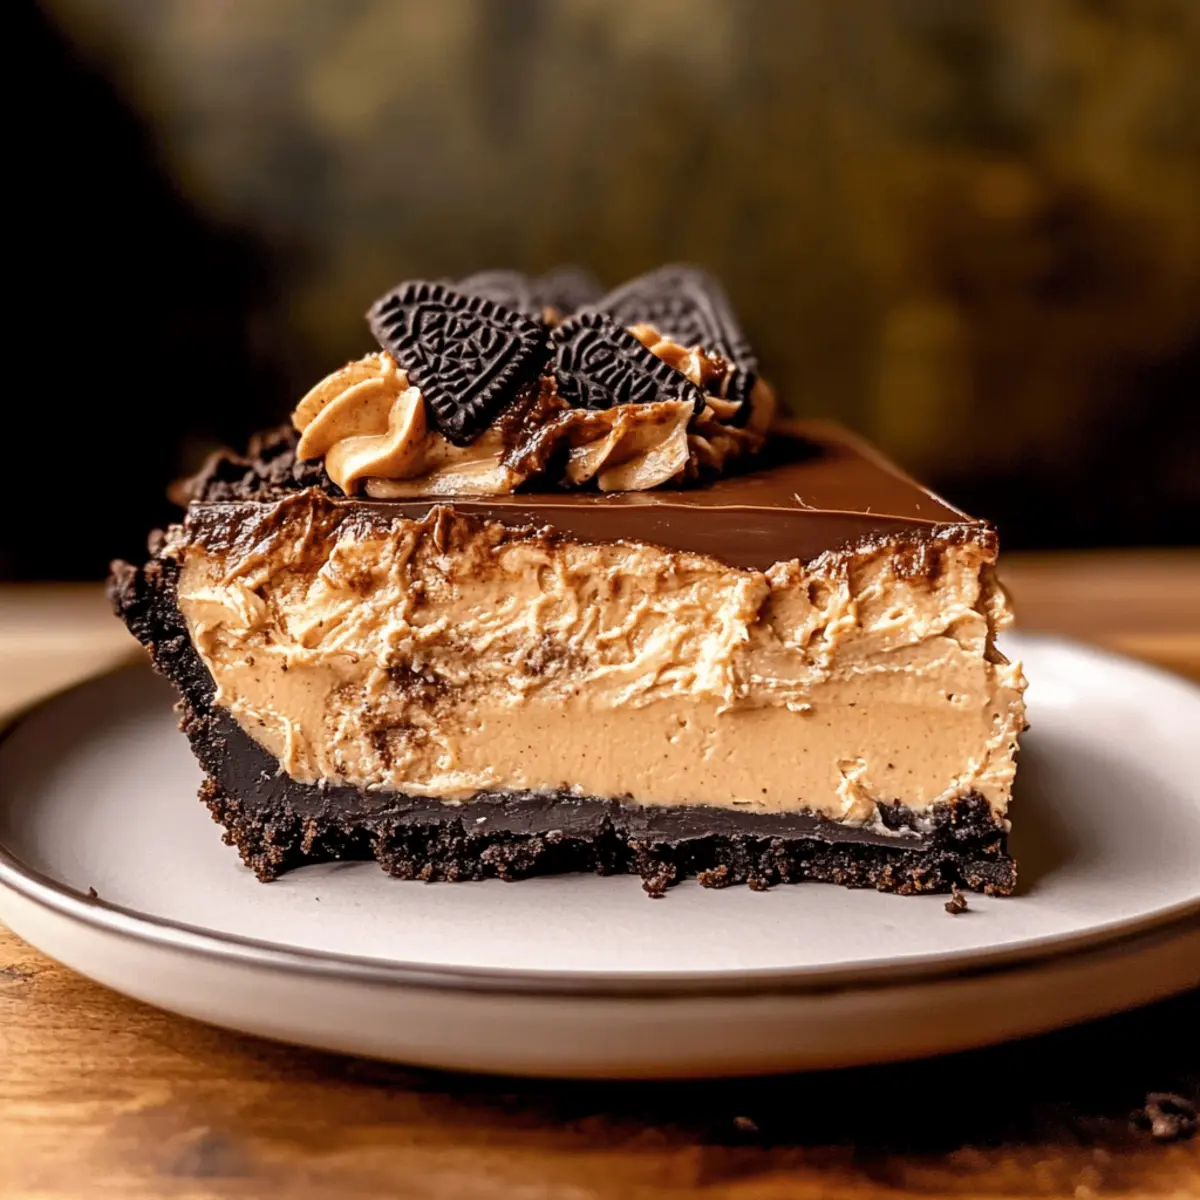
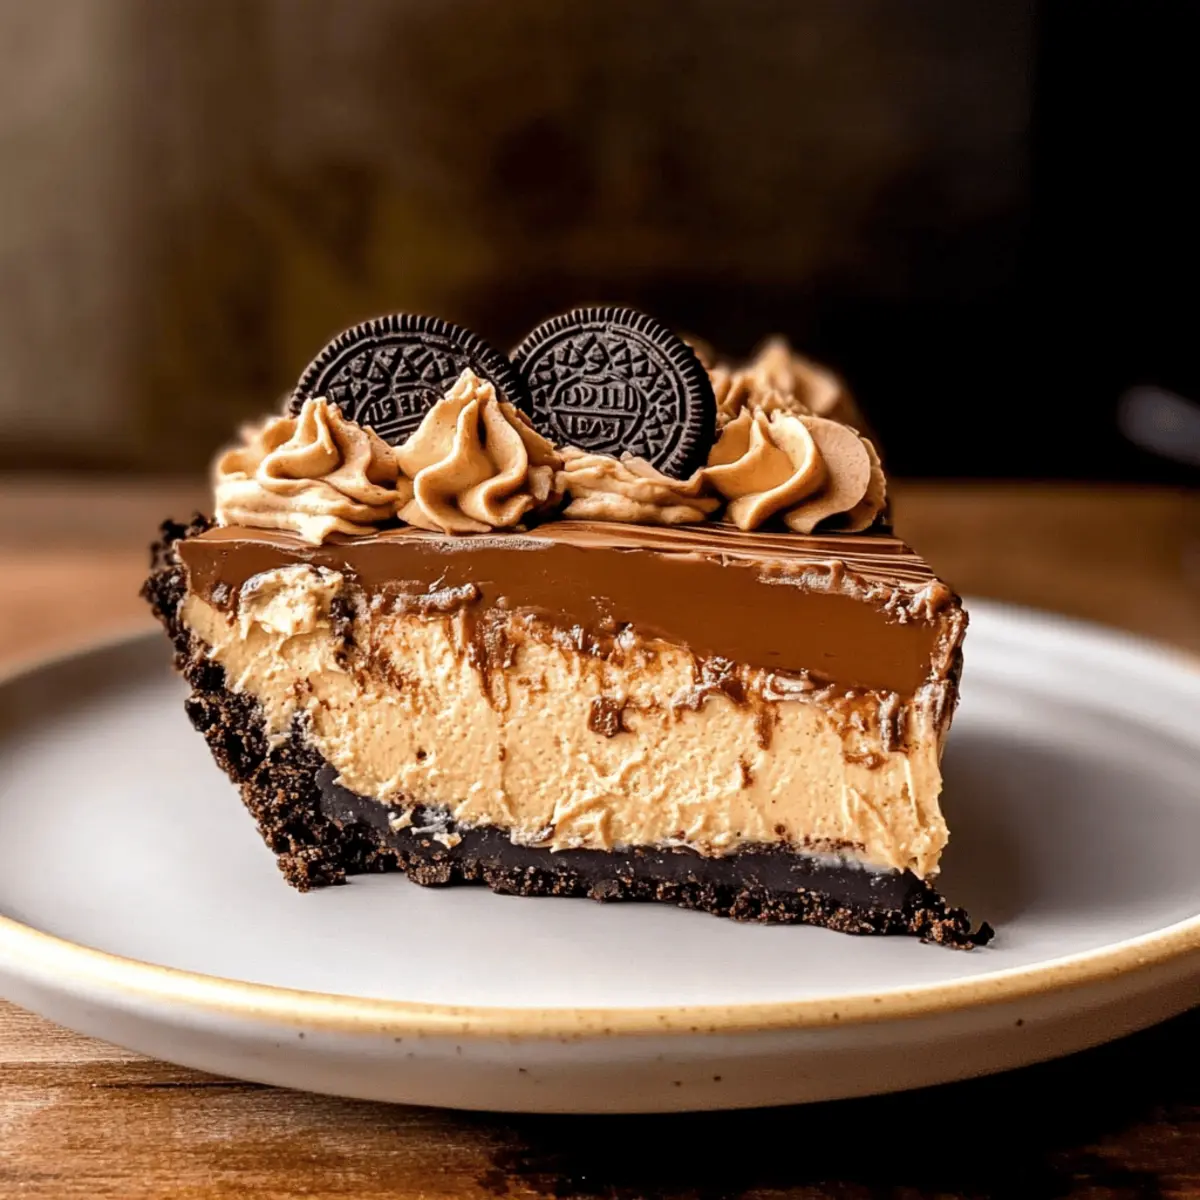
The first time I tasted a no-bake Chocolate Peanut Butter Pie, I couldn’t believe how easy and indulgent it was. Layers of velvety chocolate and creamy peanut butter sit elegantly atop a crunchy Oreo crust, creating a dessert that’s both a showstopper and a crowd-pleaser. What I love most about this recipe is not just its effortless preparation—perfect for both novice and seasoned chefs—but also its ability to brighten any occasion with its rich, satisfying flavors. Whether you’re hosting a dinner party or simply craving a sweet treat, this pie is your go-to solution for a delightful, homemade dessert. Are you ready to take a bite out of this irresistible creation?
Why is this pie a must-try?
Indulgent Layers: The no-bake aspect makes it an effortless choice, perfect for busy cooks.
Oreo Crust Delight: The crunchy crust balances the creamy fillings, creating a delightful textural contrast.
Crowd-Pleaser: With rich chocolate and creamy peanut butter, it’s sure to be a hit at any gathering.
Versatile Options: You can easily customize it by swapping peanut butter for almond or cashew butter for a twist.
Quick Prep: This pie is an ideal solution for last-minute dessert needs, allowing you to whip up something special without spending hours in the kitchen.
Whether you’re a seasoned chef or trying your hand at dessert for the first time, this Chocolate Peanut Butter Pie will impress without the fuss!
Chocolate Peanut Butter Pie Ingredients
Get ready to create this delightful dessert with our simplified ingredient list!
For the Crust
- Oreo Cookies – These provide the structure and sweetness for the crust; gluten-free cookies can be used as a substitute.
- Unsalted Butter – Binds the Oreo crumbs together; use coconut oil for a dairy-free crust option.
For the Chocolate Layer
- Cream Cheese – Adds creaminess and richness to the chocolate filling; opt for vegan cream cheese if desired.
- Unsweetened Cocoa Powder – Enhances the chocolate flavor; Dutch-processed cocoa can offer a smoother taste.
- Granulated Sugar – Sweetens the chocolate layer; feel free to use powdered sugar for a silkier texture.
- Sour Cream – Provides tang and moisture; Greek yogurt can be a great substitute.
- Pure Vanilla Extract – Enhances the overall flavor profile; almond extract offers a unique twist.
- Chocolate Bar – For a deep chocolate flavor; high-quality chocolate ensures an amazing taste.
For the Peanut Butter Layer
- Cream Cheese – Similar purpose as in the chocolate layer for creamy texture; try almond or cashew cream for a dairy-free version.
- Peanut Butter – Offers that rich, nutty flavor; you can choose creamy or crunchy based on preference.
Whipped Cream
- Heavy Cream – Essential for whipped cream, adding lightness to the batter; coconut cream works perfectly for dairy-free pies.
- Powdered Sugar – Sweetens the whipped cream; regular sugar can be used but may change the texture.
For Decoration
- Peanut Butter Cups – Adds a fun, crunchy finish on top; this is optional, but they make for a delightful presentation.
Now that you’ve gathered your ingredients, you’re all set to create a sensational no-bake Chocolate Peanut Butter Pie! Enjoy the process and the delicious outcome!
Step‑by‑Step Instructions for Chocolate Peanut Butter Pie
Step 1: Prepare Pie Crust
Begin by spraying a 9-inch pie pan with non-stick cooking spray. Next, crush Oreo cookies into fine crumbs using a food processor or rolling pin. In a mixing bowl, combine the cookie crumbs with melted butter until well blended. Press this mixture firmly into the bottom and sides of the pie pan. Chill the crust in the refrigerator for 30 minutes to set.
Step 2: Make Chocolate Filling
In a clean mixing bowl, beat together the cream cheese, sugar, and unsweetened cocoa powder until smooth and creamy. This should take about 2-3 minutes on medium speed. Gradually mix in the vanilla extract, sour cream, and melted chocolate until thoroughly combined. The filling should be silky and rich. Set aside while you prepare the peanut butter layer.
Step 3: Make Peanut Butter Filling
In another mixing bowl, beat softened cream cheese and granulated sugar until smooth and creamy. Add in the peanut butter and mix until well combined, then blend in the vanilla extract and sour cream. Continue mixing until the filling is light and fluffy, approximately 2-3 minutes. This peanut butter layer should be rich and well incorporated.
Step 4: Whip Cream
In a separate, chilled bowl, pour heavy cream and sift in powdered sugar. Using an electric mixer, whip on medium-high speed until stiff peaks form, typically 3-5 minutes. This whipped cream should be light and airy, providing a delightful texture to your Chocolate Peanut Butter Pie. Be careful not to overmix.
Step 5: Combine Fillings
Gently fold half of the whipped cream into the chocolate filling, ensuring a light and airy texture remains. Do the same with the peanut butter mixture using the remaining whipped cream. This step is crucial for achieving a light and fluffy consistency in your pie layers. You’ll have two beautifully creamy fillings ready to layer.
Step 6: Layer the Pie
Spread the chocolate filling evenly over the chilled Oreo crust, smoothing the top with a spatula. Carefully layer the peanut butter filling on top of the chocolate layer. To finish, drizzle melted peanut butter across the surface, using a toothpick or knife to create swirls. This adds an enticing look to your no-bake Chocolate Peanut Butter Pie.
Step 7: Chill
Cover the pie with foil and refrigerate for a minimum of 6 hours, ideally overnight. This chilling time allows the pie to set and the flavors to meld beautifully together. When ready to serve, ensure it’s chilled thoroughly for the best texture and taste, creating a delightful dessert experience.
Step 8: Decorate and Serve
Once set, remove the pie from the fridge and uncover. Optionally, decorate the top with chopped peanut butter cups for a fun and festive look. Slice the pie into wedges and serve chilled, allowing everyone to indulge in the rich and creamy layers of your homemade Chocolate Peanut Butter Pie.
Make Ahead Options
These no-bake Chocolate Peanut Butter Pies are perfect for busy home cooks who want to save time without sacrificing flavor! You can prepare the Oreo crust and chocolate filling up to 24 hours in advance—simply press the crust into the pan and refrigerate it, then store the chocolate layer separately until you’re ready to assemble. For optimal freshness, make the peanut butter layer the day you plan to serve it. When ready to complete your pie, just combine the layers, chill for a minimum of 6 hours, and garnish with peanut butter cups. This way, you’ll ensure your dessert remains just as delicious while making your meal planning a breeze!
Expert Tips for Chocolate Peanut Butter Pie
-
Room Temperature Ingredients: Ensure all dairy ingredients are at room temperature before mixing to achieve the smoothest filling possible. Cold cream cheese can result in lumps!
-
Gentle Folding: Remember to fold the whipped cream gently into the chocolate and peanut butter mixtures. Overmixing can deflate the whipped cream, leading to a denser pie.
-
Chill for Best Flavor: For an unforgettable taste experience, chill the pie overnight before serving. This enhances the flavors and helps the texture set perfectly.
-
Layering Technique: When layering, use a spatula to spread the fillings evenly. This ensures every slice gets a great mix of chocolate and peanut butter flavors in your no-bake Chocolate Peanut Butter Pie.
-
Decorate Thoughtfully: Get creative with your toppings! Optional peanut butter cups can add a delightful crunch, but you can also use crushed nuts or chocolate shavings for added texture.
-
Storage Savvy: If you have leftovers, store them in an airtight container in the fridge for up to 5 days, ensuring you can enjoy this delectable pie for longer!
How to Store and Freeze Chocolate Peanut Butter Pie
Fridge: Store leftovers in an airtight container for up to 5 days. This keeps the flavors intact and maintains its creamy texture.
Freezer: For longer storage, freeze individual slices wrapped in plastic wrap for up to 30 days. Thaw in the fridge overnight before serving.
Reheating: There’s no need to reheat this no-bake pie; simply serve chilled for the best experience. Enjoy the delightful layers of chocolate and peanut butter!
Slicing Tips: To cut through the firm pie effortlessly, run your knife under warm water before slicing to create clean, beautiful pieces.
What to Serve with No-Bake Chocolate Peanut Butter Pie
Pairing this decadent pie with delightful sides can transform dessert into a full-fledged celebration of flavor!
-
Fresh Berries: Juicy raspberries or strawberries add a burst of freshness that complements the creamy layers beautifully. Their slight tartness balances the rich sweetness of the pie, making each bite a treat.
-
Coffee: A rich, bold cup of coffee enhances the pie’s flavors and adds a warm note, creating a comforting dessert experience. The coffee’s aromas blend seamlessly with chocolate and peanut butter, making every sip and bite unforgettable.
-
Ice Cream: A scoop of vanilla or chocolate ice cream brings a delightful creaminess that pairs well with the crunchy crust. Melting gently atop the pie, it adds an extra layer of decadence that every dessert lover will appreciate.
-
Chocolate Drizzle: Finish off each slice with a silky chocolate sauce. This simple addition elevates the presentation and infuses more chocolatey goodness, delighting your guests even further.
-
Whipped Cream: Lightly dollop whipped cream on the pie for extra indulgence. Its airy texture contrasts perfectly with the rich layers, enhancing the overall mouthfeel of this delicious dessert.
-
Nutty Granola: For a crunchy contrast, serve a small bowl of nutty granola on the side. Its texture balances the creaminess of the pie and offers a wholesome twist that will surprise your taste buds.
Creating the perfect pairing will leave everyone raving about this no-bake Chocolate Peanut Butter Pie!
Chocolate Peanut Butter Pie Variations
There’s plenty of room for creativity within this delightful pie, so feel free to explore delightful variations!
-
Nut Alternatives: Swap peanut butter for almond or cashew butter for a different flavor twist. Each nut brings its own unique taste, making your pie distinct and delicious!
-
Gluten-Free Crust: Use gluten-free cookie crumbs like crushed gluten-free Oreos or even graham crackers, ensuring everyone can enjoy this treat without compromise.
-
Vegan Filling: Substitute the cream cheese in both layers with vegan cream cheese and use coconut cream in place of heavy cream for a delightful dairy-free pie.
-
Chocolate Variations: Try using dark chocolate or even white chocolate for a creamy filling. Each type adds its own flair, creating a unique dessert experience.
-
Extra Crunch: Fold in chopped nuts or chocolate chips into the fillings for an extra layer of texture. Imagine the delightful crunch creating a new dimension in each bite!
-
Flavor Infusions: Add a dash of espresso powder to the chocolate filling or a tiny pinch of cinnamon for a warm spice note that perfectly complements the chocolate and peanut butter pairing.
-
Fruit Toppings: Top with fresh berries like raspberries or strawberries before serving for a burst of fruity freshness that contrasts beautifully with the rich pie.
-
Heat Element: Spice it up by mixing in a pinch of cayenne pepper to the chocolate layer, giving it a surprising kick that balances the sweetness.
By embracing these variations, you can make your Chocolate Peanut Butter Pie even more special. You might also love trying these combinations in other desserts like Greek Yogurt Peanut or White Chocolate Raspberry. Let your creativity soar as you prepare this sweet masterpiece!
Chocolate Peanut Butter Pie Recipe FAQs
How do I choose the best chocolate for this pie?
Absolutely! For the richest flavor, select a high-quality dark chocolate bar with at least 60% cocoa content. Look for chocolates with a smooth texture and deep flavor profile to complement the creamy peanut butter layer. If you prefer a slightly sweeter pie, opt for semi-sweet chocolate; just make sure to melt it gently either in a microwave with short intervals or on a double boiler to prevent burning.
How should I store my Chocolate Peanut Butter Pie?
I recommend storing any leftovers in an airtight container in the fridge for up to 5 days. This way, you’ll maintain its delicious flavor and creamy texture. If you want to keep it longer, freeze individual slices wrapped in plastic wrap for up to 30 days. Simply thaw overnight in the fridge when you’re ready to enjoy it again!
What if my pie feels too soft when I take it out of the fridge?
Very! If your pie is too soft, it may not have chilled long enough. Make sure to chill it for at least 6 hours, and ideally overnight, for the best results. If the filling still seems loose, try placing it in the freezer for about 30 minutes before serving. This should help firm it up a bit more.
Can I make this pie dairy-free?
Absolutely! You can substitute each dairy component with non-dairy alternatives. Use vegan cream cheese for both layers, coconut cream instead of heavy cream for whipping, and substitute with almond butter or cashew cream as your choice of nut butter. Each of these swaps will help you enjoy a delicious no-bake Chocolate Peanut Butter Pie that everyone can savor!
What are the signs that my pie has gone bad?
Be mindful! If you see any dark spots or an off smell, it’s best to toss it. Additionally, if the texture feels watery or you notice any separation in the filling, those are signs that the pie may no longer be good to eat. Always better to check before indulging!
Can I use crunchy peanut butter in this recipe?
The more the merrier! Using crunchy peanut butter instead of creamy will give your pie an extra layer of texture and delightful bites. Just ensure you choose a quality peanut butter that’s easy to mix to achieve the best creamy filling consistency. Enjoy this tasty twist!
Delicious No-Bake Chocolate Peanut Butter Pie to Indulge In
Ingredients
Equipment
Method
- Spray a 9-inch pie pan with non-stick cooking spray. Crush Oreo cookies into fine crumbs using a food processor or rolling pin. Combine the cookie crumbs with melted butter and press into the pie pan. Chill for 30 minutes to set.
- In a mixing bowl, beat together cream cheese, sugar, and cocoa powder until smooth. Gradually mix in the vanilla, sour cream, and chocolate until combined. Set aside.
- In another bowl, beat cream cheese and sugar until smooth. Add peanut butter and mix. Blend in vanilla and sour cream until light and fluffy.
- In a separate chilled bowl, whip heavy cream with powdered sugar until stiff peaks form.
- Gently fold half of the whipped cream into the chocolate filling and the rest into the peanut butter mixture.
- Layer the chocolate filling over the Oreo crust, then the peanut butter filling. Drizzle melted peanut butter on top and swirl.
- Cover with foil and refrigerate for at least 6 hours, ideally overnight.
- Once set, decorate with chopped peanut butter cups and serve chilled.
Leave a Reply