
“Camping meals have never tasted so good!” my friend exclaimed as we gathered around the fire, the rich aroma of melted cheese and garlic wafting through the air. That moment sparked my passion for this Dutch Oven Cheesy Pull Apart Garlic Bread, and I’m thrilled to share it with you! This easy-to-make recipe not only elevates your outdoor gatherings but doubles as a crowd-pleasing appetizer for any occasion. Picture soft, gooey mozzarella nestled between crusty slices of rustic bread, all infused with aromatic garlic and buttery goodness—pure comfort food. What’s even better? It’s perfect for adventurers ready to trade in fast food for a satisfying, homemade delight. Are you curious about how to create this cheesy masterpiece that will leave your friends begging for more? Let’s dive in!
What makes this garlic bread irresistible?
Melt-in-Your-Mouth: The combination of gooey mozzarella and aromatic garlic creates a flavor explosion that you’ll crave over and over.
Camping Convenience: Made effortlessly in a Dutch oven, it’s perfect for outdoor cooking, ensuring you can enjoy gourmet food even in the wilderness.
Easy to Customize: From different cheese varieties like cheddar or pepper jack to fresh herb swaps, you can personalize this recipe to suit every palate.
Perfect for Sharing: This pull-apart delight is ideal for gatherings, ensuring everyone can enjoy a piece of this warm, cheesy goodness.
No More Fast Food: Elevate your meals with a homemade touch that outshines any greasy take-out option—your friends will thank you!
For more delicious camping treats, check out my recipes for Sticky Garlic Chicken and Cheesy Cajun Garlic!
Dutch Oven Cheesy Pull Apart Garlic Bread Ingredients
• Get ready to indulge in this gooey, cheesy delight!
For the Bread
- Round Italian or Sourdough Bread – Use a loaf that comfortably fits in your Dutch oven for the best pull-apart experience.
For the Filling
- Shredded Mozzarella Cheese (6 oz) – Offers a melty, gooey filling that’s the star of the show in this Dutch Oven Cheesy Pull Apart Garlic Bread.
- Garlic (3 large cloves) – Infuses the bread with a robust flavor; try mincing it for an extra aromatic kick.
For the Garlic Butter Spread
- Unsalted Butter (1/2 cup) – Gives a creamy richness; if using salted butter, reduce added salt for balance.
- Salt (1/4 tsp) – Enhances the overall flavor of the garlic spread; adjust to taste based on your butter choice.
For a Finishing Touch
- Fresh Parsley or Basil (1/4 cup, chopped) – Brightens up the dish, adding vibrant color and fresh flavor before serving.
Step‑by‑Step Instructions for Dutch Oven Cheesy Pull Apart Garlic Bread
Step 1: Prep Garlic Butter
Begin by softening ½ cup of unsalted butter at room temperature until it’s creamy. Mince 3 large cloves of garlic with a fine grater and mix them with the butter along with ¼ teaspoon of salt. This flavorful garlic butter will be the key to delicious Dutch Oven Cheesy Pull Apart Garlic Bread. Wrap the butter blend in wax paper to keep it fresh while you prepare the other ingredients.
Step 2: Prepare Briquettes
To achieve the perfect cooking temperature, light a charcoal chimney starter and use about 20-25 briquettes. Aim for a consistent heat of around 400°F for optimal baking. Let the briquettes ash over for about 10-15 minutes, or until they are glowing, ensuring an even and controlled heat for your Dutch oven.
Step 3: Prepare the Bread
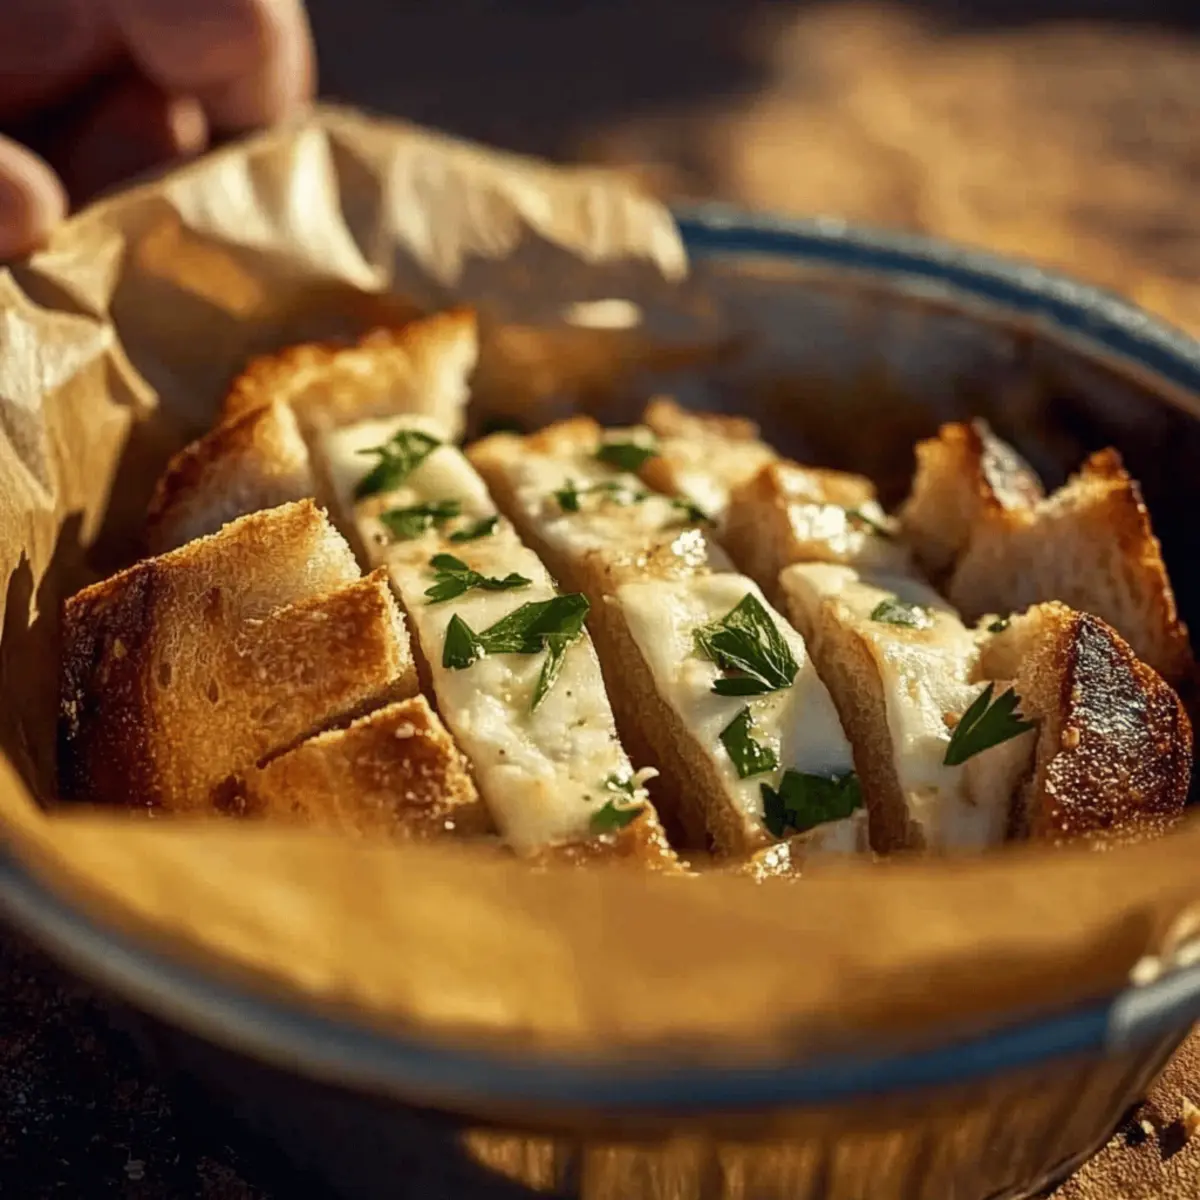
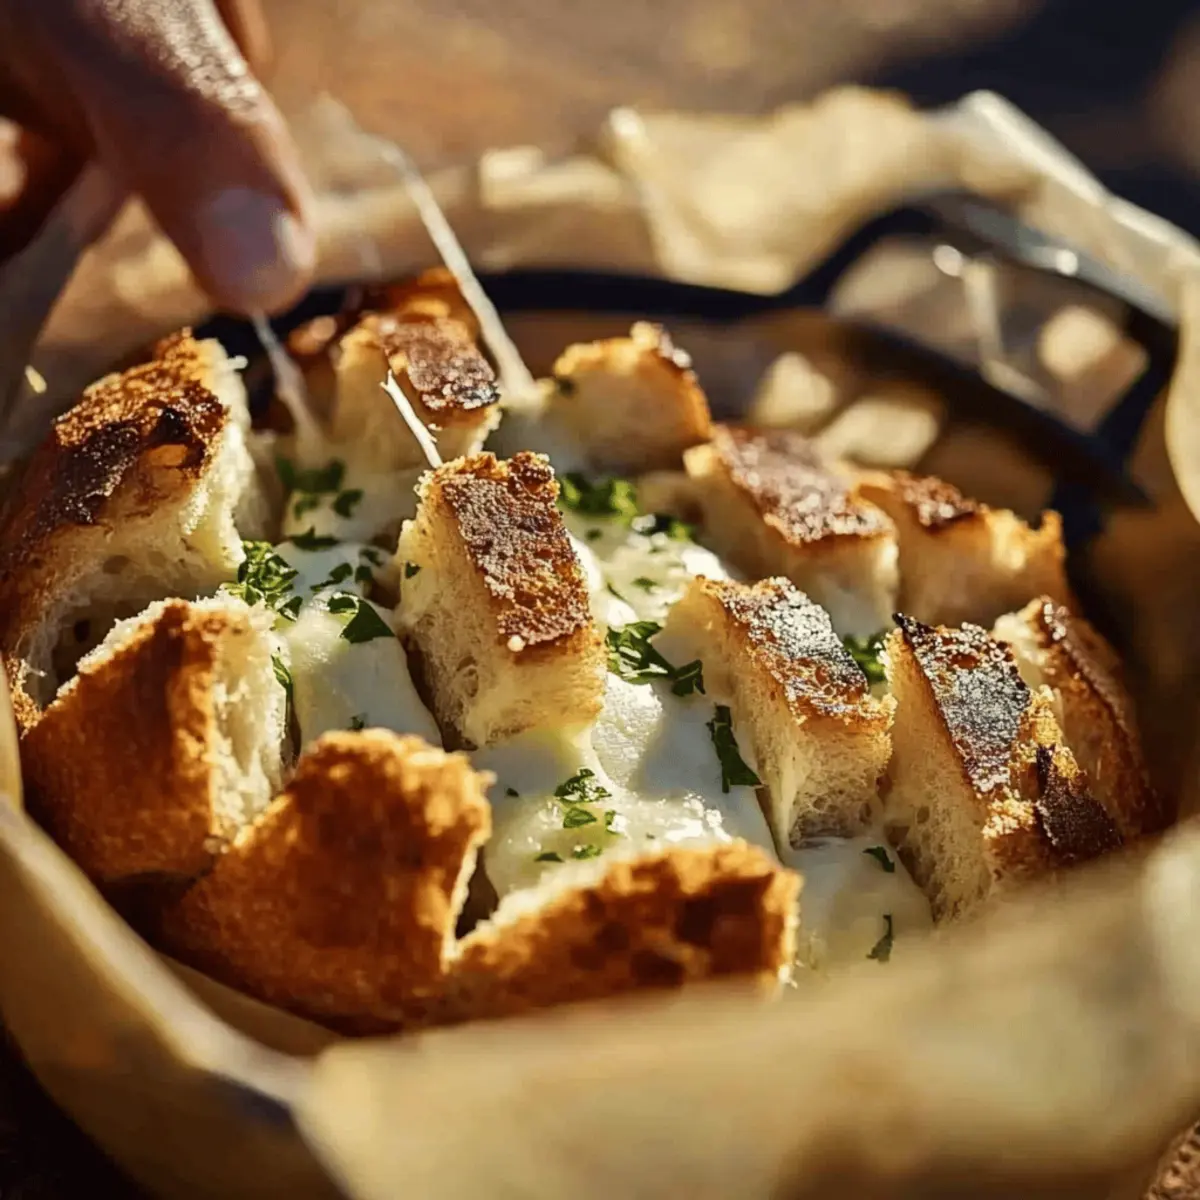
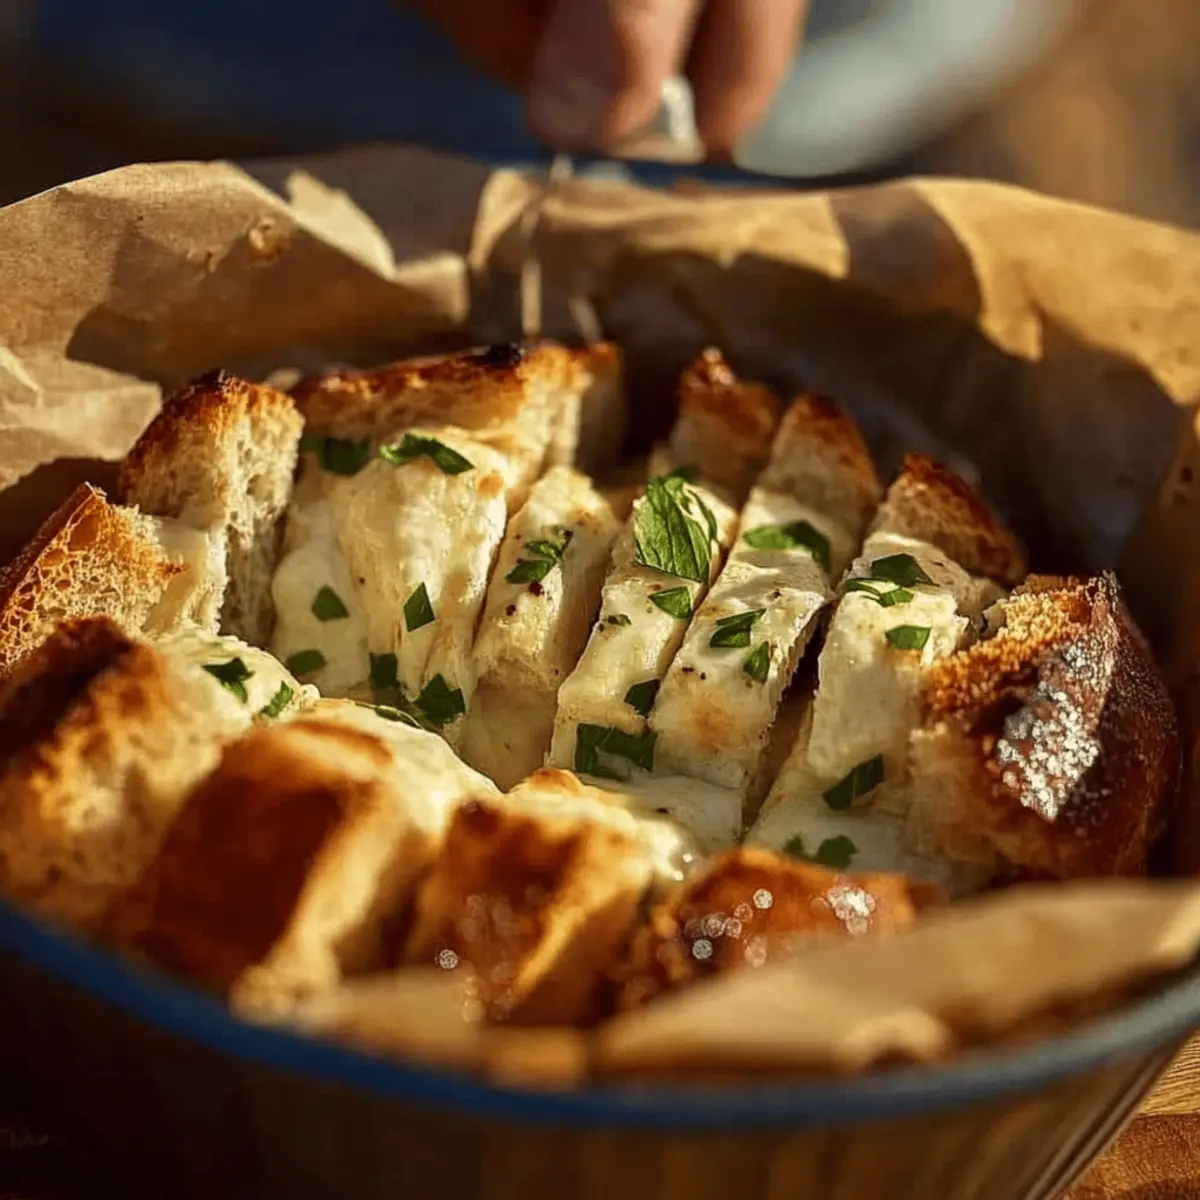
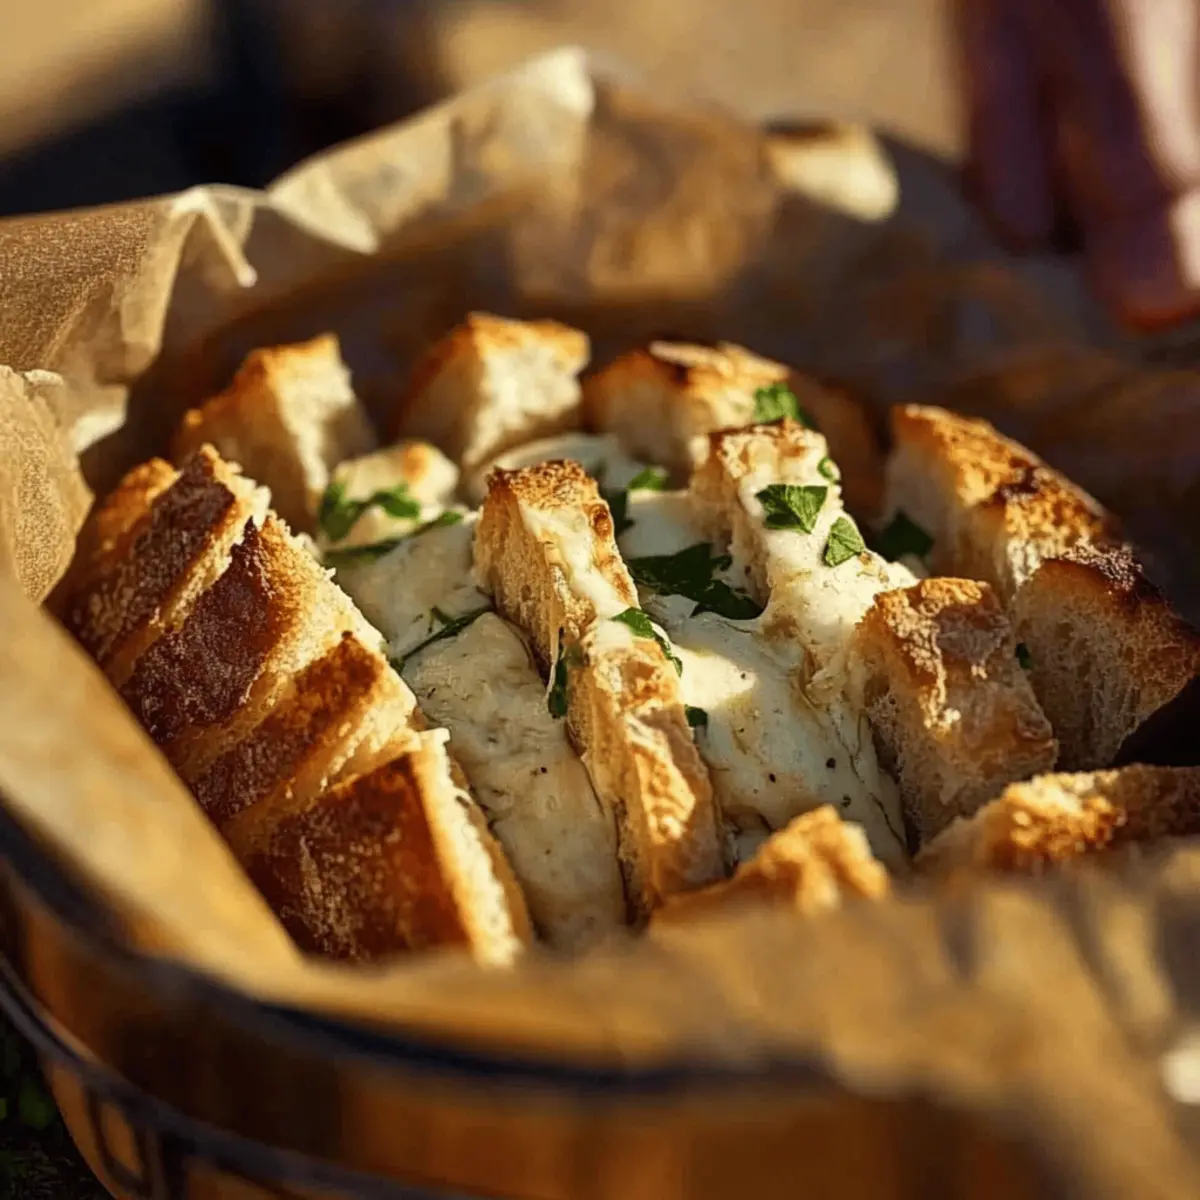
Select a round Italian or sourdough bread that fits snugly in your Dutch oven. Carefully slice the bread both horizontally and vertically, creating bite-sized squares without cutting all the way through the bottom. This will allow the delicious garlic butter and melted cheese to seep into every nook and cranny of your Dutch Oven Cheesy Pull Apart Garlic Bread.
Step 4: Spread Garlic Butter
Generously apply the garlic butter mixture to the cut surfaces of the bread, ensuring every slice is coated with that rich, buttery goodness. Then, fill each slice with shredded mozzarella cheese, letting it overflow slightly for a gooey, melty experience. Don’t be shy with the cheese; it’s the star of the show!
Step 5: Bake in Dutch Oven
Line the inside of your Dutch oven with parchment paper for easier cleanup. Carefully place the prepared garlic bread inside, spreading it out to maintain its structure. Cover the Dutch oven with its lid and position the hot briquettes on top and underneath. Bake for 15-20 minutes, or until the cheese is fully melted and bubbly, and the bread is golden brown.
Step 6: Final Touches
Once the Dutch Oven Cheesy Pull Apart Garlic Bread is finished baking, carefully remove it from the heat. Sprinkle chopped fresh parsley or basil on top for a pop of color and fresh flavor. Serve warm, and enjoy this delightful, shareable appetizer or side dish at your next gathering or camping adventure!
How to Store and Freeze Dutch Oven Cheesy Pull Apart Garlic Bread
-
Room Temperature: Enjoy your Dutch Oven Cheesy Pull Apart Garlic Bread fresh, but if you have leftovers, keep them in a cool, dry place, wrapped loosely in foil for up to 2 days.
-
Fridge: For longer storage, wrap the leftover bread tightly in plastic wrap or aluminum foil and place it in the refrigerator where it will stay fresh for up to 3 days.
-
Freezer: You can freeze the garlic bread for up to 3 months. Wrap it tightly in plastic wrap and then in aluminum foil to prevent freezer burn.
-
Reheating: To enjoy, reheat thawed bread in an oven at 350°F for about 10-15 minutes until warmed through and cheesy goodness is restored.
What to Serve with Dutch Oven Cheesy Pull Apart Garlic Bread
Imagine a hearty feast where every bite is brimming with flavor, complemented by delightful side dishes that elevate your meal.
-
Marinara Sauce: Perfect for dipping, this classic pairing adds a tangy contrast to the rich, cheesy bread. The splashes of red provide a pop of color and a burst of flavor in every bite.
-
Simple Green Salad: Light and refreshing, a crisp salad with mixed greens, cherry tomatoes, and a zesty vinaigrette balances the heaviness of the garlic bread, creating a well-rounded dining experience.
-
Grilled Chicken Skewers: Tender, slightly smoky skewers of chicken marinated in herbs pair beautifully with the gooey, buttery bread, making for an irresistible combo at any gathering.
-
Roasted Vegetables: Seasonal veggies, caramelized to perfection, bring warmth and earthiness, enhancing the comforting experience of this cheesy delicacy.
-
French Onion Soup: This savory soup, with its rich broth and gooey cheese topping, creates a cozy atmosphere, making it a delightful first course before indulging in the bread.
-
Sparkling Lemonade: For a refreshing drink, this zesty beverage adds a touch of brightness, cleansing the palate between bites of the delicious Dutch oven cheesy pull apart garlic bread. Enjoy a sip as you dive into each cheesy piece!
Dutch Oven Cheesy Pull Apart Garlic Bread Variations
Feel free to get creative with this recipe to match your taste buds and preferences!
-
Different Cheese: Swap mozzarella for cheddar, pepper jack, or gouda for a unique flavor twist. Cheese lovers will savor the excitement of these variations!
-
Herb Infusion: Use fresh herbs like rosemary, thyme, or chives as substitutes for parsley or basil. They’ll add an aromatic zest to your garlic bread that will have everyone asking for your secret.
-
Spicy Kick: Add crushed red pepper flakes or diced jalapeños to the garlic butter for a fiery hit. This twist is perfect for those who love a little heat with their cheesy bread!
-
Sweet Touch: Integrate a drizzle of honey or a sprinkle of brown sugar into the garlic butter mixture. This unexpected sweetness will create a delightful contrast with the savory garlic flavor.
-
Filling Surprises: Sneak in cooked bacon or diced sun-dried tomatoes between the layers of cheese for an extra flavor punch! These additions will elevate the dish to gourmet status in no time.
For further culinary inspiration, check out my recipes for Cheesy Dynamite Chicken or Cheesy Cajun Garlic!
-
Vegetarian Boost: Layer in spinach or artichokes between the slices for added veggies. This not only enhances the nutrition but also brings a burst of color!
-
Bread Alternative: Try this recipe using an alternative bread, like gluten-free or whole-grain loaves, to cater to different dietary needs without sacrificing taste.
Expert Tips for Dutch Oven Cheesy Pull Apart Garlic Bread
- Choose the Right Bread: Make sure your round Italian or sourdough bread fits snugly in the Dutch oven to allow for optimal pull-apart enjoyment.
- Perfectly Paired Cheese: Shredded mozzarella is a classic, but feel free to mix cheese types like cheddar or pepper jack for added flavor boosts.
- Watch the Timing: Keep an eye on the baking time; overcooking can lead to burnt bread, while undercooking means gooey cheese won’t reach its full melty potential.
- Keep It Clean: Lining your Dutch oven with parchment paper makes cleanup a breeze, ensuring you can focus on the delightful meal rather than scrubbing pots.
- Herb Variations: Experiment with different herbs like rosemary or thyme for a unique twist on this Dutch Oven Cheesy Pull Apart Garlic Bread, enhancing flavors to suit your preferences.
Make Ahead Options
These Dutch Oven Cheesy Pull Apart Garlic Bread are perfect for meal prep enthusiasts! You can prepare the garlic butter and slice the bread up to 24 hours before your gathering, allowing the flavors to meld while saving precious time later. Once you’ve mixed the softened butter, minced garlic, and salt, wrap it tightly in wax paper and refrigerate to keep it fresh. Assemble the bread by spreading the garlic butter and adding shredded mozzarella cheese within 3 days of baking, then wrap it in plastic wrap to prevent drying out. When ready to bake, just follow the finishing steps—place it in your Dutch oven, add the briquettes, and cook for 15-20 minutes. This way, you’ll enjoy hot, cheesy goodness with minimal effort!
Dutch Oven Cheesy Pull Apart Garlic Bread Recipe FAQs
What type of bread is best for this recipe?
Absolutely! A round Italian or sourdough bread works best for the Dutch Oven Cheesy Pull Apart Garlic Bread, providing the perfect structure for pulling apart. Make sure it fits snugly in your Dutch oven to get the ultimate cheesy experience without collapsing.
How long can I store leftovers?
Very! This tasty garlic bread is best enjoyed fresh, but if you’ve got leftovers, wrap them loosely in foil and store them in a cool, dry place for up to 2 days. For longer storage, keep it in the refrigerator for up to 3 days, wrapped tightly in plastic wrap or aluminum foil.
Can I freeze Dutch Oven Cheesy Pull Apart Garlic Bread?
Definitely! To freeze, wrap the cooled garlic bread tightly in plastic wrap and then in aluminum foil to prevent freezer burn. It can be stored in the freezer for up to 3 months. When you’re ready to indulge, let it thaw in the refrigerator overnight before reheating.
What should I do if my bread is not pulling apart easily?
If your bread isn’t pulling apart as expected, it might be due to not slicing deep enough through the bread. For next time, ensure you’re cutting through the bread without completely severing the bottom. This allows the garlic butter and cheese to seep into the cuts, creating that delicious pull-apart effect.
Can I customize the cheeses in this recipe?
Absolutely! I often mix cheese types for extra flavor. You can use cheddar for a sharp kick or pepper jack for some heat. Just remember to combine your cheese fillings with the mozzarella to maintain that gooey texture that everyone loves. Don’t hesitate to get creative!
Is this recipe safe for all dietary needs?
Great question! This recipe contains dairy and gluten, so it’s not suitable for those with lactose intolerance or gluten allergies. For a gluten-free version, you can explore gluten-free breads, and for a dairy-free option, try using plant-based cheese substitutes available in most grocery stores today!
Melted Goodness: Dutch Oven Cheesy Pull Apart Garlic Bread
Ingredients
Equipment
Method
- Begin by softening ½ cup of unsalted butter at room temperature until it's creamy. Mince 3 large cloves of garlic with a fine grater and mix them with the butter along with ¼ teaspoon of salt. Wrap the butter blend in wax paper to keep it fresh while you prepare the other ingredients.
- Light a charcoal chimney starter with about 20-25 briquettes and let them ash over for 10-15 minutes until glowing to achieve a consistent heat of around 400°F.
- Select a round Italian or sourdough bread that fits snugly in your Dutch oven. Slice the bread horizontally and vertically into bite-sized squares without cutting all the way through.
- Generously apply the garlic butter mixture to the cut surfaces of the bread. Fill each slice with shredded mozzarella cheese, letting it overflow slightly.
- Line the inside of your Dutch oven with parchment paper, place the prepared garlic bread inside, cover with the lid, and bake for 15-20 minutes.
- Once baked, remove from heat and sprinkle chopped fresh parsley or basil on top for a pop of color. Serve warm.
Leave a Reply