
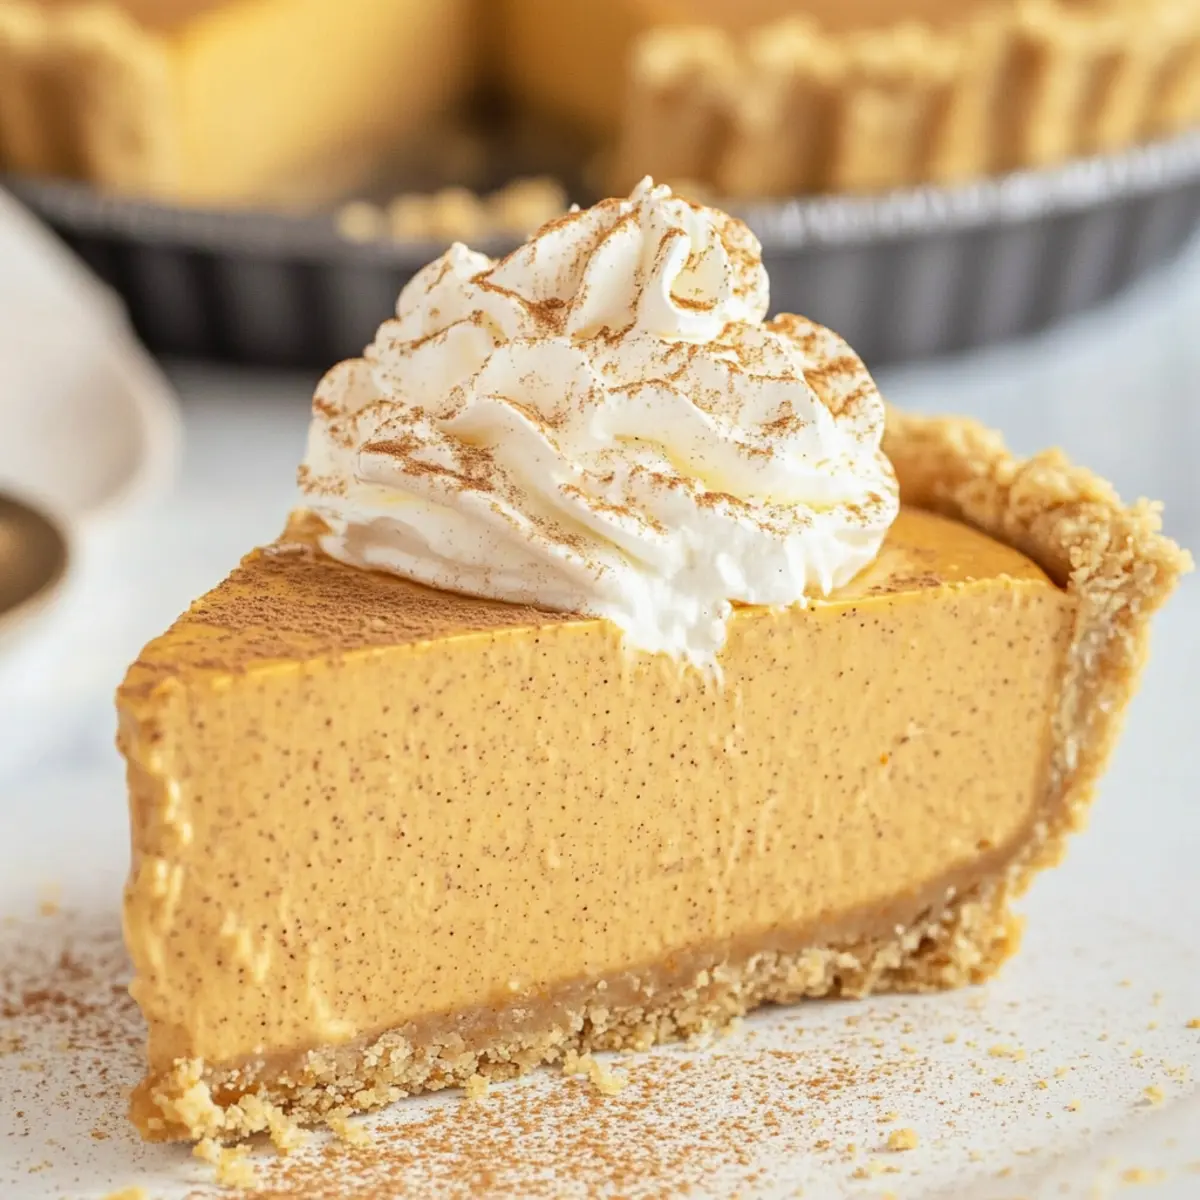
As the first chill of autumn settles in, my thoughts turn to the warmth of homemade treats that bring family and friends together. This year, I’m thrilled to whip up a delightful No Bake Marshmallow Pumpkin Pie—a twist on the beloved classic that’s destined to become a new holiday favorite. With its airy texture, thanks to the fluffy marshmallows and Cool Whip, this easy dessert can be prepared in a fraction of the time, letting you savor every precious moment with loved ones. Plus, it’s gluten-free friendly, ensuring everyone can indulge without a worry. Ready to experience a slice of this fluffy Thanksgiving delight? Let’s dive into the recipe!
Why Is This Dessert a Must-Try?
Simplicity: This recipe requires no baking, making it an effortless option for busy hosts during the holidays.
Fluffy Texture: With a blend of large marshmallows and Cool Whip, the pie boasts a light, airy consistency that melts in your mouth.
Rich Flavor: The combination of pure pumpkin and warm spices creates a comforting taste that captures the essence of fall.
Crowd-Pleasing: Perfect for gatherings, this pie is sure to delight both pumpkin pie lovers and newcomers alike.
Versatile Options: Whether you’re looking for a gluten-free alternative or want to experiment with a chocolate crust, this recipe allows for creativity while maintaining its integrity.
Enjoy a slice with a warm cup of spiced cider or pair it with easy treats like Pumpkin Smores Cookies for a festive touch!
No Bake Marshmallow Pumpkin Pie Ingredients
• Get ready to create a festive treat!
For the Pie Filling
- Large Marshmallows – Provide sweetness and fluffiness. Consider using marshmallow fluff as an alternative, but reduce added sugar if possible.
- Pure Pumpkin – Adds rich pumpkin flavor and color. Ensure you use 100% pure pumpkin, not pumpkin pie filling, for better flavor.
- Cinnamon – Provides warm spice notes that enhance the pumpkin flavor. Substitute with pumpkin pie spice if desired for a mixed spice flavor.
- Pumpkin Pie Spice – Complements the pumpkin with additional spices. Omit if not available, but the pie may be less flavorful.
- Salt – Enhances overall flavor. Use sea salt or kosher salt for a different texture.
- Cool Whip (thawed) – Creates a creamy texture and adds sweetness without the need for whipping cream. Replace with homemade whipped cream for a more natural taste.
For the Crust
- Graham Cracker Crust (store-bought) – Acts as the pie’s base. You can use a gluten-free graham cracker crust for a gluten-free option.
Step‑by‑Step Instructions for No Bake Marshmallow Pumpkin Pie
Step 1: Heat the Filling
In a medium saucepan, combine large marshmallows, pure pumpkin, cinnamon, pumpkin pie spice, and salt. Heat this mixture over low to medium heat, stirring frequently for about 8-10 minutes until the marshmallows are fully melted and the mixture is smooth and creamy, with an inviting orange hue.
Step 2: Cool the Mixture
Once your filling is silky smooth, carefully transfer it to a large mixing bowl. Allow it to cool at room temperature for approximately 30 minutes. The mixture should be slightly warm when you touch it; this cooling period is crucial for achieving a light texture in your No Bake Marshmallow Pumpkin Pie.
Step 3: Fold in the Cool Whip
After the filling has cooled, gently fold in the thawed Cool Whip using a spatula. Be careful to combine the two mixtures thoroughly without deflating the whipped topping, which will take about 2-3 minutes. You’ll know it’s ready when the color lightens and the texture becomes airy and fluffy.
Step 4: Pour into Crust
Now, take your graham cracker crust and pour the pumpkin filling into it, smoothing out the top with your spatula. Ensure the filling is evenly distributed, reaching the edges of the crust. The combination of filling and crust will create a delightful visual contrast, leaving you excited for the final product.
Step 5: Refrigerate the Pie
Cover the pie with the crust lid or plastic wrap, then place it in the refrigerator. Allow it to chill for at least 8 hours or preferably overnight. This resting time is key for setting the filling of your No Bake Marshmallow Pumpkin Pie, creating the perfect sliceable texture.
Step 6: Serve and Enjoy
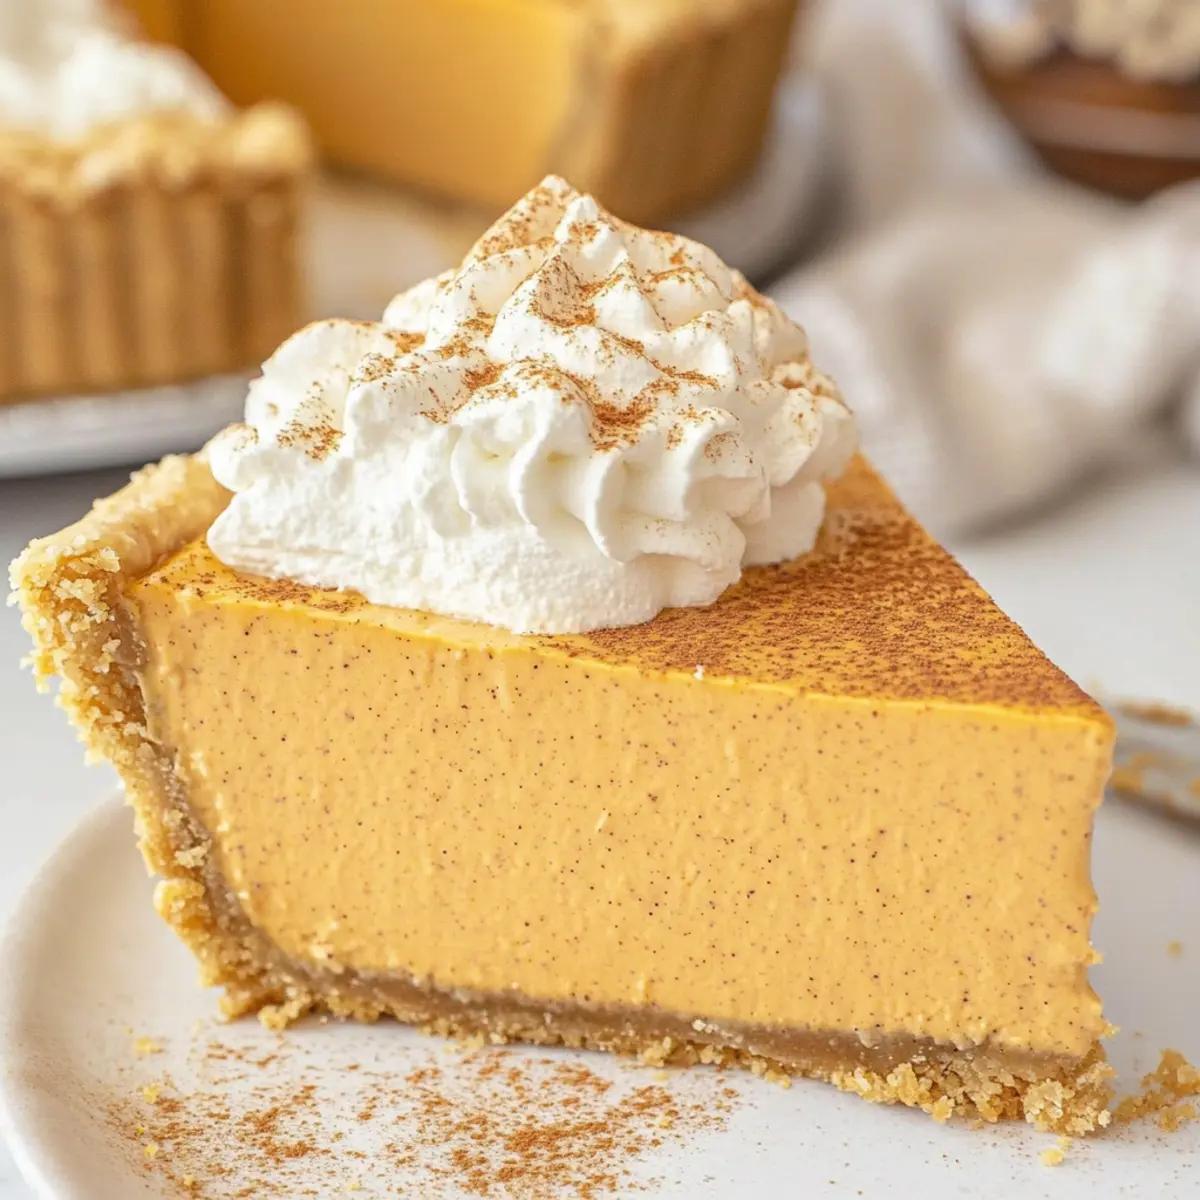
When ready to serve, remove the pie from the fridge and carefully uncover it. Slice into wedges and serve chilled, topped with whipped cream if desired. The fluffy filling will have settled beautifully, making this dessert a stunning and delicious centerpiece at your holiday table.

What to Serve with No Bake Marshmallow Pumpkin Pie
As you prepare to delight in this fluffy pumpkin treat, think about how you can create a festive spread that captivates all the senses.
-
Creamy Mashed Potatoes: The buttery, smooth texture of mashed potatoes beautifully contrasts with the airy pie, making for a comforting meal experience.
-
Spiced Cider: A warm cup of spiced cider adds a festive touch, enhancing the pumpkin flavor while providing a heartwarming aroma on chilly evenings.
-
Warm Cinnamon Rolls: Soft, gooey cinnamon rolls drizzled with icing make a delightful pairing, offering a sweet complement to the pie’s light texture.
-
Roasted Brussels Sprouts: Their crispy edges and savory flavor provide a wonderful balance to the sweetness of the pie, adding a touch of healthy crunch to the table.
-
Pumpkin Soup: Starting the meal with a velvety pumpkin soup can create a wonderful theme, blending flavors while ensuring a cozy, autumnal vibe.
-
Caramel Apple Slices: Fresh, crisp apple slices with a drizzle of caramel provide an extra element of sweetness and crunch, enhancing the seasonal spirit.
-
Whipped Cream Topping: An extra dollop of whipped cream, perhaps with a hint of vanilla or cinnamon, will elevate each slice of pie while reinforcing its creamy charm.
-
Chestnut Stuffing: A savory stuffing with nutty chestnuts sings of the holidays, making it a perfect side that complements the fall flavors of the pie.
Make Ahead Options
These No Bake Marshmallow Pumpkin Pies are ideal for meal prep, saving you valuable time during the busy holiday season! You can prepare the pumpkin filling up to 24 hours in advance by completing Steps 1 through 3 and storing it in an airtight container in the refrigerator. To maintain the fluffy texture, ensure the filling is completely cooled before folding in the Cool Whip. On the day you’re ready to serve, simply pour the filling into the graham cracker crust and refrigerate the pie for at least 8 hours or overnight. This way, you can enjoy a stress-free dessert that’s just as delicious when you finally slice into it!
Storage Tips for No Bake Marshmallow Pumpkin Pie
-
Fridge: Store leftover pie in the refrigerator, covered with the pie’s lid or plastic wrap, for up to 4-5 days to maintain freshness and flavor.
-
Room Temperature: Avoid leaving the pie at room temperature for more than 2 hours, as the creamy filling needs to stay chilled for food safety.
-
Freezer: It’s best not to freeze this No Bake Marshmallow Pumpkin Pie, as the texture can become grainy and lose its fluffiness upon thawing.
-
Reheating: Serve the pie chilled straight from the fridge. There’s no need for reheating, as its delightful texture and flavor are best enjoyed cold.
Expert Tips for No Bake Marshmallow Pumpkin Pie
-
Chill Time Matters: Allow the pie to chill for a full 8 hours or overnight. This ensures the filling sets properly for perfect slices.
-
Cooling Period: Don’t skip cooling the marshmallow mixture before folding in the Cool Whip. This step is vital for maintaining that fluffy texture in your No Bake Marshmallow Pumpkin Pie.
-
Whipping Alternatives: Consider making your own whipped cream by mixing heavy cream with powdered sugar. It’s fresher and provides a nice contrast to the filling.
-
Flavor Boosters: Add a touch of vanilla extract or a sprinkle of nutmeg to the filling for extra depth and warmth in flavor.
-
Serving Style: Dress up each slice with additional whipped cream or even a drizzle of caramel sauce for an eye-catching and delicious finish.
No Bake Marshmallow Pumpkin Pie Variations
Feel free to get creative and customize this delightful recipe to suit your taste or dietary needs!
-
Mini Marshmallows: Use miniature marshmallows for a fun, bite-sized twist. Adjust the quantity to match the weight of large marshmallows.
-
Chocolate Crust: Swap the graham cracker crust for a chocolate cookie crust. This rich alternative adds a delightful contrast to the pumpkin filling.
-
Flavored Whipped Toppings: Experiment with flavored whipped toppings, like cinnamon or vanilla, to enhance the overall flavor profile.
-
Pumpkin Spice Infusion: For a more intense pumpkin spice flavor, add an extra teaspoon of pumpkin pie spice to the filling. It deepens the seasonal warmth.
-
Nutty Accents: Fold in crushed pecans or walnuts into the filling for added texture and a nutty flavor that pairs wonderfully with pumpkin.
-
Lower Sugar Option: Use sugar-free marshmallows and Cool Whip for a lighter dessert without sacrificing the delicious taste. Perfect for those watching their sugar intake.
-
Spicy Kick: Add a pinch of cayenne pepper or crushed red pepper flakes to the filling for a subtle warmth that beautifully complements the sweetness.
-
Caramel Drizzle: Top each slice with a drizzle of caramel sauce before serving for an indulgent touch that adds both flavor and visual appeal.
For more delicious pumpkin-inspired treats, check out our Pumpkin Spice Gooey Cake with Cream Cheese Frosting or whip up some delicious Pumpkin Pie Tacos to impress your guests!

No Bake Marshmallow Pumpkin Pie Recipe FAQs
How do I know if my pumpkin is ripe or fresh?
When selecting pure pumpkin, look for smooth, unblemished skin and a rich orange color. Avoid pumpkins with dark spots all over or soft spots, as these can indicate overripeness or spoilage. If you’re using canned pumpkin, make sure it’s labeled “100% pure pumpkin” rather than “pumpkin pie filling” for the best flavor impact.
How should I store leftover No Bake Marshmallow Pumpkin Pie?
Store any leftovers in the refrigerator, covered with the pie’s lid or plastic wrap, to maintain freshness. This pie can be kept for up to 4-5 days. Always remember, food safety is vital, so avoid leaving the pie at room temperature for more than 2 hours.
Can I freeze No Bake Marshmallow Pumpkin Pie?
It’s best to avoid freezing this pie. The unique texture provided by the marshmallows and Cool Whip can become grainy and lose its delightful fluffiness upon thawing. Enjoy it freshly made and chilled instead!
What can I do if my Cool Whip deflates while mixing?
If you notice your Cool Whip deflating, take care to fold it into the cooled pumpkin mixture gently with a spatula. Avoid vigorous stirring, as this will break the air bubbles. If it still deflates, consider adding more cool whipped cream to the mixture gradually for the desired fluffiness.
Are there any dietary considerations for this pie?
Absolutely! For gluten-free options, opt for a gluten-free graham cracker crust to make this No Bake Marshmallow Pumpkin Pie suitable for those with gluten sensitivities. Additionally, if you’re concerned about allergens, ensure that the marshmallows and Cool Whip you choose are free from common allergens such as nuts or dairy.
No Bake Marshmallow Pumpkin Pie: Effortless Holiday Bliss
Ingredients
Equipment
Method
- In a medium saucepan, combine large marshmallows, pure pumpkin, cinnamon, pumpkin pie spice, and salt. Heat this mixture over low to medium heat, stirring frequently for about 8-10 minutes until the marshmallows are fully melted and the mixture is smooth and creamy, with an inviting orange hue.
- Once your filling is silky smooth, carefully transfer it to a large mixing bowl. Allow it to cool at room temperature for approximately 30 minutes.
- After the filling has cooled, gently fold in the thawed Cool Whip using a spatula. Be careful to combine the two mixtures thoroughly without deflating the whipped topping, which will take about 2-3 minutes.
- Now, take your graham cracker crust and pour the pumpkin filling into it, smoothing out the top with your spatula.
- Cover the pie with the crust lid or plastic wrap, then place it in the refrigerator. Allow it to chill for at least 8 hours or preferably overnight.
- When ready to serve, remove the pie from the fridge and carefully uncover it. Slice into wedges and serve chilled, topped with whipped cream if desired.
Leave a Reply