
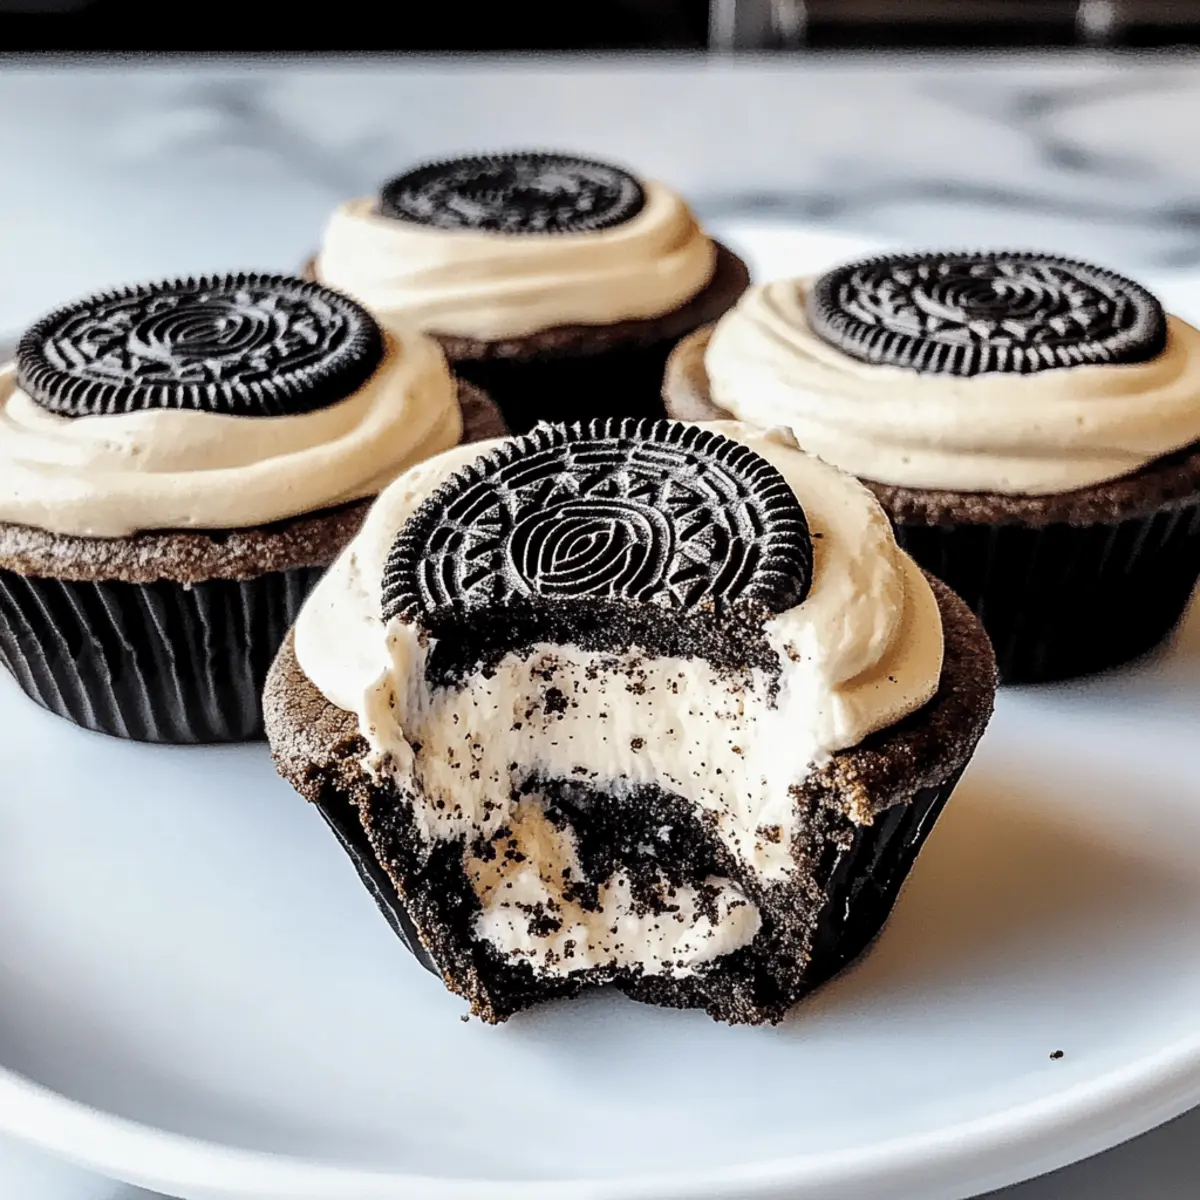
In the midst of a busy week, when sweet cravings strike and a quick dessert feels out of reach, I stumbled upon my new favorite indulgence: Easy Oreo Cheesecake Cookie Cups. These charming individual-sized treats meld the satisfying crunch of an Oreo crust with a creamy, dreamy cheesecake filling. What makes them even better? They come together effortlessly and are customizable to fit your personal taste. These cookie cups are not just easy to make—perfect for busy schedules—they’re also a guaranteed crowd-pleaser at any gathering. Whether you’re hosting a cozy get-together or simply treating yourself, I promise each bite will transport you right into dessert bliss. Curious about how to whip these up? Let’s dive into the magic of Oreo Cheesecake Cookie Cups!
Why Are Oreo Cheesecake Cookie Cups Irresistible?
Decadence at Its Best: The luxurious blend of creamy cheesecake and crunchy Oreo crust makes each bite a delightful experience.
Effortless Preparation: Minimal baking required! With simple ingredients and straightforward steps, you can whip these up in no time.
Customizable Joy: Feel free to swap Oreos with your favorite cookies, or add fruit purees for a personal twist. Each batch can be unique!
Perfect for Any Occasion: Whether it’s a celebration or a quiet night in, these cookie cups are sure to impress friends and family alike. For another delectable treat, check out my Pumpkin Smores Cookies that also promise easy indulgence!
Convenience Meets Flavor: Store leftovers for up to five days—if there are any! These tasty bites are perfect for meal prep or quick dessert cravings.
Oreo Cheesecake Cookie Cups Ingredients
For the Crust
- Oreo Cookies – Provides the crunchy base; feel free to substitute with other chocolate cookies if desired.
- Butter – Enhances richness and binds cookie crumbs; using unsalted butter offers better control over saltiness.
For the Cheesecake Filling
- Cream Cheese – Essential for that creamy cheesecake texture; full-fat cream cheese is recommended for the best results.
- Sugar – Sweetens the filling; granulated sugar is standard, but brown sugar can offer a deeper flavor profile.
- Sour Cream – Adds creaminess with a slight tang; Greek yogurt can be a lower-fat substitute.
- Mini Chocolate Chips – Optional; fold in for an extra layer of texture and sweetness—replace with white chocolate for a twist.
For Topping
- Whipped Cream – Adds lightness and sweetness; either store-bought or homemade works just fine.
- Crushed Oreos – Sprinkled on top for extra crunch and visual appeal, completing your Oreo Cheesecake Cookie Cups beautifully.
Step‑by‑Step Instructions for Oreo Cheesecake Cookie Cups
Step 1: Preheat Your Oven
Start by preheating your oven to 350°F (175°C). This initial step is crucial for ensuring your Oreo Cheesecake Cookie Cups bake evenly. While the oven warms up, prepare your ingredients so they’re ready to use as soon as you’re done with the crust.
Step 2: Make the Oreo Crust
Crush the Oreo cookies into fine crumbs using a food processor or by placing them in a zip-top bag and rolling over them with a rolling pin. Combine the crushed Oreos with melted unsalted butter until everything is well mixed and resembles wet sand. This mixture will form the delicious crunchy base for your cookie cups.
Step 3: Prepare the Muffin Tin
Line a muffin tin with cupcake liners to prevent sticking and to make it easy to serve the Oreo Cheesecake Cookie Cups. Press about a tablespoon of the Oreo mixture into the bottom of each liner, using your fingers or the back of a measuring spoon to create a firm, even crust.
Step 4: Make the Cheesecake Filling
In a mixing bowl, beat the softened cream cheese and granulated sugar together using a hand mixer or stand mixer until fluffy and creamy, about 2-3 minutes. Next, add sour cream and mix until smooth. If desired, fold in mini chocolate chips for extra texture. This will be your luscious cheesecake filling.
Step 5: Fill the Cookie Cups
Spoon the creamy cheesecake filling into each cookie crust, filling them nearly to the top. The filling should mound slightly over the edges of the Oreo crust. This step is crucial for achieving the perfect balance of crust and filling in your Oreo Cheesecake Cookie Cups.
Step 6: Bake the Cookie Cups
Carefully place the muffin tin in the preheated oven and bake for 15-18 minutes. The cheesecake filling should be set around the edges but still slightly jiggly in the center; this ensures a creamy texture when cooled.
Step 7: Cool and Chill
Once baked, remove the muffin tin from the oven and allow the cookie cups to cool completely at room temperature for about 30 minutes. After cooling, transfer them to the refrigerator to chill for at least 2 hours. This chilling time lets the flavors meld beautifully in your Oreo Cheesecake Cookie Cups.
Step 8: Add Toppings
Once chilled, remove the Oreo Cheesecake Cookie Cups from the fridge. Pipe or dollop whipped cream on top of each one, adding a light and airy contrast. Finish by sprinkling crushed Oreos as a delightful garnish, elevating both the visual appeal and flavor of your treats.
Make Ahead Options
These delicious Oreo Cheesecake Cookie Cups are perfect for meal prep, allowing you to indulge in a sweet treat without the last-minute rush! You can prepare the Oreo crust and cheesecake filling up to 24 hours in advance. Simply crush the Oreos and mix with butter for the crust, and keep it refrigerated. Prepare the cheesecake filling and store it in an airtight container in the fridge. When you’re ready to bake, fill the prepared crusts and bake as instructed. This way, you’ll have a delightful dessert on hand with just a little effort, ensuring the flavors stay fresh and the texture remains creamy—just as delicious!
Storage Tips for Oreo Cheesecake Cookie Cups
-
Room Temperature: These cookie cups are best enjoyed chilled; avoid storing them at room temperature to maintain their creamy texture.
-
Fridge: Store leftover Oreo Cheesecake Cookie Cups in an airtight container in the refrigerator for up to 5 days. This keeps them fresh and tasty!
-
Freezer: For longer storage, place individual cookie cups in a freezer-safe container. They can be frozen for up to 2 months; simply thaw in the fridge before serving.
-
Reheating: While these treats are meant to be enjoyed chilled, if a warm dessert appeals, microwave on low power for about 10-15 seconds, just to soften the filling slightly.
Oreo Cheesecake Cookie Cups Variations
Feel free to put your own spin on these delightful treats, creating something uniquely yours with just a few simple adjustments!
-
Chocolate Chip Cookies: Swap Oreos with chocolate chip cookies for a nostalgic flavor that will surprise your guests. The buttery taste combined with creamy cheesecake creates pure joy.
-
Peanut Butter Twist: Use peanut butter cookies for the crust and fold in peanut butter chips into the filling for a decadent, nutty flair. Imagine the rich, creamy layer melding perfectly with the crunchy crust—absolutely irresistible!
-
Fruit Fusion: Add fruit puree, like raspberry or strawberry, to the cheesecake filling for a fruity twist. This not only brightens the flavor but also adds a beautiful pop of color to your dessert cups.
-
Dairy-Free Delight: Substitute cream cheese with a non-dairy alternative such as cashew or coconut cream. This swap makes your cookie cups accessible for vegan diets while keeping them wonderfully creamy.
-
No-Bake Option: For a simpler approach, chill the cookie cups instead of baking them for a cool and creamy treat that’ll beat the summer heat. The no-bake method makes preparation even easier!
-
Spicy Kick: Add a pinch of cinnamon or cayenne pepper to the filling for a fun twist. This unexpected heat can elevate your cookie cups, making them a conversation starter at any gathering.
-
Chocolate Ganache: Drizzle chocolate ganache over the whipped cream topping for an extra layer of indulgence that will have everyone asking for seconds. It’s a heavenly combination of flavors that works beautifully with the creamy filling.
-
Cookies and Cream Version: For those who can’t get enough of Oreos, mix crushed Oreos into the cheesecake filling itself. This double Oreo technique is a dream come true for cookie lovers!
For more sweet inspirations, you might also enjoy my Oreo Cheesecake Cookie or check out the rich flavors in my Pumpkin Smores Cookies. Enjoy your baking adventure!
Expert Tips for Oreo Cheesecake Cookie Cups
-
Perfect Bake Time: Bake until the edges set and center is slightly jiggly; this ensures a creamy texture without overbaking.
-
Cream Cheese Quality: Use full-fat cream cheese for the best flavor and texture; low-fat versions may alter the intended richness.
-
Cool Properly: Ensure the cookie cups cool completely before adding whipped cream to prevent melting and maintain their fluffy topping.
-
Customization Options: Feel free to experiment with different cookie bases or add fruit purees in the filling for a unique take on your Oreo Cheesecake Cookie Cups.
-
Storage Tips: Store leftovers in an airtight container in the fridge for up to five days. Reheating isn’t recommended; enjoy them chilled!
What to Serve with Easy Oreo Cheesecake Cookie Cups
These delightful cookie cups are perfect for a sweet gathering or any time you want to treat yourself to something special.
- Fresh Berries: Juicy strawberries or tart raspberries contrast wonderfully with the creamy sweetness, adding a burst of freshness.
- Chocolate Sauce: Drizzling warm chocolate sauce over the top enhances the indulgence, making each bite even more decadent.
- Ice Cream: A scoop of vanilla or cookies and cream ice cream on the side creates a fantastic blend of textures and temperatures.
Pair these cookie cups with a light fruit salad for a refreshing balance that cuts through the richness, or elevate your dessert experience with a cup of coffee or espresso.
- Whipped Cream: Additional whipped cream, either homemade or store-bought, adds an airy lightness that complements the rich cheesecake flavor.
- Mint Leaves: A sprig of fresh mint can brighten up the presentation and infuse a subtle freshness into every delicious bite.
- Coffee or Espresso: The deep, rich flavors warm up the sweetness and create an elegant finish to your indulgent meal.
Whether you keep it simple or go all out with pairings, these Easy Oreo Cheesecake Cookie Cups are destined to steal the show!
Oreo Cheesecake Cookie Cups Recipe FAQs
How do I choose the best Oreo cookies for the crust?
Absolutely! When selecting your Oreo cookies, look for ones that are free from excess dark spots or cracks. Choose fresh packages without any damage. While classic Oreos work wonderfully, feel free to substitute with any chocolate cookie you love for a unique twist!
What’s the best way to store leftover Oreo Cheesecake Cookie Cups?
For optimal freshness, store your leftover Oreo Cheesecake Cookie Cups in an airtight container in the fridge. They’ll keep for about 5 days. I recommend separating layers with parchment paper if you’re stacking them. The flavors only get better as they chill!
Can I freeze Oreo Cheesecake Cookie Cups, and how?
Absolutely! For longer-lasting treats, freeze your Oreo Cheesecake Cookie Cups. To do this, place them in a single layer in a freezer-safe container. You can freeze them for up to 2 months! When you’re ready to enjoy, thaw them in the fridge overnight. This way, they’ll retain their creamy texture.
What should I do if the cheesecake filling is too runny?
If your cheesecake filling turns out too runny, it’s likely due to not beating the cream cheese enough or adding too much sour cream. Here’s step-by-step guidance:
- Make sure your cream cheese is softened to room temperature before mixing; this helps incorporate air and creates a fluffy texture.
- Beat the cream cheese and sugar until smooth and fluffy (about 2-3 minutes).
- If you’ve added extra sour cream, try reducing the amount next time. You want a thick filling that holds well when chilled. Also, chilling longer will help firm it up.
Are there any dietary considerations for pets or allergies with these ingredients?
Very! Always remember that certain ingredients in these cookie cups—like cream cheese and sugar—aren’t suitable for pets. Make sure to keep them away from your furry friends! Additionally, if you’re catering to allergies, be cautious with substitutions, especially if your guests have dairy or gluten sensitivities. You can try dairy-free cream cheese or gluten-free cookies for a customized version.
Decadent Oreo Cheesecake Cookie Cups for Easy Indulgence
Ingredients
Equipment
Method
- Preheat your oven to 350°F (175°C). Prepare your ingredients while the oven warms up.
- Crush the Oreo cookies into fine crumbs and mix with melted unsalted butter until well combined.
- Line a muffin tin with cupcake liners and press about a tablespoon of the mixture into each liner to form the crust.
- Beat softened cream cheese and sugar together until fluffy. Add sour cream and mix until smooth, then fold in mini chocolate chips if desired.
- Spoon the cheesecake filling into each cookie crust, filling nearly to the top.
- Bake for 15-18 minutes, until the edges are set but the center is slightly jiggly.
- Allow the cookie cups to cool at room temperature for 30 minutes, then transfer to the refrigerator to chill for at least 2 hours.
- Pipe or dollop whipped cream on top of each cookie cup and finish with crushed Oreos.
Leave a Reply