
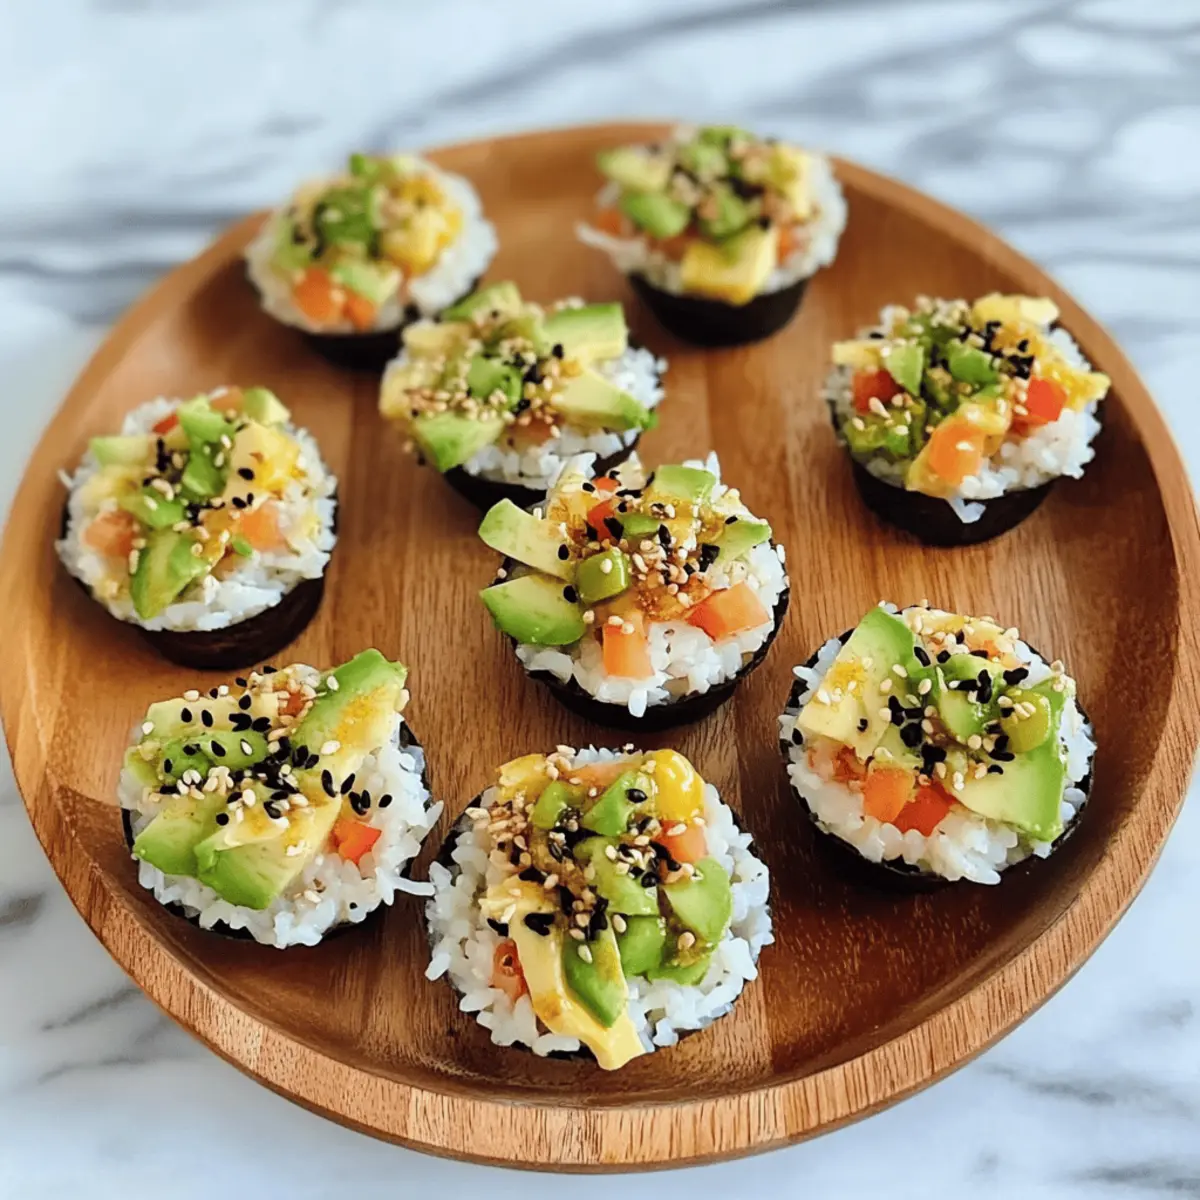
As I stood in my kitchen, the aroma of simmering sushi rice wafted through the air, instantly transporting me to my favorite sushi spot. These customizable no-bake sushi cups are not just a meal; they’re a playful adventure waiting to be enjoyed. With quick prep and the freedom to mix and match fresh veggies, creamy avocado, and a kick of spicy mayo, these sushi cups become your personalized culinary masterpiece. Whether you’re hosting friends, looking for a fun snack, or preparing a light lunch, they’re perfect for satisfying cravings without the fuss of traditional sushi rolling. Curious about how to create this delightful dish? Let’s dive into the recipe together!
Why Are Sushi Cups a Must-Try?
Endless customization: You can easily tailor your sushi cups with your favorite vegetables and sauces, making them a true reflection of your taste.
No baking required: These delightful cups save you time and effort, perfect for busy days or spontaneous gatherings.
Healthy and fresh: Packed with vibrant veggies and wholesome ingredients, they satisfy cravings while keeping things nutritious.
Kid-friendly fun: The finger-food format is a hit with kids, making snack time exciting and interactive!
Perfect for any occasion: Whether it’s a potluck, a casual dinner, or meal prepping for the week, these sushi cups fit right in.
Ready to explore more sushi-inspired recipes? Don’t miss our Canned Tuna Sushi Bowl for another tasty twist!
Sushi Cups Ingredients
For the Rice Cups
• Sushi Rice – Rinsed well before cooking for fluffiness and the right texture.
• Water – Essential for cooking sushi rice to the perfect firmness.
For the Filling
• Chopped Vegetables – Choose fresh crunch from carrots, cucumber, or bell peppers for a vibrant mix.
• Mukimame (Shelled Edamame) – A plant-based protein that adds a delightful texture; substitute regular edamame if needed.
• Diced Avocado – Adds a creamy, rich flavor; about half an avocado will suffice for this recipe.
For the Sauce
• Sauce of Choice – Enhance flavor with soy sauce, tamari, or coconut aminos, depending on dietary preferences.
• Mayonnaise – The base for your spicy mayo; vegan mayo works for a lighter version.
• Sriracha Sauce – Adjust level of spice according to your preference; it adds a punchy kick.
• Honey – Sweetens and balances the mayo; substitute with agave for a vegan option or omit for a sugar-free version.
• Sesame Oil – Offers a nutty depth of flavor to the mayo.
For Garnish
• Black Sesame Seeds – Use for an attractive presentation and added crunch; white sesame seeds are a suitable substitute.
Now that you’ve gathered your ingredients for these fabulous sushi cups, it’s time to dive into the wonderful world of flavors!
Step‑by‑Step Instructions for Sushi Cups
Step 1: Prepare Rice
In a medium pot, combine 1 cup of rinsed sushi rice with 1 1/4 cups of water. Bring to a boil over medium heat, then cover the pot with a lid, reduce to low heat, and simmer for 20 minutes. You’ll know it’s done when all the water is absorbed, and the rice is tender. Once cooked, fluff the rice with a fork and set it aside to cool for about 10 minutes.
Step 2: Form Cups
With the cooled sushi rice, generously fill each cup of a muffin tin, packing the rice firmly into the mold to form sturdy cups. Make sure to leave a little space at the top to prevent overflow. Once filled, refrigerate the muffin tin for about 20 minutes so the rice can set, which will help maintain the shape when you remove them.
Step 3: Mix Filling
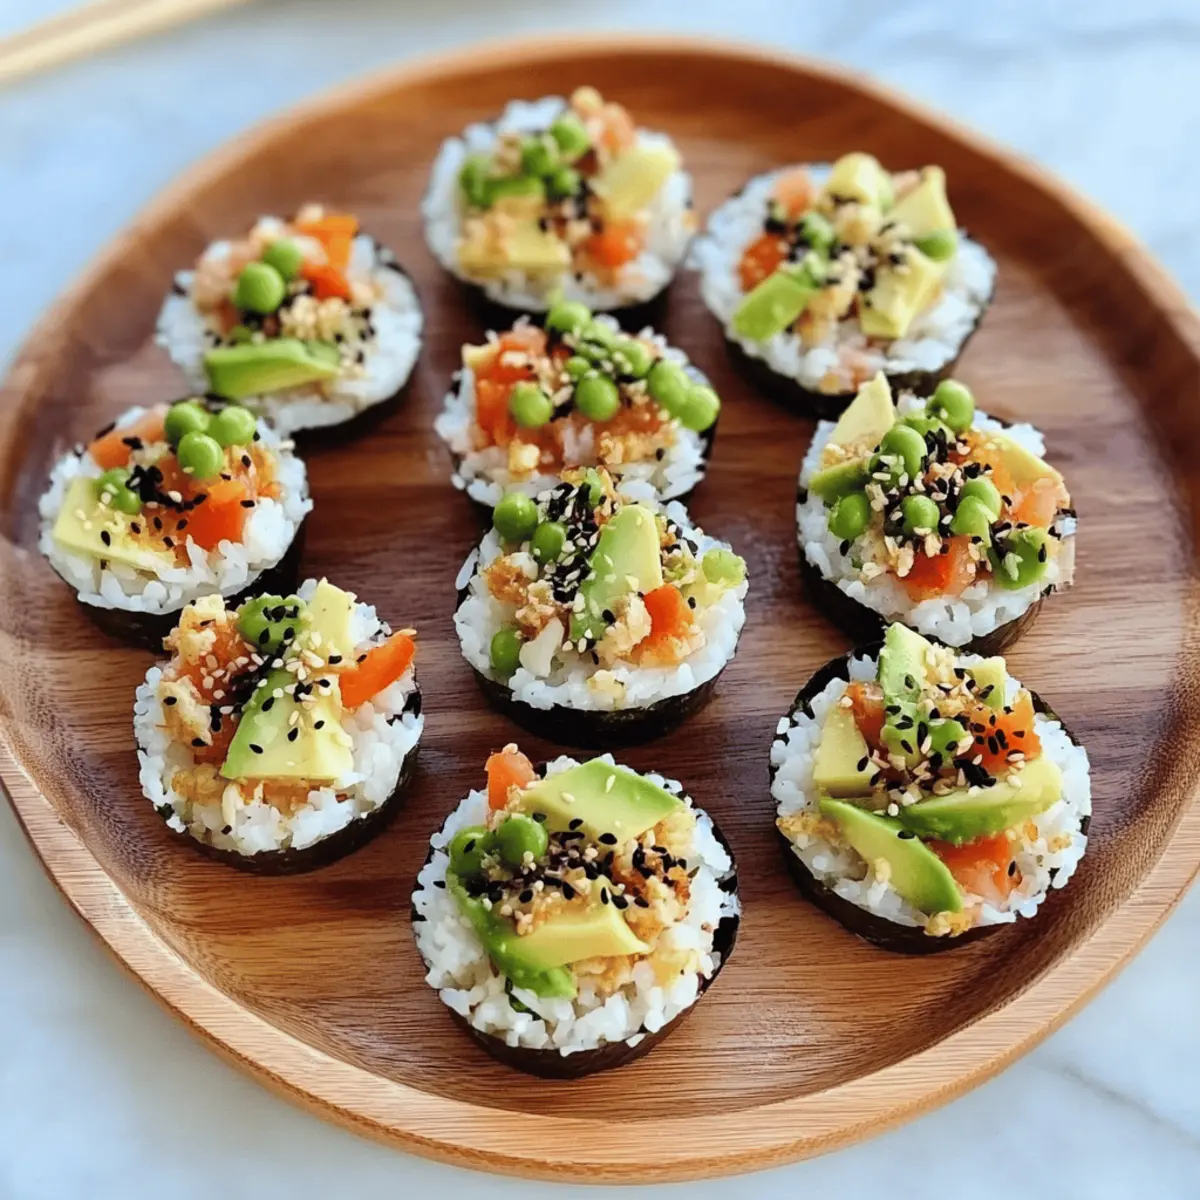
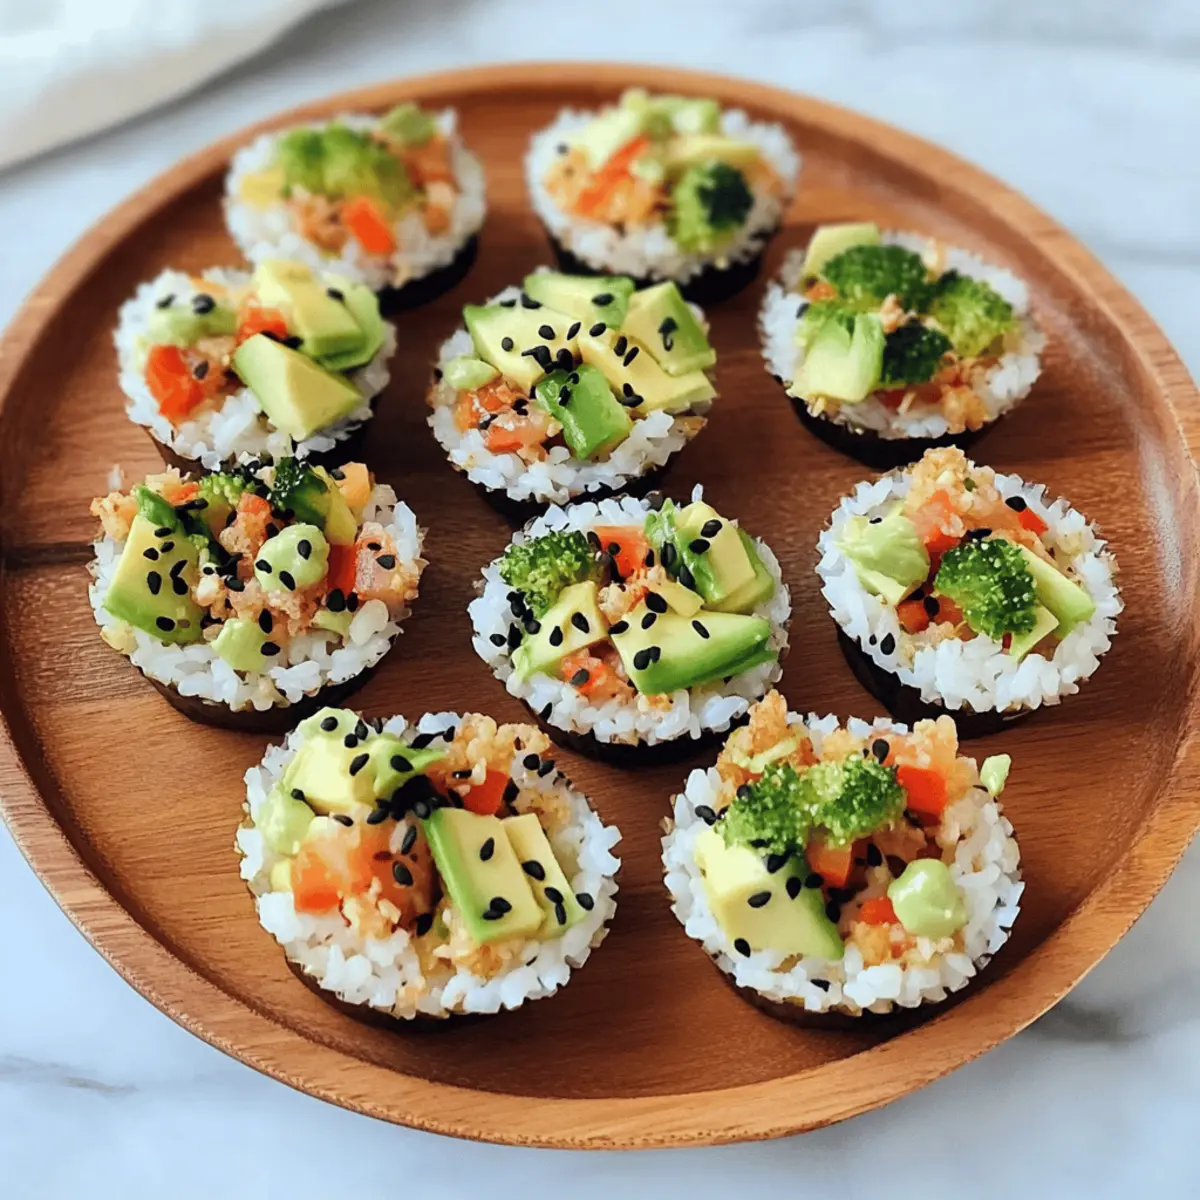
In a large mixing bowl, combine your choice of chopped vegetables, such as carrots and cucumbers, along with 1 cup of mukimame and half a diced avocado. Drizzle your preferred sauce, such as soy sauce or tamari, over the mixture. Gently toss everything together to ensure the ingredients are evenly coated with the sauce, creating a colorful and nutritious filling for your sushi cups.
Step 4: Make Spicy Mayo
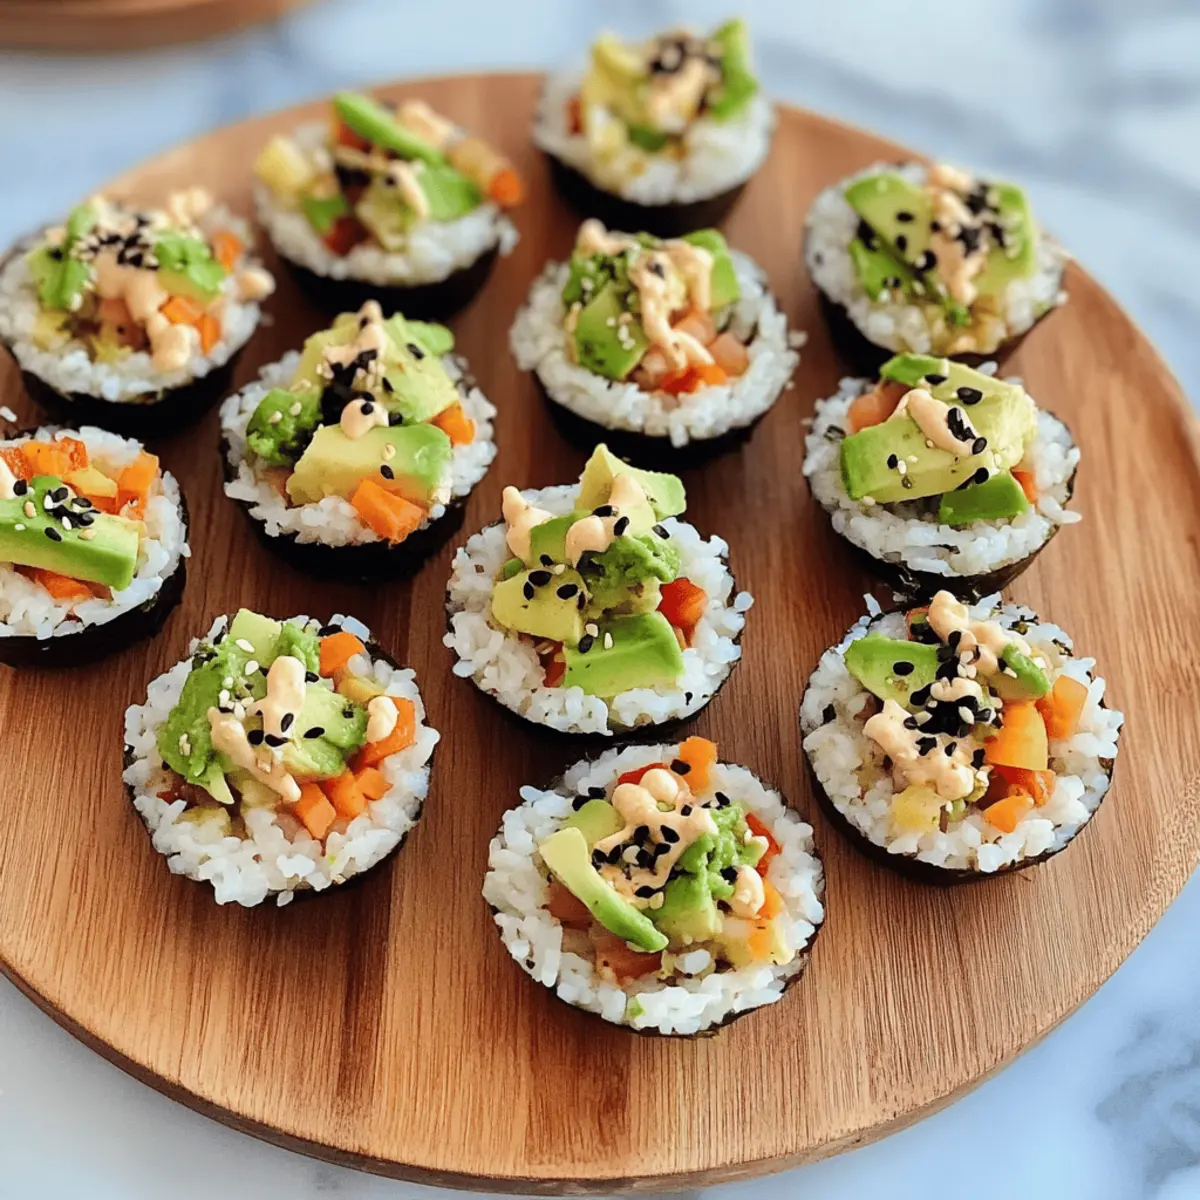
In a small bowl, mix together 1/4 cup of mayonnaise, 1 tablespoon of Sriracha, 1 teaspoon of sesame oil, and a drizzle of honey until smooth and creamy. Taste the mayo and adjust the spiciness by adding more Sriracha if desired. This spicy mayo will add a delightful kick to your sushi cups, enhancing the overall flavor of your dish.
Step 5: Assemble
Remove the rice cups from the fridge and carefully lift them from the muffin tin using a silicone spatula or your fingers. Fill each cup generously with the veggie mixture, making sure to pack it in lightly. Finally, drizzle the spicy mayo over each sushi cup and sprinkle with black sesame seeds for a finishing touch, adding both flavor and visual appeal to your delicious sushi cups.
Helpful Tricks for Sushi Cups
- Rinse Rice Thoroughly: Rinsing sushi rice before cooking helps remove excess starch, resulting in fluffy rice cups that hold their shape nicely.
- Use Silicone Muffin Liners: These are fantastic for preventing breakage when removing your sushi cups from the tin. They make the process much easier!
- Prep Veggies Wisely: Avoid watery vegetables like tomatoes; they can make your rice soggy. Stick to crunchy options for the best texture.
- Make Ahead: Assemble your sushi cups a maximum of 24 hours in advance, storing them in an airtight container to keep them fresh.
- Customize Sauces: Don’t be afraid to experiment with different sauces to enhance the flavor of your sushi cups. Try teriyaki or a spicy peanut sauce for variety!
What to Serve with Customizable No-Bake Sushi Cups?
Creating a meal around these delightful sushi cups opens the door to a world of vibrant flavors and textures, perfect for any occasion.
-
Crispy Seaweed Salad: A refreshing side that complements the sushi cups, adding a delightful crunch with a slightly briny flavor.
-
Edamame: Serve these tender soybeans salted for a protein-packed snack that pairs beautifully with the fresh sushi cups. They’re nutritious and fun to pop out of their pods!
-
Miso Soup: This warm, savory broth enhances the meal’s comfort factor while balancing the freshness of the sushi cups, making it a cozy addition to your dining experience.
-
Pickled Ginger: A classic sushi accompaniment that clears the palate between bites, providing a zesty contrast to the creaminess of the avocado and mayo in your cups.
-
Sushi Ginger Limeade: A refreshing drink that combines the tanginess of lime with a touch of sweetness, ensuring your meal is both satisfying and thirst-quenching.
-
Fruit Salad: A light and colorful mix of seasonal fruits offers a sweet conclusion to your meal, ensuring the flavors remain bright and light.
With these options, you can craft a complete and satisfying experience that highlights your no-bake sushi cups’ fresh and customizable nature.
Make Ahead Options
These Sushi Cups are perfect for meal prep enthusiasts! You can prepare the rice cups up to 24 hours in advance by following the assembly steps but leaving out the filling and spicy mayo until ready to serve. Additionally, chop your vegetables and mix the filling a day ahead, storing them in an airtight container in the refrigerator to maintain freshness. To keep the rice cups from becoming soggy, be sure to refrigerate them separately from the filling. When it’s time to enjoy, simply fill the rice cups with your veggie mixture, drizzle with the spicy mayo, and garnish with sesame seeds for a beautiful presentation. This way, you’ll have delicious, ready-to-eat Sushi Cups on hand for your busy weeknights!
Sushi Cups: Exciting Variations to Try
Feel free to personalize your sushi cups with these delightful twists that cater to every palate!
-
Dairy-Free: Replace avocado with cashew cream for a rich, creamy texture without the dairy. This plant-based swap maintains that luscious mouthfeel.
-
Spicy Kick: Add sliced jalapeños or crushed red pepper to the filling for an extra burst of heat. This simple addition elevates the flavor profile with each bite.
-
More Protein: Incorporate grilled shrimp or shredded crab meat into the veggie mix for a heartier version. This not only adds protein but also a satisfying seafood flavor.
-
Crunch Factor: Toss in crushed rice crackers or tempura bits as a topping for an unforgettable crunch. The combination of textures enhances the entire experience!
-
Vegetarian Delight: Switch mukimame for black beans or chickpeas rich in protein for a filling veggie alternative. Both options offer a hearty texture and earthy flavor.
-
Sweet and Savory: Drizzle honey or maple syrup over the filling for a sweet twist that balances the spiciness. It’s a delightful surprise and tempting balance of flavors.
-
Tropical Vibes: Use diced mango or pineapple along with other veggies for a refreshing twist. This fruity addition brings a summer feel to your sushi cups!
-
Flavorful Marinade: Marinate your chopped vegetables in a mix of rice vinegar and sesame oil beforehand for an umami boost. This extra step enhances the overall flavor and zest of each bite.
Looking for even more inspiration? Check out our delicious Cheesecake Cookie Cups or enjoy a savory Baked Apple Cinnamon Oatmeal Cups for a sweet finish!
Storage Tips for Sushi Cups
- Fridge: Keep assembled sushi cups in an airtight container and refrigerate for up to 2 days to maintain freshness and texture.
- Freezer: If you want to store them for longer, freeze the rice cups separately without filling. They can last up to 1 month; defrost in the fridge before filling.
- Reheating: For best results, enjoy sushi cups cold or at room temperature. If desired, gently reheat the rice cups in a microwave for about 10-15 seconds, but be cautious not to overheat them.
- Leftover Filling: Store any leftover filling ingredients separately in the fridge for up to 3 days to keep them fresh and ready for future sushi cup creations.
Sushi Cups Recipe FAQs
What type of rice should I use for sushi cups?
Absolutely, sushi rice is the best choice as it provides the perfect texture and stickiness needed to form the cups. Be sure to rinse it thoroughly before cooking to remove excess starch. This will help achieve fluffy rice that holds its shape well.
How long can I store assembled sushi cups in the fridge?
Keep your sushi cups fresh by storing them in an airtight container in the fridge. They’re best enjoyed within 2 days to maintain their texture and taste. After that, the ingredients may start to lose their crispness.
Can I freeze sushi cups?
Yes, you can freeze the rice cups! Without the filling, freeze them in a single layer on a baking sheet, then transfer them to an airtight container or resealable bag. They can be stored for up to 1 month. When you’re ready to enjoy, simply defrost them in the fridge overnight.
What if I have leftover filling?
You can absolutely save any leftover filling! Store it in an airtight container in the fridge for up to 3 days. This way, you can whip up fresh sushi cups whenever the craving strikes, making it easy to enjoy throughout the week!
Can I customize ingredients for dietary restrictions?
Very! These sushi cups are incredibly versatile. You can easily tailor them to fit gluten-free or vegetarian diets by using gluten-free soy sauce or tamari, and excluding any animal products. Just ensure you choose compatible veggies and sauces that suit your dietary needs.
What vegetables work best in sushi cups?
The more the merrier! Crunchy vegetables like cucumbers, bell peppers, and carrots are perfect for adding texture and flavor. Be cautious with watery veggies; they can make your rice soggy. Stick with fresh, crisp options for the best results!
Sushi Cups Recipe FAQs
Sushi Cups: No-Bake Delights You Can Customize Anytime
Ingredients
Equipment
Method
- In a medium pot, combine the rinsed sushi rice with water. Bring to a boil, then cover, reduce to low heat, and simmer for 20 minutes. Fluff the rice and let it cool for about 10 minutes.
- Fill each muffin tin cup with the cooled sushi rice, packing it firmly. Refrigerate for 20 minutes to set.
- In a mixing bowl, combine chopped vegetables, mukimame, and diced avocado. Drizzle with sauce and toss to coat.
- In a small bowl, mix together mayonnaise, Sriracha, sesame oil, and honey until smooth. Adjust spiciness as desired.
- Remove rice cups from the fridge, fill with veggie mixture, drizzle with spicy mayo, and sprinkle with black sesame seeds.
Leave a Reply