
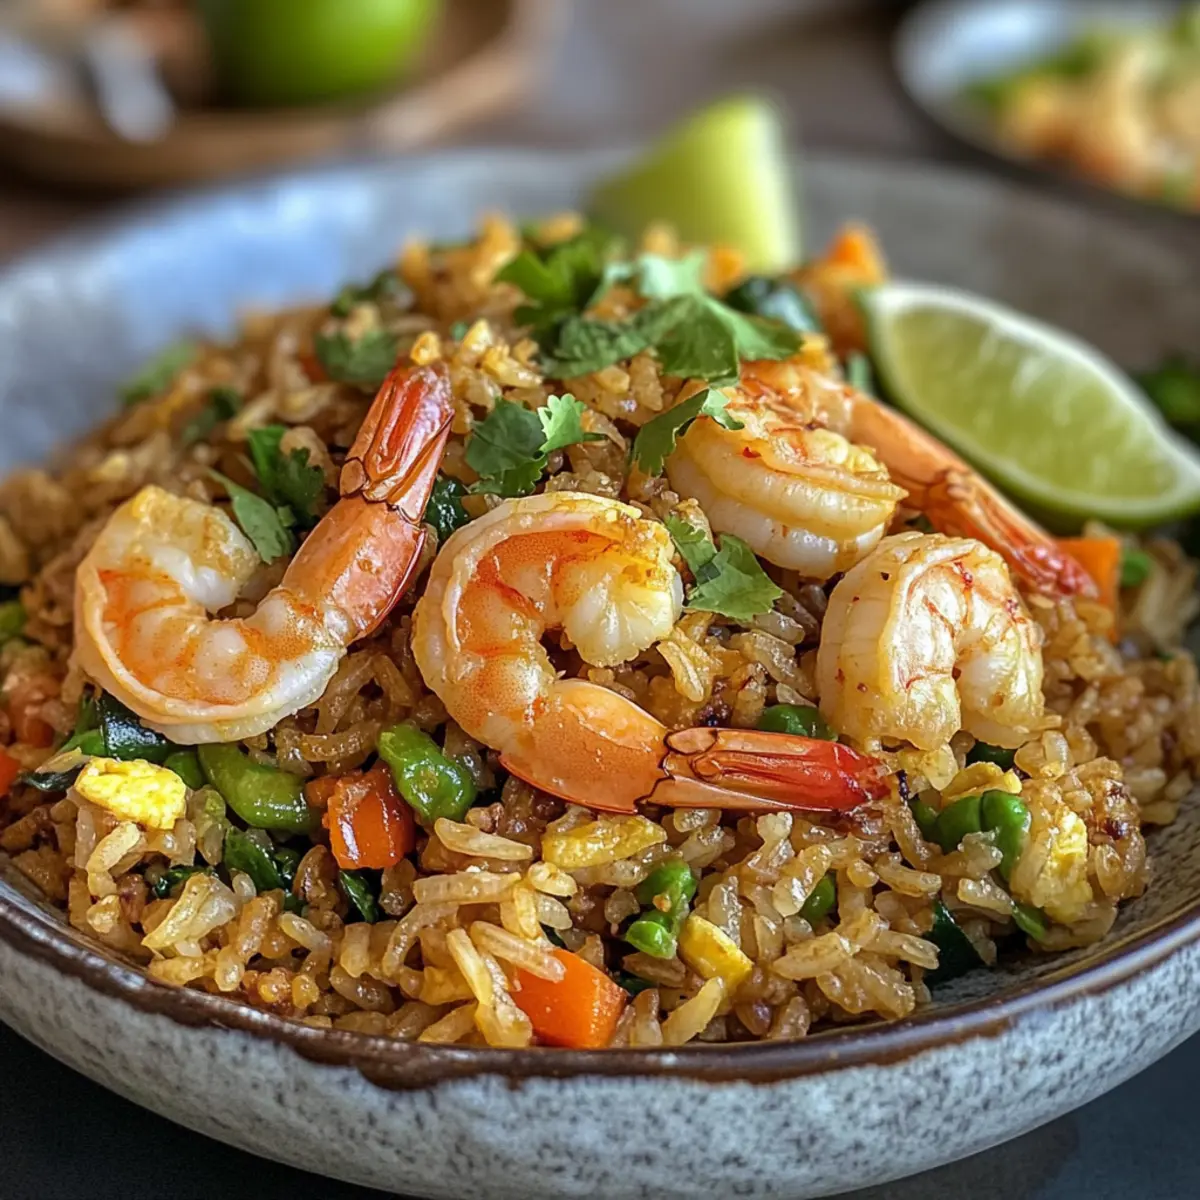
As I sifted through my pantry, a little pack of jasmine rice caught my eye, whispering promises of fragrant meals. I knew it was time to whip up a comforting batch of Authentic Thai Fried Rice, or Khao Pad—a dish vibrant enough to brighten any weeknight. This quick and easy recipe doesn’t just deliver on flavor; it’s completely customizable, allowing you to tailor it to your protein preferences and seasonal vegetables. Whether you choose succulent shrimp, tender chicken, or hearty tofu, this recipe is a guaranteed crowd-pleaser that can be prepped in no time. With each bite, you’ll savor the delightful harmony of sweet, salty, sour, and spicy elements that make Thai cuisine irresistible. Curious about how this all comes together? Let’s dive into the deliciousness!
Why Is Thai Fried Rice So Irresistible?
Customizable to Perfection: Choose your favorite protein—shrimp, chicken, pork, or tofu—making it personal for everyone.
Quick and Easy: Ready in just 20 minutes, it’s the perfect solution for busy weeknights.
A Flavor Explosion: The delightful balance of sweet, salty, sour, and spicy notes will elevate your home-cooked meals.
Meal Prep Friendly: Make a big batch ahead, store it, and enjoy it for days, just like with my Than Takeout Fried dish!
Versatile Ingredients: Swap in seasonal veggies or experiment with flavors—there’s no limit to your creativity!
Crowd-Pleaser: Impress your friends and family with a restaurant-quality dish that keeps them coming back for more.
Thai Fried Rice Ingredients
For the Rice
• Jasmine Rice – This aromatic base provides the dish’s signature texture, but basmati rice can be used if jasmine is unavailable.
For the Protein
• Shrimp – Adds a seafood delight and cooks quickly for a sumptuous flavor.
• Chicken – A classic choice that remains juicy and satisfying throughout the dish.
• Pork – Offers a slightly sweet and meaty component to complement the rice.
• Tofu – Perfect for a vegetarian option; it absorbs flavors beautifully and adds heartiness.
For the Vegetables
• Onion – Diced to enhance sweetness and provide a satisfying crunch.
• Tomatoes – Freshness at its best; cherry tomatoes burst with flavor and color.
• Chinese Broccoli – Offers vibrant color and texture; swap with bell peppers or peas as desired.
For the Flavor
• Fish Sauce – Essential for umami depth; replace with soy sauce for a vegetarian version.
• Soy Sauce – Complements the dish perfectly; opt for low-sodium if preferred.
• Oyster Sauce – Adds a touch of sweetness; optional for those seeking a lighter dish.
• Garlic – Minced to enhance flavor with its aromatic goodness.
• Chili – Slices add a kick of heat; adjust based on your spice tolerance.
• Lime Juice – Brightens flavors with a zesty punch; fresh is best for a vibrant taste.
• Sugar (Palm or Regular) – Balances the savory flavors, adjust to achieve your perfect taste.
For Garnishing
• Fresh Herbs (Cilantro, Basil, Green Onions) – Vital for garnishing and bringing freshness to each serving.
Step‑by‑Step Instructions for Authentic Thai Fried Rice
Step 1: Prep Ingredients
Begin by gathering all your ingredients for the Thai Fried Rice. Dice your chosen protein—shrimp, chicken, pork, or tofu—into bite-sized pieces, and chop your vegetables, including onions, tomatoes, and Chinese broccoli. Mince the garlic and chili to enhance the dish’s flavor, and beat the eggs in a separate bowl. This prep will ensure a smooth cooking process.
Step 2: Cook Protein
Heat a tablespoon of oil in a wok or large skillet over medium-high heat. Once hot and shimmering, add the diced protein to the pan. Cook for about 3-4 minutes, stirring occasionally until the protein is cooked through and slightly golden. Transfer the cooked protein to a plate and set aside, allowing it to rest while you move on to the next step.
Step 3: Scramble Eggs
In the same pan, add a little more oil if needed and pour in the beaten eggs. Allow them to sit for a few seconds to begin setting, then gently scramble them with a spatula until fully cooked and no longer runny, about 2-3 minutes. Push the scrambled eggs to one side of the pan, leaving a space for the vegetables to be added.
Step 4: Stir-Fry Veggies
Increase the heat to high and add the minced garlic and chili to the pan. Sauté for about 30 seconds until fragrant, being careful not to let them burn. Next, toss in the diced onions, tomatoes, and Chinese broccoli (or your choice of vegetables). Stir-fry for 2-3 minutes until the veggies are tender yet still vibrant, ensuring a perfect balance of textures.
Step 5: Combine Ingredients
Add the day-old jasmine rice to the pan, breaking up any clumps as you incorporate it with the vegetables and scrambled eggs. Sprinkle in the fish sauce, soy sauce, and, if desired, oyster sauce. Stir everything together until the rice is heated through, around 3-4 minutes, and begins to develop a slight crisp on the bottom.
Step 6: Serve & Garnish
Once your Thai Fried Rice is thoroughly mixed and piping hot, plate it on a large serving dish. Garnish with freshly chopped herbs like cilantro and green onions, and serve with lime wedges and cucumber slices on the side. The vibrant colors and aromas make for an irresistible presentation that invites everyone to dig in!
Make Ahead Options
Preparing Authentic Thai Fried Rice in advance is a fantastic way to save time on busy weeknights! You can chop your vegetables and protein up to 24 hours ahead—just refrigerate each component separately to maintain their freshness and crispness. Additionally, cooking the jasmine rice a day in advance will allow it to cool and firm up, reducing clumping when stir-frying. When you’re ready to enjoy your Thai Fried Rice, simply heat oil in a wok, stir-fry the prepped ingredients, and add your cold rice, sauces, and scrambled eggs. Follow the final cooking steps to achieve that delightful crispy finish just like you’d get from a Thai street vendor. Enjoy a delicious meal with minimal effort!
Expert Tips for Thai Fried Rice
- Use Day-Old Rice: Day-old jasmine rice provides the best texture, ensuring it’s fluffy and less likely to clump together in your Thai Fried Rice.
- High Heat Cooking: Maintain high heat throughout the cooking process for optimal flavor and a delightful crispiness in every bite.
- Taste as You Go: Gradually adjust sauces, tasting after each addition to find the perfect flavor balance for your Thai Fried Rice.
- Prep Before You Cook: Have all ingredients prepped and ready to go before cooking, allowing for a smoother, more enjoyable cooking experience.
- Avoid Overcrowding the Pan: Cook in batches if necessary to prevent steaming, which can lead to mushy rice instead of the desired crispness.
- Customize to Taste: Don’t hesitate to swap in your favorite proteins or seasonal vegetables; the beauty of Thai Fried Rice lies in its versatility!
Thai Fried Rice Variations & Substitutions
Feel free to get creative with your Thai Fried Rice and make it uniquely yours with these fun variations!
- Dairy-Free: Skip any cheese (though it’s not traditional) and enjoy pure Thai flavors without dairy.
- Gluten-Free: Swap regular soy sauce for tamari or coconut aminos to keep it gluten-free. You won’t sacrifice flavor!
- Vegetable Boost: Add more colorful veggies like bell peppers, snap peas, or zucchini for a nutritious enhancement that delights the eye and palate.
- Protein Swaps: Choose your favorite protein! Shrimp adds a seafood essence, or go for tofu for a hearty vegetarian dish. Chicken and pork are equally delicious.
- Spice It Up: Craving more heat? Toss in more chili slices or a dash of your favorite hot sauce—just a little will elevate it to a spicy delight!
- Coconut Twist: For a tropical flair, use coconut oil for cooking and throw in a splash of coconut milk for a creamy, rich finish.
- Herb Infusion: Experiment with fresh herbs beyond the usual cilantro; Thai basil or mint can add an exciting twist to your fried rice.
- Nuts for Crunch: For a delightful crunch, sprinkle some chopped peanuts or cashews on top before serving. It adds texture and flavor like you’d find in authentic Thai street food.
Every forkful of these variations is an invitation to savor. And if you’re looking for more inspired meals, why not try my Thai Peanut Chicken or a delicious bowl of Corn Chicken Rice? The possibilities are endless!
What to Serve with Authentic Thai Fried Rice
As the enticing aroma of your homemade fried rice fills the air, it’s time to consider the perfect accompaniments that will elevate your meal even further.
- Crispy Spring Rolls: These crunchy delights add texture and make for a delicious starter, perfect for sharing before the main dish.
- Fresh Cucumber Salad: A refreshing mix of cucumbers in a light vinaigrette complements the flavors of the rice, adding a crisp, cool bite.
- Lime Wedges: A squeeze of fresh lime over your fried rice brightens flavors, making every bite a joyful explosion of zest.
- Thai Iced Tea: This sweet, creamy beverage balances the savory note of the fried rice, enhancing the overall dining experience with its delightful flavors.
- Mango Sticky Rice: A sweet treat to end your meal, this dessert’s creamy texture and sweet mango make it an unforgettable pairing that echoes Thai cuisine’s balance.
- Sautéed Bok Choy: Lightly cooked greens offer a tender contrast and a boost of nutrient-rich flavor, making this dish a healthy addition to your table.
- Peanut Sauce: A rich and savory dip for vegetables or grilled meat that pairs beautifully with the fried rice’s seasoning, adding a creamy note that’s hard to resist.
- Sesame Broccoli: Slightly charred broccoli with a touch of sesame brings a nutty flavor and vibrant color to your plate, enhancing its visual appeal.
How to Store and Freeze Thai Fried Rice
- Fridge: Store leftover Thai Fried Rice in an airtight container for up to 3 days to keep it fresh and tasty.
- Freezer: You can freeze Thai Fried Rice for up to 1 month in resealable freezer bags or containers; make sure to remove as much air as possible.
- Reheating: Thaw the rice overnight in the fridge before reheating. Warm it in a skillet over medium heat until heated through, adding a splash of soy sauce for extra moisture if needed.
- Make-Ahead: For a low-stress meal prep, prepare your vegetables and protein a day in advance, and cook the rice ahead of time. This will save you valuable time on busy nights!
Authentic Thai Fried Rice Recipe FAQs
How do I choose the right jasmine rice for this recipe?
I recommend using high-quality jasmine rice, which should have a nice, fragrant aroma and a glossy texture. Look for grains that are slightly sticky when cooked, as this will give your Thai Fried Rice the perfect consistency. If you can’t find jasmine rice, basmati is a suitable substitute, though it has a nuttier flavor.
What’s the best way to store leftover Thai Fried Rice?
Store any leftover Thai Fried Rice in an airtight container in the refrigerator for up to 3 days. Make sure it has cooled completely before sealing to maintain freshness. For meal prep enthusiasts, this dish stores well and can be easily reheated for quick lunches or dinners!
Can I freeze Thai Fried Rice, and if so, how?
Absolutely! You can freeze Thai Fried Rice for up to 1 month. To do this, let the dish cool completely, then place it in resealable freezer bags or airtight containers. Be sure to remove as much air as possible before sealing. When you’re ready to enjoy it, thaw in the refrigerator overnight and reheat in a skillet for best results.
What if my rice clumps together when cooking?
If your rice clumps together, it might be freshly cooked rice rather than day-old rice. I highly recommend using day-old rice because it dries out slightly and becomes less sticky, allowing for a fluffier texture in your Thai Fried Rice. If you’re in a pinch, spread freshly cooked rice on a baking sheet to cool for a bit, or rinse it under cold water to separate the grains.
Is this recipe suitable for people with dietary restrictions?
Yes, this recipe is highly customizable! For a vegetarian or vegan option, simply use tofu or omit the fish sauce and oyster sauce, replacing them with additional soy sauce or tamari. Always check for any allergies relating to soy or seafood if serving to guests. For a gluten-free version, use certified gluten-free soy sauce.
What kind of vegetables can I add to my Thai Fried Rice?
Very! This dish offers flexibility with vegetables. I often use chopped bell peppers, carrots, or peas, depending on what’s in season or available. You can also toss in some snap peas or bok choy for added crunch and color. Don’t hesitate to experiment!
Quick and Delicious Thai Fried Rice That's Customizable for You
Ingredients
Equipment
Method
- Begin by gathering all your ingredients for the Thai Fried Rice. Dice your chosen protein and chop your vegetables, including onions, tomatoes, and Chinese broccoli. Mince the garlic and chili, and beat the eggs in a separate bowl.
- Heat oil in a wok or large skillet over medium-high heat. Add the diced protein and cook for 3-4 minutes until cooked through. Transfer to a plate and set aside.
- In the same pan, add more oil if needed and pour in the beaten eggs. Scramble until fully cooked, about 2-3 minutes, then push to one side.
- Increase heat to high and add minced garlic and chili. Sauté for 30 seconds, then toss in onions, tomatoes, and Chinese broccoli. Stir-fry for 2-3 minutes.
- Add day-old jasmine rice, breaking up clumps. Stir in fish sauce, soy sauce, and oyster sauce. Heat through for 3-4 minutes.
- Plate the fried rice and garnish with fresh herbs. Serve with lime wedges and cucumber slices.
Leave a Reply