
Have you ever felt the joy of pulling a tray of cookies from the oven, only to discover they’ve transformed into adorable little cups of wonder? I was amazed the first time I created these Sugar Cookie Cups filled with silky cream cheese frosting. Not only do they look delightful for any gathering, whether it’s a festive holiday or a casual get-together, but they’re also surprisingly easy to make, allowing you to impress your friends without breaking a sweat. These mini dessert bowls pack a chewy punch and are incredibly versatile—think colorful frosting toppings for every occasion! Ready to indulge in a fun baking adventure? Let’s dive into this recipe that’s bound to become your new favorite treat!
Why Are Sugar Cookie Cups So Irresistible?
Chewy Base: The soft and buttery sugar cookie foundation gives these treats their delightful chewy texture, making every bite a joyous experience.
Customizable Fun: With options for various frostings and toppings, you can create unique versions like a festive twist with Greek Yogurt Cookie Dough Bites or a classic with chocolate frosting.
Perfect for Every Occasion: Whether it’s a birthday bash or a holiday soirée, these Sugar Cookie Cups look stunning and taste divine, ensuring they stand out on any dessert table.
Simplicity You’ll Love: This recipe is easy enough for beginner bakers, so you’ll impress friends and family without the stress—ideal for a last-minute treat!
Crowd-Pleasing Appeal: With their adorable presentation and endless customization, they are sure to win over adults and kids alike, perfect for gatherings or just a sweet snack at home!
Why not serve them alongside a refreshing drink or even with Cheesecake Cookie Cups for an entertaining dessert duo?
Sugar Cookie Cups Ingredients
• Here’s everything you need for scrumptious Sugar Cookie Cups!
For the Cookie Base
- All-Purpose Flour – Provides structure; use gluten-free flour for a gluten-free option.
- Baking Soda & Baking Powder – Essential leavening agents to help the cookies rise and maintain their texture.
- Salted Butter – Adds richness and flavor; make sure it’s at room temperature for smoother mixing.
- Granulated Sugar – The primary sweetener contributing to a chewy texture that’s hard to resist.
- Vanilla Extract – Enhances the overall flavor; substitute with vanilla bean extract for a more profound taste.
- Almond Extract – A hint of classic sugar cookie flavor; optional but highly recommended.
- Large Egg – Binds the ingredients together, ensuring moisture; use it at room temperature.
For the Cream Cheese Frosting
- Cream Cheese – The key ingredient that provides tanginess and creaminess to the frosting.
- Powdered Sugar – Sweetens and thickens the frosting to the ideal consistency.
- Milk – Adjusts the frosting’s thickness; add more for a thinner consistency or powdered sugar for thickness.
For Decoration
- Sprinkles – Use colorful, themed sprinkles to top your cookie cups for that extra fun touch!
Step‑by‑Step Instructions for Sugar Cookie Cups
Step 1: Preheat the Oven
Begin your delightful Sugar Cookie Cups by preheating your oven to 350°F (175°C). While it heats up, grab two muffin pans and generously grease them with nonstick spray to ensure easy removal of your cookie cups later. This step is crucial for baking those adorable little dessert bowls that are soft and chewy!
Step 2: Cream the Butter and Sugar
In a large mixing bowl, combine softened salted butter with granulated sugar. Use an electric mixer to cream them together on medium speed until the mixture is light and fluffy, about 3-4 minutes. Make sure to scrape down the sides of the bowl as needed to incorporate all the ingredients. This creamy base is key to achieving that perfect texture.
Step 3: Add the Wet Ingredients
Once your butter and sugar are fluffy, add in one large room-temperature egg, along with vanilla extract and almond extract. Beat this mixture on medium speed until it becomes smooth and well-blended, taking about 1-2 minutes. The combination of these flavors builds the delicious foundation of your Sugar Cookie Cups.
Step 4: Combine the Dry Ingredients
In a separate bowl, whisk together all-purpose flour, baking powder, baking soda, and a pinch of salt. Gradually incorporate this dry mixture into the wet ingredients using a spatula or wooden spoon. This is a gentle process; mix until just combined—be careful not to over-mix, as this can affect the cookie’s texture.
Step 5: Shape the Cookie Cups
Now that your dough is ready, take about 2 tablespoons of dough and press it into the bottom of each muffin cup, making sure to extend it halfway up the sides. Use your fingers to create an even layer; this will form the cup that holds the luscious frosting later. The dough should slightly fill the cup and have a smooth surface.
Step 6: Bake the Cookie Cups
Place the muffin pans into your preheated oven and bake for 12 minutes or until the edges are golden brown and the tops are set. Once done, remove from the oven and allow the cookie cups to cool in the pan for about 15 minutes. During this time, you can prep your frosting, so you’re ready to fill them when cool.
Step 7: Make the Cream Cheese Frosting
In a medium bowl, beat together room-temperature cream cheese and softened butter until fully smooth. Gradually add in powdered sugar and a splash of milk, mixing until you achieve the desired frosting consistency. Aim for a smooth and spreadable texture that will perfectly complement your Sugar Cookie Cups.
Step 8: Frost the Cookies
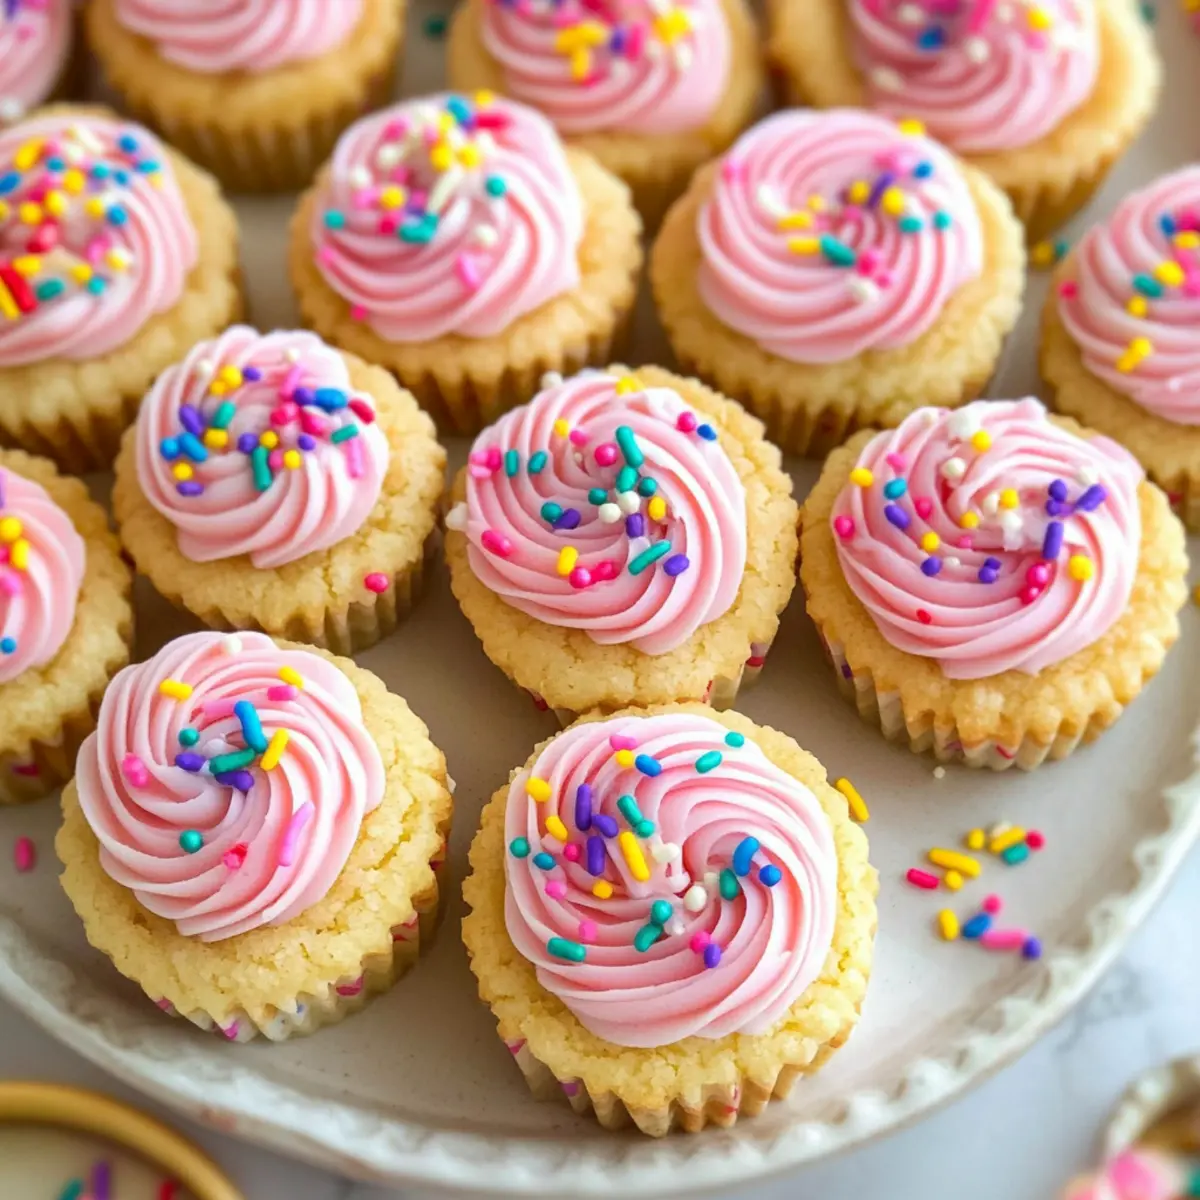
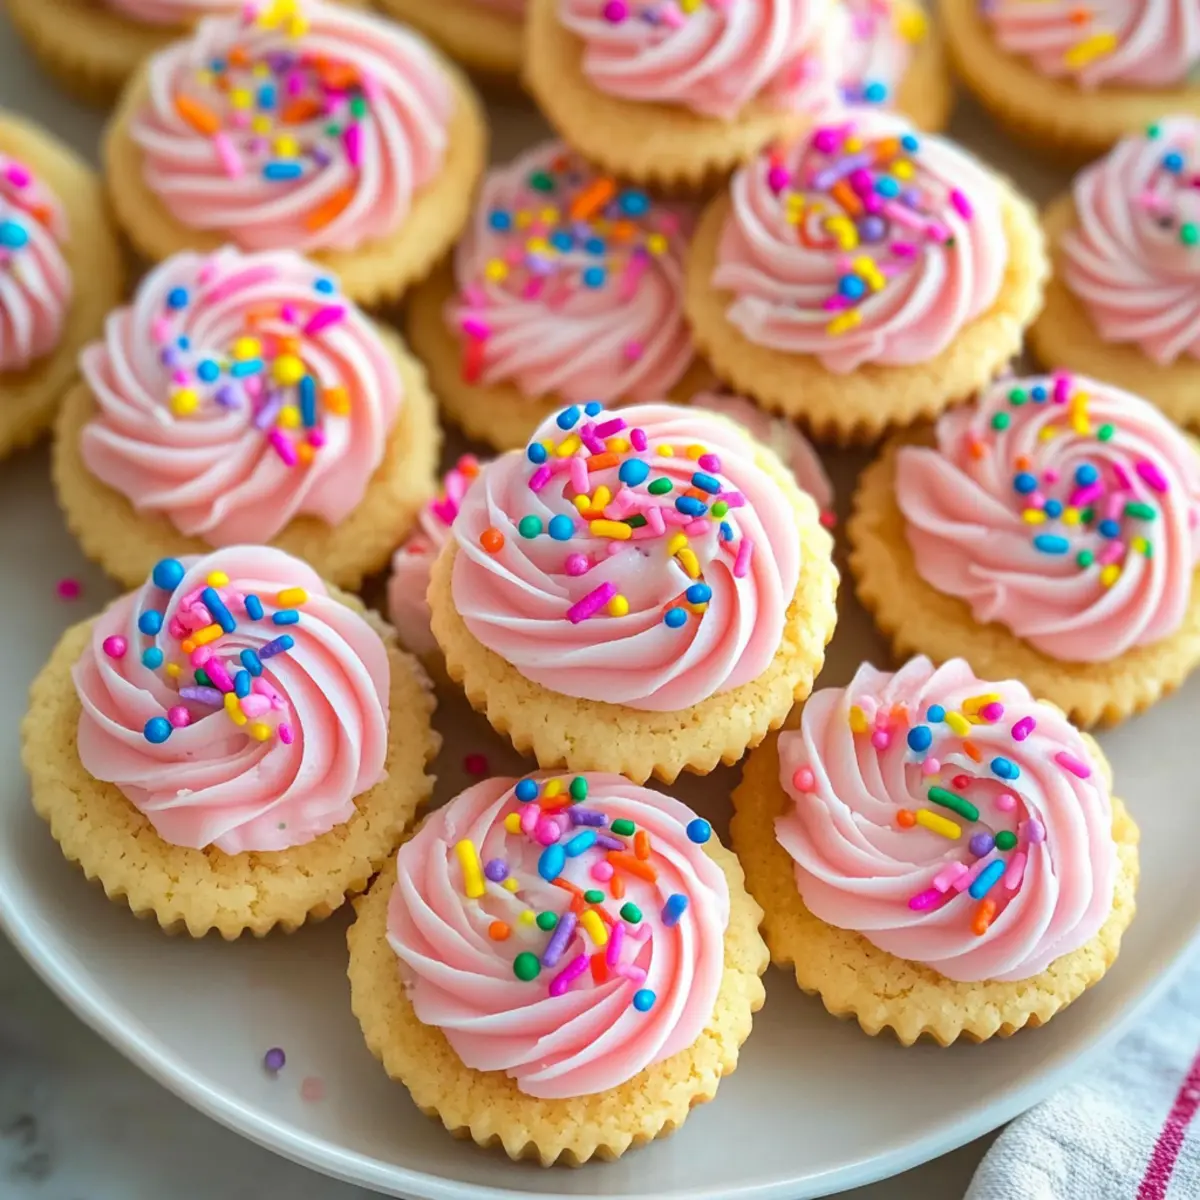
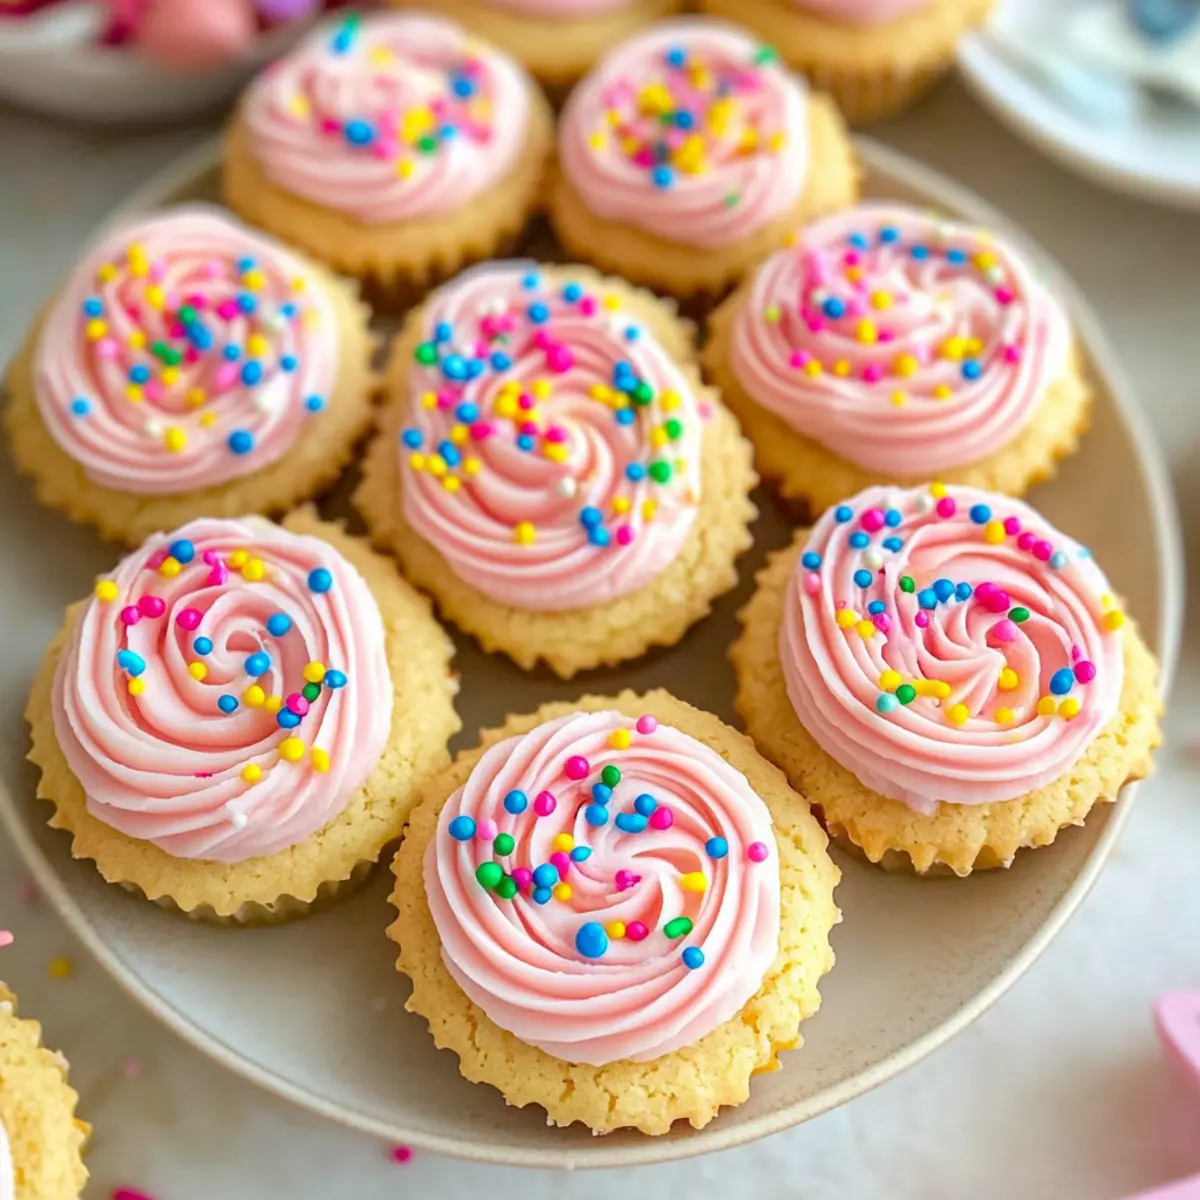
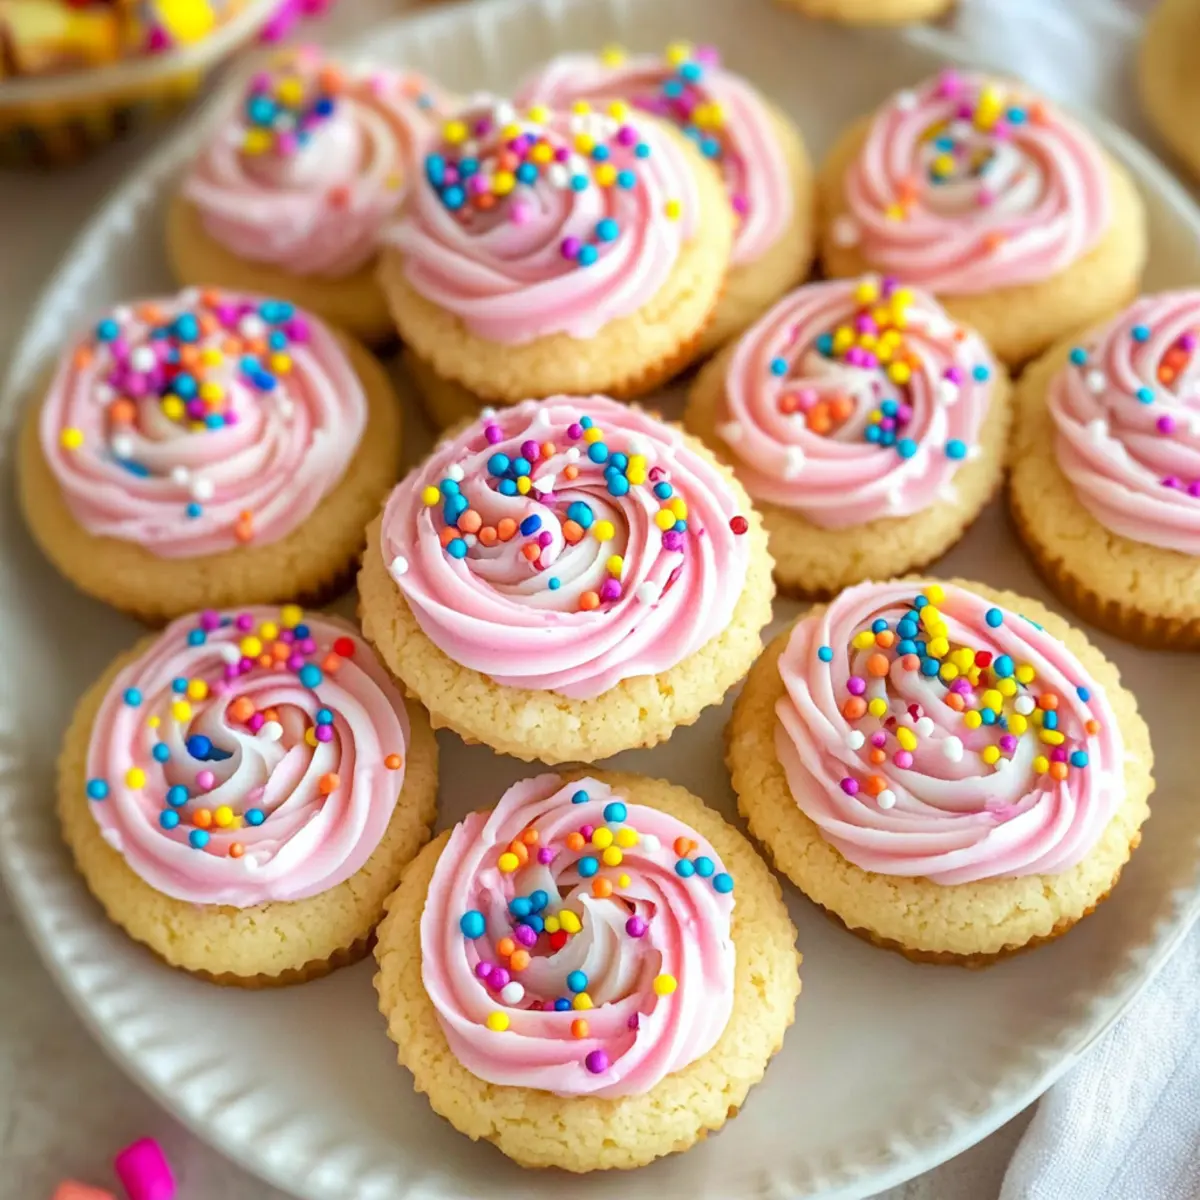
Once your Sugar Cookie Cups have cooled completely, it’s time to frost! Using a piping bag or a simple spoon, fill the center of each cookie cup with your creamy frosting. Be generous—you want a nice swirl of frosting peeking over the sides for that appealing presentation. Finish off with colorful sprinkles to add a festive touch.
Step 9: Serve and Enjoy
Your delightful Sugar Cookie Cups are now ready to enjoy! Display them on a platter or serve individually, pairing wonderfully with a glass of milk or coffee. These treats are perfect for gatherings, celebrations, or simply a sweet indulgence at home. Be prepared for everyone to ask for the recipe!
Sugar Cookie Cups Variations & Substitutions
Customization is the name of the game with these delightful cookie cups, inviting you to explore endless creative possibilities!
-
Gluten-Free: Use a 1:1 gluten-free flour blend to make these cookie cups perfect for gluten-sensitive friends.
-
Dairy-Free: Swap cream cheese with a plant-based cream cheese alternative and use coconut oil instead of butter for a dairy-free delight. Your guests will never know!
-
Chocolate Lovers: Fold mini chocolate chips or chunks into the dough for a sweet surprise inside each cookie cup. The melted chocolate will create a delectable contrast with the frosting.
-
Lemon Zest: Add grated lemon zest and a splash of lemon juice to the dough. This gives the cookie cups a refreshing citrus twist that pairs wonderfully with cream cheese frosting.
-
Nutty Twist: Incorporate almond or hazelnut flour into the cookie base to add a rich, nutty flavor. A sprinkle of chopped nuts on top can complement the frosting nicely.
-
Frosting Varieties: Experiment with different frostings like vanilla buttercream, chocolate ganache, or tangy lemon frosting. The possibilities elevate these cups from simple to extraordinary!
-
Spice It Up: Mix in a pinch of cinnamon or nutmeg to the dough for a warm, cozy flavor, particularly delightful during the fall and winter seasons.
Why not pair your Sugar Cookie Cups with a stunning dessert like these delightful Cheesecake Cookie Cups or satisfy a chocolate craving with Cookies Cream Dessert? The choices are endless, so let your imagination guide you!
Storage Tips for Sugar Cookie Cups
Room Temperature: Store your Sugar Cookie Cups in an airtight container at room temperature for up to 3 days to keep them fresh and delicious.
Fridge: If you have leftover frosted cookie cups, refrigerate them in a sealed container for up to 1 week to maintain their flavor and texture.
Freezer: For longer storage, freeze unbaked cookie dough in individual portions. When ready to bake, simply thaw in the fridge overnight and then follow the baking instructions.
Reheating: If enjoyed fresh, warm leftover cookie cups for a few seconds in the microwave for a delightful treat that enhances the soft, chewy texture.
Make Ahead Options
These adorable Sugar Cookie Cups are perfect for busy home cooks looking to save time during the week! You can prepare the cookie dough up to 3 days in advance; simply store it in an airtight container in the refrigerator. For even longer storage, freeze the dough for up to 3 months—just thaw it overnight in the fridge before shaping into cups. You can also bake the cookie cups up to 24 hours ahead; just cool them completely and cover them tightly to maintain their chewy texture. When you’re ready to serve, fill them with frosting and sprinkles for a delightful treat that’s just as delicious as freshly made!
Expert Tips for Sugar Cookie Cups
-
Room Temperature Ingredients: Ensure all ingredients are at room temperature for better blending, which leads to a smoother cookie and frosting texture.
-
Avoid Over-Mixing: When combining wet and dry ingredients, mix until just combined to prevent tough cookie cups. Over-mixing can lead to a less tender result.
-
Cool Before Frosting: Allow the cookie cups to cool completely before frosting to avoid melting. This ensures your cream cheese frosting stays fluffy and beautiful.
-
Experiment with Flavors: Don’t hesitate to get creative! Try adding lemon zest for a refreshing twist or mix in mini chocolate chips for added texture in the dough.
-
Use Fun Toppings: Elevate your presentation by decorating with themed sprinkles or even drizzling chocolate over the frosting for extra flair!
-
Storage Secrets: Store leftover Sugar Cookie Cups in an airtight container at room temperature for up to one week to keep them fresh and tasty.
What to Serve with Sugar Cookie Cups
Indulging in Sugar Cookie Cups is a delightful experience, and pairing them with the right treats can elevate your dessert spread to sheer perfection.
-
Glass of Milk: A classic pairing, the creaminess of milk complements the sweetness of the cookie cups perfectly, balancing flavors. There’s nothing like dipping a cookie in milk; it adds nostalgia to your dessert moment.
-
Coffee or Espresso: The bold flavors of coffee enhance the sweetness of the cream cheese frosting, making for a cozy, afternoon treat. Sip it warm while enjoying your adorable cookie cups for a rich experience.
-
Fresh Fruit Salad: The bright flavors of fresh fruit add a refreshing contrast to the sweetness of the cookie cups. Consider a mix of berries and citrus to provide a burst of color and tangy goodness.
-
Chocolate Drizzle: A simple melted chocolate drizzle over the frosting transforms this dessert into an elegant treat with added richness. It brings a luxurious touch that will wow your guests.
-
Cheesecake Bites: Pairing these cookie cups with small cheesecake bites adds a creamy element that complements the chewy texture of the cookies. It offers a delightful contrast that dessert lovers will crave.
-
Ice Cream: A scoop of vanilla or berry-flavored ice cream beside the cookie cups creates a deliciously decadent dessert experience. Together, they form a playful combination that melts in your mouth.
-
Chocolate Milkshakes: For a fun twist, serve sugar cookie cups alongside chocolate milkshakes. The creamy sweetness of the shake and the chewy cups create a dream-like pairing.
-
Nutty Granola: A sprinkle of crunchy granola adds texture and a savory touch that balances the sweetness of Sugar Cookie Cups. It makes for a guilt-free yet indulgent treat!
-
Cupcake Bites: To create a whimsical dessert spread, add small cupcakes next to your cookie cups. Their contrasting textures and flavors will invite guests to sample and indulge.
Sugar Cookie Cups Recipe FAQs
What should I look for when selecting ingredients for Sugar Cookie Cups?
Absolutely! Choose ingredients that are at their best—look for all-purpose flour that is fresh and free of clumps. Make sure your baking soda and baking powder are not expired (they lose potency over time), and opt for salted butter for a richer flavor. For the cream cheese, choose a block rather than spreadable cream cheese for a smoother frosting.
How do I store Sugar Cookie Cups?
To store your Sugar Cookie Cups, place them in an airtight container at room temperature for up to 3 days for the best flavor and texture. If you have leftover frosted cups, they can be refrigerated for up to one week. Just make sure they’re covered so they stay fresh!
Can I freeze Sugar Cookie Cups?
Yes, indeed! For freezing, I recommend freezing the unbaked cookie dough in individual portions. Just scoop out your dough, wrap each ball in plastic wrap, and put them into a freezer bag. They can be stored for up to 3 months. When you’re ready to bake, simply thaw the dough overnight in the refrigerator before following the baking instructions.
What if my cookie cups didn’t form properly?
Very! If your Sugar Cookie Cups don’t hold their shape, it could be due to over-mixing the dough or too much flour in the mixture. Be sure to gently combine your wet and dry ingredients and measure your flour accurately (using the spoon-and-level method is best!). If they do spread out too much, you can gently reshape them with a tablespoon while they’re still warm from the oven.
Are Sugar Cookie Cups safe for people with dietary restrictions?
Absolutely! You can easily adapt these Sugar Cookie Cups for gluten-free diets by substituting all-purpose flour with a 1:1 gluten-free flour blend. Just check that your baking powder and other ingredients are gluten-free as well. Additionally, keep in mind any nut allergies for the almond extract—feel free to omit it or replace it with additional vanilla extract!
Delicious Sugar Cookie Cups with Cream Cheese Frosting Delight
Ingredients
Equipment
Method
- Preheat your oven to 350°F (175°C) and grease muffin pans with nonstick spray.
- In a mixing bowl, cream together the softened butter and granulated sugar until light and fluffy, about 3-4 minutes.
- Add in the egg, vanilla extract, and almond extract; beat until smooth, about 1-2 minutes.
- In another bowl, whisk together flour, baking soda, baking powder, and salt. Gradually mix this into the wet ingredients until just combined.
- Take about 2 tablespoons of dough and press it into the bottom and halfway up the sides of each muffin cup.
- Bake in the preheated oven for 12 minutes until the edges are golden brown; cool in the pan for 15 minutes.
- To make the frosting, beat together cream cheese and butter until smooth, then gradually add powdered sugar and milk.
- Frost the cooled cookie cups generously with the cream cheese frosting and top with sprinkles.
- Serve and enjoy your delightful Sugar Cookie Cups!
Leave a Reply