
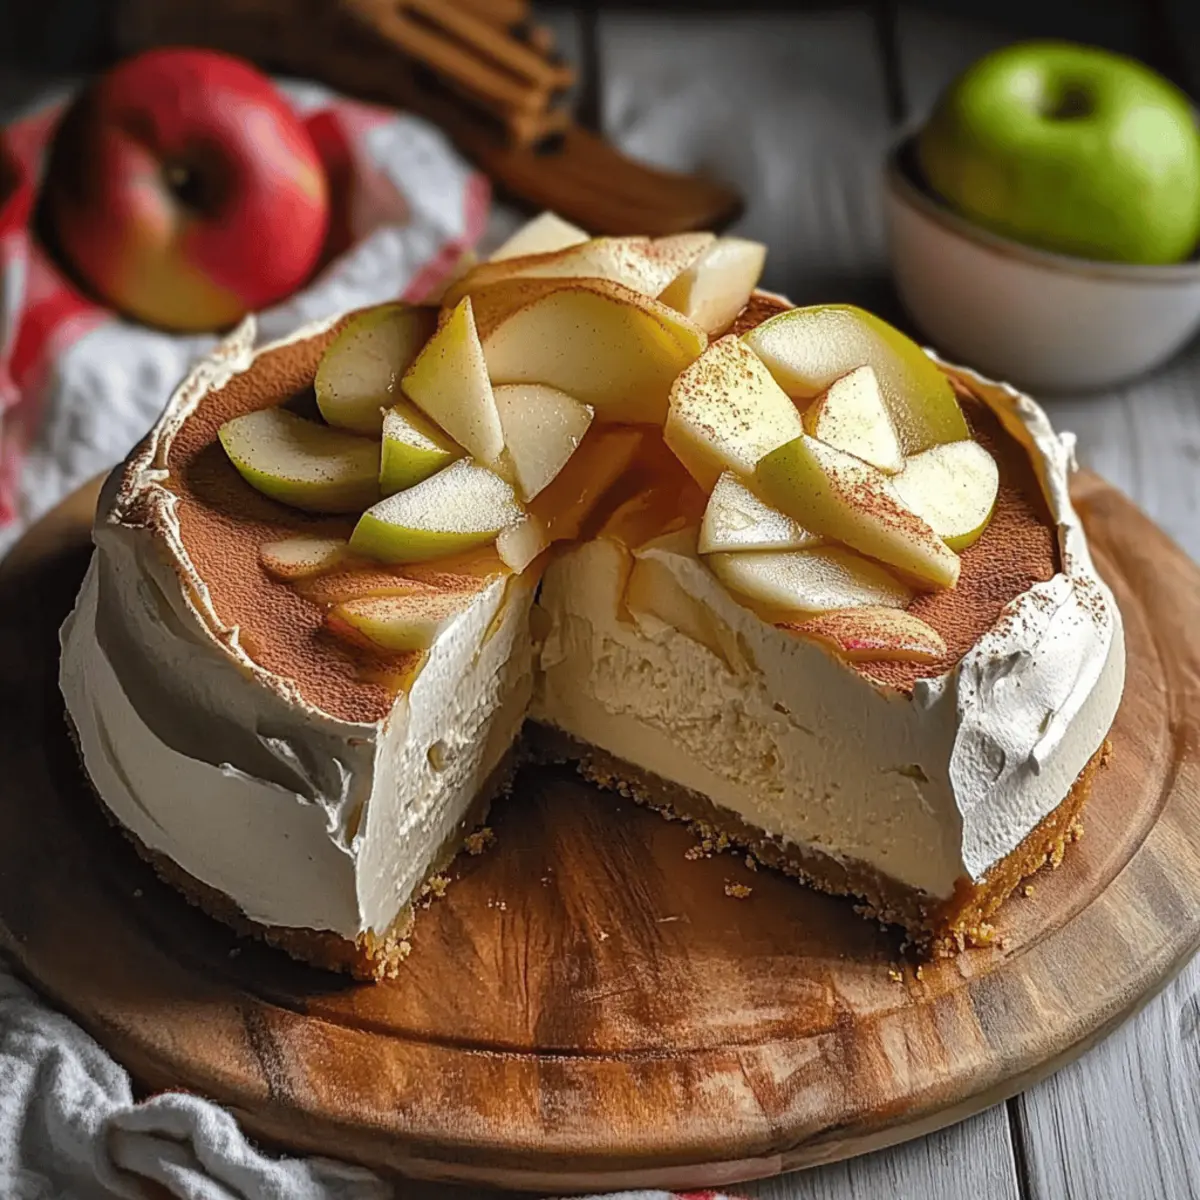
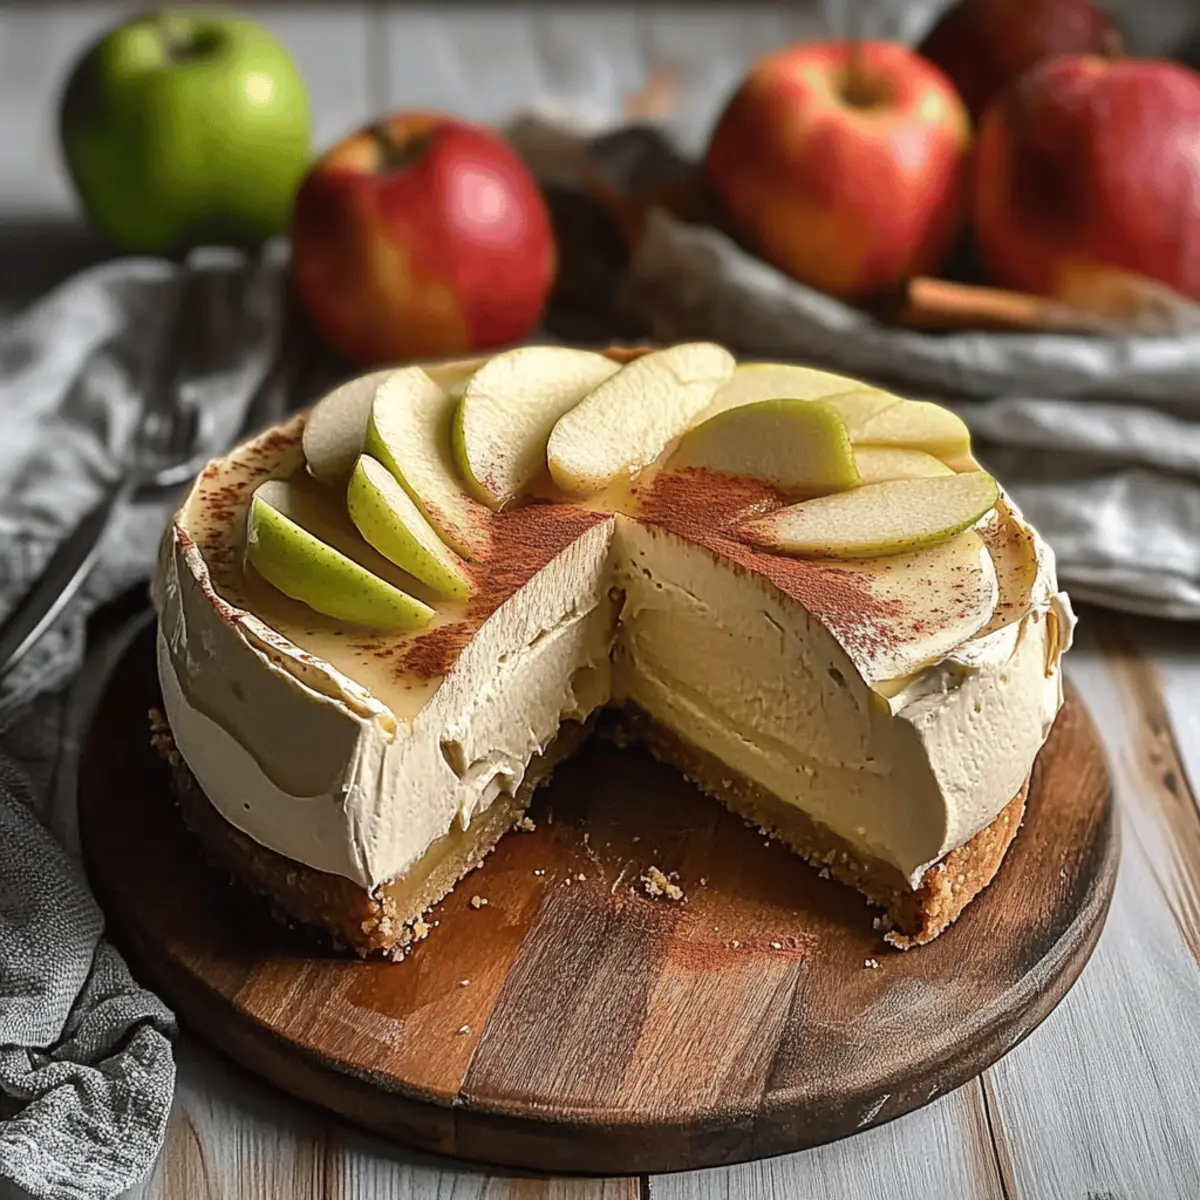
As the leaves begin to carpet the ground in hues of red and gold, I can’t help but feel that warm and cozy pull towards the kitchen. This is the time for indulgent desserts—like my creamy Apple Cider Cheesecake, a delightful twist on traditional fall treats. With its vibrant tang from reduced apple cider and an airy texture that melts in your mouth, this cheesecake not only embraces the essence of autumn but is also easy to whip up, making it perfect for gatherings or a cozy night in. Plus, the optional mulling spices bring an added warmth that makes this cheesecake a true seasonal star. Curious about how to bring this autumn delight to your table? Let’s dive into the recipe!

Why is this cheesecake a must-try?
Exquisite Fall Flavor: The use of fresh apple cider and optional mulling spices creates a taste that perfectly embodies autumn.
Creamy Texture: Expect a smooth and airy consistency that melts in your mouth, offering a unique experience compared to traditional cheesecakes.
Simple Preparation: With straightforward steps, you’ll find it easy to make, giving you more time to enjoy your gathering or cozy evening.
Versatile Toppings: Top it with whipped cream and sliced apples or drizzle it with caramel from reduced cider for a touch of decadence.
Crowd-Pleaser: Whether it’s a family dinner or a festive party, this cheesecake will be the centerpiece that impresses all your guests, just like other beloved recipes such as Oreo Cheesecake Cookie Cups or Air Fryer Apple Fries.
Apple Cider Cheesecake Ingredients
• Discover the essential elements for crafting this delightful dessert!
For the Crust
- Digestive Cookies or Graham Crackers – Provides a flavorful and textured base; Oreo can be used for a chocolate twist.
- Butter – Binds the crust and adds richness; Melt it before mixing with crumbs for best results.
- Salt – Enhances sweetness and balances flavors; Fine sea salt is recommended for optimal taste.
- Powdered Sugar – Adds a subtle sweetness to the crust; Granulated sugar can substitute, but texture may vary.
For the Filling
- Fresh Apple Cider – The star ingredient for that juicy apple essence; Reduced cider is ideal for an intensified flavor.
- Mulling Spices – Optional but recommended to enhance apple flavor during reduction; Try cloves, allspice, or nutmeg for warmth.
- Cream Cheese – Main filling component, ensuring creaminess; Let it reach room temperature for easy mixing.
- Brown Sugar – Sweetens the filling for a rich flavor; Both light and dark brown sugars work well.
- Vanilla Extract – Adds depth to the cheesecake; Pure vanilla is preferred for the best taste.
- Sour Cream – Imparts creaminess and a slight tang; Full-fat sour cream gives the best results.
- Reduced Apple Cider – Must be prepared ahead for an intense flavor boost; Cool completely before incorporating into the filling.
- Cinnamon – Complements the apple flavor beautifully; Adjust to taste, or include other spices for variety.
- Eggs – Provide structure; Ensure they are at room temperature for easier blending.
- All-Purpose Flour – Stabilizes the cheesecake’s texture; Omit for a gluten-free version using almond flour.
Enjoy creating this delightful Apple Cider Cheesecake that is sure to become a cherished addition to your fall dessert repertoire!
Step‑by‑Step Instructions for Apple Cider Cheesecake
Step 1: Reduce the Cider
Begin by pouring 3 cups of fresh apple cider into a saucepan. Bring it to a boil over medium-high heat, optionally adding mulling spices for enhanced flavor. Allow the cider to simmer, reducing to about 1/3 cup, which should take around 15-20 minutes. You’ll know it’s ready when it’s fragrant and has thickened slightly. Set the reduced cider aside to cool.
Step 2: Prepare the Crust
Crush your digestive cookies or graham crackers into fine crumbs using a food processor or a zip-top bag with a rolling pin. In a mixing bowl, combine the crumbs with melted butter, a pinch of salt, and powdered sugar, mixing well. Press this mixture evenly into the bottom of a greased and lined 9-inch springform pan. Bake at 350°F for 10 minutes, then remove it from the oven to cool.
Step 3: Mix the Filling
In a large mixing bowl, beat the softened cream cheese and brown sugar together until smooth and creamy. Next, add in the sour cream, vanilla extract, ground cinnamon, and cooled reduced apple cider, mixing thoroughly until well combined. You’ll want a silky texture with no lumps. Gradually add eggs one at a time, gently mixing after each addition to avoid incorporating too much air.
Step 4: Add the Flour
Once the egg mixture is smooth, gently fold in the all-purpose flour just until combined. Be careful not to overmix, as this can lead to a dense cheesecake. The filling for your Apple Cider Cheesecake should be velvety and thick, ready for the crust. Ensure everything is well incorporated but still light and airy in texture.
Step 5: Bake the Cheesecake
Pour the filling evenly into your cooled crust, smoothing the top with a spatula. To prevent cracking, place the springform pan in a larger baking dish filled with hot water, creating a water bath. Bake at 325°F for about 90 minutes. The edges should be set, while the center has a slight jiggle when shaken gently.
Step 6: Cool the Cheesecake
Once the baking time is up, turn off the oven and crack the door open slightly. Allow the cheesecake to cool in the oven for 30 minutes, which helps prevent sinking. Afterward, carefully remove it from the water bath and refrigerate for a minimum of 8 hours or overnight for the best flavor and texture before slicing.

Expert Tips for the Best Apple Cider Cheesecake
-
Room Temperature Ingredients: Ensure your cream cheese and eggs are at room temperature before mixing. This helps achieve a smooth, creamy filling for your apple cider cheesecake.
-
Gentle Mixing: Be cautious when adding eggs to the filling; mix slowly to avoid incorporating too much air, which can cause cracks during baking.
-
Water Bath Perfection: Employ the water bath method carefully by tightly wrapping the springform pan. This prevents moisture from leaking in and guarantees a silky texture.
-
Chill Time Matters: Patience is key! Letting your cheesecake chill overnight not only improves the flavor but also ensures a firm and sliceable texture.
-
Mulling Spice Balance: If using optional mulling spices, adjust quantities according to your preference. Too much can overpower the apple flavor instead of enhancing it.
How to Store and Freeze Apple Cider Cheesecake
Refrigerator: Store your cheesecake in an airtight container for up to 3-4 days. This helps it maintain its creamy texture and flavor while safeguarding against any odors.
Freezer: If you wish to enjoy your apple cider cheesecake later, it can be frozen for up to 2 months. Wrap individual slices tightly in plastic wrap and then foil to prevent freezer burn.
Thawing: To defrost, simply transfer the cheesecake to the fridge overnight before serving. This leaves your cheesecake perfectly cool and ready for indulgence.
Reheating: For the best texture, avoid reheating in the microwave. Instead, let it come to room temperature after thawing, ensuring each slice remains luscious and velvety.
What to Serve with Apple Cider Cheesecake
Enhance your dining experience with complementary dishes that will make this dreamy cheesecake shine even brighter.
-
Whipped Cream: A dollop of fresh whipped cream adds a light, airy complement to the rich cheesecake, making each bite feel decadent yet balanced.
-
Sliced Apples: Freshly sliced apples bring a crisp, sweet-tart flavor that perfectly contrasts the creaminess of the cheesecake, echoing its apple cider essence.
-
Caramel Sauce: Drizzled over each slice, caramel sauce adds a luscious sweetness that pairs beautifully with the warm spices, enhancing all the fall flavors.
-
Cinnamon Sugar Pecans: Crunchy pecans tossed in cinnamon sugar provide a delightful crunch and nutty flavor that contrasts the smooth texture of the cheesecake.
Savor the fusion of flavors and textures from these delightful pairings, creating a complete autumn feast that’s sure to impress friends and family alike!
Apple Cider Cheesecake Variations
Feel free to let your creativity shine by customizing this recipe to suit your taste! Here are some delightful variations and substitutions you can try.
-
Flavor Boost: Try adding maple extract to the filling for a deliciously layered flavor profile. This will elevate the autumn essence beautifully!
-
Texture Twist: Substitute Greek yogurt for sour cream if you’re after a thicker, creamier texture that still delivers that tangy goodness.
-
Dairy-Free: For a vegan option, swap cream cheese with vegan cream cheese and use coconut cream in place of sour cream. Your cheesecake will still be rich and decadent!
-
Spiced Up: Add a dash of ginger or cardamom along with the cinnamon for a warm, spicy note that’s perfect for the chilly months.
-
Caramel Drizzle: Drizzle with salted caramel sauce made from reduced apple cider for an extra indulgent touch—it’s like a warm hug in dessert form!
-
Crust Variation: Experiment with a nut-based crust using almonds or walnuts blended with dates for a gluten-free option that’s both hearty and satisfying.
-
Fruity Companion: Pair with a topping of sautéed apples in cinnamon and brown sugar to add a wonderful layer of flavor and texture. It’s an apple celebration!
-
Mini Cheesecakes: Create individual mini cheesecakes in muffin tins using the same recipe. They are perfect for gatherings and add a fun twist to serving!
By mixing and matching these variations, the possibilities are endless. And if you love fruit desserts, don’t forget to check out my Baked Apple Cinnamon Cups or try these delightful Fried Strawberry Cheesecake Sandwiches for even more fruity inspiration!
Make Ahead Options
These Apple Cider Cheesecake preparations are perfect for busy home cooks looking to save time! You can prepare the crust up to 3 days in advance; simply follow the crust preparation steps and store it wrapped in plastic in the refrigerator. Additionally, the filling can be made up to 24 hours ahead—combine the ingredients as directed, and refrigerate after mixing, covering tightly to prevent drying out. To maintain that delicious creaminess, avoid overmixing the eggs when you’re ready to bake. When it’s time to serve, just pour the filling into your pre-prepared crust and bake as instructed. With these make-ahead tips, you’ll enjoy a scrumptious dessert with minimal last-minute effort!
Apple Cider Cheesecake Recipe FAQs
What kind of apple cider should I use?
I recommend using fresh apple cider, particularly Honeycrisp cider for its tartness. Avoid using hard cider since it will alter the flavor and texture of the cheesecake. The freshness of the cider makes a significant difference in enhancing the overall taste.
How long can I store my cheesecake?
You can store your apple cider cheesecake in the refrigerator for 3 to 4 days. Make sure it’s placed in an airtight container to keep it fresh and tasty during that time. It’s a great way to treat yourself throughout the week!
Can I freeze apple cider cheesecake? If so, how?
Absolutely! To freeze your apple cider cheesecake, wait until it’s fully cooled and then wrap it tightly in plastic wrap, followed by a layer of aluminum foil. This method prevents freezer burn and keeps it fresh for up to 2 months. When you’re ready to enjoy it, thaw it in the fridge overnight for the best texture.
What do I do if my cheesecake cracks while baking?
No worries! Cracking can happen to the best of us. To avoid this in the first place, ensure you gently mix the eggs into the filling to minimize air. If cracks appear, you can cover them with whipped cream or a fruity topping when serving, which adds a delightful touch and hides any imperfections.
Is this cheesecake safe for people with allergies?
If you’re concerned about allergies, keep in mind that this apple cider cheesecake contains common allergens like dairy and gluten. You can make it gluten-free by substituting all-purpose flour with almond flour and using gluten-free graham crackers for the crust. Always check the labels on your ingredients to ensure they align with dietary needs!
Can I use a different type of crust?
The base is versatile! While digestive cookies or graham crackers work beautifully, you can experiment with Oreo cookies for a chocolate flavor or even a nut-based crust for a gluten-free option. Mix it up and customize the cheesecake to fit your taste!
Dreamy Apple Cider Cheesecake: Your Fall Favorite Awaits
Ingredients
Equipment
Method
- Step 1: Reduce the Cider. Begin by pouring 3 cups of fresh apple cider into a saucepan. Bring it to a boil over medium-high heat, optionally adding mulling spices for enhanced flavor. Allow the cider to simmer, reducing to about 1/3 cup, which should take around 15-20 minutes. You'll know it’s ready when it's fragrant and has thickened slightly. Set the reduced cider aside to cool.
- Step 2: Prepare the Crust. Crush your digestive cookies or graham crackers into fine crumbs using a food processor or a zip-top bag with a rolling pin. In a mixing bowl, combine the crumbs with melted butter, a pinch of salt, and powdered sugar, mixing well. Press this mixture evenly into the bottom of a greased and lined 9-inch springform pan. Bake at 350°F for 10 minutes, then remove it from the oven to cool.
- Step 3: Mix the Filling. In a large mixing bowl, beat the softened cream cheese and brown sugar together until smooth and creamy. Next, add in the sour cream, vanilla extract, ground cinnamon, and cooled reduced apple cider, mixing thoroughly until well combined. Gradually add eggs one at a time, gently mixing after each addition to avoid incorporating too much air.
- Step 4: Add the Flour. Once the egg mixture is smooth, gently fold in the all-purpose flour just until combined. Be careful not to overmix, as this can lead to a dense cheesecake.
- Step 5: Bake the Cheesecake. Pour the filling evenly into your cooled crust, smoothing the top with a spatula. To prevent cracking, place the springform pan in a larger baking dish filled with hot water, creating a water bath. Bake at 325°F for about 90 minutes. The edges should be set, while the center has a slight jiggle when shaken gently.
- Step 6: Cool the Cheesecake. Once the baking time is up, turn off the oven and crack the door open slightly. Allow the cheesecake to cool in the oven for 30 minutes, which helps prevent sinking. Afterward, carefully remove it from the water bath and refrigerate for a minimum of 8 hours or overnight.
Leave a Reply