
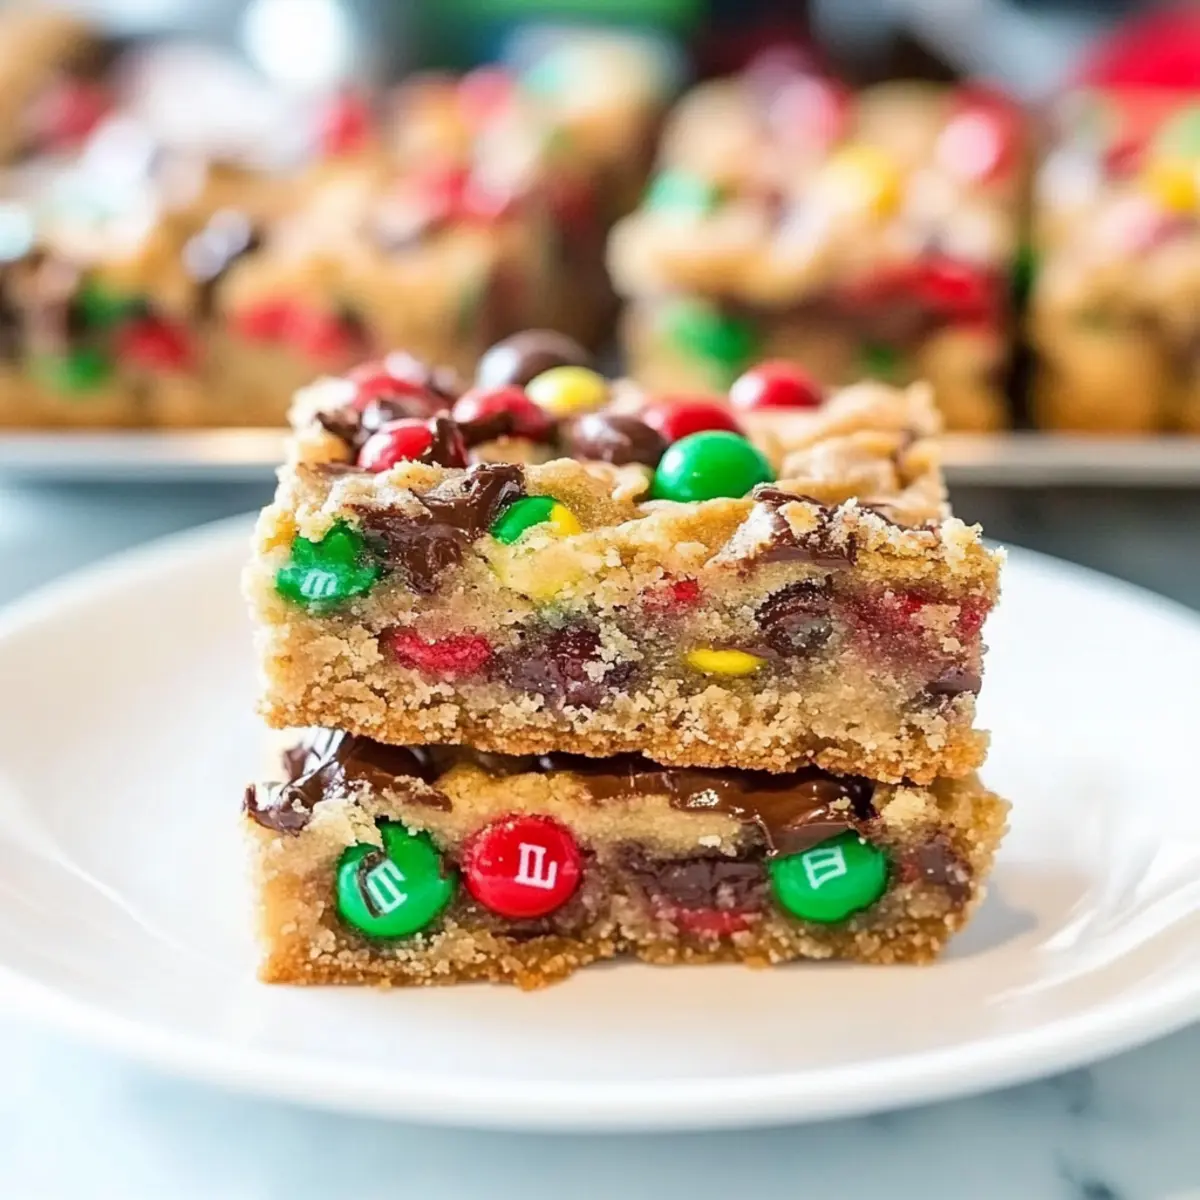
As I glanced at the calendar, I felt the unmistakable tingle of the holiday spirit creeping in. It’s that magical time of year again! Nothing brings joy quite like sharing a plate of festive treats, and these Christmas Magic Cookie Bars are bound to steal the show. With their layers of graham crackers, gooey chocolate, and colorful M&M’s, they’re an absolute crowd-pleaser that’s easy enough for even the tiniest hands to help make. Not only do these bars capture the essence of holiday baking with zero stress, but they also transform everyday ingredients into a delightful dessert that kids and adults alike will adore. Are you ready to create your new holiday tradition? Let’s dive into this joyful recipe together!
Why are Christmas Magic Cookie Bars so delightful?
Easy to Make: This recipe requires minimal effort, making it perfect for busy holiday schedules. Kids can get in on the action, helping out in the kitchen!
Festive Flavors: The combination of chocolate, peanut butter chips, and vibrant M&M’s delivers a rich sweetness that captures the holiday spirit.
Versatile Variations: Feel free to swap ingredients, such as using butterscotch chips instead of peanut butter for a unique twist or tossing in dried cranberries for an extra bite.
No-Bake Elements: With simple layers and no complicated steps, you can whip these up in no time, allowing you to spend more time with family and friends.
Perfect for Gifting: These bars make fantastic homemade gifts that look beautiful and taste amazing, just like my Pumpkin Smores Cookies which are also a hit during holidays.
Crowd-Pleaser: Whether at a holiday gathering or a cozy night in, these bars will leave everyone asking for seconds!
Christmas Magic Cookie Bars Ingredients
For the Base
• Butter – Adds richness and helps bind the crust together; use unsalted for a balanced flavor.
• Graham Cracker Crumbs – Forms the crunchy base; substitute with crushed digestive biscuits for a unique twist.
For the Toppings
• Shredded Coconut – Provides a chewy texture; can be swapped with quick cooking oats if you prefer no coconut.
• Peanut Butter Chips – Offers a sweet, nutty flavor; use chocolate chips or butterscotch chips for variation.
• Semi-Sweet Chocolate Chips – Imparts a rich chocolate taste; dark chocolate chips can add more intensity.
• M&M’s – Adds color and fun; opt for seasonal M&M’s to match the holiday spirit or omit for simplicity.
For Binding
• Sweetened Condensed Milk – Binds the ingredients together and adds sweetness; no substitutes are recommended for this essential ingredient.
Step‑by‑Step Instructions for Christmas Magic Cookie Bars
Step 1: Preheat the Oven
Begin by preheating your oven to 350°F (175°C). This ensures that your Christmas Magic Cookie Bars will bake evenly and achieve that delightful golden texture. While the oven is heating, gather your 13×9 inch baking dish and butter it lightly to prevent sticking, setting the stage for a lovely, gooey treat.
Step 2: Make the Base Layer
In a mixing bowl, melt ½ cup of unsalted butter and then mix in 1 ½ cups of graham cracker crumbs until the mixture resembles wet sand. Press this buttery mixture firmly into the bottom of your prepared baking dish, creating an even layer. This forms the delicious crunchy base that supports all the lovely layers to come.
Step 3: Add the Coconut Layer
Sprinkle 1 cup of shredded coconut evenly over the graham cracker base. Make sure to cover the entire surface for a delightful chewiness in each bite of your Christmas Magic Cookie Bars. The coconut adds not only texture but also a touch of festive sweetness that enhances the overall flavor palette.
Step 4: Layer on the Chocolates
Now it’s time to layer the chocolates! Sprinkle 1 cup of semi-sweet chocolate chips over the coconut, followed by 1 cup of peanut butter chips. These rich, melty layers create that indulgent contrast everyone loves. For a pop of color, finish off this layer with ½ cup of vibrant M&M’s scattered generously over the top.
Step 5: Drizzle with Sweetened Condensed Milk
Evenly drizzle 1 can of sweetened condensed milk over the entire layered creation. This crucial step binds all the ingredients together while adding a luscious sweetness. Make sure to cover as much of the surface as possible, which will help achieve that gooey consistency when baking your Christmas Magic Cookie Bars.
Step 6: Bake and Set
Place your baking dish in the preheated oven and bake for 25-30 minutes. Keep a close eye on the bars; they should be golden brown and set around the edges while still slightly soft in the center. The delightful aromas wafting from the oven will surely get everyone excited for these festive goodies!
Step 7: Cool and Slice
Once baked, remove the dish from the oven and allow the Christmas Magic Cookie Bars to cool completely in the pan. This step is important for achieving clean slices. After cooling for at least 1 hour, use a sharp knife to cut them into squares, ensuring each piece showcases the colorful layers you’ve created.
Expert Tips for Christmas Magic Cookie Bars
• Cool Completely: Allow the bars to cool for at least 1 hour before slicing. This prevents them from crumbling and ensures clean cuts.
• Use Parchment Paper: Line your baking dish with parchment paper for easy removal and cleanup, making your holiday baking experience smooth and fuss-free.
• Layer Wisely: Distribute each layer evenly to maintain structured, beautiful bars. This ensures everyone gets a taste of each delicious component in your Christmas Magic Cookie Bars.
• Store Properly: Keep the bars in an airtight container at room temperature for up to a week or freeze for longer storage to maintain their freshness.
• Flavor Experiment: Don’t hesitate to experiment with flavors! Swap peanut butter chips for butterscotch or white chocolate, or mix in dried fruit for added texture and richness.
How to Store and Freeze Christmas Magic Cookie Bars
Room Temperature: Store your Christmas Magic Cookie Bars in an airtight container at room temperature for up to 1 week to maintain their chewy texture and flavor.
Fridge: If you prefer a firmer texture, refrigerate the bars, where they will last for up to 2 weeks. Be sure to wrap them tightly to prevent drying out.
Freezer: For longer preservation, freeze the bars by wrapping them tightly in plastic wrap and then placing them in a freezer-safe container. They can be frozen for up to 3 months.
Reheating: To enjoy the bars warm, simply microwave a square for 10-15 seconds until just softened, bringing out their gooey goodness once more!
Christmas Magic Cookie Bars Variations
Dive into the delightful world of customization with these Christmas Magic Cookie Bars, and let your imagination soar!
- Nut-Free: Substitute peanut butter chips with sunflower seed butter chips for a tasty alternative that keeps these bars nut-free.
- Dairy-Free: Use coconut oil instead of butter and almond milk sweetened condensed milk for a delicious dairy-free option.
For a twist on textures, consider adding a handful of crushed nuts like walnuts or pecans, providing an extra crunch that beautifully contrasts the gooey layers.
- Fruit-Filled: Toss in dried cranberries or cherries for a festive burst of flavor that complements the chocolatey goodness.
- Spicy Kick: Add a pinch of cinnamon or cayenne pepper to the graham cracker crust for a surprising spiciness that warms the soul, perfect for holiday gatherings.
Want to keep the holiday spirit alive? Try incorporating seasonal spices like nutmeg or cardamom, which pair wonderfully with the rich, sweet flavors of your bars.
- Sugar-Free: Use a sugar substitute in the sweetened condensed milk if you prefer to enjoy these sweet delights with less sugar.
- Chocolate Lovers: Swap semi-sweet chocolate chips for dark chocolate for a more intense chocolate experience, or mix both for a rich and layered flavor.
As you explore these variations, don’t forget to check out my Fudgy Brownie Cookies for another sweet treat, or join in the fun with my Oreo Cheesecake Cookie recipe that will charm your festive gatherings!
What to Serve with Christmas Magic Cookie Bars
Indulging in festive treats is even more delightful when paired with complementary sides and sips that elevate the holiday spirit.
-
Creamy Hot Cocoa: Warm, rich, and decadent, sipping hot cocoa alongside these bars turns dessert into a cozy experience. Add a swirl of whipped cream for extra luxury!
-
Sparkling Cider: The bubbly nature of sparkling cider adds a refreshing contrast to the sweetness of the bars. A toast with this drink can bring cheer to any gathering!
-
Vanilla Ice Cream: A scoop of creamy vanilla ice cream creates a delightful juxtaposition with the chewy texture of the bars. The melty goodness on top is simply irresistible.
-
Fresh Fruit Salad: A lively mix of seasonal fruits adds a refreshing element that balances the indulgence. The natural sweetness of fruits can lighten the overall palate.
-
Peppermint Bark: This crispy, chocolatey treat can provide a festive crunch that enhances the flavors of your cookie bars, making for a delightful holiday dessert spread.
-
Spiced Nuts: The warmth of cinnamon and nutmeg in spiced nuts complements the flavors of the cookie bars perfectly. A crunchy snack helps to contrast the gooeyness of the bars.
-
Gingerbread Cookies: Keep the holiday spirit going with gingerbread cookies that offer a spiced kick, pairing beautifully with the sweet layers of chocolate and peanut butter in your bars.
-
Coffee or Espresso: A cup of bold coffee or a shot of espresso can cut through the richness, enhancing the chocolate flavors of your Christmas Magic Cookie Bars and providing a lovely, cozy finish.
Make Ahead Options
These Christmas Magic Cookie Bars are fantastic for meal prep and can save you valuable time during the busy holiday season! You can make the base layer with the melted butter and graham cracker crumbs up to 24 hours in advance, simply cover it tightly with plastic wrap. Additionally, feel free to layer the shredded coconut and chocolate components ahead of time; just refrigerate the assembled pan until you’re ready to bake, ensuring the layers remain fresh and intact. When you’re prepared to serve these delightful bars, drizzle the sweetened condensed milk on top and bake them as directed for that warm, gooey experience everyone loves. With these make-ahead tips, your holiday dessert will be just as delicious while allowing you to spend more time enjoying the festivities!
Christmas Magic Cookie Bars Recipe FAQs
What type of graham crackers should I use?
I recommend using classic graham crackers for their sweet crunch, but feel free to substitute with crushed digestive biscuits if you’re in the mood for something different. This can add a unique flavor twist to your Christmas Magic Cookie Bars!
How should I store my Christmas Magic Cookie Bars?
Store your bars in an airtight container at room temperature for up to 1 week. If you prefer a firmer texture, feel free to refrigerate them for up to 2 weeks. Just make sure to wrap them securely to keep the moisture in!
Can I freeze Christmas Magic Cookie Bars?
Absolutely! To freeze, wrap each bar tightly in plastic wrap and then place them in a freezer-safe container. They can be stored in the freezer for up to 3 months. When you’re ready to enjoy, simply let them thaw at room temperature or warm them briefly in the microwave.
What should I do if my bars are too sticky?
If your bars are sticky, likely they haven’t been allowed to cool adequately before slicing. Make sure to cool them for at least 1 hour. If they still feel too soft, consider refrigerating them for 30 minutes to firm them up before cutting.
Are there any allergy considerations I should be aware of?
Definitely! The Christmas Magic Cookie Bars contain common allergens like gluten from graham crackers and nuts if using peanut butter chips. For a nut-free option, you can simply omit the peanut butter chips and replace them with butterscotch or chocolate chips, ensuring everyone can enjoy a tasty treat!
Irresistible Christmas Magic Cookie Bars for Holiday Cheer
Ingredients
Equipment
Method
- Preheat your oven to 350°F (175°C) and lightly butter your 13×9 inch baking dish.
- Melt ½ cup of unsalted butter and mix in 1 ½ cups of graham cracker crumbs. Press into the bottom of the baking dish.
- Sprinkle 1 cup of shredded coconut evenly over the graham cracker base.
- Layer 1 cup of semi-sweet chocolate chips, followed by 1 cup of peanut butter chips and ½ cup of M&M’s.
- Drizzle 1 can of sweetened condensed milk evenly over the layers.
- Bake for 25-30 minutes until golden brown around the edges.
- Cool completely in the pan for at least 1 hour before slicing into squares.
Leave a Reply