
As I stepped into my kitchen, the scent of sugar and cream cheese danced in the air, instantly transporting me to joyful Christmas mornings. This year, I’m excited to share a delightful twist on the traditional cookie with my Christmas Pink Velvet Cookies. These beauties, infused with a unique cake batter flavor and topped with velvety cream cheese frosting, are not only a feast for the eyes but also irresistibly soft and satisfying. Perfect for holiday festivities, they’re a quick treat to whip up that guarantees smiles all around, whether you’re serving them at a festive gathering or gifting them in decorative boxes. Ready to add a pop of color and flavor to your holiday baking? Let’s dive into this cheerful recipe that will surely become a new favorite!

Why Are Christmas Pink Velvet Cookies Special?
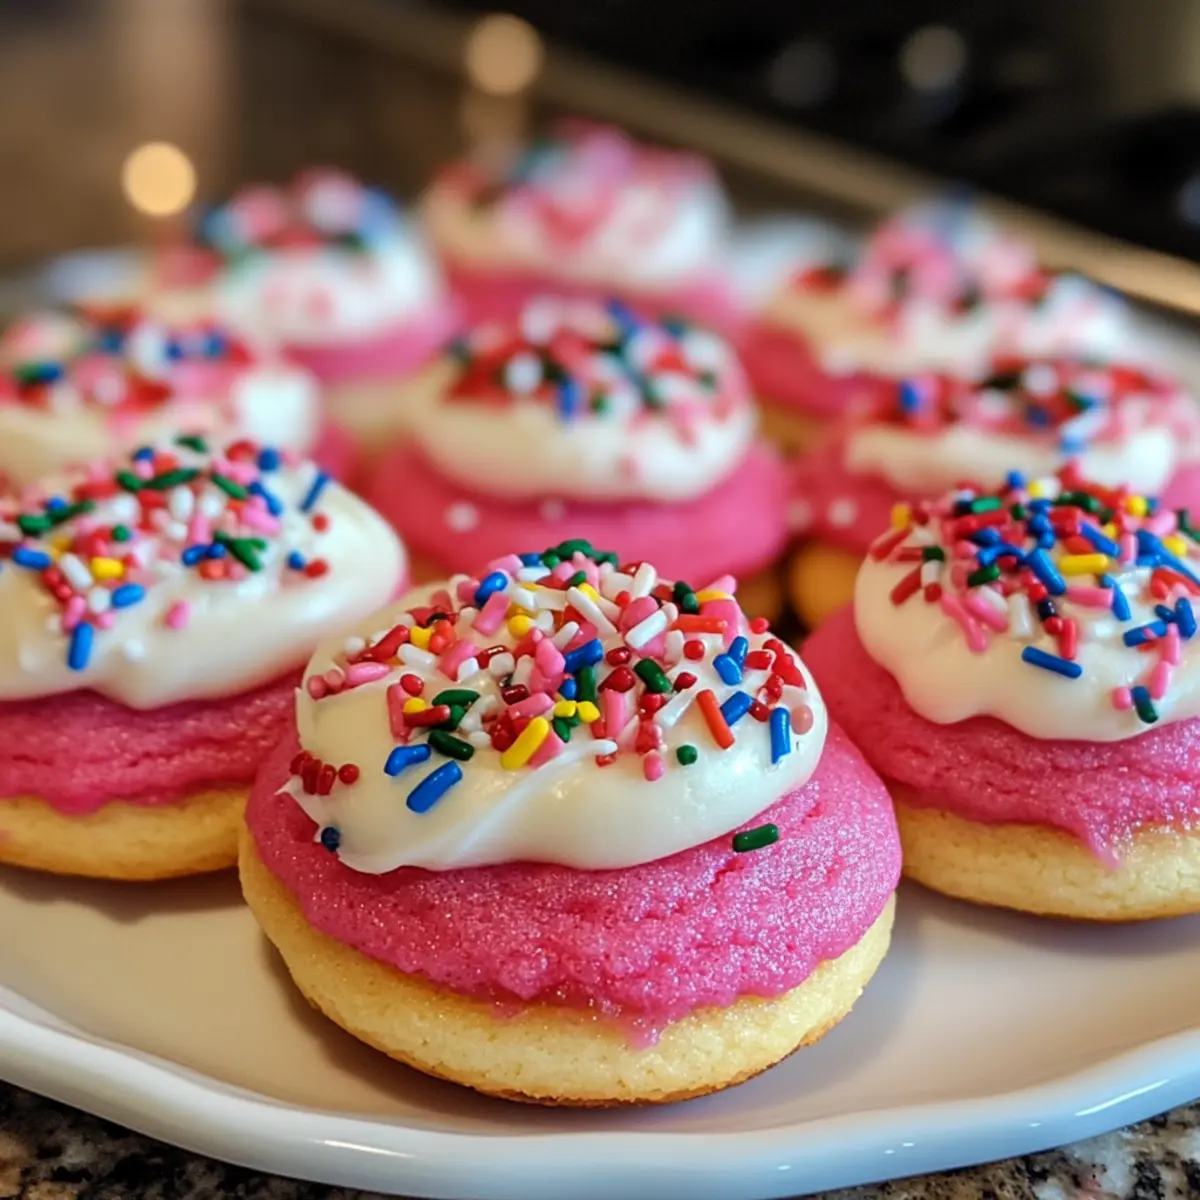
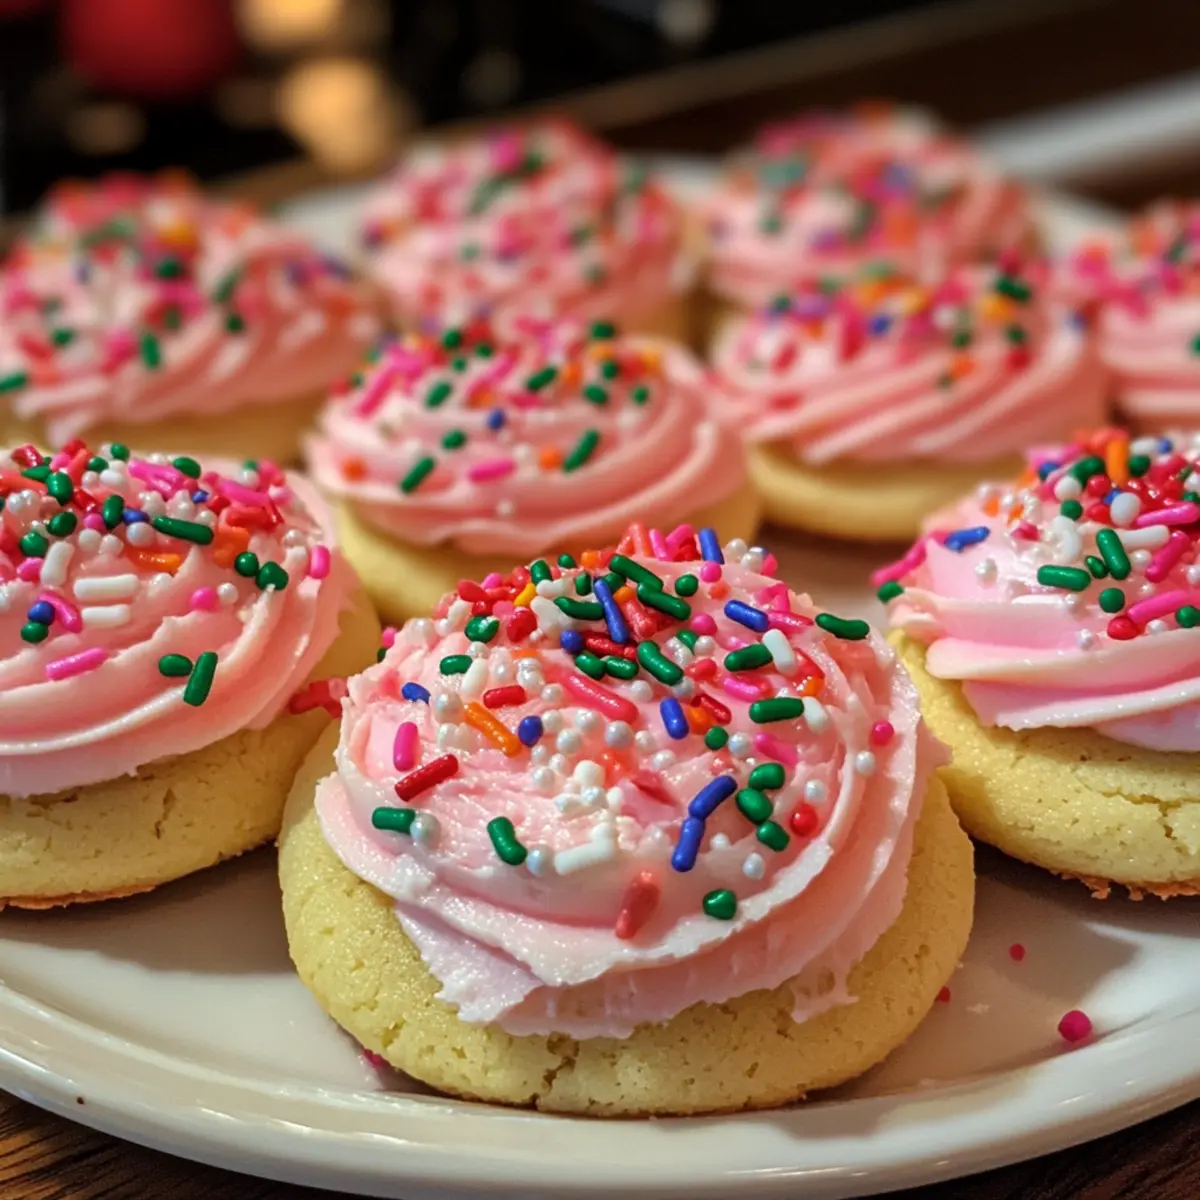
Festive Appeal: These cookies boast a stunning pink color, making them a visual delight that instantly brightens any holiday gathering.
Irresistible Flavor: Infused with delicious cake batter flavor and topped with rich cream cheese frosting, every bite is a heavenly experience.
Quick and Easy: Perfect for those busy holiday schedules, they come together in no time—ideal for both novice and experienced bakers alike!
Versatile Treat: Whether you personalize them with festive sprinkles or enjoy them plain, they adapt to your holiday style. For more delightful cookie ideas, try my Fudgy Brownie Cookies or Cookies Cream Dessert.
Crowd-Pleasing Snack: These cookies are guaranteed to be a hit at any festive gathering, leaving everyone asking for seconds!
Christmas Pink Velvet Cookie Ingredients
For the Cookies
- Salted Butter – Provides richness and moisture; you can use unsalted butter but add a pinch of salt.
- Granulated Sugar – Adds sweetness and enhances browning; no recommended substitutions for optimal flavor.
- Eggs – Acts as a binding agent for structure; consider flax eggs for a vegan alternative.
- Cake Batter Flavoring – Elevates the unique cake batter flavor; omit for a traditional flavor or swap with vanilla extract.
- Pink Food Coloring – Delivers the signature pink hue; use natural beet juice for a dye-free option.
- All-Purpose Flour – The main structural component; opt for a gluten-free flour blend if needed.
- Baking Powder – Essential for leavening the cookies; ensure it’s fresh for the best results.
For the Frosting
- Butter (for Frosting) – Adds creaminess; replace with vegan butter for a dairy-free version.
- Cream Cheese – Provides tanginess that pairs beautifully with sweetness; non-dairy cream cheese works for a vegan option.
- Vanilla Extract – Adds depth to the frosting; no substitutions needed unless allergies arise.
- Powdered Sugar – Sweetens and thickens frosting; direct substitutes aren’t recommended for texture.
- Milk or Heavy Cream – Used to adjust frosting consistency; plant-based milk is a suitable dairy-free alternative.
For Decoration
- Christmas Sprinkles – Provides festive flair; feel free to use other decorative toppings or omit for a simpler look.
These Christmas Pink Velvet Cookies are not only a delightful treat to enjoy but guaranteed to be a captivating addition to your holiday spread!
Step‑by‑Step Instructions for Christmas Pink Velvet Cookies
Step 1: Preheat Your Oven
Begin by preheating your oven to 350°F (180°C). This will ensure that your Christmas Pink Velvet Cookies bake evenly. While the oven is heating up, gather your ingredients and equipment, including mixing bowls, a whisk, a cookie sheet, and parchment paper.
Step 2: Cream the Butter and Sugar
In a large mixing bowl, combine the softened salted butter and granulated sugar. Use a hand mixer or whisk to cream them together until the mixture is light and fluffy, about 2 minutes. You should see the mixture turning a pale yellow and becoming airy, which provides a great base for your cookies.
Step 3: Incorporate the Wet Ingredients
Next, beat in the eggs, cake batter flavoring, and pink food coloring until fully combined. The batter should take on a lovely pink hue, reminiscent of festive cheer. Make sure all the ingredients are well blended for the best flavor in your Christmas Pink Velvet Cookies.
Step 4: Mix in Dry Ingredients
Gradually add the all-purpose flour and baking powder to the wet mixture. Using a spatula or wooden spoon, gently mix until a soft dough forms. Be cautious not to overmix; the dough should be slightly sticky but fully combined, indicating you’re ready for the next step.
Step 5: Shape the Cookies
Divide the dough into portions of roughly 3 tablespoons each. Roll each portion into balls and place them on a parchment-lined cookie sheet. Flatten each ball slightly with your hands or the bottom of a glass. This will ensure they spread out nicely while baking, creating that irresistible soft texture.
Step 6: Bake the Cookies
Place your cookie sheet in the preheated oven and bake the Christmas Pink Velvet Cookies for 9-11 minutes. Watch for the cookies to puff up and the centers to lose their glossy look; this indicates they are perfectly baked. Remove them from the oven and let them cool on the sheet for a few minutes.
Step 7: Prepare the Cream Cheese Frosting
While the cookies cool, whip together the softened butter, cream cheese, and vanilla extract in a clean bowl until the mixture is smooth and creamy. This will create a luscious frosting that will beautifully complement your Christmas Pink Velvet Cookies.
Step 8: Add the Powdered Sugar
Gradually sift in the powdered sugar while mixing. Adjust the consistency with a splash of milk if necessary, aiming for a spreadable yet thick frosting. Make sure the frosting is smooth and fluffy, ideal for piping onto your cookies.
Step 9: Frost the Cookies
Once the cookies are cool, use a piping bag to frost each cookie, starting from the center and spiraling outward to create a beautiful design. The frosting should be thick enough to hold its shape while being decorative for the Christmas Pink Velvet Cookies.
Step 10: Decorate with Sprinkles
Finally, top each frosted cookie with festive Christmas sprinkles for an extra charming touch. These sprinkles not only enhance the visual appeal but also add a fun crunch, making your cookies a delightful hit at any holiday gathering!
Make Ahead Options
These Christmas Pink Velvet Cookies are perfect for busy home cooks eager to get a head start on their holiday festivities! You can prepare the dough up to 24 hours in advance by mixing it and refrigerating, which allows the flavors to develop beautifully. Alternatively, you can bake the cookies and store them in an airtight container at room temperature for up to 3 days. For longer storage, freeze the baked cookies for up to three months. When you’re ready to serve, simply frost them with the cream cheese frosting and top with festive sprinkles just before enjoying. This ensures they stay soft and delightful, making holiday gatherings a breeze!
Expert Tips for Christmas Pink Velvet Cookies
-
Butter Temperature: Ensure the butter is softened to room temperature for a creamy texture in your cookies. Cold butter can cause dense, uneven cookies.
-
Dough Consistency: Avoid overmixing after adding the flour; this can lead to tough cookies. Mix just until the dough comes together for that perfect soft bite.
-
Baking Time: Keep an eye on the baking time. Cookies should puff up, and the centers should appear non-glossy for ideal texture.
-
Frosting Freshness: For the best frosting, frost cookies when they are warm; it helps the frosting adhere better.
-
Storage Care: Flash freeze decorated cookies for 30 minutes before storing. This prevents smudging of the frosting and maintains their festive look.
These tips will help you create delightful Christmas Pink Velvet Cookies that everyone will love!
Christmas Pink Velvet Cookies Variations
Feel free to get creative and customize your Christmas Pink Velvet Cookies to suit your holiday spirit!
-
Dairy-Free: Use coconut or almond milk in the frosting and vegan cream cheese for a delicious dairy-free treat. These swaps will still yield that classic creamy texture without sacrificing flavor.
-
Gluten-Free: Substitute all-purpose flour with a 1:1 gluten-free flour blend. This way, everyone can enjoy these festive cookies without worrying about gluten.
-
Flavor Boost: Add a splash of almond extract along with the vanilla extract for a delightful twist. This will elevate the flavor profile, making each bite uniquely delicious.
-
Chocolate Lovers: Stir in some mini chocolate chips into the cookie dough for a rich chocolatey burst with every bite. The chocolate complements the sweet cream cheese frosting beautifully.
-
Adjusting Color: Change the food coloring to match your festive theme! Consider using blue or green for different holidays or events. It’s a fun way to personalize your treats.
-
Seasonal Spices: Incorporate a pinch of cinnamon or nutmeg into the dough for a warm, comforting taste reminiscent of holiday spices. This twist adds a cozy aroma and flavor to your cookies.
-
Decorative Toppings: Don’t be afraid to mix it up with your sprinkle selections! Use crushed candy canes for a minty crunch or drizzle some melted chocolate over the frosting.
-
Nutty Additions: Add chopped nuts like pecans or walnuts for extra texture and a delightful crunch. This addition can also enhance the overall flavor profile, making them even more delicious!
With these variations, you’re set to create a batch of Christmas Pink Velvet Cookies that are not only festive but also uniquely yours. Consider pairing them with a refreshing cup of Whipped Pink Lemonade for a delightful holiday experience everyone will love!
How to Store and Freeze Christmas Pink Velvet Cookies
Room Temperature: Keep unfrosted cookies in an airtight container for up to 3 days to maintain freshness and texture.
Fridge: Frosted cookies can be stored in the refrigerator for up to one week. Make sure to place them in an airtight container to avoid drying out.
Freezer: For longer storage, freeze decorated cookies in an airtight container for up to three months. Flash freeze them first for 30 minutes to prevent frosting from smearing.
Reheating: To enjoy freshly softened cookies, microwave them briefly for about 10 seconds before serving and enjoy the delightful taste of your Christmas Pink Velvet Cookies!
What to Serve with Christmas Pink Velvet Cookies
As you indulge in these festive treats, imagine the joyful atmosphere they can create, sparking laughter and cheer at your holiday gatherings.
-
Rich Hot Chocolate: The creamy sweetness of hot chocolate elevates the sugary notes of the cookies while offering a comforting warmth. It’s the perfect drink companion to evoke holiday nostalgia.
-
Festive Fruit Salad: A colorful fruit salad with berries and citrus balances the sweetness of the cookies, creating a refreshing contrast that brightens your palate.
-
Peppermint Bark: This holiday favorite adds a delightful crunch and minty twist that pairs beautifully with the soft texture of the cookies, offering a fun flavor adventure.
-
Christmas Punch: A sparkling cranberry or ginger ale punch provides a festive fizz that complements the rich cream cheese frosting perfectly. It’s an inviting and cheerful addition to any holiday setting.
-
Holiday Cookie Platter: Serve alongside other seasonal cookies like gingerbread or sugar cookies to create a stunning dessert spread that delights both the eyes and taste buds.
-
Chocolate Eggnog: The creamy, chocolatey richness of eggnog brings a rich, festive flair, making every bite of cookie feel like a cozy hug during the holidays.
-
Spiced Tea: A warm spiced tea can deepen the flavor experience, balancing the sweetness of the cookies with comforting aromatic spices, making it a lovely pairing.
-
Cinnamon Rolls: For a special twist, serve the cookies with mini cinnamon rolls. Their complementary cinnamon flavors create a delightful holiday breakfast or brunch spread.
Christmas Pink Velvet Cookies Recipe FAQs
How do I select ripe ingredients for my cookies?
Absolutely! When choosing ingredients, ensure your butter is soft but not melted; this is crucial for a creamy texture. Eggs should be fresh and at room temperature for better incorporation into the dough. For the pink food coloring, choose a high-quality product for vibrant color, or you can opt for natural beet juice for a healthier option.
What is the best way to store leftover cookies?
Very! Unfrosted cookies can be kept in an airtight container at room temperature for up to 3 days. If you have frosted cookies, store them in the refrigerator for up to one week, ensuring they’re in an airtight container to maintain their freshness and avoid drying out.
Can I freeze Christmas Pink Velvet Cookies?
Absolutely! To freeze your cookies, first, flash freeze them by placing them on a baking sheet for about 30 minutes. This prevents the frosting from smearing. Once frozen, transfer them into an airtight container, layering them with parchment paper. They can be kept in the freezer for up to three months. When ready to enjoy, thaw them in the fridge overnight before serving.
What if my cookies turn out tough?
Oh no! If your cookies are tough, it might be due to overmixing the dough after adding the flour. Remember, mix just until combined to avoid developing gluten. Also, check that your butter is properly softened; cold butter can lead to dense cookies.
Are these cookies safe for pets or those with allergies?
Good question! While the Christmas Pink Velvet Cookies are delicious for humans, they are not suitable for pets due to ingredients like butter and sugar. If there’s a concern about allergies, be mindful of substituting eggs with flax eggs for a vegan option or using gluten-free flour for those with gluten sensitivities. It’s always wise to check labels for potential allergens when using commercial products!
Can I customize the frosting for dietary needs?
Yes, you can! For a dairy-free frosting, simply use vegan butter and dairy-free cream cheese in place of the traditional ingredients. Adjust the milk with a plant-based alternative to achieve your desired consistency. Feel free to make it your own while enjoying the Christmas Pink Velvet Cookies!

Christmas Pink Velvet Cookies to Brighten Your Holiday Treats
Ingredients
Equipment
Method
- Preheat your oven to 350°F (180°C).
- Cream together the softened butter and granulated sugar until light and fluffy, about 2 minutes.
- Beat in the eggs, cake batter flavoring, and pink food coloring until fully combined.
- Gradually add flour and baking powder, mixing gently until a soft dough forms.
- Shape dough into balls and flatten slightly on a parchment-lined cookie sheet.
- Bake for 9-11 minutes until cookies puff and centers lose glossy look. Cool for a few minutes.
- Prepare frosting by whipping together butter, cream cheese, and vanilla until smooth.
- Sift in powdered sugar while mixing and adjust consistency with milk, aiming for a spreadable frosting.
- Frost cooled cookies using a piping bag, starting from the center and spiraling outward.
- Decorate with Christmas sprinkles for festive flair.
Leave a Reply