
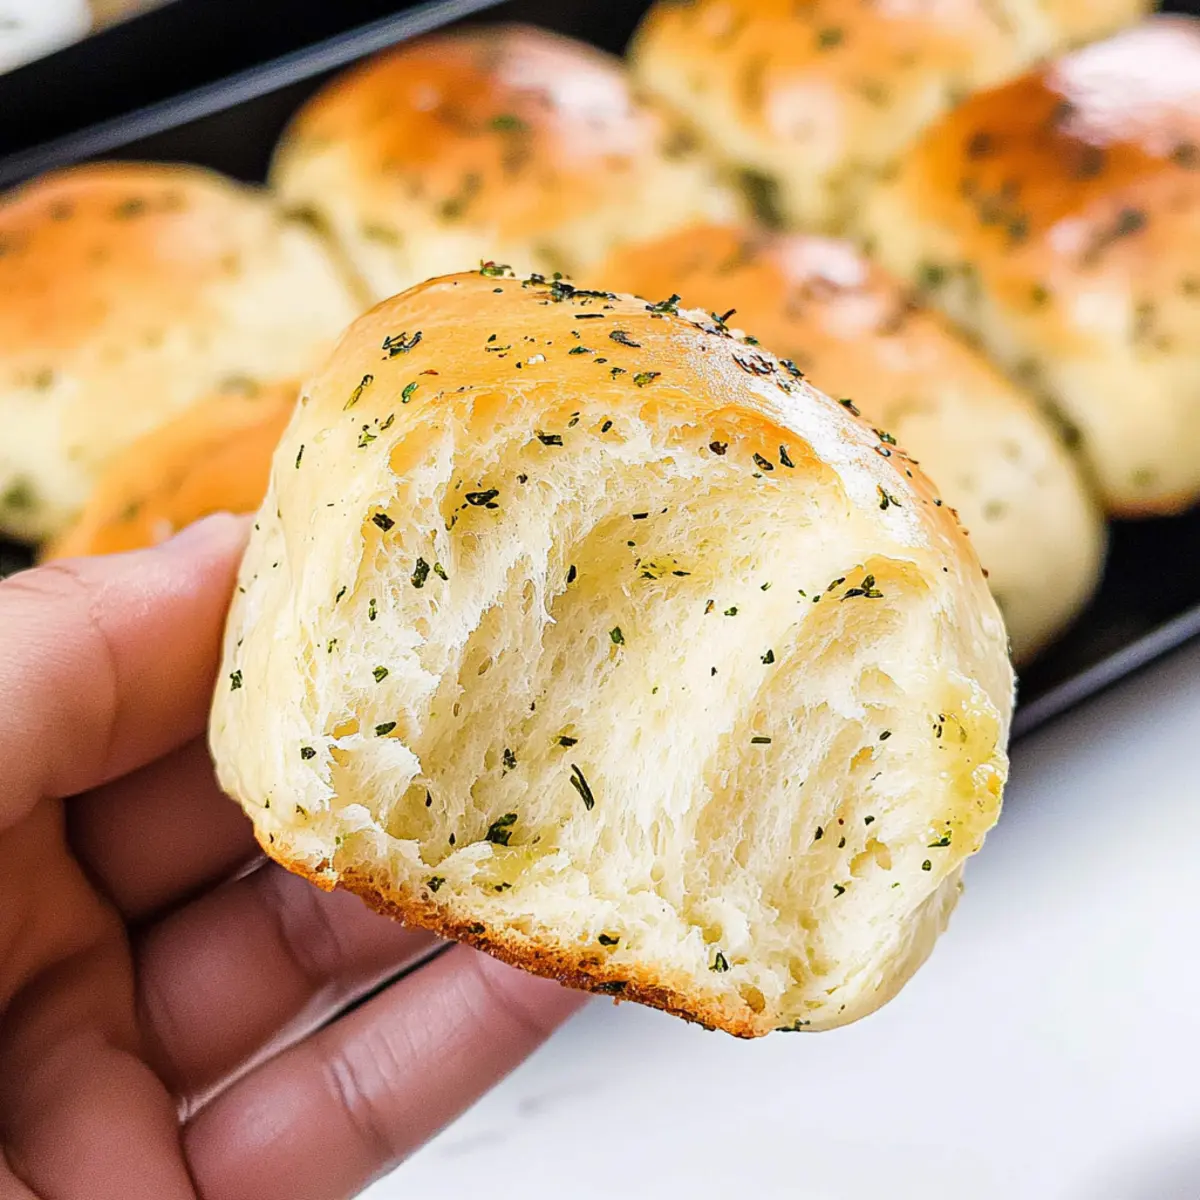
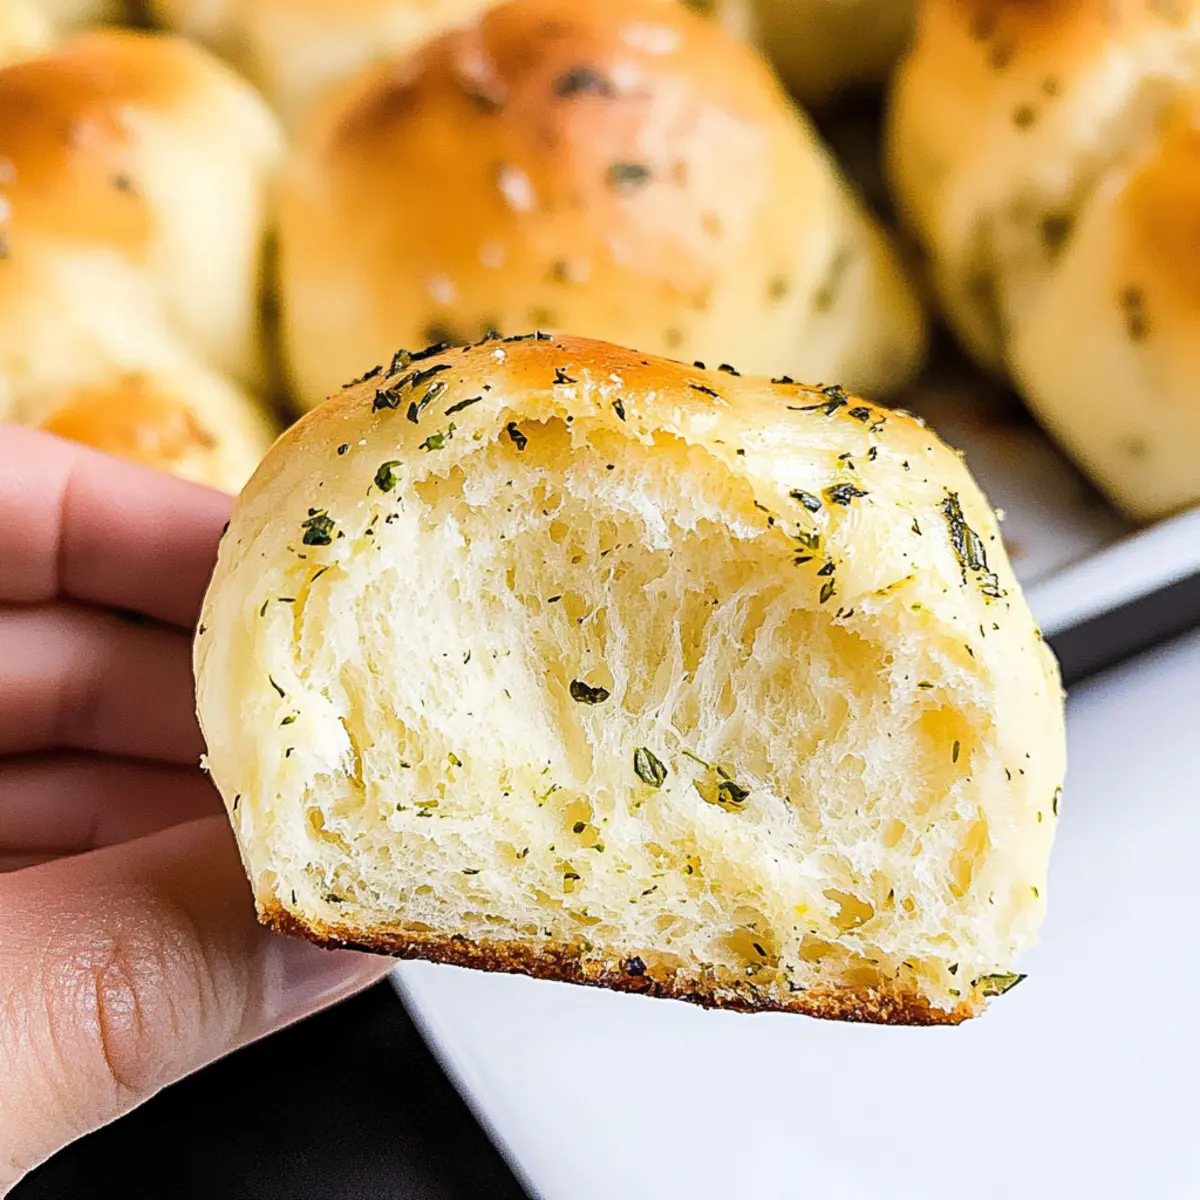
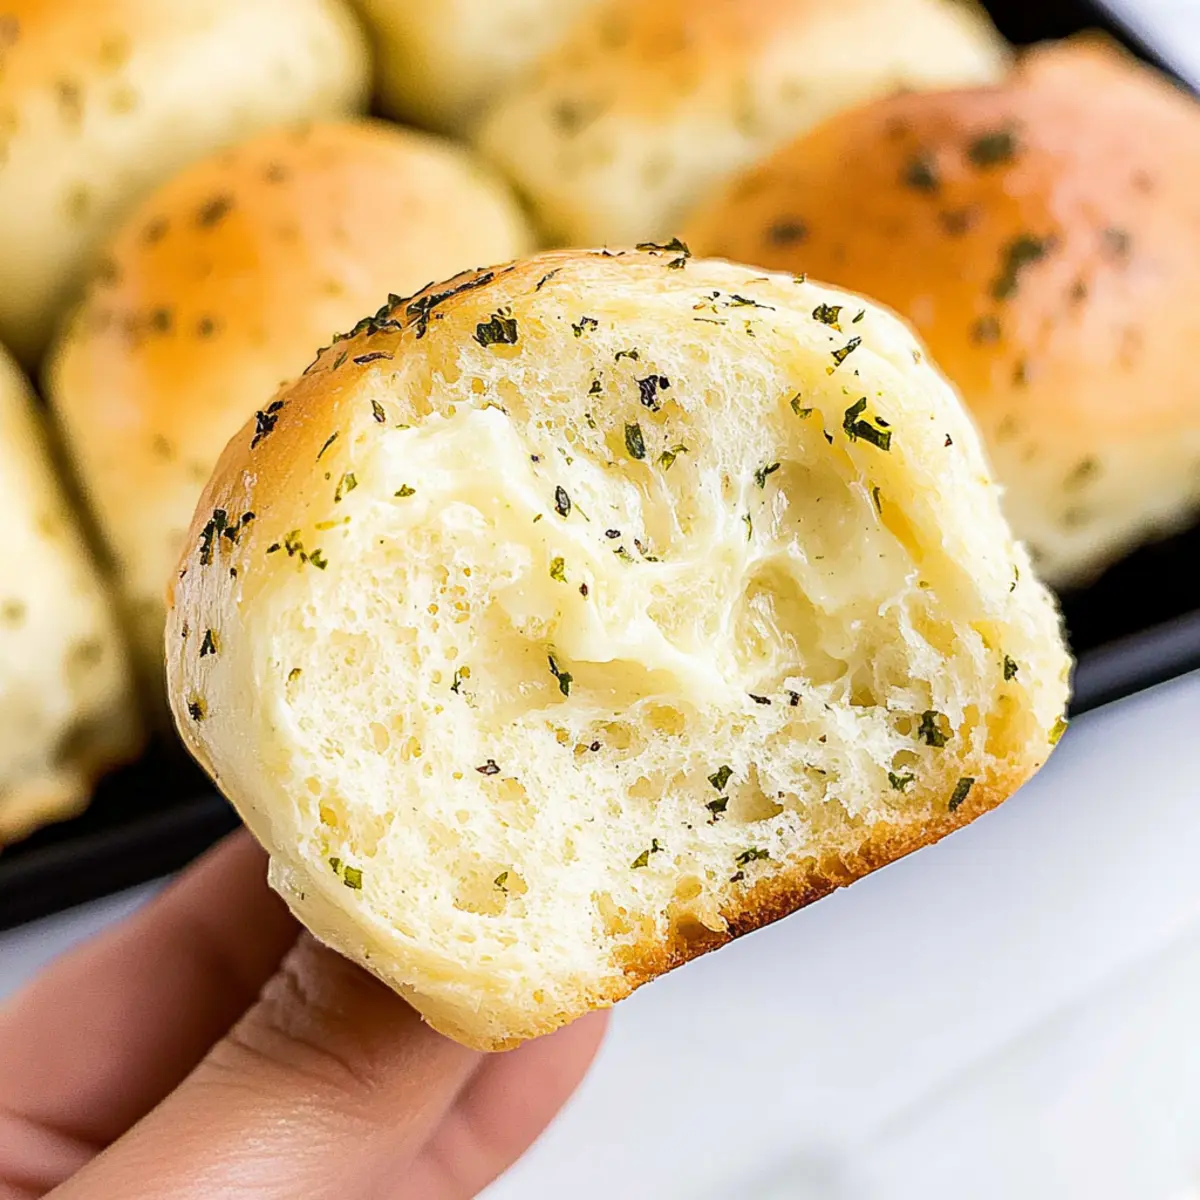
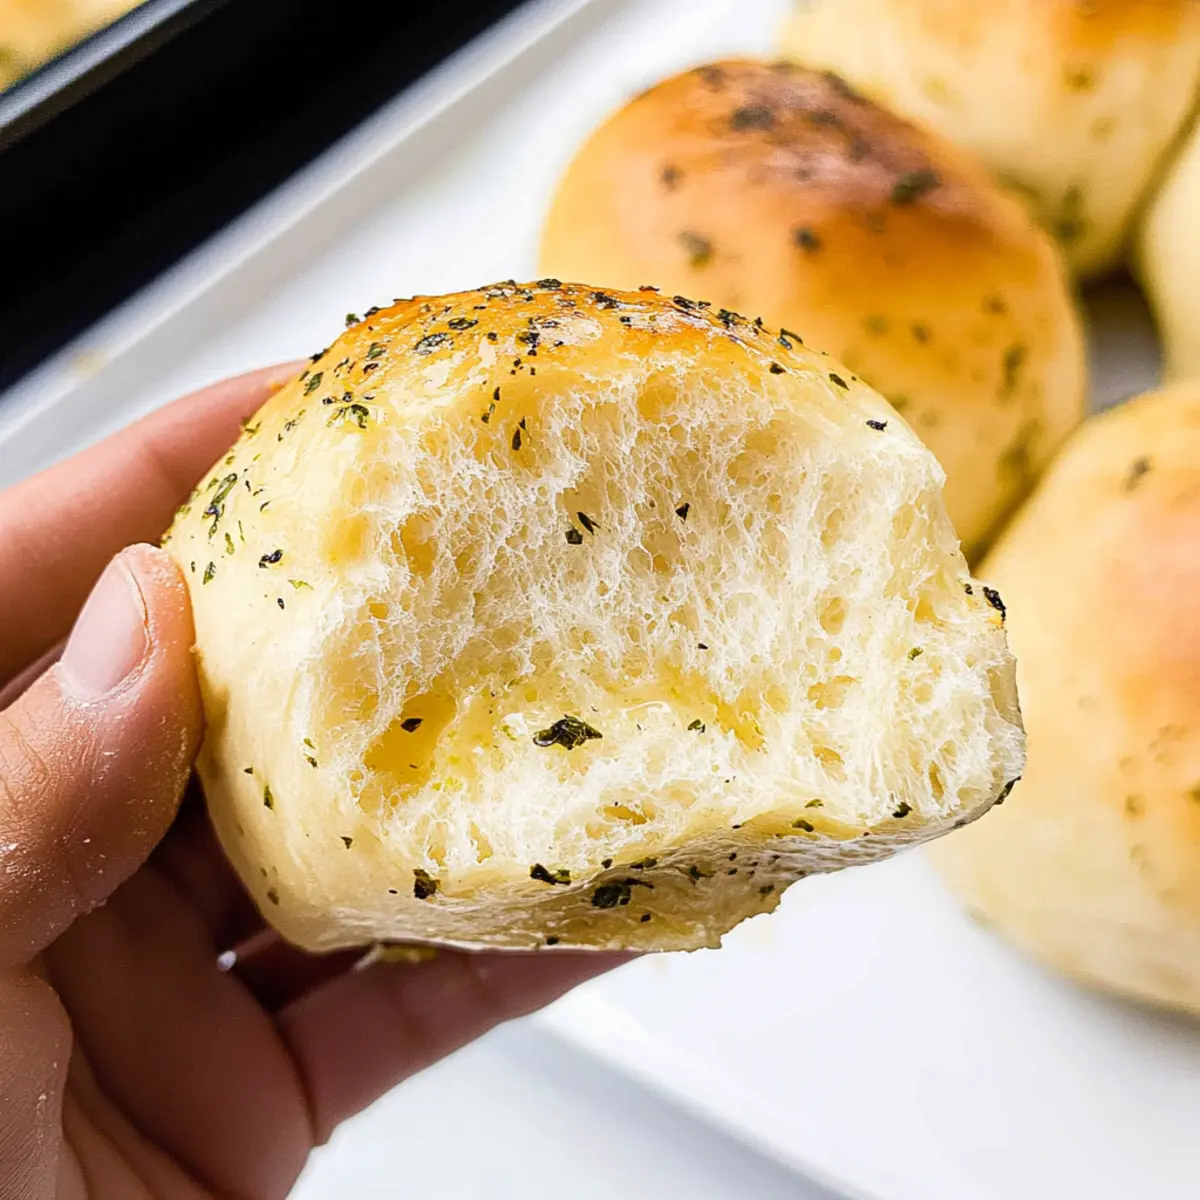
The aroma of freshly baked bread has a way of pulling us in, doesn’t it? There’s something undeniably heartwarming about gathering around the table and sharing homemade food. With these Fluffy Garlic Herb Dinner Rolls, you can turn any ordinary meal into a special occasion. As you bite into the soft, pillowy texture, you’ll also experience a delightful blend of savory garlic and fresh herbs that make these rolls a must-have for your holiday table. Not only do they elevate everyday dinners, but they are also incredibly simple to make, even for those just starting their baking journey. And the best part? They freeze beautifully, so you can prepare them ahead of time! Ready to transform your meals with a touch of homemade goodness? Let’s dive into this delicious recipe!
Why not elevate your bread game?
Homemade Comfort: There’s nothing quite like the warmth of homemade bread wafting through your kitchen. Soft and Fluffy: These dinner rolls are light as air with a melt-in-your-mouth texture. Savory Delight: Infused with aromatic garlic and fresh herbs, they complement any dish beautifully, whether it’s a hearty stew or your holiday feast. Easy to Make: With straightforward instructions, even novice bakers can impress. Versatile Pairing: They’re perfect for dipping, sopping, or simply enjoying on their own alongside a dish like Sticky Garlic Chicken. Plus, you can make them ahead of time and store them for later, ensuring a burst of homemade goodness whenever you need it!
Garlic Dinner Roll Ingredients
For the Dough
- Whole Milk – Activates yeast and adds moisture; remember to warm it to 110-115°F.
- Active Dry Yeast – Essential for rising; ensure it’s fresh for the best results.
- Granulated Sugar – Fuels yeast activation; use 2 tablespoons plus 1 teaspoon for perfect proofing.
- Large Eggs – Adds richness and helps bind the dough; lightly beat before incorporating.
- Unsalted Butter – Provides moisture and flavor; melt and cool it to blend easily.
- Garlic Powder – Infuses a savory base; fresh garlic can be used for a stronger flavor.
- Salt – Enhances overall flavor and controls yeast activity; don’t skip this step.
- Bread Flour – Offers the structure necessary for fluffy rolls; all-purpose flour will work but may yield a different texture.
For the Herbs
- Fresh Rosemary & Parsley – Add robust aroma and flavor; ensure parsley is well-drained before adding.
- Dried Oregano – Introduces additional herbal notes; can be swapped with fresh herbs according to your preference.
For the Garlic Herb Butter
- Garlic Herb Butter – A delicious mixture for brushing on top of the rolls before and after baking, intensifying the garlic dinner roll experience.
Step‑by‑Step Instructions for Garlic Dinner Rolls
Step 1: Activate Yeast
In a medium bowl, combine your warmed whole milk (110-115°F), granulated sugar, and active dry yeast. Stir gently and let it sit for about 10-15 minutes until the mixture becomes frothy. This step is crucial for ensuring your garlic dinner rolls rise beautifully.
Step 2: Make Dough
In a stand mixer, add the frothy yeast mixture along with the remaining sugar, lightly beaten eggs, melted unsalted butter, garlic powder, and salt. Use the dough hook to gradually mix in bread flour, about 3-4 cups, until the dough pulls away from the sides and forms a soft ball.
Step 3: Knead Dough
Knead the dough either in the stand mixer for about 3 minutes or by hand for 8-10 minutes until it’s smooth and slightly sticky. As you knead, incorporate the fresh rosemary, parsley, and dried oregano to infuse the dough with flavorful herbs.
Step 4: First Rise
Lightly oil a bowl and place the kneaded dough inside, covering it with plastic wrap. Allow it to rise in a warm, draft-free area for approximately 1 hour or until the dough has doubled in size. This step is essential for achieving those fluffy garlic dinner rolls.
Step 5: Shape Rolls
Once risen, punch down the dough to release any air bubbles, then divide it into 12 equal pieces. Shape each piece into a ball and place them in a greased 9×13-inch pan. Arrange the rolls close together for that delightful soft texture once baked.
Step 6: Second Rise
Cover the shaped rolls with a clean kitchen towel and let them rise for another 1 to 1.5 hours until doubled in size. This second rise is crucial for developing the lightness and fluffiness expected from garlic dinner rolls.
Step 7: Preheat & Bake
Preheat your oven to 350°F. While preheating, brush the tops of the rolls generously with garlic herb butter. Bake the rolls in the oven for 18-20 minutes or until they are golden brown and sound hollow when tapped.
Step 8: Cool & Serve
Remove the garlic dinner rolls from the oven and brush them with a bit more melted garlic herb butter for added flavor. Allow them to cool slightly in the pan before serving. These rolls are perfect for sharing as a delightful addition to any meal.
Garlic Dinner Rolls: Delicious Customizations
Feel free to get creative and make these garlic dinner rolls your own with these delightful variations!
-
Herb Swap: Try using fresh thyme or basil instead of rosemary and parsley for a unique flavor twist. Each herb lends its own aromatic personality, enhancing the rolls beautifully.
-
Cheesy Touch: Incorporate shredded cheese into the dough or smear the tops with garlic cheese butter before baking. The ooey-gooey cheesy goodness adds a creamy texture that takes these rolls to a whole new level of deliciousness.
-
Gluten-Free: Substitute gluten-free all-purpose flour for traditional bread flour to accommodate gluten sensitivities. Just ensure you add a binding agent like xanthan gum to maintain structure.
-
Whole Wheat: For a heartier option, swap out half of the bread flour for whole wheat flour. This will provide a nutty flavor and more fiber while still offering that fluffy texture!
-
Spicy Kick: Add a pinch of red pepper flakes to the garlic-herb butter for a mild heat. This zesty addition can bring an unexpected zing that pairs well with rich dishes, such as a comforting stew.
-
Garlic Lovers: Replace garlic powder with fresh minced garlic for an intensified savory flavor. Not only does it create a stronger aroma, but it also elevates the rolls to new heights of garlic goodness.
-
Brushed with Honey: For a touch of sweetness, drizzle honey over the rolls before serving. This contrast of sweet and savory makes every bite a tantalizing experience.
-
Herbed Olive Oil Dip: Serve the rolls with a simple herb-infused olive oil for dipping. A mixture of olive oil, balsamic vinegar, and Italian herbs creates a luscious dip that’s perfect for these fluffy bites.
Whichever variation you choose, these garlic dinner rolls are sure to become a cherished part of your meals, perfect for pairing with dishes like Cheesy Honey Garlic or savoring on their own!
Expert Tips for Garlic Dinner Rolls
- Milk Temperature: Make sure the milk is warmed to 110-115°F; too hot may kill the yeast, leading to flat rolls.
- Proofing Yeast: Always check the yeast’s freshness; if the mixture doesn’t froth, it’s ineffective, and your garlic dinner rolls won’t rise.
- Kneading Time: Whether using a stand mixer or hand, knead just until smooth and slightly sticky to ensure airy rolls.
- Rising Environment: Create a warm area for your dough by placing it next to a mug of steaming water in a closed microwave—this promotes proper rising.
- Make-Ahead Ready: Shape the rolls and refrigerate overnight if needed; just let them come to room temperature before baking for fresh rolls whenever you desire.
- Butter Brushing: Don’t skip brushing the rolls with garlic herb butter before and after baking for that extra layer of savory goodness!
Storage Tips for Garlic Dinner Rolls
Room Temperature: Keep your garlic dinner rolls in an airtight container for up to 3 days to retain their softness. Avoid exposing them to air to prevent drying out.
Fridge: Storing in the fridge is not ideal as it can dry them out. However, if necessary, wrap them tightly in plastic wrap for up to 5 days.
Freezer: Freeze baked rolls in a sealed plastic bag or airtight container for up to 1 month. Ensure they are fully cooled before freezing to maintain texture.
Reheating: To reheat, thaw rolls at room temperature or place directly in a microwave for 15-20 seconds. You can also warm them in a preheated oven at 350°F for about 5-10 minutes for a freshly baked taste.
What to Serve with Garlic Dinner Rolls
Imagine the delightful aroma of warm garlic dinner rolls filling your home, inviting loved ones to gather around the table filled with wholesome, delicious comfort.
- Creamy Tomato Soup: The richness of tomato soup perfectly balances the fluffy dinner rolls, creating a cozy, heartwarming meal.
- Savory Beef Stew: Pairing these fluffy rolls with a hearty beef stew allows you to soak up every last drop of delicious gravy.
- Roasted Chicken: The succulent flavors of a garlic-herb roasted chicken complement the savory notes in the rolls, making every bite a delicious experience.
- Garden Salad: A light garden salad adds freshness, contrasting beautifully with the warm, fluffy rolls and savory garlic flavor.
- Baked Mac and Cheese: Indulge in the creamy cheesy goodness of mac and cheese alongside these rolls for a comforting, nostalgic meal.
- Honey-Glazed Carrots: The sweetness of honey-glazed carrots enhances the flavors while adding brightness to your plate, a perfect side to your homemade rolls.
- Chardonnay: A chilled glass of Chardonnay will enhance your dining experience, bringing out the aromatic herbs without overpowering the meal.
- Chocolate Cake: Finish off your delightful spread with a slice of rich chocolate cake for a sweet, satisfying contrast to the savory garlic rolls.
- Garlic Herb Butter: Consider serving extra garlic herb butter on the side, allowing guests to slather on more rich flavor as they wish.
Make Ahead Options
These Garlic Dinner Rolls are perfect for meal prep, allowing you to enjoy homemade goodness without the last-minute rush! You can prepare the dough up to 24 hours in advance by following all the steps until shaping the rolls. After shaping, place them on a greased baking sheet, cover with plastic wrap, and refrigerate overnight. This slow rise in the fridge helps develop flavor while keeping them fluffy. When ready to bake, simply let the rolls sit at room temperature for about 30 minutes before preheating your oven. Brush with garlic herb butter and bake as directed for rolls that are just as delicious as when made fresh!
Garlic Dinner Rolls Recipe FAQs
What is the best way to select garlic for the rolls?
When choosing garlic for your dinner rolls, look for bulbs that are firm and unblemished, avoiding any with dark spots or sprouting greens. Fresh cloves will give you the strongest flavor, so if possible, use them instead of garlic powder for an added burst of garlicky goodness.
How should I store leftover garlic dinner rolls?
To keep your garlic dinner rolls soft and fresh, store them in an airtight container at room temperature for up to 3 days. Avoid refrigerating them as this can dry them out; however, if you need to, make sure to wrap them tightly in plastic wrap for up to 5 days.
Can I freeze the garlic dinner rolls, and how?
Absolutely! After the rolls have cooled completely, place them in a freezer-safe bag or airtight container. They can be frozen for up to 1 month. To reheat, simply thaw them at room temperature or pop them in the microwave for about 15-20 seconds. For an oven-reheated taste, warm them at 350°F for 5-10 minutes.
What should I do if my rolls didn’t rise properly?
If your garlic dinner rolls didn’t rise as expected, there are a few things to check. First, ensure your yeast is fresh and properly activated; it should be foamy after combining with warm milk and sugar. Additionally, make sure the dough was allowed to rise in a warm, draft-free environment. If the rolls are too sticky during kneading, try adding a bit of flour gradually until the dough reaches the desired consistency.
Are garlic dinner rolls suitable for people with allergies?
These rolls contain common allergens such as wheat (in the form of bread flour) and eggs. If you’re looking for a gluten-free option, substitute with a gluten-free flour blend and egg replacers. Always double-check other ingredient labels to accommodate any specific allergies.
Garlic Dinner Rolls: Fluffy Bites of Comfort for Every Meal
Ingredients
Equipment
Method
- In a medium bowl, combine warmed whole milk, granulated sugar, and active dry yeast. Stir gently and let sit for 10-15 minutes until frothy.
- In a stand mixer, add the frothy yeast mixture, remaining sugar, lightly beaten egg, melted unsalted butter, garlic powder, and salt. Gradually mix in bread flour until dough forms.
- Knead the dough for about 3 minutes in the stand mixer or 8-10 minutes by hand until smooth and slightly sticky. Incorporate fresh rosemary, parsley, and dried oregano while kneading.
- Lightly oil a bowl, place the kneaded dough inside, cover with plastic wrap, and let it rise for about 1 hour until doubled in size.
- Punch down the risen dough, divide into 12 equal pieces, and shape into balls. Place in a greased 9x13-inch pan.
- Cover the shaped rolls with a kitchen towel and let them rise for another 1 to 1.5 hours until doubled in size.
- Preheat the oven to 350°F. Brush tops of the rolls with garlic herb butter and bake for 18-20 minutes until golden brown.
- Remove from oven, brush with more garlic herb butter, and allow to cool slightly before serving.
Leave a Reply