
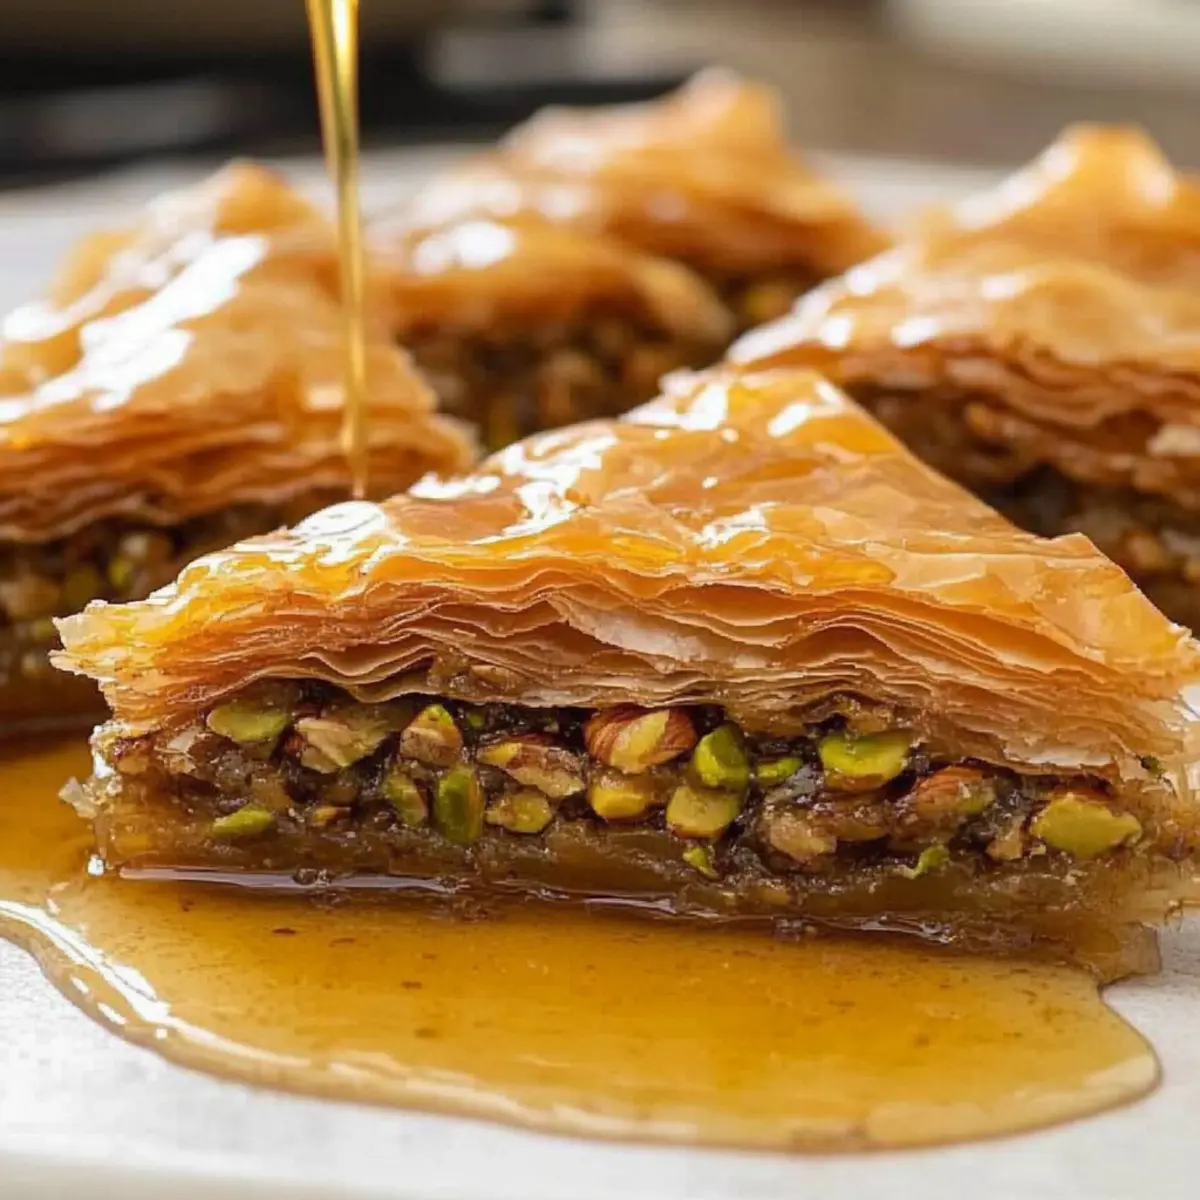
As the warm, comforting aroma of spiced nuts and honey fills the kitchen, I can’t help but feel transported to a bustling Greek market, where baklava is more than just dessert – it’s a celebration. This Classic Greek Baklava recipe, made with flaky phyllo dough and a luscious syrup, is your ticket to impressing family and friends at your next gathering. Not only is this treat make-ahead, allowing you to enjoy a stress-free celebration, but it’s also a versatile crowd-pleaser that adapts beautifully to reflect your personal taste. Whether you’re team walnuts or team pistachios, each slice is a symphony of crunch and sweetness, guaranteed to be a hit at any festive table. Ready to dive into the layers of tradition and flavor? Let’s get started!

Why Is Baklava So Irresistible?
Decadent Layers: Experience the heavenly combination of flaky phyllo and spiced nuts, making every bite a delightful journey of textures.
Make-Ahead Marvel: This baklava improves with time, allowing you to prepare it in advance for gatherings without any last-minute stress.
Customizable Flavor: Choose between walnuts or pistachios—or even mix them for a unique twist! Want a healthier snack? Check out these Frozen Greek Yogurt options!
Festive Showstopper: The golden-hued dessert is visually stunning, making it a stunning centerpiece for any celebration or holiday feast.
Crowd-Pleasing Treat: With its sweet syrup and nutty crunch, baklava is loved by all, ensuring happy faces around the table.
Greek Baklava Ingredients
For the Baklava
• Phyllo Dough – The essential structure for the baklava; ensure you thaw it overnight to prevent tearing.
• Unsalted Butter (1 1/4 cups) – Adds richness and flakiness; always melt it to coat the dough evenly.
• Walnuts (8 ounces, finely chopped) – The key nut for a crunchy texture; feel free to mix with almonds for variation.
• Pistachios (8 ounces, finely chopped) – Imparts a buttery flavor and vibrant color; can replace walnuts completely for a pistachio-centric treat.
• Ground Cinnamon (1 teaspoon) – Warms the flavor profile of the nut mixture beautifully.
For the Syrup
• Granulated Sugar (1 cup) – Sweetens the syrup; balances the nutty flavors perfectly.
• Water (3/4 cup) – Forms the syrup’s base; crucial for achieving the right consistency.
• Honey (1/2 cup) – Adds a beautiful floral note and sweetness; can adjust to taste based on preference.
• Lemon Juice (2 tablespoons) – Provides acidity to cut through the sweetness; essential for flavor balance.
• Fresh Orange Peel (1 piece, 2 inches) – Infuses the syrup with a delightful citrus aroma, elevating the overall taste.
This Greek Baklava is not just a dessert; it’s an experience that tantalizes your senses and unites family and friends around the table!
Step‑by‑Step Instructions for Classic Greek Baklava
Step 1: Prepare Phyllo Dough
Thaw the phyllo dough overnight in the refrigerator. Once thawed, keep it covered with a damp towel to prevent it from drying out while you work. This delicate dough is the foundation of your Classic Greek Baklava, so handling it with care will ensure a flaky, crispy result.
Step 2: Make Syrup
In a medium saucepan, combine 1 cup of granulated sugar, 3/4 cup of water, 1/2 cup of honey, 2 tablespoons of lemon juice, and a 2-inch piece of fresh orange peel. Bring the mixture to a boil over medium heat, stirring until the sugar dissolves. Once boiling, reduce the heat and let it simmer for 4 minutes. Remove from heat and allow it to cool completely before using.
Step 3: Prep Nuts
While the syrup cools, finely chop 8 ounces of walnuts and 8 ounces of pistachios. In a large bowl, mix the nuts with 1 teaspoon of ground cinnamon. This nut mixture will add a warm spiciness to your baklava, offering delightful flavor between the crunchy layers.
Step 4: Assemble Baklava
Preheat your oven to 325°F (160°C). Brush a 9×13-inch baking dish lightly with melted butter. Layer 10 sheets of phyllo dough in the prepared dish, brushing each sheet with melted butter before adding the next. This careful layering is key to creating the flaky texture of your Classic Greek Baklava.
Step 5: Add Nut Layers
After the initial layer of phyllo, sprinkle 3/4 cup of the nut mixture over the top, ensuring even coverage. Repeat this process, adding another 10 sheets of buttered phyllo followed by more nut mixture. Continue this layering for a total of four nut layers, ensuring a delightful crunch throughout.
Step 6: Finish Layers
Top off your assembly with the remaining phyllo sheets, continuing to brush each layer with melted butter. Once all layers are added, use a sharp knife to score the baklava into diamond shapes. This not only marks where to cut but also allows for even cooking and syrup absorption.
Step 7: Bake
Place your assembled baklava in the preheated oven and bake for 1 hour and 15 minutes, or until it turns a golden brown on top. Keep an eye on it during the last few minutes to prevent over-browning. The beautiful, crisp top layer is a signature characteristic of Classic Greek Baklava.
Step 8: Add Syrup
Once baked, remove the baklava from the oven and immediately drizzle the cooled syrup over the hot baklava. Ensure even distribution so each slice will be sweetened perfectly. Allow the baklava to cool at room temperature for 4 to 6 hours to let the flavors meld and syrup soak in, creating that deliciously sticky texture.
What to Serve with Classic Greek Baklava?
As the sweet and nutty aroma of baklava wafts through your kitchen, imagine the perfect accompaniments that elevate your dessert experience to the next level.
- Fresh Fruit Salad: A medley of seasonal fruits adds a bright, refreshing contrast to the rich baklava, cleansing the palate beautifully.
- Creamy Vanilla Ice Cream: The cool creaminess of ice cream complements the warm, flaky layers, creating a delightful balance of temperatures.
- Greek Yogurt with Honey: The tangy yogurt paired with a drizzle of honey echoes the flavors of your baklava while adding a delightful creaminess.
- Chai Tea: A warm cup of chai enhances the spiced notes of the baklava, offering comfort and warmth after a hearty meal.
- Mint Tea: The herbal notes of mint tea refresh the taste buds, making it a delightful drink pairing for your Greek dessert.
- Rosewater Lemonade: A floral twist on classic lemonade amplifies the baklava’s sweetness while providing a refreshing and vibrant beverage.
- Baklava Dessert Platter: Create a gorgeous platter showcasing different variations of baklava that incorporates nuts and flavors, making for a stunning presentation at your gathering.
- Baklava-inspired Cheesecake: For a true indulgent treat, a cheesecake infused with baklava spices creates a unique dessert experience that will wow your guests.
Make Ahead Options
Preparing Greek Baklava ahead of time not only saves you valuable hours, but it also allows the flavors to deepen, creating an even more delicious dessert! You can assemble the baklava up to 24 hours in advance—just cover the dish tightly with plastic wrap and refrigerate to keep the phyllo dough from drying out. The nut mixture can also be prepped up to 3 days ahead, stored in an airtight container to maintain freshness. When you’re ready to bake, simply take it out, score the top, and bake as directed. Drizzle the cooled syrup over the hot baklava right after baking and let it rest to allow the syrup to soak in, ensuring it remains just as crispy and delightful!
Greek Baklava Variations & Substitutions
Feel free to get creative with this delightful baklava recipe; let your taste buds guide you on a flavor adventure!
- Nut Swap: Replace walnuts with pecans or hazelnuts for a unique twist on texture and flavor. Each nut brings its special essence to the baklava.
- Pistachio Focus: Use only pistachios to create a vibrant, green baklava that truly showcases this nut’s buttery flavor. It’s a feast for the eyes as much as the palate!
- Almond Delight: Mix in almond flour with the nut mixture for an extra layer of flavor, enhancing the overall nuttiness of your baklava, which pairs beautifully with the honey syrup.
- Dried Fruit Boost: Incorporate chopped dried apricots or cranberries into the nut mixture for a fruity burst of flavor that complements the sweetness of the syrup.
- Syrup Variation: For a different kind of sweetness, infuse the syrup with a splash of vanilla extract or a hint of rose water for an exotic touch that pays homage to traditional recipes.
- Spiced Delight: Add a pinch of nutmeg or cardamom to the nut mixture to bring additional warmth and depth to the baklava. This subtle change can elevate the overall taste!
- Vegan Option: Use coconut oil or vegan butter instead of regular butter, and substitute maple syrup for honey to create a delicious vegan baklava. It’s a wonderful way to share the love without compromising on flavor.
- Ice Cream Pairing: Serve your baklava warm with a scoop of vanilla ice cream or Greek yogurt on the side. The cold creaminess contrasts beautifully with the warm, nutty dessert.
For more delightful treats, explore these options: Greek Yogurt Cookie or enjoy uniquely flavored bites with Frozen Greek Yogurt. Each suggestion adds a delightful twist to your baklava experience!
How to Store and Freeze Greek Baklava
Room Temperature: Keep baklava covered at room temperature for up to 2 weeks to maintain its crispiness and flavor.
Fridge: If you prefer to refrigerate it, store baklava in an airtight container to prevent moisture loss and keep it fresh for up to 1 month.
Freezer: To freeze, wrap individual pieces tightly in plastic wrap and then in aluminum foil. Greek baklava can be frozen for up to 2 months; allow to thaw overnight in the fridge before serving.
Reheating: Reheat in the oven at 350°F (175°C) for 10-15 minutes if you prefer it warm and crispy again.
Expert Tips for Greek Baklava
-
Keep Phyllo Covered: Always keep the phyllo dough covered with a damp towel while working. It dries out quickly, leading to tears and compromised layers.
-
Cool Syrup Importance: Allow the syrup to cool completely before drizzling it over the hot baklava. This prevents sogginess, ensuring each piece remains perfectly layered.
-
Butter Moderation: Apply a thin, even layer of melted butter between phyllo sheets. Avoid over-buttering, as doing so can result in greasy baklava and less crispness.
-
Check Doneness: Since oven heat can vary, start checking your baklava a few minutes before the suggested baking time. It should be golden brown on top, indicating it’s ready.
-
Diamond Scoring: Don’t skip scoring the baklava before baking. This helps in cutting through the layers later and allows the syrup to seep into each piece beautifully.
Enjoy crafting your Greek Baklava, a dessert that’s sure to impress!
Greek Baklava Recipe FAQs
How do I select the best phyllo dough?
Absolutely! When choosing phyllo dough, look for brands that are labeled as “extra-thin” or “Greek” as they usually yield the best texture. Always ensure the dough is well-sealed and check the expiration date. If possible, thaw in the refrigerator overnight to maintain its integrity when working with it.
How should I store leftover baklava?
Very! Store baklava covered at room temperature for up to 2 weeks. If you have a lot left over or prefer a cooler option, feel free to refrigerate it in an airtight container, which will keep it fresh for up to 1 month. Just make sure it’s well-sealed to avoid moisture loss!
Can I freeze baklava, and how do I do it?
Absolutely! To freeze Greek Baklava, first cut it into the desired serving sizes. Wrap each piece tightly in plastic wrap and then in aluminum foil to prevent freezer burn. You can safely freeze it for up to 2 months. When you’re ready to enjoy, simply thaw it overnight in the fridge. For a freshly baked taste, reheat it in the oven at 350°F (175°C) for about 10-15 minutes.
What should I do if my baklava turns out soggy?
Very! If your baklava is soggy, it’s likely because the syrup was poured over while the baklava was still too hot, causing the layers to absorb excess moisture. To troubleshoot, let it cool completely before serving. Next time, ensure the syrup is at room temperature when drizzling it on your hot baklava. Proper syrup cooling is crucial for that perfect texture!
Are there any dietary considerations for Greek Baklava?
Absolutely! Since baklava contains nuts such as walnuts and pistachios, it’s essential for those with nut allergies to avoid it altogether. Additionally, this dessert is rich and sweet due to sugar and honey, so those monitoring sugar intake should consider enjoying it in moderation. If you’re serving pets or inquiring about allergy concerns, it’s a good practice to mention its contents to avoid any reactions.
Deliciously Golden Greek Baklava Recipe to Wow Your Guests
Ingredients
Equipment
Method
- Thaw the phyllo dough overnight in the refrigerator, keeping it covered with a damp towel.
- In a medium saucepan, combine sugar, water, honey, lemon juice, and orange peel. Bring to a boil and simmer for 4 minutes, then cool completely.
- Finely chop walnuts and pistachios, then mix them with ground cinnamon in a large bowl.
- Preheat oven to 325°F (160°C). Brush a baking dish with melted butter and layer 10 sheets of phyllo, brushing each with butter.
- Sprinkle 3/4 cup of the nut mixture over the phyllo layer, then repeat the layering process for a total of four nut layers.
- Top with remaining phyllo sheets, scoring into diamond shapes before baking.
- Bake for 1 hour and 15 minutes until golden brown. Drizzle the cooled syrup over the hot baklava after removing from the oven.
- Allow baklava to cool at room temperature for 4-6 hours before serving.
Leave a Reply