
There’s nothing quite like the sight of a cake gracefully rising in the oven, and the magic really happens when it’s a Light & Fluffy Cloud Cake. This dessert is the embodiment of airy bliss—with its sponge-like exterior and a cloud of whipped cream that whispers sweetness on your palate. Perfect for celebrations or a cozy afternoon chat with friends, this cake is not only a joy to make but also a delight to share. With gluten-free options available, you can cater to everyone’s dietary needs. Whether you’re surprising guests or indulging yourself, this recipe invites you to savor each light bite. Ready to create a dreamy masterpiece?
Why is Cloud Cake a Must-Try?
Lightness: This cake captures the essence of blissful textures, making each bite feel like you’re floating on a cloud.
Versatile: Whether served plain, with fresh berries, or a drizzle of chocolate, this dessert caters to all palates.
Effortless Elegance: Impress your guests at any celebration without complex techniques—just whip, fold, and bake!
Gluten-Free Friendly: With a simple swap to gluten-free flour, you can ensure everyone enjoys this dreamy treat.
Time-Saving: The make-ahead capability lets you bake the layers in advance, freeing up your schedule without compromising taste.
Elevate your dessert game with this recipe—if you enjoy light classics, you may also love Sweet Coconut Cream Pancakes or a slice of Spice Gooey Cake!
Light & Fluffy Cloud Cake Ingredients
Experience the airy perfection of this delightful creation!
For the Cake Batter
- 6 large eggs, separated – Provides the necessary structure and volume; be sure the egg whites are at room temperature for better whipping.
- 1 cup granulated sugar (divided) – Sweetens the cake and stabilizes the egg whites when whipped; essential for the ideal texture.
- 1 cup cake flour, sifted – Adds lightness and tenderness; using cake flour helps achieve the perfect delicate texture.
- 1/2 tsp cream of tartar – Stabilizes egg whites, allowing them to hold their airy structure while being whipped.
For the Whipped Filling
- 2 cups heavy whipping cream (cold) – Forms the luscious whipped filling; start with very cold cream for the best results.
- 1/3 cup powdered sugar – Sweetens the whipped cream without compromising its lightness; a necessary ingredient for balance.
- 2 tsp vanilla extract – Enhances the overall flavor profile, adding a hint of sweetness.
For Serving
- Powdered sugar (for dusting) – A light finishing touch that provides a cloud-like appearance; it makes the cake look even more inviting.
This Light & Fluffy Cloud Cake is sure to be a star at your gatherings—get ready to impress!
Step‑by‑Step Instructions for Light & Fluffy Cloud Cake
Step 1: Preheat the Oven
Begin by preheating your oven to 325°F (160°C). While it warms up, prepare two 8-inch round cake pans by greasing them and lining the bottoms with parchment paper. This will ensure that your Light & Fluffy Cloud Cake layers come out smoothly without sticking to the pan.
Step 2: Mix Egg Yolks
In a large mixing bowl, whip together the egg yolks and half of the granulated sugar until the mixture becomes pale, thick, and slightly frothy. This should take about 2–3 minutes using an electric mixer on medium speed. You’ll know it’s ready when it has a creamy consistency, which provides the rich base for your cake.
Step 3: Whip Egg Whites
In a separate bowl, beat the egg whites with cream of tartar using a clean mixer until they form soft peaks—this usually takes around 3–5 minutes. Gradually add the remaining sugar while continuing to whip until you reach stiff peaks. The egg whites should look shiny and maintain their shape, forming the airy structure crucial for your Light & Fluffy Cloud Cake.
Step 4: Combine Mixtures
Carefully fold the whipped egg whites into the egg yolk mixture in batches. Use a rubber spatula to gently incorporate them, followed by alternating with the sifted cake flour. Be cautious not to deflate the mixture; a light hand here ensures that your cake retains its airy cloud-like texture.
Step 5: Bake the Layers
Pour the combined batter evenly into the prepared cake pans and smooth the tops with a spatula. Place them in the preheated oven and bake for 25-30 minutes. They are done when they spring back lightly when touched and a toothpick inserted in the center comes out clean, indicating a perfectly baked cake.
Step 6: Cool the Cakes
Once baked, remove the cake layers from the oven and allow them to cool in the pans for about 10 minutes. Then, carefully transfer them to a wire rack to cool completely, which should take another 30-40 minutes. This step is essential for achieving the ideal texture for your Light & Fluffy Cloud Cake.
Step 7: Prepare the Whipped Cream
In a chilled mixing bowl, whip the heavy cream until it starts to thicken—this should take about 2 minutes. Gradually add the powdered sugar and vanilla extract, continuing to whip until you reach stiff peaks, which will take another 2-3 minutes. Make sure to stop once it holds its shape to avoid a grainy texture.
Step 8: Assemble the Cake
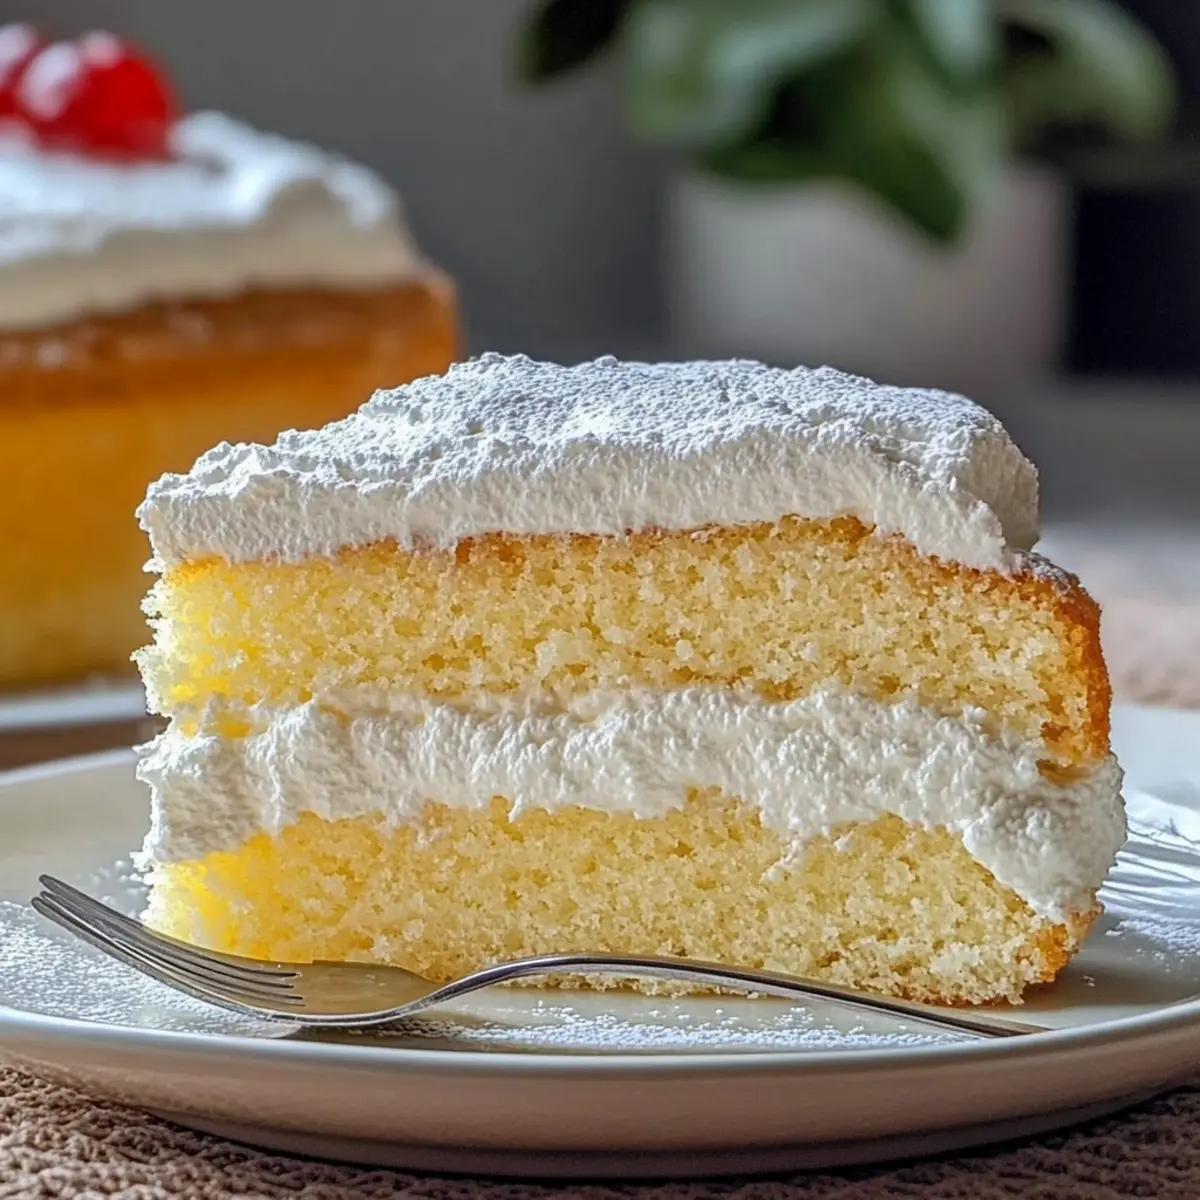
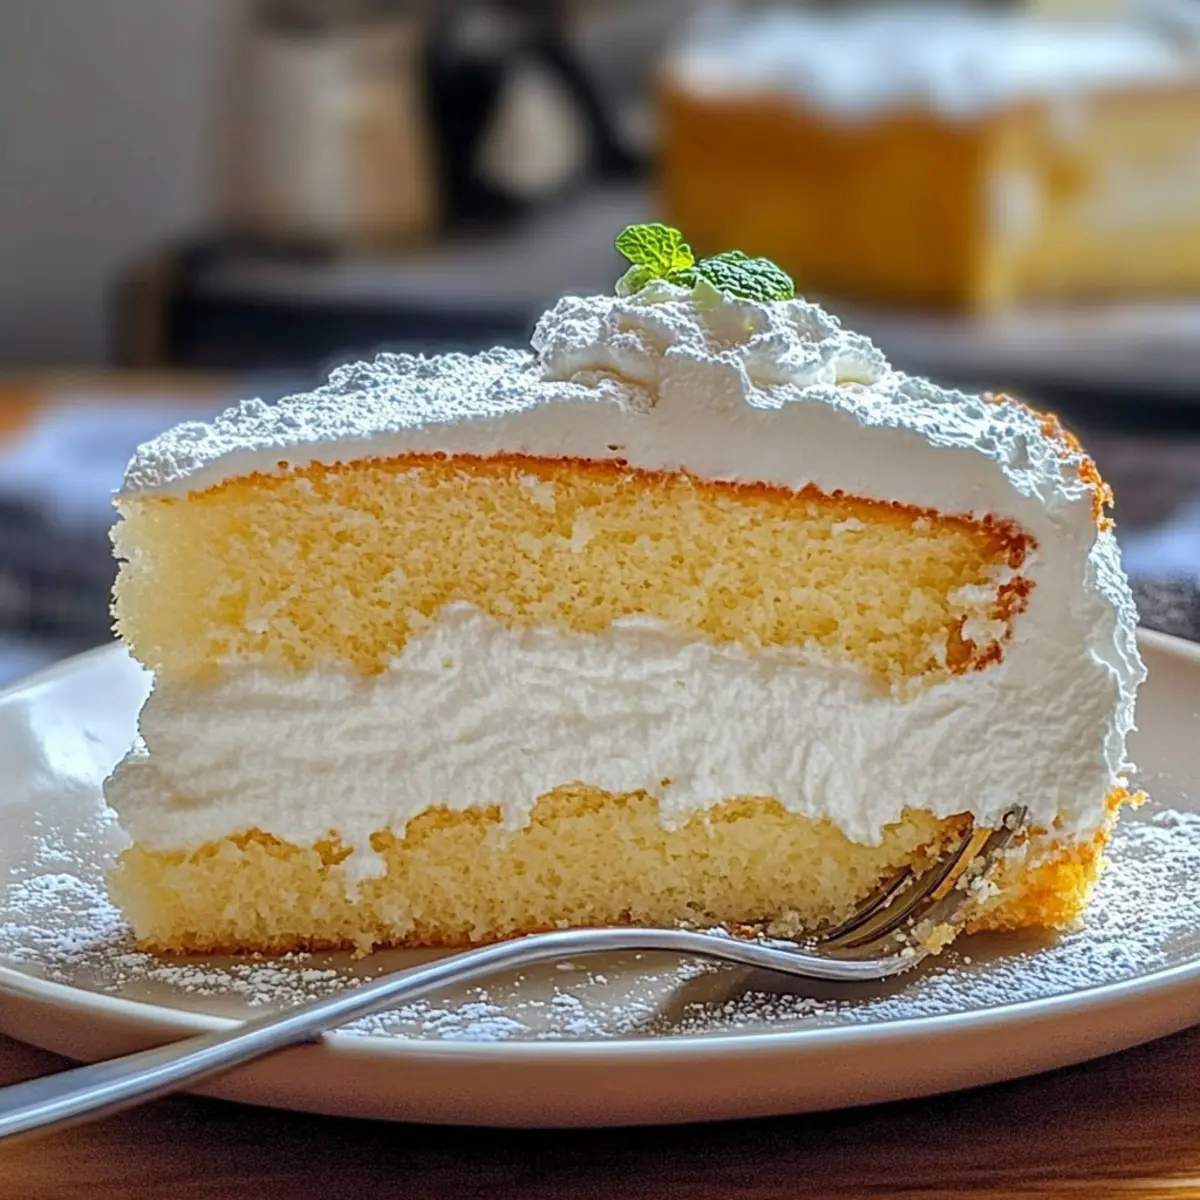
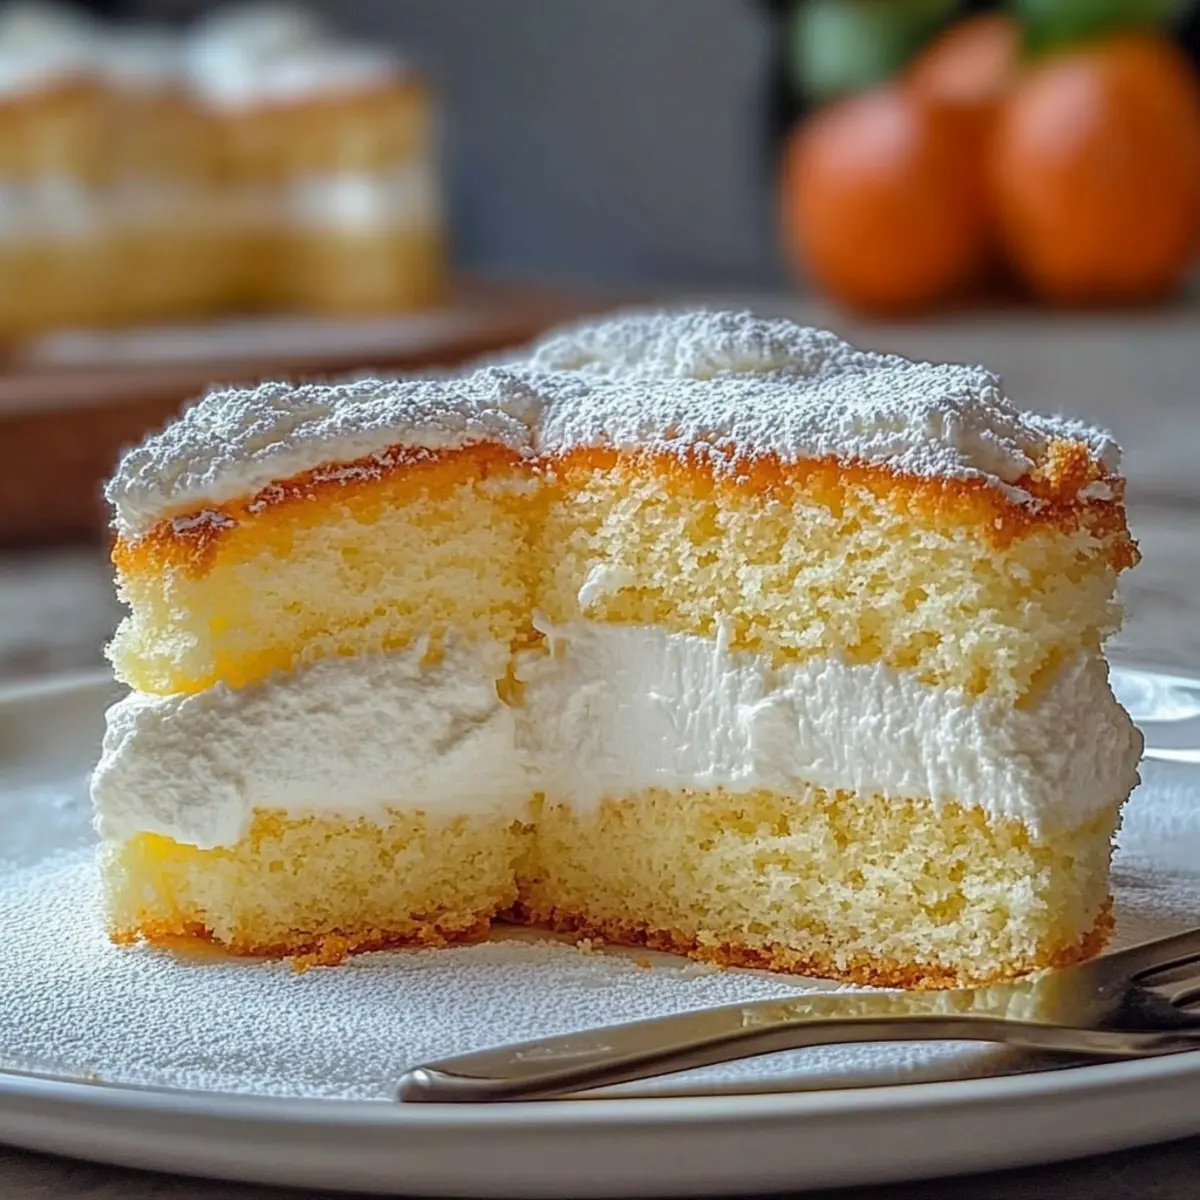
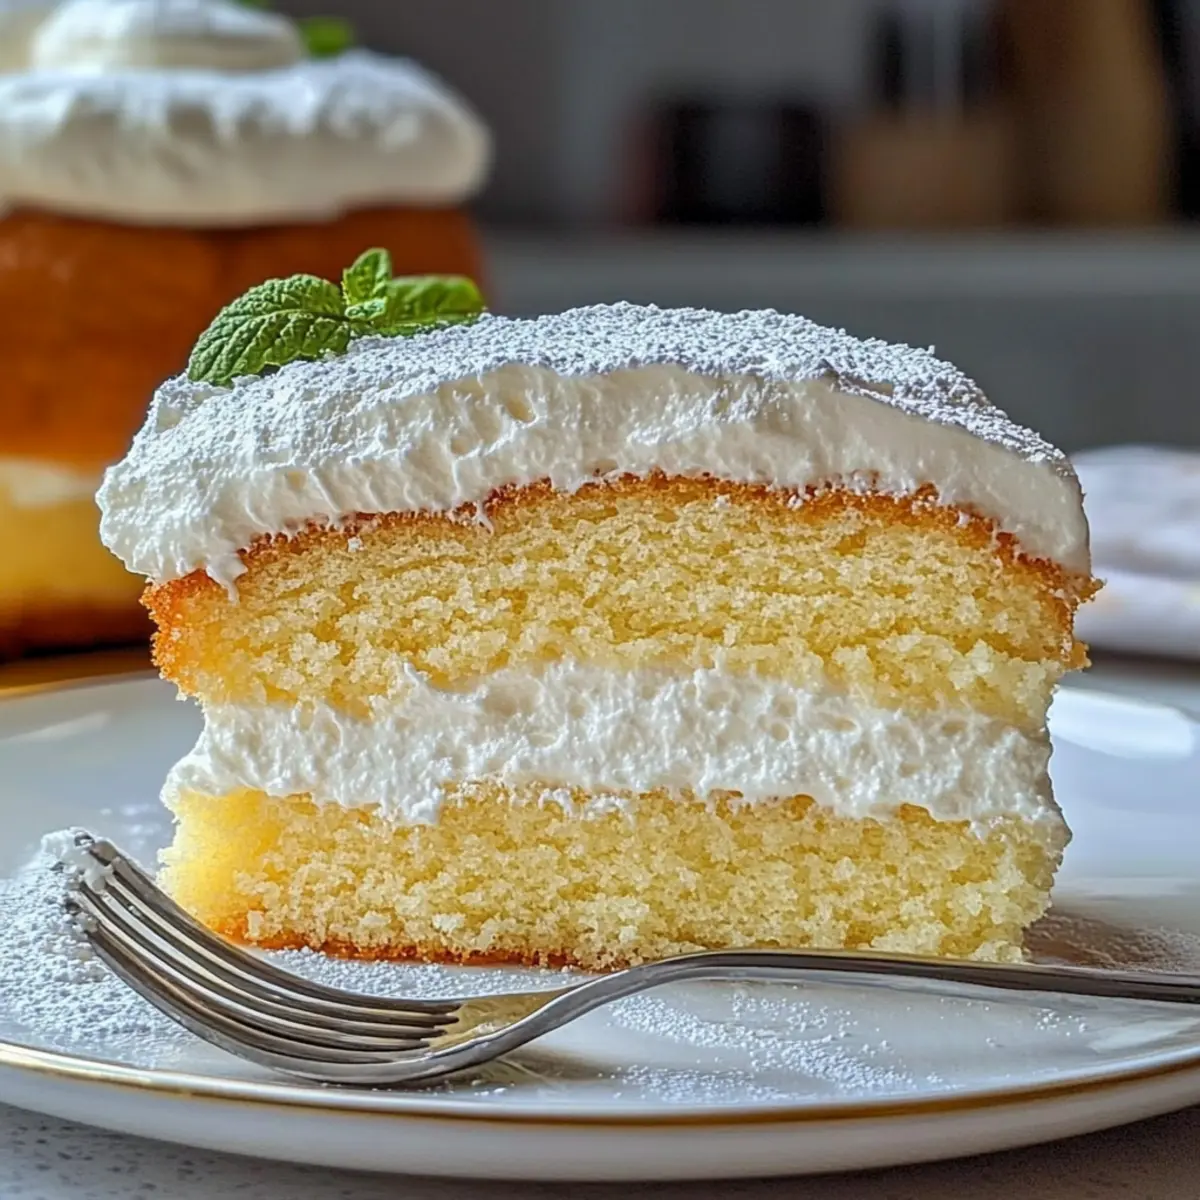
To assemble your Light & Fluffy Cloud Cake, spread a generous layer of whipped cream over the top of the first cake layer. Gently place the second layer on top, then level the sides and fill any gaps with more whipped cream. This creates a delightful filling that enhances the overall dreamy texture of the cake.
Step 9: Dust and Decorate
For the finishing touch, dust the top of your cake with powdered sugar to create a cloud-like appearance. If you’d like, you can also garnish with fresh berries or mint leaves, giving your Light & Fluffy Cloud Cake a colorful and elegant look perfect for any celebration.
Step 10: Serve and Enjoy
Once assembled, the Light & Fluffy Cloud Cake is best served slightly chilled, allowing the whipped cream to maintain its structure. Slice it gently with a serrated knife for clean edges, and delight your guests with this airy, delightful treat that’s perfect for any occasion.
How to Store and Freeze Light & Fluffy Cloud Cake
Fridge: Keep your Light & Fluffy Cloud Cake stored in an airtight container for up to 3 days. This helps retain its light texture and prevents it from drying out.
Freezer: For longer storage, wrap the unassembled layers tightly in plastic wrap and foil, then freeze for up to 2 months. Thaw in the fridge before assembly.
Reheating: If desired, serve the cake slightly chilled for the best flavor. Avoid reheating, as it can affect the whipped cream’s texture.
Room Temperature: Enjoy the cake at room temperature for a few hours after serving; just be mindful not to leave it out for a long period to maintain its freshness.
What to Serve with Light & Fluffy Cloud Cake?
Enjoy this delightful dessert at your next gathering by complementing it with the perfect accompaniments that enhance its airy elegance.
-
Fresh Berries: The tartness of strawberries and raspberries contrast beautifully with the cake’s sweetness, adding a pop of color and flavor.
-
Light Fruit Compote: A mixed fruit compote offers a juicy complement, refreshing your palate after each indulgent bite.
-
Herbal Tea: The delicate flavors of herbal tea, like chamomile or mint, elevate the dessert experience, making it perfect for afternoon tea.
-
Creamy Vanilla Ice Cream: A scoop of vanilla ice cream adds a velvety texture, merging with the cake’s lightness for a decadent treat.
-
Sparkling Water with Citrus: Refreshing sparkling water infused with lemon or lime creates a vibrant pairing, cleansing the palate between bites.
-
Chocolate Drizzle: A light drizzle of melted chocolate creates a lovely contrast and enhances the sweetness of the cloud cake.
-
Whipped Cream Topping: For an extra cloud-like ambiance, serve additional whipped cream on the side, inviting guests to add their desired amount.
-
Champagne or Prosecco: Celebrate special occasions with a glass of bubbly, as the effervescence complements the cake’s airy texture.
Each of these delightful pairings enhances the Light & Fluffy Cloud Cake, transforming your gathering into a truly memorable experience!
Expert Tips for Light & Fluffy Cloud Cake
-
Room Temperature Eggs: Ensure egg whites are at room temperature to facilitate better whipping, which is key for the cake’s light structure.
-
Gentle Folding: When incorporating the egg whites into the yolk mixture, fold gently to maintain the airy texture essential for your Light & Fluffy Cloud Cake.
-
Watch the Cream: Keep an eye on your whipped cream—stop whipping as soon as stiff peaks form to avoid a grainy texture that can compromise your filling.
-
Use a Serrated Knife: For slicing, a serrated knife will help maintain the delicate structure of your cake, ensuring clean, beautiful portions every time.
-
Make it Ahead: You can bake the layers a day in advance; just wrap them well and refrigerate until you’re ready to assemble, making the hosting experience easier.
Light & Fluffy Cloud Cake Variations
Feel free to get creative with this Light & Fluffy Cloud Cake to suit your taste—let’s make it your own!
-
Gluten-Free: Substitute cake flour with a certified gluten-free blend for an equally delightful, airy cake that everyone can enjoy.
-
Berry Bliss: Fold in fresh berries or thin slices of fruit into the whipped cream for a burst of flavor and vibrant color in every slice. Strawberries, raspberries, or blueberries work wonderfully!
-
Chocolate Lover’s Delight: Add cocoa powder to the whipped cream, or poke holes in the cake layers to drizzle with chocolate sauce for a rich, indulgent twist that will satisfy any sweet tooth.
-
Zesty Surprise: Incorporate some lemon or orange zest into the whipped cream for a refreshing citrus kick that balances the sweetness beautifully.
-
Nutty Texture: Sprinkle finely chopped nuts, like almonds or hazelnuts, within the cake layers or on top of the whipped cream for added crunch and depth of flavor.
-
Seasonal Flair: Swap out vanilla extract for seasonal flavors, such as almond extract in winter or peppermint for the holidays, to truly personalize your creation.
-
Creamy Coconut: Use coconut cream instead of heavy whipping cream for a tropical twist—this adds creaminess and a lovely coconut flavor that pairs perfectly with the light cake.
-
Heavenly Layering: For a show-stopping presentation, layer the whipped cream with your favorite fruit compote or a drizzle of caramel between the cake layers, creating a stunning visual and taste experience.
Whether you’re slicing this cake for an elegant gathering or a cozy afternoon treat, these variations will help you craft a memorable dessert. If you’re in the mood for something a bit different, why not check out our Fried Strawberry Cheesecake or celebrate with a piece of Oreo Cheesecake Cookie Cups? Enjoy the delicious journey ahead!
Make Ahead Options
These Light & Fluffy Cloud Cake layers are perfect for meal prep! You can bake the sponge layers up to 24 hours in advance. Once cooled completely, wrap each layer tightly in plastic wrap and refrigerate to maintain their airy texture. The whipped cream filling can also be prepared a day ahead; just ensure it’s kept cold in the fridge until assembling. When you’re ready to serve, simply layer the whipped cream between the chilled cake layers and dust with powdered sugar. This make-ahead strategy saves you time on busy days while delivering delicious, restaurant-quality results your friends and family will adore!
Light & Fluffy Cloud Cake Recipe FAQs
What kind of flour should I use for the Light & Fluffy Cloud Cake?
For the best results, I recommend using cake flour, as it gives the cake its necessary lightness and tenderness. Cake flour has a lower protein content compared to all-purpose flour, which can lead to a denser texture. If you need a gluten-free version, be sure to use a certified gluten-free cake flour blend.
How should I store the Light & Fluffy Cloud Cake?
To keep your cake fresh, store it in an airtight container in the refrigerator for up to 3 days. This will help retain its airy texture and prevent it from drying out. If you need to make it ahead of time, you can bake the layers one day in advance and wrap them tightly until you’re ready to assemble.
Can I freeze the Light & Fluffy Cloud Cake?
Absolutely! You can freeze the unassembled layers for up to 2 months. Wrap them tightly in plastic wrap and then foil to avoid freezer burn. When you’re ready to enjoy, simply thaw them in the refrigerator overnight before assembling with the whipped cream filling. This way, you can have cake ready to go for any occasion!
What should I do if my whipped cream turns grainy?
If your whipped cream begins to look grainy, it may have been overwhipped. To avoid this, it’s important to whip the cream until just stiff peaks form. If you notice it has become grainy, you can try folding in a little bit more cold cream to salvage it. Whip gently until it reaches the desired consistency, and remember to watch it closely next time!
Are there any dietary considerations I should be aware of?
Yes! This Light & Fluffy Cloud Cake recipe can easily accommodate gluten-free diets with the appropriate flour. Additionally, be mindful if you’re serving guests with dairy allergies, as it contains both heavy cream and butter. Substituting coconut cream for the whipped filling can provide a delicious, dairy-free alternative.
How do I serve the Light & Fluffy Cloud Cake for the best experience?
I suggest serving the cake slightly chilled, maybe alongside a hot cup of tea or coffee to balance out its sweetness. For an elegant touch, garnish with fresh berries or a sprinkle of powdered sugar on top to enhance its cloud-like visual appeal. Enjoying it in the company of family or friends truly makes each bite more delightful!
Light & Fluffy Cloud Cake: Your New Favorite Celebration Treat
Ingredients
Equipment
Method
- Preheat your oven to 325°F (160°C) and prepare two 8-inch round cake pans by greasing them and lining the bottoms with parchment paper.
- In a large mixing bowl, whip together the egg yolks and half of the granulated sugar until pale and frothy.
- In a separate bowl, beat the egg whites with cream of tartar until soft peaks form, then gradually add remaining sugar.
- Gently fold the whipped egg whites into the egg yolk mixture, alternating with sifted cake flour.
- Pour the batter evenly into the prepared pans and bake for 25-30 minutes, or until they spring back when touched.
- Allow the cake layers to cool in pans for 10 minutes before transferring to a wire rack to cool completely.
- Whip the heavy cream in a chilled bowl until it thickens, then add powdered sugar and vanilla, continuing to whip until stiff peaks form.
- Spread whipped cream over the top of the first layer, place the second layer on top, and fill gaps with more cream.
- Dust the top of your cake with powdered sugar and garnish with fresh berries or mint leaves if desired.
- Serve slightly chilled for best flavor and delight your guests.
Leave a Reply