
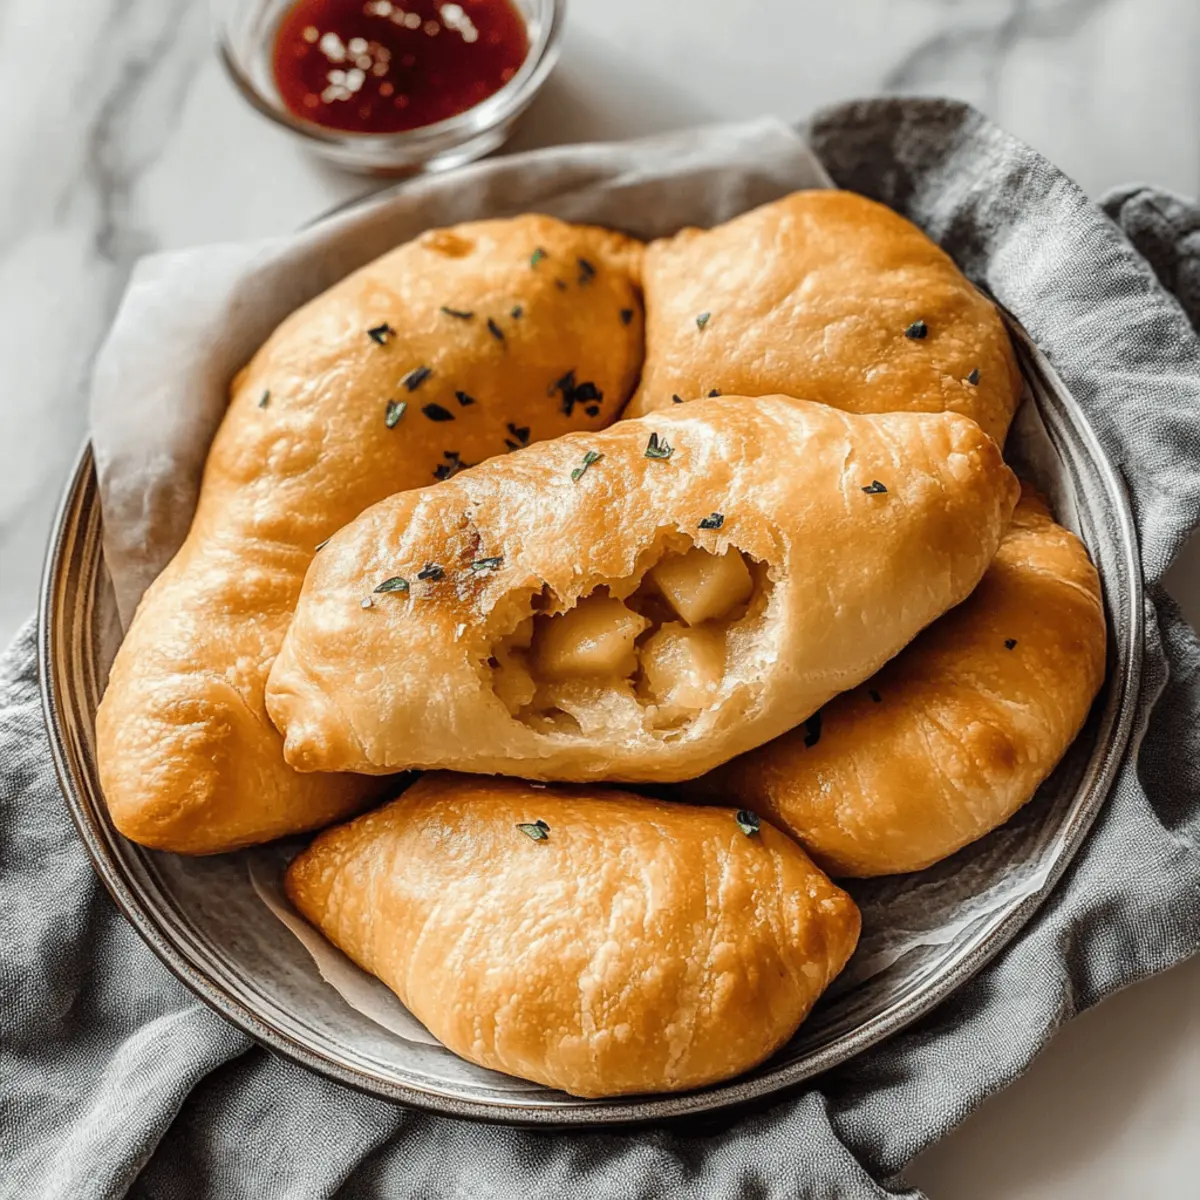
As I bit into that warm, crispy shell, I could almost hear the bustling streets of Moscow come alive. There’s something utterly enchanting about Russian Piroshki, especially when they’re filled with creamy potatoes and savory meat. This delightful dish not only captures the essence of comfort food but also delivers a culinary experience that’s fast and fun to make at home. Plus, they’re incredibly versatile—you can savor them as a hearty main course or a delightful snack, perfect for any time of day. What’s not to love about these fluffy hand pies that can easily be paired with a dollop of sour cream? Are you ready to dive into the world of piroshki and create your own delicious memories?
Why are Piroshki a Must-Try?
Irresistible Fluffiness: These Russian Piroshki boast a light, airy dough that contrasts beautifully with their savory filling.
Versatile Delight: Enjoy them as your main dish or a satisfying snack, perfect for brunch or a cozy dinner.
Quick to Make: With straightforward steps, you’ll find that whipping up these treats is faster than you think!
Crowd-Pleasing Appeal: They’re an instant hit at gatherings—who can resist golden, crispy piroshki?
Cultural Experience: Immerse yourself in a piece of Russian heritage as you indulge in these traditional pastries.
Make sure to check out our serving suggestions for pairing ideas that elevate your piroshki experience!
Russian Piroshki Ingredients
• Indulge in these delightful treats with the following ingredients you’ll need to craft authentic Russian piroshki!
For the Dough
- Egg – Essential for structure; ensure it’s at room temperature for better mixing.
- Sugar – Acts as nourishment for the yeast; any granulated sugar can work in a pinch.
- Salt – Elevates flavor; don’t skimp on this important ingredient!
- Vegetable Oil – Provides tenderness to the dough; melted butter or lard are great alternatives.
- Milk – Adds tenderness—use warm milk to help the dough rise effectively.
- Instant Yeast – The leavening agent; no need for activation, just toss it into the mix.
- All-purpose Flour – Gives the dough its structure; make sure to sift it properly.
For the Filling
- Potatoes – The star of the filling—boil and mash them for the best flavor and texture.
- Unsalted Butter – Enhances the creaminess of the filling; using unsalted gives you better control over flavor.
- Onion – Provides a flavorful base; sweet onions are preferred for their mild taste.
- Garlic – Adds a flavor boost; fresh cloves are ideal, but garlic powder can substitute in a pinch.
- Ground Meat – Offers protein; beef is traditional, but pork or turkey can also be tasty substitutes.
- Paprika – Adds depth and enhances flavor; it’s optional but contributes to that authentic taste.
- Dill – A must for the classic touch; highly recommended for that genuine Russian flavor.
- Salt and Pepper – Essential for seasoning the filling and dough for balanced taste.
For Frying
- Vegetable Oil (for frying) – Required for deep frying the piroshki; make sure you have enough for them to float as they cook.
Dive into the world of Russian Piroshki, and don’t forget to prepare your preferred accompaniments, like sour cream, for maximum enjoyment!
Step‑by‑Step Instructions for Fluffy Russian Piroshki with Potatoes and Meat
Step 1: Make the Dough
In a large mixing bowl, combine the room temperature egg, sugar, and salt until smooth. Slowly mix in warm milk and vegetable oil, ensuring a well-blended mixture. Gradually add sifted all-purpose flour and instant yeast. Knead the dough for 8-10 minutes until it’s smooth and elastic, then cover it with a clean towel, letting it rise in a warm area for about 60-90 minutes or until doubled in size.
Step 2: Prepare Potatoes
While the dough is rising, peel and chop the potatoes into even pieces. Boil them in salted water for about 10-25 minutes, depending on size, until fork-tender. Drain the potatoes and mash them in a bowl, mixing in unsalted butter until the texture is creamy and smooth. Set aside to cool for a bit before combining with the meat filling.
Step 3: Cook Meat Filling
In a large skillet, melt 2 tablespoons of unsalted butter over medium heat. Add finely chopped onion and sauté until soft and fragrant, about 5 minutes. Stir in the ground meat, cooking thoroughly until browned, stirring occasionally. Season with salt, pepper, and optional paprika. Once cooked, allow the mixture to cool completely before adding to the potato filling.
Step 4: Make Filling
In a mixing bowl, combine the cooled mashed potatoes with the meat mixture, adding fresh dill and any additional seasoning as desired. Mix well until the filling is creamy and evenly blended. Set aside while you assemble the Russian Piroshki, ensuring everything is at a manageable temperature to prevent the dough from becoming soggy.
Step 5: Assemble Piroshki
Once the dough has doubled, punch it down and divide it into 12 equal pieces. Roll each piece into an oval shape, about 4-5 inches long. Place a generous tablespoon of the filling in the center of each oval. Pinch the edges to seal them tightly, ensuring no filling escapes. Slightly flatten each piroshki for even cooking during frying.
Step 6: Fry
In a deep pot or skillet, heat vegetable oil to a temperature of 350-375°F (180-190°C). Carefully add the piroshki to the hot oil, frying them in batches to avoid overcrowding. Cook for about 5 minutes, flipping halfway through, until they are golden brown and puffed. Use a slotted spoon to remove them, allowing excess oil to drain on paper towels.
Step 7: Cool and Serve
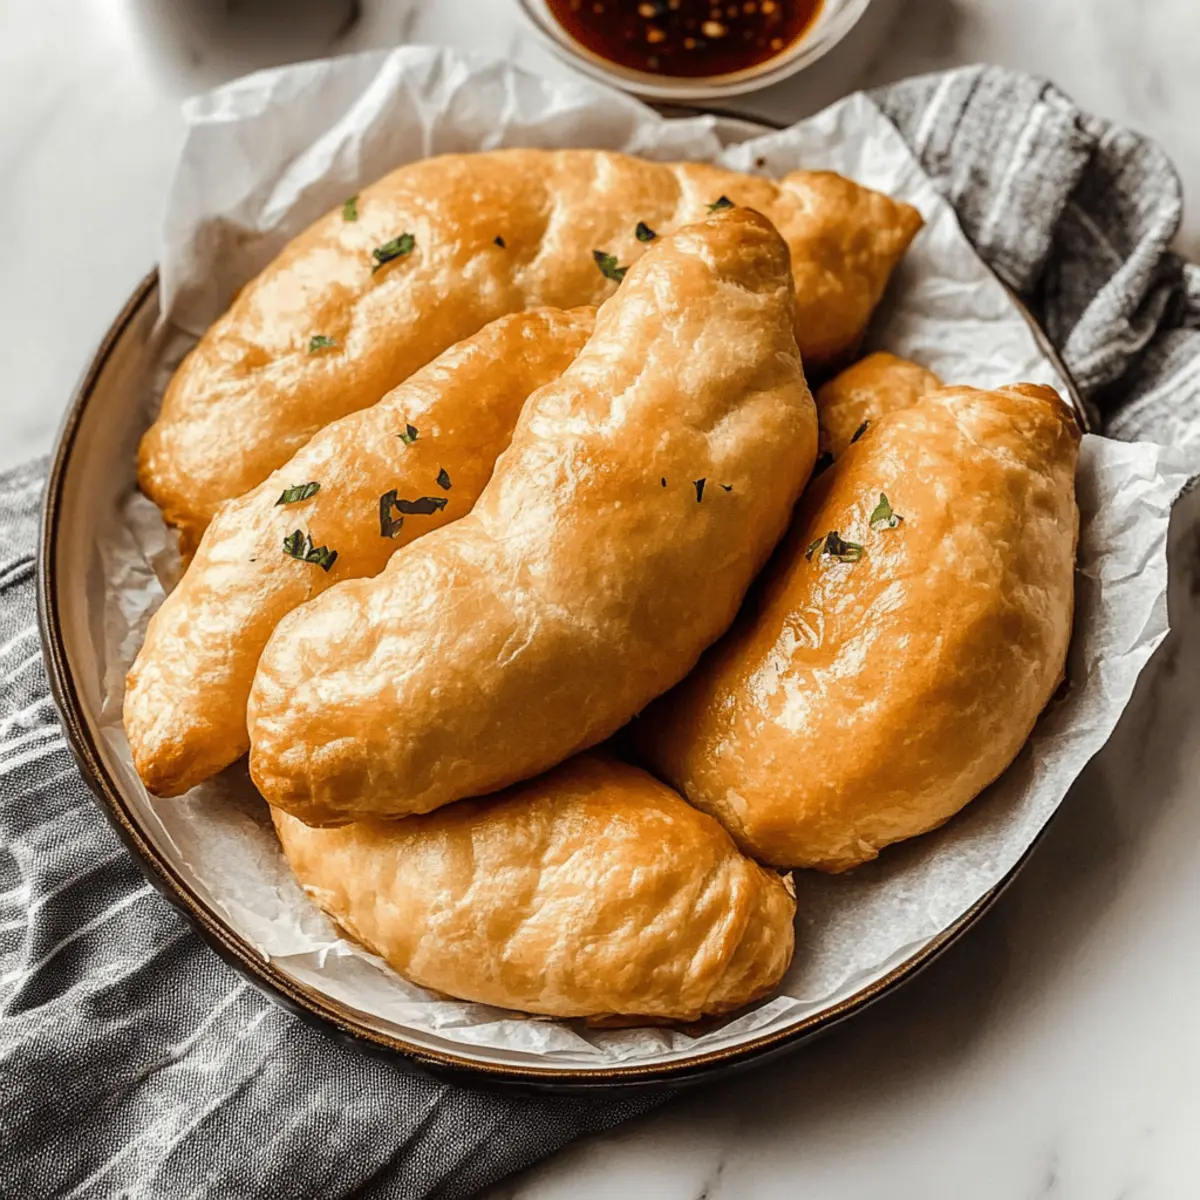
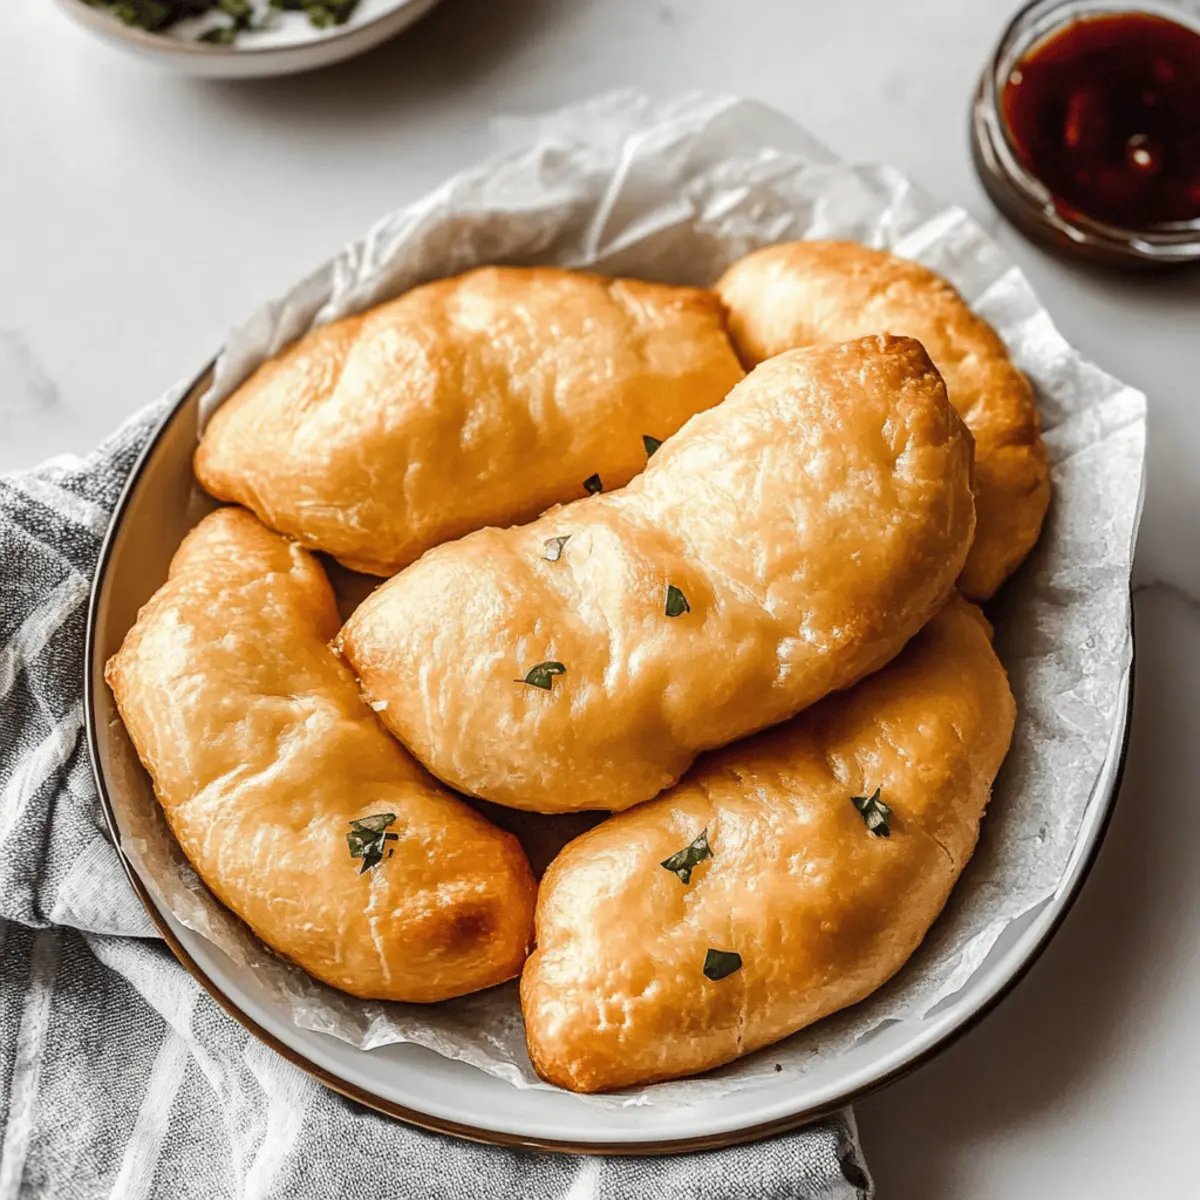
Once fried, let the piroshki cool slightly on a plate lined with paper towels to absorb any excess oil. Serve warm, with a side of sour cream for dipping, or enjoy them on their own as a delightful snack or main dish. These fluffy Russian Piroshki with Potatoes and Meat are best enjoyed fresh out of the fryer!
How to Store and Freeze Russian Piroshki
Room Temperature: Keep freshly fried piroshki in an airtight container for up to 2 days. If placing them in the fridge, be sure the container is completely sealed to prevent them from drying out.
Fridge: Store leftovers in an airtight container in the fridge for up to 3 days. Reheat them in the oven at 350°F (175°C) for about 10 minutes to regain their crispiness.
Freezer: Freeze unassembled piroshki before frying for up to 2 months. Lay them on a baking sheet to freeze individually; once solid, transfer to a freezer-safe bag. Fry directly from frozen, adding a couple of extra minutes to the frying time.
Reheating: For reheating fried piroshki, use the oven or an air fryer for best results, ensuring they stay crispy—avoid the microwave as it can make them soggy.
Expert Tips for Fluffy Russian Piroshki
-
Humidity Awareness: Adjust flour amounts based on humidity levels to ensure your dough isn’t too dry or too sticky, which can affect the final texture of your Russian Piroshki.
-
Temperature Matters: Always use room temperature ingredients like eggs and warm milk to promote better yeast activation and dough elasticity.
-
Fry with Care: Maintain oil temperature between 350-375°F for perfectly golden piroshki. If the oil is too hot, they may burn before cooking through.
-
Cool Before Assembly: Let both dough and filling cool adequately. This prevents sogginess and helps to maintain the fluffy texture of the piroshki.
-
Measurement Precision: For the best results, use a kitchen scale to measure flour accurately, ensuring consistency in your dough every time!
What to Serve with Fluffy Russian Piroshki with Potatoes and Meat
Elevate your dining experience with delicious accompaniments that enhance every bite of these delightful hand pies.
- Sour Cream: This classic pairing adds a creamy, cool element that balances the savory warmth of the piroshki.
- Russian Beet Salad: The earthy flavors and vibrant colors of beets in this fresh salad contrast beautifully with the doughy piroshki.
- Pickled Cucumbers: Their tangy crunch provides a refreshing contrast, cutting through the richness of the meat and potato filling.
- Garlic Dill Potatoes: These buttery, herb-infused potatoes echo the piroshki’s filling while adding extra texture and flavor. Together, they’re a comforting dish.
- Kefir or Kvass: These traditional fermented drinks provide a refreshing and tangy counterpart to the hearty piroshki, enhancing the overall meal experience.
- Steamed Vegetables: Freshly steamed broccoli or carrots add a light touch and vibrant color to your plate, balancing the richness of the piroshki.
- Borscht: This beetroot soup with its deep, rich flavors makes for a perfect pairing that is both hearty and comforting, often enjoyed with a dollop of sour cream.
- Fruit Compote: A sweet, fruity side can create a delightful contrast, especially if you opt for piroshki with sweet fillings later on.
- Pryaniki (Spiced Honey Cookies): If you’re serving a sweet filling variation, these spiced cookies make for a wonderful dessert pairing, rounding out a lovely meal.
Russian Piroshki: Customizations You’ll Love
Get creative with your Russian Piroshki and discover how easily you can adapt this beloved recipe to suit your tastes!
-
Vegetarian Filling: Replace ground meat with sautéed mushrooms or lentils for a hearty vegetarian option. These swaps bring earthiness and protein to your piroshki without losing flavor!
-
Cheesy Goodness: Mix in some shredded cheese, like mozzarella or cheddar, into your potato filling for a deliciously creamy twist. The melty goodness will elevate each bite to the next level!
-
Sweet Treats: Try using fruit preserves or sweetened cream cheese for a dessert-style piroshki. These sweet bites make for an unforgettable finish!
-
Herb Twist: Experiment by adding fresh herbs like chives or parsley to your potato and meat filling, giving it an aromatic herbal lift. It’s a simple way to make a familiar dish feel fresh!
-
Spicy Kick: For those who love a little heat, sprinkle in some chili flakes or add diced jalapeños to your meat filling. This ups the flavor profile with a delightful spiciness that livens things up.
-
Gluten-Free Option: Substitute all-purpose flour with a gluten-free blend to ensure everyone can enjoy these delectable treats. Just make sure to check the binding agents in your flour substitute!
-
Baked Piroshki: If frying isn’t your thing, brush the assembled piroshki with egg wash and bake them for a healthier alternative. They will come out golden but remain fluffy and delightful.
-
Savory Alternatives: Use other fillings such as sauerkraut, spinach, or cheese and potato for a unique spin on this classic. Each ingredient will present a new flavor experience worth savoring!
Feel free to mix and match these variations, ensuring your family can enjoy piroshki just the way they like them. Don’t forget to check out our serving suggestions for perfect pairings to make your piroshki experience even better!
Make Ahead Options
These Russian Piroshki with Potatoes and Meat are perfect for meal prep enthusiasts! You can prepare the dough and filling up to 24 hours in advance, allowing for a stress-free cooking experience on busy weeknights. Simply let the dough rise as instructed, then refrigerate it until you’re ready to assemble the piroshki. The filling can also be made ahead; just cook the potatoes and ground meat mixture, let them cool, and store them in an airtight container in the fridge. When it’s time to enjoy your piroshki, let the dough come to room temperature before rolling and frying as directed for delicious results that taste just as good as freshly made!
Russian Piroshki with Potatoes and Meat Recipe FAQs
What type of potatoes should I use for the filling?
For the best results, use starchy potatoes such as Russet or Idaho, which yield a creamy texture when boiled and mashed. Avoid waxy potatoes like Red Bliss, as they can become gluey and won’t blend well with the meat filling.
How should I store the leftover piroshki?
Place leftover piroshki in an airtight container at room temperature for up to 2 days. For longer storage, refrigerate in an airtight container for up to 3 days. Reheat in the oven at 350°F (175°C) for about 10 minutes to restore their crispiness.
Can I freeze piroshki?
Absolutely! You can freeze unassembled piroshki before frying. Lay them out on a baking sheet in a single layer to freeze individually. Once solid, transfer them to a freezer-safe bag and store for up to 2 months. To fry, adjust cooking time by adding a couple of extra minutes, frying them directly from frozen.
What if my dough is too sticky or dry?
Don’t worry! If your dough is too sticky, sprinkle a bit of flour while kneading until manageable. If it’s too dry, add a small amount of warm milk—only a tablespoon at a time—until it reaches the right consistency. Remember, humidity can affect dough texture, so adjustments may be necessary!
Are these piroshki suitable for my kids or anyone with allergies?
While delicious, these piroshki do contain common allergens like wheat and eggs, so keep this in mind for anyone with dietary restrictions. You can try making a vegetarian version using mushrooms or lentils instead of ground meat for kids or guests who don’t eat meat.
How long does the dough need to rise?
Let the dough rise for about 60-90 minutes until it has doubled in size. Place it in a warm area, covering it with a clean kitchen towel to retain moisture. A well-risen dough is crucial for achieving that fluffy texture that makes Russian piroshki so inviting!

Savory Russian Piroshki: Fluffy Treats You’ll Crave!
Ingredients
Equipment
Method
- In a large mixing bowl, combine the egg, sugar, and salt until smooth. Slowly mix in warm milk and vegetable oil. Gradually add sifted flour and instant yeast. Knead for 8-10 minutes until smooth and elastic.
- Cover the dough with a clean towel and let it rise in a warm area for about 60-90 minutes or until doubled in size.
- While the dough is rising, peel and chop the potatoes. Boil them in salted water for 10-25 minutes until fork-tender. Drain and mash.
- Melt unsalted butter in a skillet. Add chopped onion and sauté for 5 minutes. Stir in ground meat, cooking until browned. Season with salt, pepper, and optional paprika.
- Combine cooled mashed potatoes with meat mixture, adding fresh dill and season to taste. Mix well and set aside.
- Once the dough has doubled, punch it down and divide into 12 pieces. Roll each piece into an oval and fill with a tablespoon of filling. Pinch edges to seal.
- Heat oil in a deep pot to 350-375°F. Fry piroshki in batches until golden brown, about 5 minutes, flipping halfway through.
- Cool slightly on paper towels, then serve warm with sour cream.
Leave a Reply