
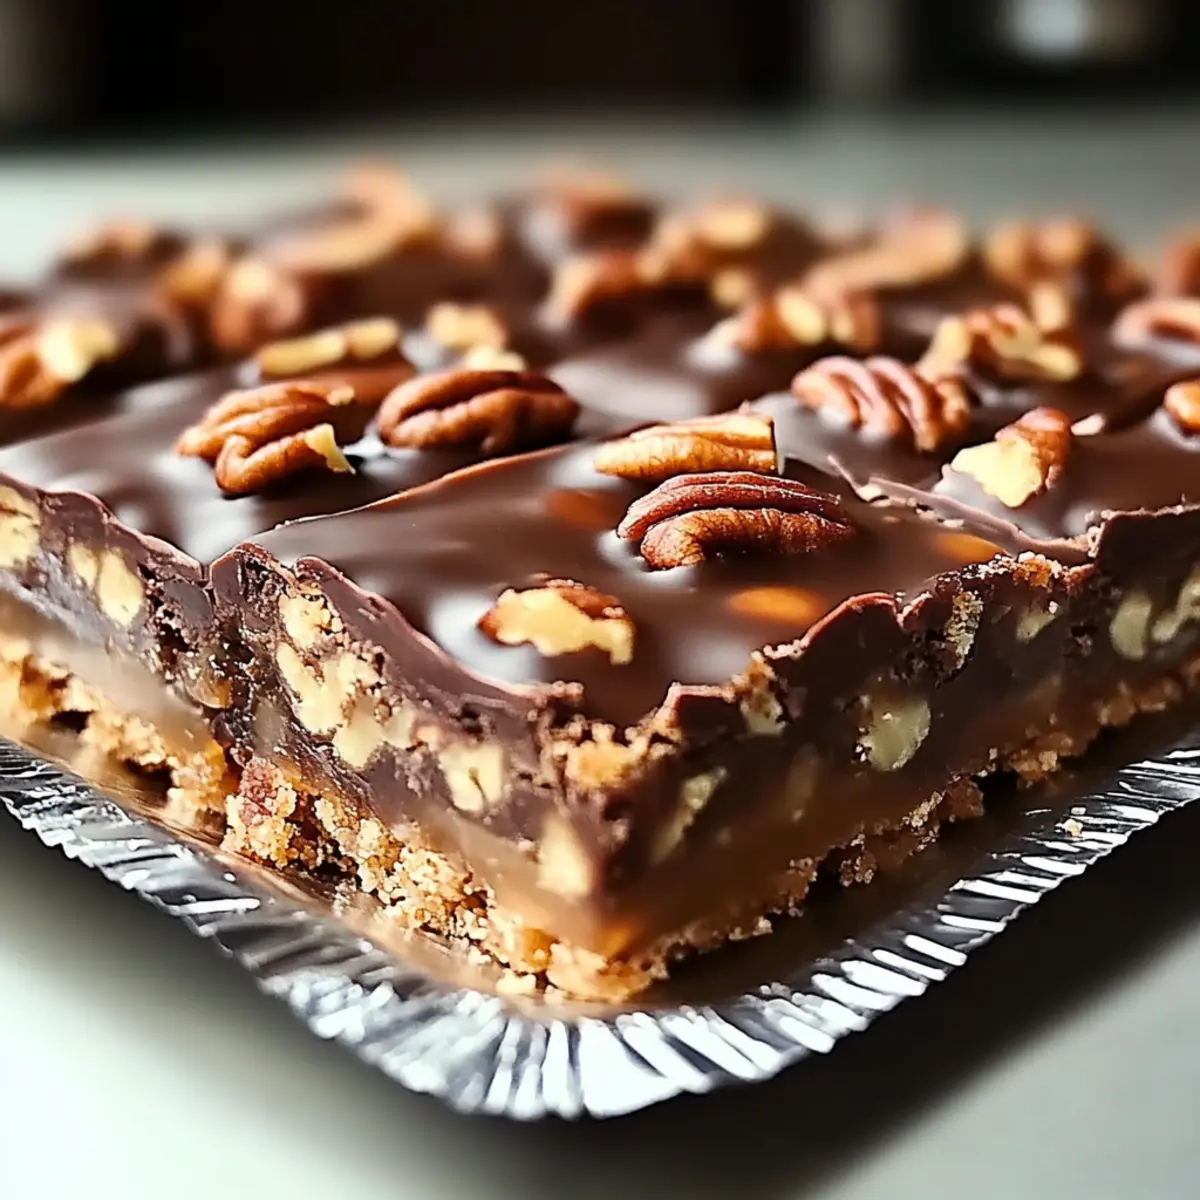
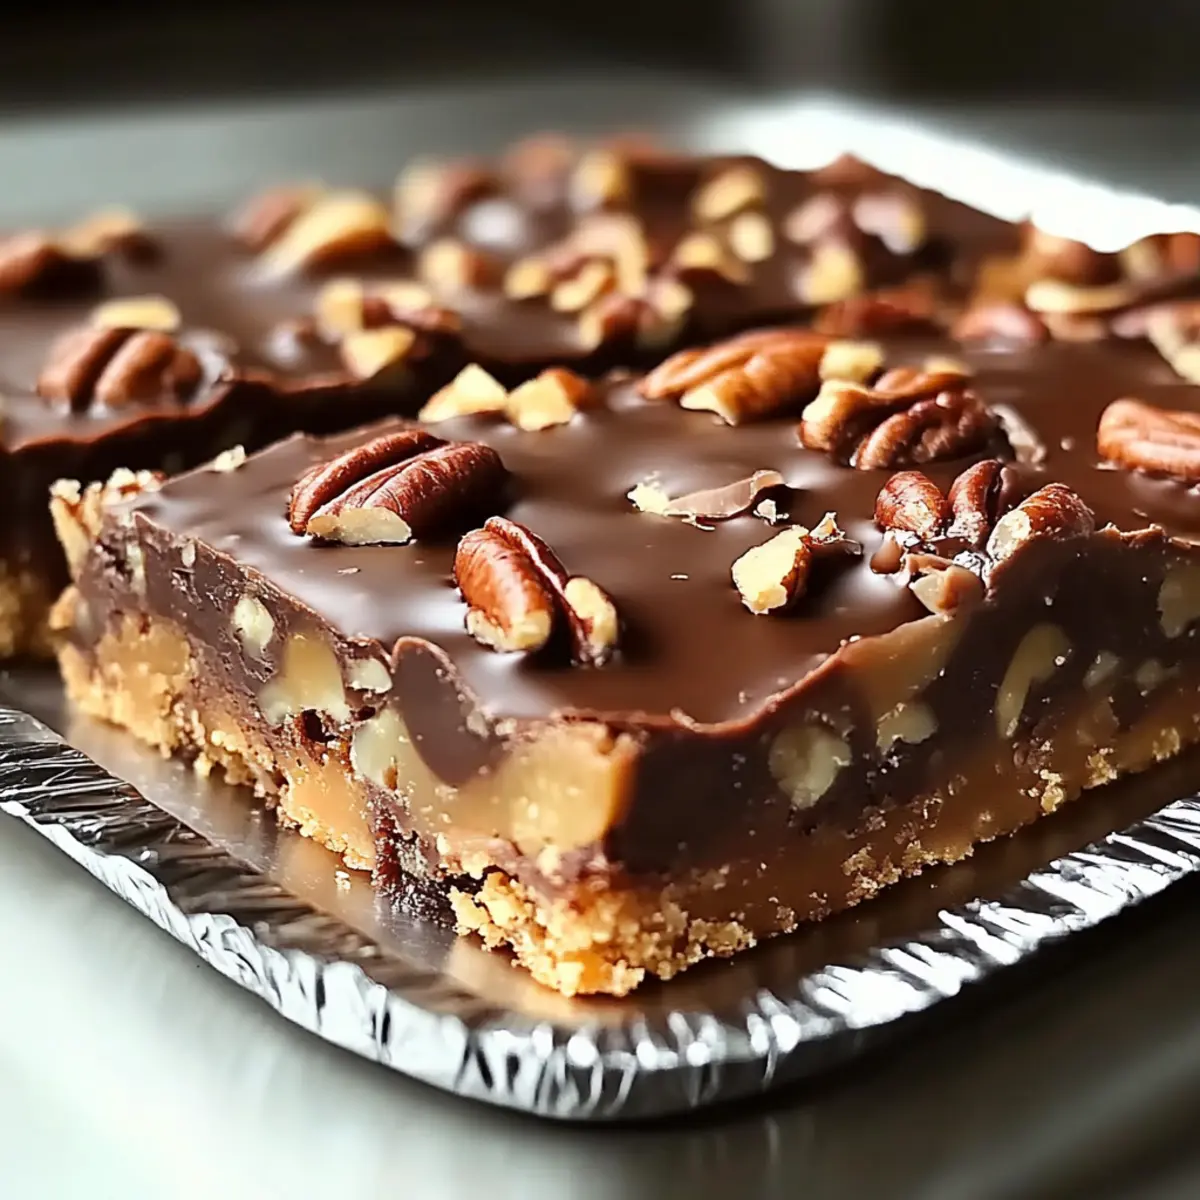
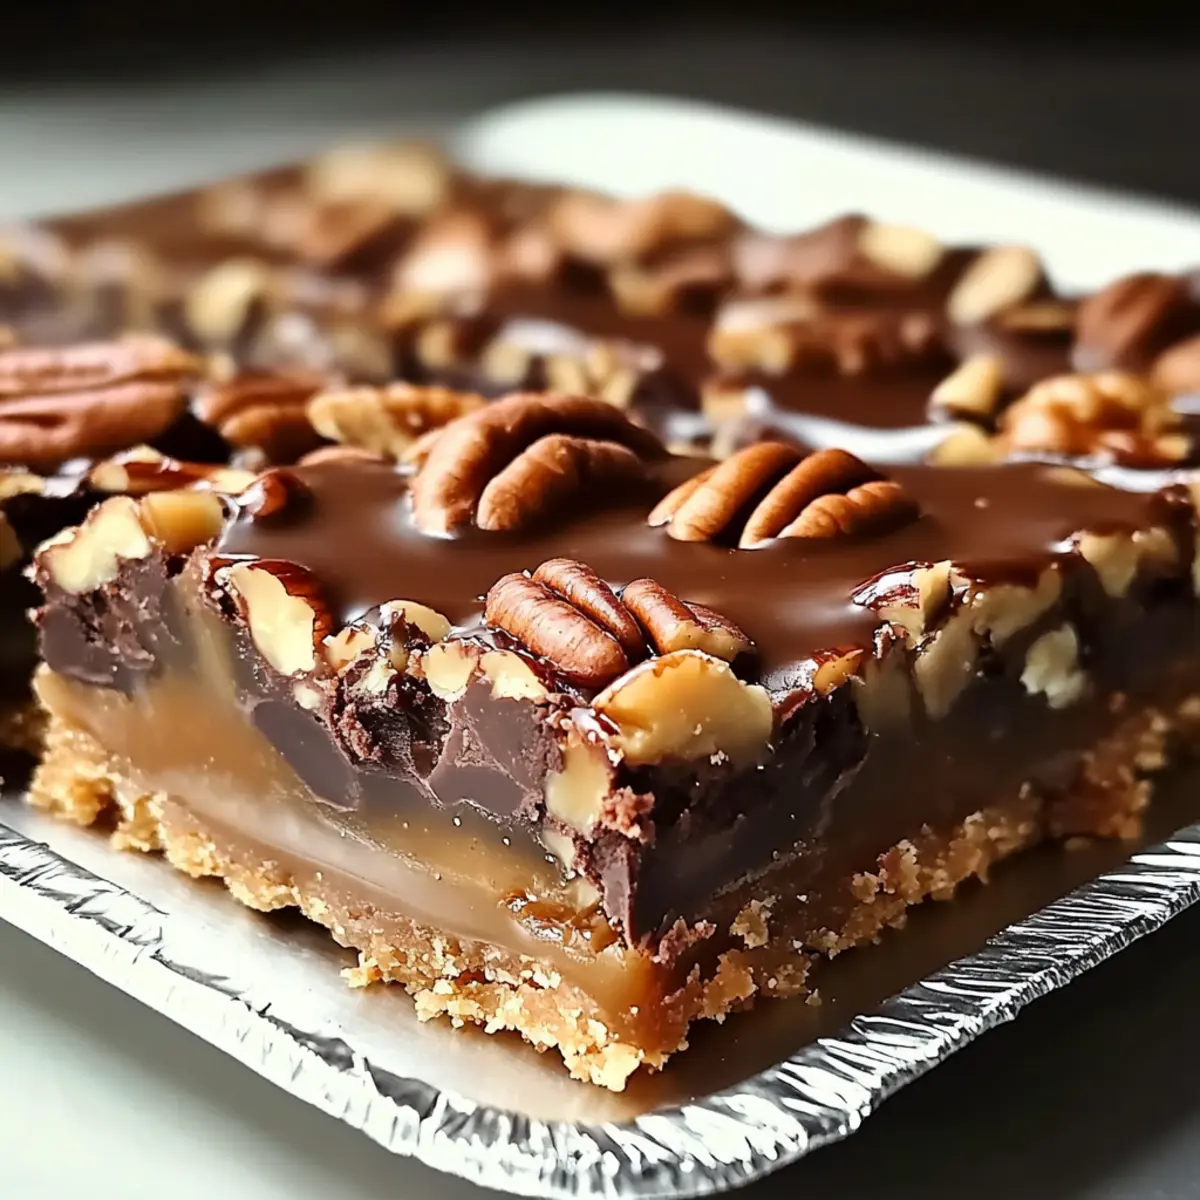
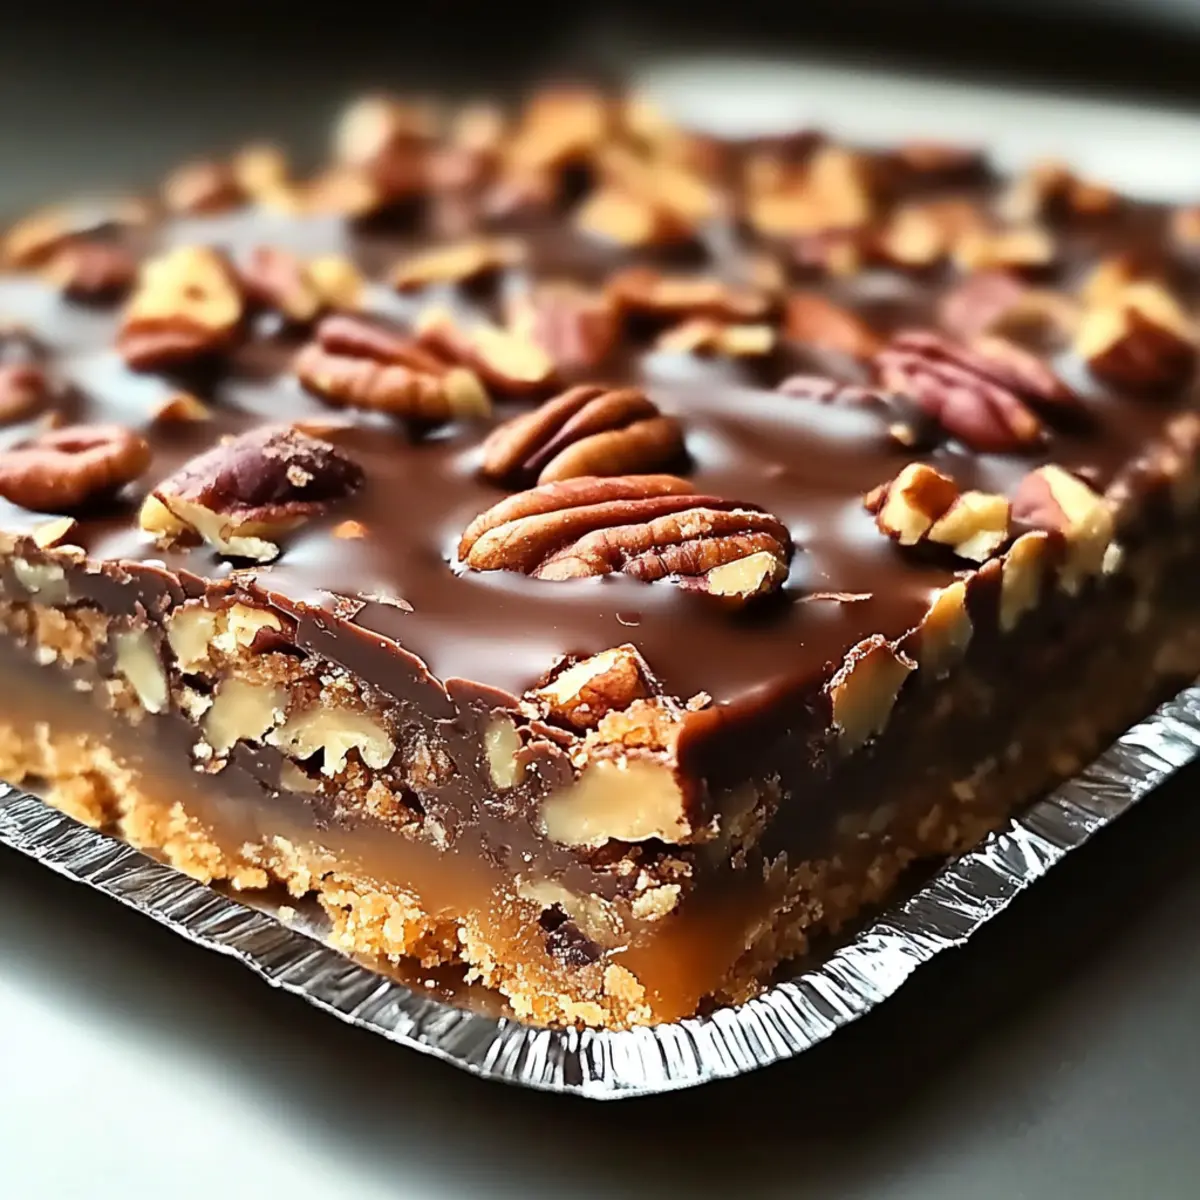
As I stirred the mixture of butter and brown sugar, a wave of nostalgia hit me—my grandmother’s laughter echoing through her cozy kitchen as the sweet aroma of caramel enveloped us. This comfort is exactly what I want to share with you today through my Easy Turtle Bars. These layered delights seamlessly combine a buttery shortbread crust, gooey caramel, and decadent chocolate, topped with crunchy pecans. They’re not just simple to whip up; they also make a crowd-pleasing dessert for gatherings or a satisfying treat for when a sweet craving strikes. Imagine the joy on your friends’ faces as they take a bite! Ready to dive into a blissful baking adventure? Let’s get started!
Why Are Turtle Bars So Irresistible?
Decadence Defined: These Turtle Bars are the epitome of indulgence, layering buttery shortbread, sweet caramel, and creamy chocolate into every rectangular bite.
Quick and Easy: With just a few simple steps, you can whip up these treats faster than a trip to the bakery!
Crowd-Pleasing Delight: Perfect for parties or family gatherings, everyone will rave about these delicious bars—there’s just something about homemade desserts that wow guests!
Make-Ahead Magic: These bars can be prepared in advance, saving you time on the day of your event. Simply store them, and they’ll be ready to shine when you are!
Optional Variations: Customize your Turtle Bars with different chocolates or nuts to suit your taste. Check out easy ideas to adapt this treat to your preferences!
Turtle Bars Ingredients
For the Shortbread Crust
- Cold Butter – Ensures a buttery, crisp shortbread base. Tip: Use cold for a flaky texture.
- All-Purpose Flour – Provides structure for the crust. Can substitute with gluten-free flour.
- Granulated Sugar (for crust) – Sweetens the crust.
For the Caramel Layer
- Granulated Sugar (for caramel) – Creates sweet, gooey caramel.
- Unsalted Butter (for caramel) – Adds richness to the caramel.
- Heavy Cream – Creates a smooth texture in the caramel.
- Toasted Pecans – Introduces delightful crunch. Use fresh ones, free from dark spots.
For the Topping
- Chocolate Chips – Semi-sweet or milk for a velvety finish. Dark chocolate is a variation option.
- Sea Salt (optional) – Adds a sophisticated contrast to the sweetness.
- Extra Pecans (for garnish) – Enhances presentation.
Step‑by‑Step Instructions for Turtle Bars
Step 1: Prepare the Crust
Preheat your oven to 350°F (175°C). In a large mixing bowl, combine cold butter, all-purpose flour, and granulated sugar until the mixture resembles coarse crumbs. Press this crumbly mixture evenly into the bottom of a lined 9×13-inch dish. Bake in the preheated oven for 15-18 minutes, or until the crust is lightly golden.
Step 2: Make the Caramel Layer
While the crust is baking, prepare the caramel layer. In a medium saucepan over medium heat, combine the granulated sugar and unsalted butter, stirring continuously until both are melted and the mixture is smooth, which should take about 5 minutes. Gradually whisk in the heavy cream, ensuring it’s fully incorporated, then fold in the toasted pecans for that delightful crunch.
Step 3: Spread the Caramel
Once your shortbread crust is done baking, remove it from the oven and immediately pour the warm caramel mixture over the hot crust. Use a spatula to spread the caramel evenly across the surface. Return the dish to the oven and bake for an additional 10-12 minutes, or until the caramel is bubbly and slightly golden at the edges.
Step 4: Add the Topping
Cool the caramel-covered crust for about 10 minutes after baking. Meanwhile, place chocolate chips in a microwave-safe bowl. Microwave in 30-second intervals, stirring in between, until the chocolate is fully melted and smooth. Pour the melted chocolate over the caramel layer, spreading it with a spatula for an even glossy finish.
Step 5: Cool Completely
Allow the assembled Turtle Bars to cool at room temperature for at least 1 hour to set properly. For cleaner cuts, refrigerate the dish for an additional 30 minutes. Once cooled, slice the bars into squares or rectangles, garnishing with extra pecans if desired, and they are ready to be served!
How to Store and Freeze Turtle Bars
Room Temperature: Store in an airtight container at room temperature for up to 5 days to maintain freshness and avoid any stickiness.
Fridge: If you prefer a chilled treat, keep them in the fridge for up to 2 weeks. Just ensure they’re well-wrapped to prevent drying out.
Freezer: Wrap the bars tightly in plastic wrap and aluminum foil, then place in a freezer-safe container. They can be frozen for up to 3 months. Thaw at room temperature before serving for the best taste.
Reheating: For a gooey texture, gently reheat individual bars in the microwave for 10-15 seconds before serving. Enjoy your Turtle Bars warm!
Turtle Bars Variations & Substitutions
Feel free to get creative with these Turtle Bars and make them your own with delightful twists and swaps!
- Dark Chocolate: Swap semi-sweet chocolate chips for dark chocolate for a richer, more intense flavor.
- Nut-Free Version: Replace pecans with sunflower seeds or pumpkin seeds for a nut-free option.
- Sugar Alternative: Use honey or pure maple syrup instead of granulated sugar for a natural sweetness boost.
- Spicy Kick: Add a pinch of cayenne pepper to the caramel layer for a surprising hint of heat!
- Dairy-Free: Substitute vegan butter and non-dairy cream to create a completely dairy-free treat.
- Extra Crunch: Mix in crispy rice cereal with the pecans for added texture and a fun crunch.
- Cookie Crust: Instead of shortbread, use crushed graham crackers mixed with melted butter for a different crust base.
Explore these options and create a version that speaks to your taste buds! For more inspiration, check out my delicious Chocolate Chip Cookie Bars or try my delightful take on No-Bake Cheesecake Bars. Happy baking!
Make Ahead Options
These Easy Turtle Bars are perfect for making ahead, saving you precious time during busy days or gatherings! You can prepare the shortbread crust up to 24 hours in advance; simply bake it, let it cool, and store it covered at room temperature. The caramel layer can also be made 3 days ahead; just keep it in an airtight container in the refrigerator to maintain its delightful gooeyness. When you’re ready to assemble, warm the caramel briefly to soften, then pour and bake as indicated. Finally, add the chocolate topping and allow the bars to cool completely before serving. They’ll be just as delicious while allowing you to enjoy the company of your guests!
Expert Tips for Turtle Bars
-
Cold Ingredients Matter: Ensure your butter is cold when making the crust; this is crucial for achieving a flaky texture in your Turtle Bars.
-
Watch the Caramel: Stir constantly as you make the caramel to prevent burning; a little attention goes a long way in ensuring smooth, gooey perfection!
-
Cooling Time: Don’t rush the cooling process. Allow the bars to set completely at room temperature before cutting to avoid a sticky mess.
-
Storage Savvy: Keep your Turtle Bars fresh by storing them in an airtight container. They can last up to 5 days at room temperature or 2 weeks in the fridge!
-
Reheat for Softness: If the caramel hardens, reheat the bars gently with a splash of heavy cream to restore that gooey goodness without wasting any!
What to Serve with Easy Turtle Bars
Indulging in Turtle Bars is a delightful experience, but pairing them can elevate your dessert game to new heights!
-
Rich Vanilla Ice Cream: The creamy texture beautifully contrasts the crunchy bars, creating a heavenly blend of flavors in each bite. A scoop of this classic favorite alongside warm Turtle Bars is pure bliss.
-
Fresh Berries: Sweet and tart berries like raspberries or strawberries offer a refreshing balance against the sweetness of the bars, cleansing the palate and enhancing the dessert’s overall indulgence.
-
Espresso or Coffee: The bold flavors of coffee or a shot of strong espresso perfectly complement the rich chocolate and caramel, making it an ideal pairing for your afternoon sweet treat.
-
Chocolate Sauce Drizzle: Drizzling a bit of warm, decadent chocolate sauce over your Turtle Bars takes the experience to another level. Extra richness isn’t a bad thing, right?
-
Whipped Cream: Light and airy whipped cream adds a delightful touch of fluffiness, making your dessert feel even more decadent while dialing down the sweetness a notch.
-
Salty Pretzel Bites: The crunchy, salty pretzels contrast beautifully with the sweet Turtle Bars, offering a fun twist that makes every bite interesting. Consider a dipping chocolate sauce for an extra touch!
-
Chilled White Wine: A glass of chilled Riesling or sparkling wine can elevate the moment, the refreshing acidity cutting through the creamy layers and enhancing your dessert experience.
-
Caramel Pretzel Brownies: For a double treat! This rich brownie with its own caramel and pretzel topping pairs beautifully with Turtle Bars, creating a dessert platter that is sure to impress any crowd.
Easy Turtle Bars Recipe FAQs
How can I choose the right pecans for my Turtle Bars?
Absolutely! When selecting pecans, look for fresh ones that are free from dark spots or any signs of mold. Fresh pecans should have a pleasant, nutty aroma and a firm texture. I often recommend buying them from the bulk section to ensure they are not pre-packaged and stored for too long, which can affect flavor.
What’s the best way to store Turtle Bars?
You can store your Turtle Bars in an airtight container at room temperature for up to 5 days; they’ll stay beautifully fresh! If you want to extend their life, refrigerate them for up to 2 weeks—just remember to wrap them well to prevent drying out.
Can I freeze Turtle Bars, and how do I do it properly?
Yes! You can freeze Turtle Bars for up to 3 months. Wrap them tightly in plastic wrap, then cover with aluminum foil to avoid freezer burn. Place the wrapped bars in a freezer-safe container. When you’re ready to enjoy them, simply thaw them at room temperature before serving for the best flavor and texture.
What should I do if my caramel hardens while making the bars?
If you find that your caramel has hardened, don’t worry! Simply add a splash of heavy cream to the hardened caramel in a microwave-safe bowl and gently heat it in 30-second intervals, stirring often until it becomes smooth again. This will help restore that gooey deliciousness, so you won’t have to discard any of your hard work!
Are there any dietary considerations I should be aware of?
Yes, these Turtle Bars contain gluten, dairy, and nuts. If you have any food allergies, you can substitute with gluten-free flour and plant-based butter alternatives. Additionally, make sure to choose nut-free chocolate chips if you’re serving those with nut allergies. It’s versatile, so feel free to adapt as needed to cater to your guests!
Can I modify the ingredients to create a healthier version?
The more the merrier! You can try substituting some of the sugar with natural sweeteners like honey or maple syrup. Also, consider using dark chocolate for a more intense flavor and added antioxidants. Experimenting with the recipe can lead to a healthier but equally delightful version of these Turtle Bars!
Decadent Turtle Bars to Satisfy Your Sweet Cravings
Ingredients
Equipment
Method
- Preheat your oven to 350°F (175°C). In a mixing bowl, combine cold butter, flour, and sugar until crumbly. Press evenly into the bottom of a lined dish. Bake for 15-18 minutes until golden.
- In a saucepan over medium heat, combine granulated sugar and unsalted butter. Stir until melted and smooth, about 5 minutes. Gradually whisk in heavy cream and fold in toasted pecans.
- Pour the warm caramel over the crust; spread evenly. Return to oven and bake 10-12 minutes until bubbly.
- Cool the caramel-covered crust for about 10 minutes. Melt chocolate chips in the microwave, stirring until smooth. Pour over the caramel and spread evenly.
- Allow to cool at room temperature for at least 1 hour. Refrigerate for 30 minutes, then slice into squares, garnishing with extra pecans.
Leave a Reply