
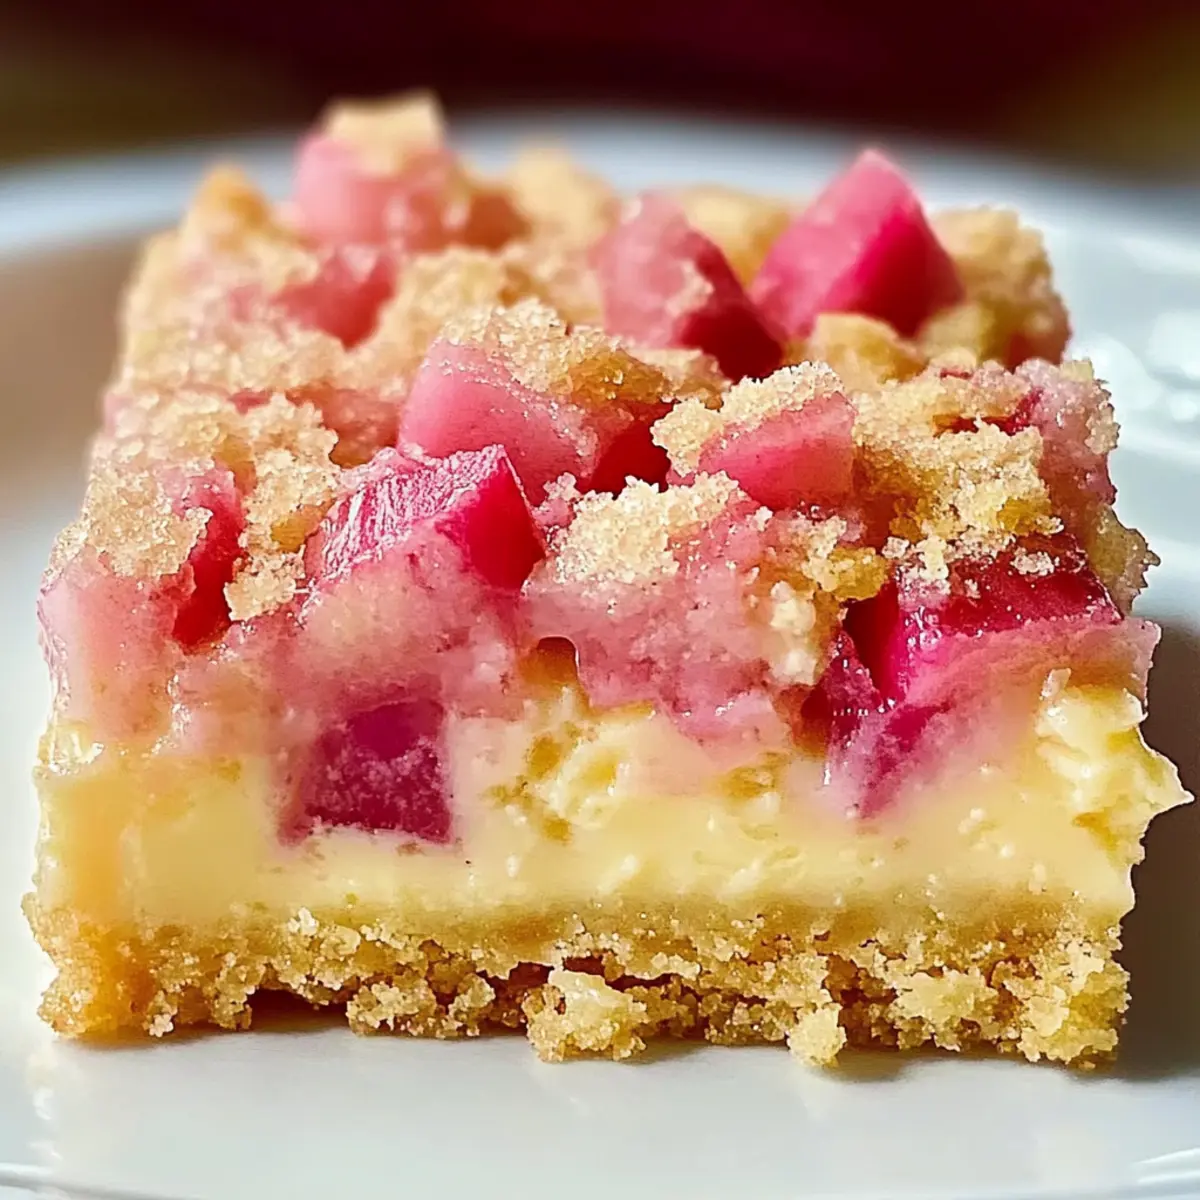
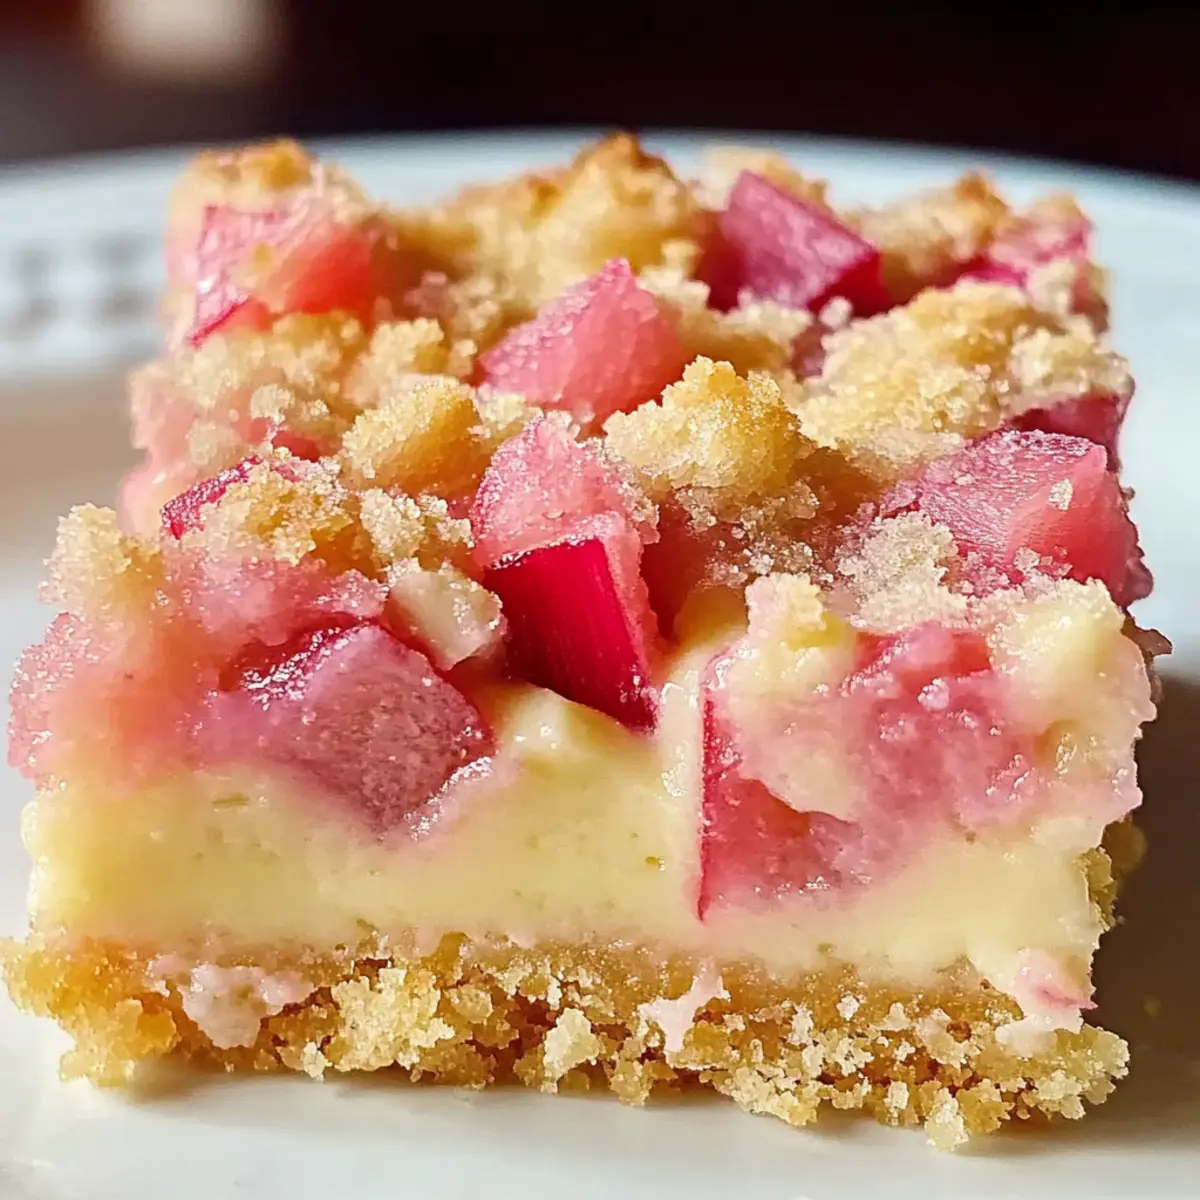
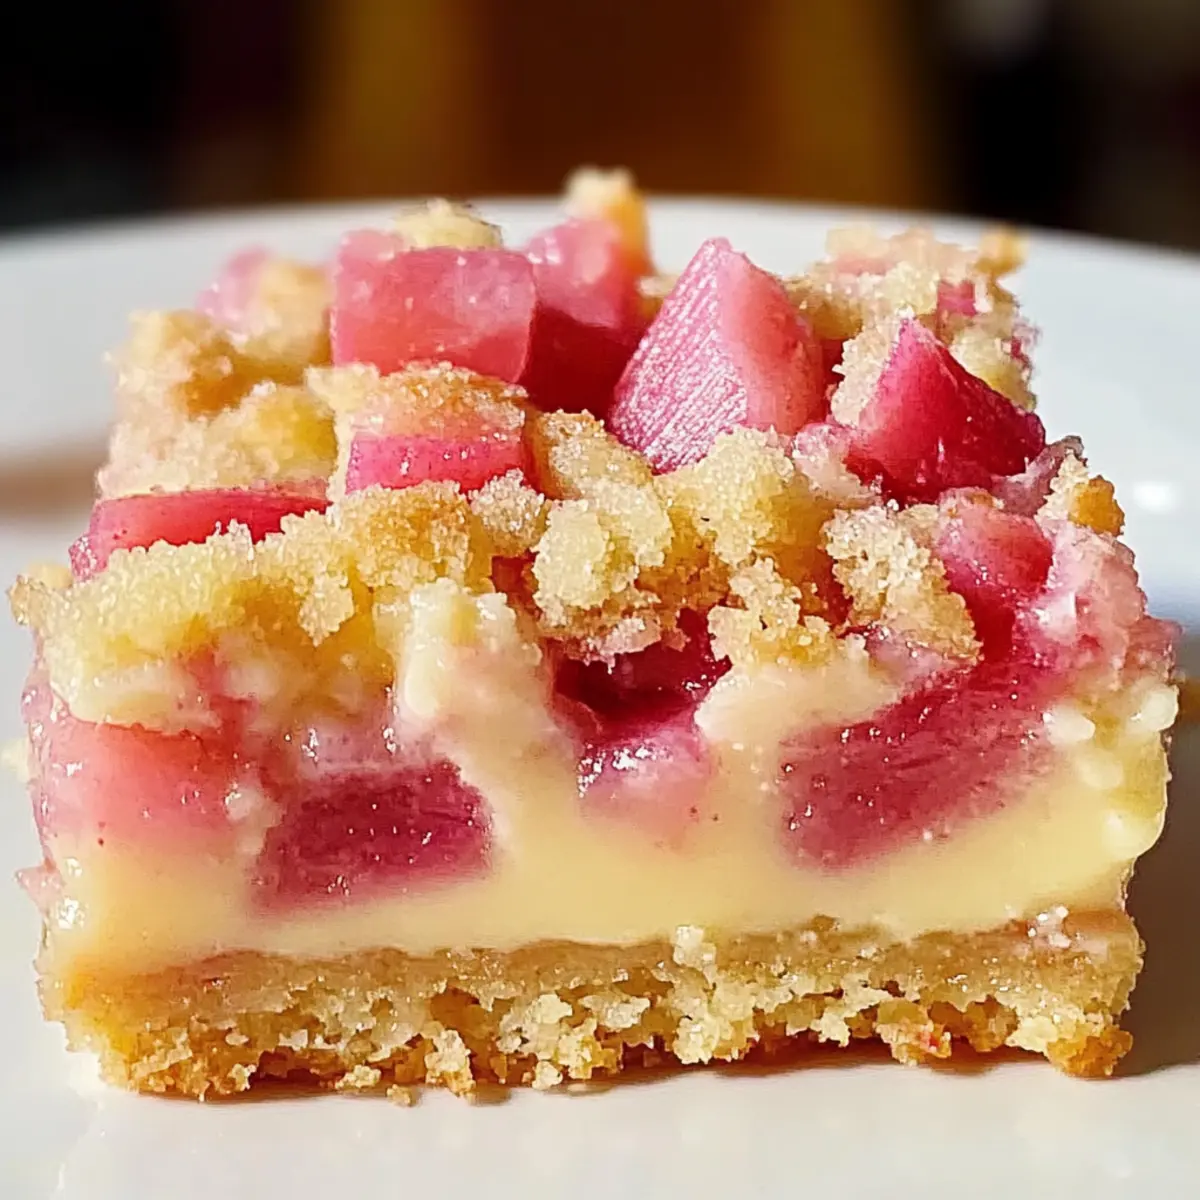
As I peeled back the layers of my grandmother’s recipe box, a little slip of paper caught my eye, whispering sweet memories of springtime baking. These Rhubarb Dream Bars, with their buttery shortbread crust and creamy, custard-like filling, promise to transport you straight to sunny afternoons spent in a garden, savoring the tangy essence of fresh rhubarb. What’s fantastic about this simple 6-ingredient dessert is not just its ease of preparation, but how adaptable it is—perfect for those looking to whip up a quick treat that feels both nostalgic and fresh. Whether you’re a seasoned home chef or just starting your culinary journey, these bars are sure to impress your friends and family, while bringing a little sunshine to your kitchen. So, are you ready to dive into this delightful spring adventure?
Why will you fall for Rhubarb Dream Bars?
Simplicity at Its Best: With just six ingredients, these bars make baking an enjoyable experience.
Nostalgic Flavors: Every bite is a delightful trip down memory lane, reminiscent of grandma’s baking days.
Adaptable and Versatile: You can switch things up with gluten-free options or different fruits like strawberries or raspberries.
Perfect for Sharing: These bars make a stunning dessert for gatherings, appealing to both kids and adults with their sweet and tangy flavor profile.
Time-Saving Treat: Minimal prep time means you can enjoy fresh dessert without hours in the kitchen, letting you spend more time with loved ones.
Don’t forget to try serving these dream bars with a dollop of whipped cream or check out our tips on how to effectively store your desserts.
Rhubarb Dream Bars Ingredients
For the Crust
• All-Purpose Flour – Provides structure and basis for both crust and filling; substitute with a gluten-free blend if needed.
• Powdered Sugar – Adds sweetness and helps create a tender crust.
• Butter (cold and cubed) – Ensures a flaky, buttery crust; avoid room temperature butter for best results.
For the Filling
• Large Eggs – Binds the filling together, creating that luscious custard-like texture; using room temperature eggs aids in smooth mixing.
• Granulated Sugar – Sweetens the filling while balancing the tanginess of the rhubarb.
• Salt – Enhances overall flavor, perfectly balancing the sweetness.
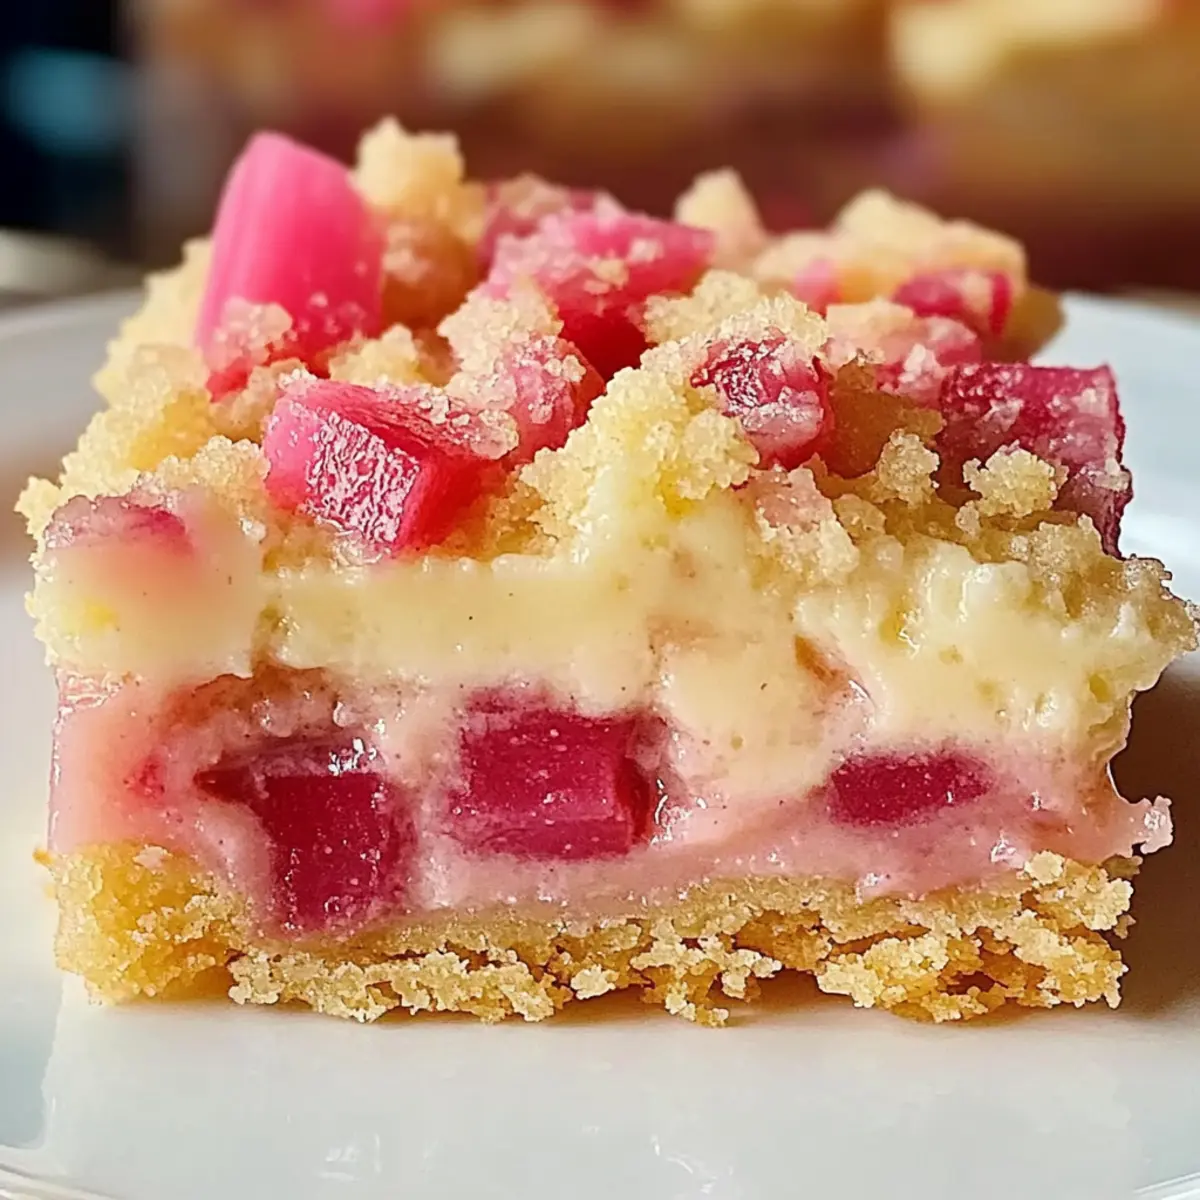
• Diced Rhubarb – The star ingredient providing vibrant tanginess; fresh or thawed frozen rhubarb works well—thaw and drain if using frozen.
• Ground Cinnamon (optional) – Adds a warm, cozy flavor to elevate the bars.
Indulging in these Rhubarb Dream Bars will surely leave you reminiscing about those cherished family moments!
Step‑by‑Step Instructions for Rhubarb Dream Bars
Step 1: Preheat the Oven
Begin by preheating your oven to 325°F (163°C). While the oven warms up, grab a 9×13 baking pan and generously grease it to prevent sticking, ensuring a smooth release after baking. This will set the stage for your Rhubarb Dream Bars, allowing the crust to bake evenly and achieve the perfect golden-brown finish.
Step 2: Make the Crust
In a large bowl, whisk together the all-purpose flour and powdered sugar until well combined. Next, cut in the cold, cubed butter using a pastry cutter or your fingertips until the mixture resembles coarse crumbs. Once mixed, press this crumbly mixture evenly into the bottom of your prepared pan, forming the crust. Bake for 15 minutes, or until just lightly golden around the edges.
Step 3: Prepare the Filling
While the crust bakes, grab the same mixing bowl and lightly beat the large eggs. Stir in granulated sugar, a pinch of salt, and a bit of flour, mixing thoroughly until smooth. If you wish, add a dash of ground cinnamon for extra warmth. This filling will create the creamy, custard-like texture in your delightful Rhubarb Dream Bars.
Step 4: Add the Rhubarb
Gently fold in the diced rhubarb to the egg mixture, ensuring the fruit is well coated with the sweet filling. This step adds that tangy pop of flavor that defines the bars. Once incorporated, carefully pour the rhubarb-infused mixture over the pre-baked crust, spreading it evenly to ensure every bite is packed with flavor.
Step 5: Bake the Bars
Return the pan to the oven and bake the Rhubarb Dream Bars for approximately 60 minutes. You’ll know they are done when the center is set and no longer jiggly, while the top develops a beautiful golden hue. Be patient, as the delicious aroma will fill your kitchen!
Step 6: Cool and Slice
Once baked, remove the bars from the oven and allow them to cool completely in the pan on a wire rack. This cooling step is essential for achieving clean, precise slices. After about an hour, you can cut the bars into squares and serve them chilled or at room temperature for the ultimate spring treat.
How to Store and Freeze Rhubarb Dream Bars
Fridge: Store your Rhubarb Dream Bars in an airtight container in the refrigerator for up to 4–5 days. This preserves their delightful creaminess and prevents drying out.
Freezer: For longer storage, freeze the bars in layers separated by parchment paper. They’ll maintain their delicious flavor for up to 2 months, perfect for an impromptu sweet treat!
Reheating: When you’re ready to enjoy, let them thaw in the fridge overnight. Serve chilled or at room temperature, and consider a quick warm-up in the microwave for 10-15 seconds if you prefer them slightly warm.
Assembly Tip: For easier slicing, ensure the bars are completely cool before cutting, which also helps them maintain their structure during freezing and thawing.
What to Serve with Rhubarb Dream Bars?
Elevate your dessert experience with delightful pairings that highlight the sweet and tangy notes of these bars.
-
Creamy Vanilla Ice Cream: A scoop of this classic companion adds creaminess and balances the tartness of the rhubarb, creating a heavenly contrast.
-
Whipped Cream: A dollop of freshly whipped cream adds a light, airy texture that enhances the bars’ rich custard filling and complements their sweetness beautifully.
-
Fresh Berries: Serve alongside a medley of strawberries or blueberries for a burst of freshness that brightens each mouthful, echoing the rhubarb’s tanginess.
-
Lavender Lemonade: A glass of this refreshing drink adds a floral note, perfectly balancing the tangy flavor and enhancing the overall enjoyment of your dessert.
-
Nutty Granola: A sprinkle of nutty granola on top will provide a delightful crunch, contrasting with the creamy texture of the bars while adding a wholesome aspect.
-
Ginger Tea: The warming spices in ginger tea will complement the flavor profile of the bars, enhancing the experience with its soothing aroma and slight heat.
Enhancing your Rhubarb Dream Bars with these thoughtful pairings will not only impress your guests but also create a memorable, multi-dimensional dessert experience.
Make Ahead Options
These Rhubarb Dream Bars are a fantastic choice for busy home cooks looking to simplify their meal prep! You can prepare the buttery shortbread crust up to 24 hours in advance by pressing the mixture into the pan and storing it in the refrigerator. The filling can be made the day before as well; simply whisk together the eggs, sugar, and rhubarb, then refrigerate it. When you’re ready to bake, pour the chilled filling over the pre-baked crust and bake as directed. To maintain the bars’ delightful texture, allow them to cool completely before slicing and refrigerating in an airtight container, where they’ll stay fresh for up to 4-5 days. Enjoy the charm of homemade Rhubarb Dream Bars without the last-minute rush!
Rhubarb Dream Bars Variations & Substitutions
Feel free to let your creativity shine as you adapt these delightful bars to suit your taste and dietary preferences!
- Gluten-Free: Substitute all-purpose flour with a gluten-free flour blend for a tasty, gluten-free version.
- Fruit Twist: Swap out diced rhubarb for chopped strawberries or raspberries to create delicious berry-infused bars.
- Nutty Addition: Sprinkle in some chopped pecans or almonds for an inviting crunchy texture that pairs beautifully with the creamy filling.
- Dairy-Free: Use a plant-based butter alternative and almond or oat milk in place of regular butter for a dairy-free dessert.
- Sweeten Naturally: Replace granulated sugar with coconut sugar or honey for a more natural sweetness that complements the tangy rhubarb.
- Spice It Up: Add a pinch of ground ginger or cardamom to the filling for an unexpected flavor boost that adds warmth.
- Zesty Citrus: Brighten the bars with a bit of lemon or orange zest mixed into the filling, enhancing the overall flavor profile.
- Layer It Up: Consider adding a cookie crumb layer (like crushed graham crackers or digestive biscuits) beneath the crust for an extra layer of flavor and crunch.
These Rhubarb Dream Bars can be transformed into a dessert that reflects your unique flair—don’t hesitate to explore those culinary possibilities! If you’re looking for more ways to customize your sweets, check out our tips on how to effectively store your desserts and elevate all your baked goods!
Expert Tips for Rhubarb Dream Bars
• Room Temperature Eggs: Ensure your eggs are at room temperature for optimal mixing. This helps create a creamy filling that’s smooth and luscious.
• Cool Completely: Allow the bars to cool completely in the pan to achieve neat, clean slices. This crucial step enhances texture and makes serving easier.
• Use Cold Butter: When making your crust, use cold, cubed butter to achieve a flaky texture. Avoid room temperature butter, which can result in a dense crust.
• Thaw Frozen Rhubarb: If using frozen rhubarb, be sure to thaw and drain it before adding to the filling. This prevents excess moisture that can make the bars soggy.
• Add Crunch: Consider topping your Rhubarb Dream Bars with chopped nuts like pecans or almonds for a delightful crunch that contrasts beautifully with the creamy filling.
Rhubarb Dream Bars Recipe FAQs
How do I choose ripe rhubarb for this recipe?
Absolutely! Look for rhubarb stalks that are firm, crisp, and vibrant in color—preferably bright pink or vibrant green. Avoid any that have dark spots or a wilted appearance, as this indicates past their prime. Fresh rhubarb should have a tart scent and feel heavy for its size, ensuring you get that delightful tang in your Rhubarb Dream Bars.
What is the best way to store Rhubarb Dream Bars once baked?
To maintain their freshness, store your Rhubarb Dream Bars in an airtight container in the refrigerator for up to 4-5 days. This will help preserve their soft texture and tangy flavor. If you see them starting to dry out a bit, it’s a good sign to dive in sooner rather than later!
Can I freeze Rhubarb Dream Bars?
Yes, you can! For maximum freshness, freeze your Rhubarb Dream Bars in layers separated by parchment paper. This helps prevent them from sticking together and keeping their delightful texture. They’ll stay good for up to 2 months in the freezer. When you’re ready to enjoy, simply let them thaw in the refrigerator overnight or at room temperature for a quicker option.
What should I do if my filling seems too runny?
If you notice your filling is too runny during preparation, try mixing in an extra tablespoon of flour to thicken it up. Additionally, ensure that your rhubarb is properly drained if using frozen, as excess moisture can lead to a watery filling. If it’s already baked and seems too jiggly, give it a little more time in the oven, keeping an eye out to avoid overbaking.
Are Rhubarb Dream Bars suitable for people with gluten allergies?
Very! Simply substitute the all-purpose flour with a gluten-free flour blend, and you’re good to go. This ensures everyone can enjoy these deliciously tangy bars without worry. The recipe’s simplicity makes it easy to adapt for various dietary needs, so feel free to explore alternatives if needed!
Rhubarb Dream Bars: A Simple, Sweet Spring Delight
Ingredients
Equipment
Method
- Preheat your oven to 325°F (163°C). Grease a 9x13 baking pan.
- In a bowl, whisk together all-purpose flour and powdered sugar. Cut in cold butter until resembling coarse crumbs. Press into the pan and bake for 15 minutes.
- Beat eggs in the same bowl, then stir in granulated sugar, salt, and flour. Mix until smooth. Optionally add ground cinnamon.
- Fold in the diced rhubarb and pour the mixture over the pre-baked crust.
- Bake for approximately 60 minutes until the center is set and the top is golden.
- Cool completely in the pan and slice into squares for serving.
Leave a Reply