
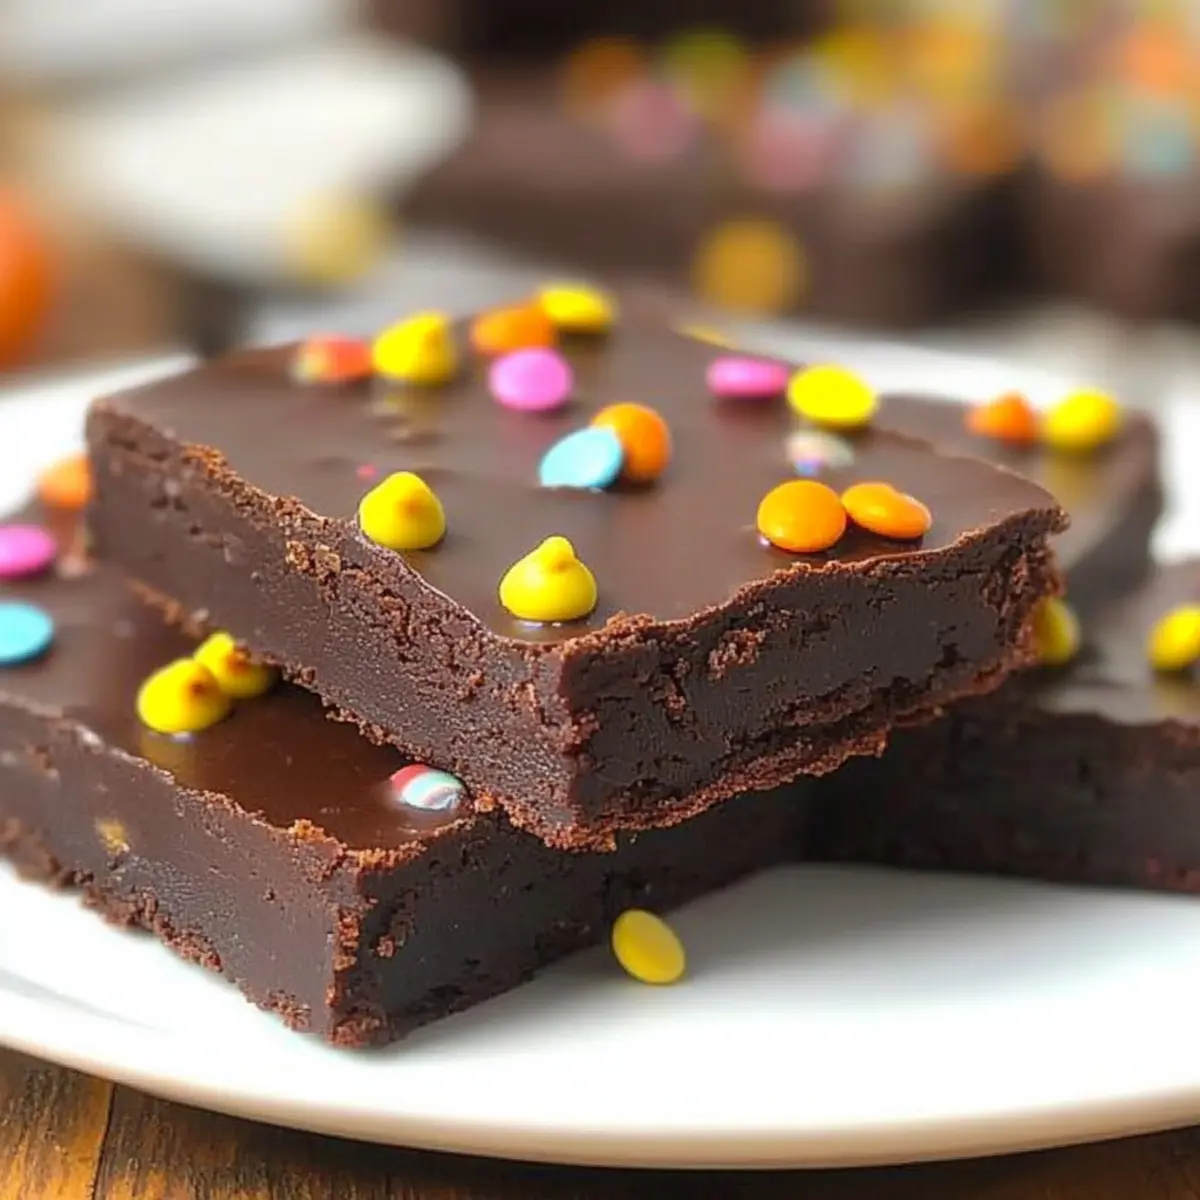
As I bit into one of those thick, fudgy squares, a wave of nostalgia washed over me, taking me back to carefree school days. This Homemade Cosmic Brownies recipe brings that delightful childhood memory to my kitchen, blending chewy brownie goodness topped with a glossy fudge ganache and colorful rainbow chips. Not only is this dessert a fun twist on a classic treat, but it also allows you to whip up a decadent indulgence that’s perfect for sharing or simply enjoying yourself. With minimal prep and maximum flavor, these brownies are bound to become your new go-to sweet craving. Are you ready to create a batch that will not just satisfy your chocolate cravings but also evoke a sprinkle of joy from the past?
Why Are Homemade Cosmic Brownies Irresistible?
Nostalgic Taste: These brownies remind you of school days with their familiar flavor.
Easy Preparation: With minimal steps, you can have these delicious brownies in no time!
Decadent Toppings: The rich fudge ganache and vibrant rainbow chips elevate them to a new level.
Versatile Treat: Perfect for parties, snacks, or a cozy night in—everyone will love them!
Crowd Pleaser: Whether you’re a seasoned chef or a home cook, these brownies impress every time. If you’re looking for more delightful recipes, don’t miss our Homemade Butter Chicken or try our fun Chicken Shawarma Wrap for a full meal experience.
Homemade Cosmic Brownies Ingredients
For the Brownies
• Butter – Unsalted and melted, for rich moisture. Substitution: Margarine can be used, but may alter the taste slightly.
• Granulated Sugar – Adds sweetness and enhances texture.
• Brown Sugar – Packed brown sugar enriches with moisture and depth of flavor.
• Vanilla Extract – Enhances the overall flavor profile and sweetness.
• Eggs – Use room temperature for better mixing and consistency.
• All-purpose Flour – Provides structure. Prep Note: Make sure to measure correctly for the best results.
• Cocoa Powder – Unsweetened, it delivers the essential chocolate flavor.
• Baking Powder – Acts as a leavening agent, ensuring lightness in texture.
• Cornstarch – Contributes to enhanced tenderness for that chewy bite.
• Salt – Balances sweetness and elevates overall flavor.
• Milk – Adds moisture for a fudgy texture.
For the Ganache
• Heavy Whipping Cream – Creates a silky smooth ganache topping.
• Semi-Sweet Chocolate Chips – Provides a rich base flavor for the ganache.
For Decoration
• Rainbow Chips – Bright, colorful sprinkles that add a fun, nostalgic touch to your Homemade Cosmic Brownies.
Step‑by‑Step Instructions for Homemade Cosmic Brownies
Step 1: Preheat and Prepare
Preheat your oven to 350°F (175°C). While it’s heating, line a 9×13 inch baking dish with parchment paper, allowing excess to hang over the edges for easy removal later. Then, give the parchment a light mist with baking spray to prevent sticking. This initial preparation ensures your Homemade Cosmic Brownies will come out perfectly when baked.
Step 2: Mix Wet Ingredients
In a large mixing bowl, combine the melted unsalted butter, granulated sugar, packed brown sugar, and vanilla extract. Stir vigorously with a whisk or wooden spoon until you achieve a smooth, creamy mixture. This process should take about 2-3 minutes. You’ll know it’s ready when the sugars are dissolved, and the mixture is slightly glossy, creating a perfect base for your brownies.
Step 3: Add the Eggs
Next, add the room temperature eggs, one at a time, mixing thoroughly after each addition. This ensures that each egg is fully integrated into your creamy mixture. This step is crucial for creating that rich, chewy texture in your Homemade Cosmic Brownies. You should see the mixture becoming thicker and more homogeneous, taking about 2 minutes in total for both eggs.
Step 4: Combine Dry Ingredients
In a separate bowl, whisk together the all-purpose flour, cocoa powder, baking powder, cornstarch, and salt. This ensures an even distribution of the leavening agents and cocoa, leading to the perfect brownie texture. Take a moment to admire the rich cocoa color; it sets the stage for the delightful chocolate flavor that will illuminate your Homemade Cosmic Brownies.
Step 5: Mix Wet and Dry Ingredients
Gradually add the dry ingredient mixture to the wet mixture, alternating with the milk. Start with a third of the dry mixture, followed by half the milk, and continue this pattern until all ingredients are combined. Mix gently until a thick, glossy brownie batter forms. This step typically takes about 3-4 minutes. You’ll want to stop mixing once there are no dry streaks—overmixing can lead to a denser, less chewy brownie.
Step 6: Bake the Brownies
Spread the thick brownie batter evenly into the prepared baking pan. Use a spatula to create a smooth and even surface, which will help the Homemade Cosmic Brownies bake uniformly. Place the pan in the preheated oven and bake for 18-25 minutes, or until a toothpick inserted into the center comes out with a few moist crumbs. Keep an eye on them, as you want them set but still soft in the center.
Step 7: Make the Ganache
While the brownies are cooling in the pan, prepare the fudge ganache. In a small saucepan, heat the heavy whipping cream over medium heat until it starts to simmer—watch closely to avoid boiling. Once simmering, remove it from heat and stir in the semi-sweet chocolate chips until melted and smooth, creating a glossy ganache that will be the crowning glory of your brownies.
Step 8: Top with Ganache and Rainbow Chips
Once the ganache is ready, pour it over the cooled brownies, using a spatula to spread it evenly across the top. While the ganache is still wet, generously sprinkle the rainbow chips over the surface. This step adds not just a pop of color, but also that nostalgic element that makes Homemade Cosmic Brownies so fun and appealing.
Step 9: Cool and Slice
Allow the brownies to set at room temperature for about 30 minutes until the ganache firms up slightly. When ready, use the parchment overhang to lift the brownies out of the pan. Place them on a cutting board, slice into squares, and behold your delicious creations! These indulgent Homemade Cosmic Brownies are now ready to satisfy any sweet tooth.
Homemade Cosmic Brownies Variations
Feel free to customize these delightful brownies to match your taste and dietary preferences, and let your creativity shine!
-
Dairy-Free: Use almond milk or coconut milk in the batter, and replace heavy cream with coconut cream for the ganache.
-
Nutty Add-In: Stir in ½ cup of chopped walnuts or pecans to the brownie batter for extra texture and that nutty flavor boost.
-
Minty Twist: Add ½ teaspoon of peppermint extract to the batter for a refreshing minty version, perfect for those who love a mint-chocolate combination.
-
Gluten-Free: Substitute all-purpose flour with a 1:1 gluten-free flour blend, ensuring everyone can enjoy this nostalgic treat.
-
Swap for Peanut Butter: Replace half the butter with creamy peanut butter for a delightful peanut butter-chocolate fusion in every bite.
-
Topping Variation: Instead of rainbow chips, try crushed Oreos or mini marshmallows on top for a delightful twist that adds both flavor and texture.
-
Extra Fudge: Mix in chocolate chunks or use dark chocolate chips to amp up the chocolate experience for true chocoholics!
-
Spicy Kick: For a surprising twist, add a pinch of cayenne pepper or a dash of chili powder to the batter for a subtle warmth that pairs beautifully with the chocolate.
As you explore these variations, consider also trying out our delicious Homemade Butter Chicken for a warm meal, or take a journey to flavor town with our Chicken Shawarma Wrap. Happy baking!
Expert Tips for Homemade Cosmic Brownies
• Room Temperature Eggs: Always use room temperature eggs to ensure better emulsification, which promotes a chewier texture in your Homemade Cosmic Brownies.
• Avoid Overbaking: Keep an eye on your brownies in the oven; they should be set but slightly soft in the center. They’ll continue to firm up as they cool!
• Correct Flour Measurement: Measure all-purpose flour accurately; too much can lead to dense brownies. Fluff it up in the bag, spoon it into your measuring cup, then level it off!
• Cutting Technique: Using a sharp, warm knife will help create clean cuts when slicing your brownies—this makes for a more attractive presentation and less crumbly pieces.
• Fun Variations: Don’t be afraid to mix it up! Add crushed cookies or a different type of chocolate chip for unique flavors and textures in your Homemade Cosmic Brownies.
How to Store and Freeze Homemade Cosmic Brownies
Room Temperature: Store brownies in an airtight container at room temperature for up to 5 days. This keeps them fresh and chewy, ready to satisfy your sweet cravings.
Fridge: For longer storage, keep brownies in the fridge for up to 1 week. Allow them to come to room temperature before enjoying for optimal texture.
Freezer: You can freeze these brownies for up to 3 months. Wrap each piece in plastic wrap, then place them in a freezer bag to prevent freezer burn.
Reheating: To enjoy a warm brownie, microwave for 10-15 seconds. This will ensure your Homemade Cosmic Brownies are just as delightful as when they were freshly baked!
What to Serve with Homemade Cosmic Brownies?
Delightfully chewy and chocolaty, these brownies deserve to be part of a cozy gathering or inspiring dessert spread.
-
Cold Milk:
The classic pairing that balances the richness of the brownies. Take a sip, let it cool your palate, and enjoy. -
Vanilla Ice Cream:
Serve warm brownies with a scoop of creamy vanilla ice cream for a delicious contrast in temperature and texture. The melty ice cream enhances the chocolate flavor beautifully! -
Coffee or Espresso:
Rich, aromatic coffee complements the dense chocolate perfectly, enhancing all the flavors with every sip. It’s an indulgent afternoon treat that’s sure to satisfy. -
Berries:
Fresh strawberries or raspberries add a refreshing brightness that cuts through the brownie’s sweetness, creating a sophisticated twist on a childhood favorite. -
Chocolate Sauce:
Drizzle some extra chocolate sauce over the top for those who can’t resist an indulgent option. This addition will take your dessert experience to a whole new level! -
Nuts:
Roasted almonds or walnuts offer a crunchy contrast that enhances each bite. Their toasty flavor makes the brownie experience richer and more satisfying. -
Whipped Cream:
A dollop of freshly whipped cream on top creates a light and airy topping to complement the fudgy texture beneath. It’s a simple yet elegant addition!
Make Ahead Options
These Homemade Cosmic Brownies are perfect for busy cooks wanting to save time! You can prepare the brownie batter up to 24 hours in advance by mixing it and storing it in an airtight container in the refrigerator. Additionally, you can make the fudge ganache ahead of time; simply cool it, then cover it tightly and refrigerate for up to 3 days. To maintain the quality, ensure the brownies are baked fresh before serving—the ganache will retain its lusciousness, and the brownies will still be just as chewy! When ready to enjoy, bake the batter as directed and top with ganache and rainbow chips before serving for an irresistible treat that will impress your family.
Homemade Cosmic Brownies Recipe FAQs
How should I select ingredients for my Homemade Cosmic Brownies?
Absolutely! For the best flavor and texture, choose unsalted butter that’s been melted and is at room temperature before mixing. The eggs should also be at room temperature for better emulsification. When it comes to cocoa powder, unsweetened is the way to go, as it allows you to control the sweetness in your brownies.
How should I store my Homemade Cosmic Brownies?
Keep your brownies in an airtight container at room temperature for up to 5 days or refrigerate them for up to 1 week. If you choose to refrigerate, let them come to room temperature before enjoying for the best chewy texture. However, if you’re planning to eat them later, it’s best to freeze them.
Can I freeze my Homemade Cosmic Brownies?
Absolutely! Wrap each brownie square tightly in plastic wrap and then place them in a freezer-safe bag, which will help avoid freezer burn. They can be frozen for up to 3 months. When you’re ready to indulge, simply take one out, let it thaw in the fridge, or reheat it in the microwave for about 10-15 seconds for that fresh-from-the-oven taste.
What if my brownies turn out too dry or crumbly?
If your brownies have turned out dry, it might be that they were overbaked. To ensure they stay chewy, follow the baking time closely and check with a toothpick; it should come out with a few moist crumbs, not completely clean. Also, make sure to measure your flour correctly—too much can lead to dense, dry brownies.
Can I make these brownies safe for gluten-free diets?
Certainly! To make your Homemade Cosmic Brownies gluten-free, you can substitute all-purpose flour with a 1:1 gluten-free flour blend. This maintains the texture while making it suitable for those with gluten sensitivities. Just double-check that your other ingredients, like baking powder, are also gluten-free to avoid cross-contamination.
Are Homemade Cosmic Brownies safe for pets?
It’s best to keep these delicious brownies out of reach of pets, particularly dogs, as chocolate can be toxic to them. If you’re looking to share a special treat with your furry friend, consider baking some dog-friendly recipes that can be just as enjoyable for them!
Homemade Cosmic Brownies: Relive Your Childhood Delight
Ingredients
Equipment
Method
- Preheat your oven to 350°F (175°C) and line a 9x13 inch baking dish with parchment paper.
- Combine melted butter, granulated sugar, brown sugar, and vanilla extract in a mixing bowl.
- Add eggs one at a time, mixing thoroughly after each addition.
- In a separate bowl, whisk together flour, cocoa powder, baking powder, cornstarch, and salt.
- Gradually mix the dry ingredients into the wet mixture, alternating with milk until combined.
- Spread the brownie batter evenly in the baking pan and bake for 18-25 minutes.
- Heat heavy cream in a saucepan, stir in chocolate chips until melted to make ganache.
- Pour ganache over cooled brownies and sprinkle with rainbow chips.
- Let set at room temperature for about 30 minutes, then slice into squares.
Leave a Reply