
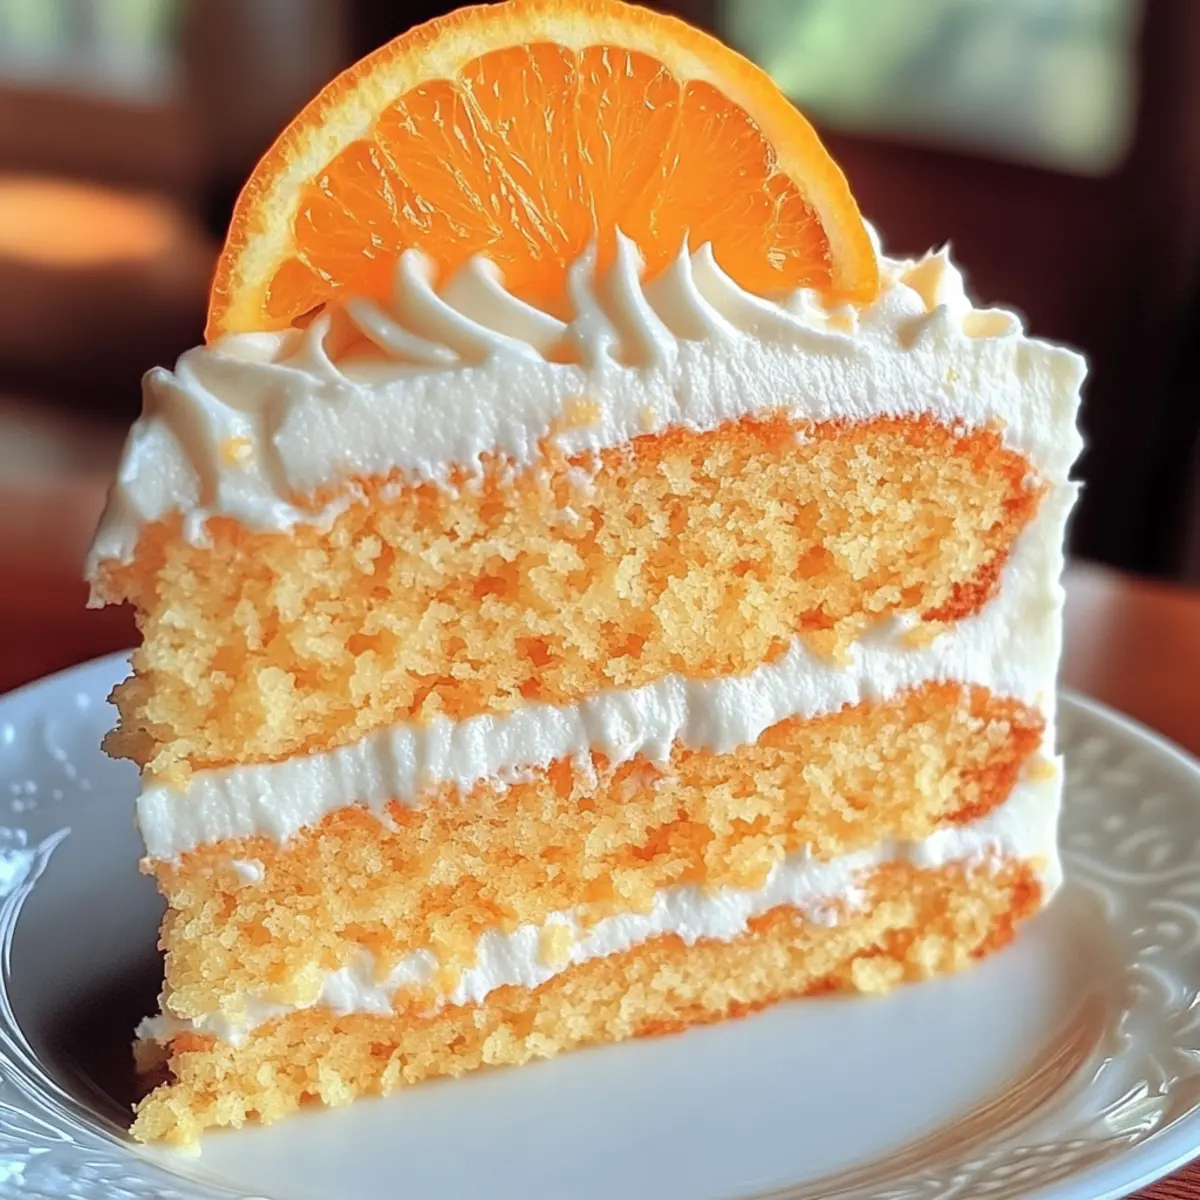
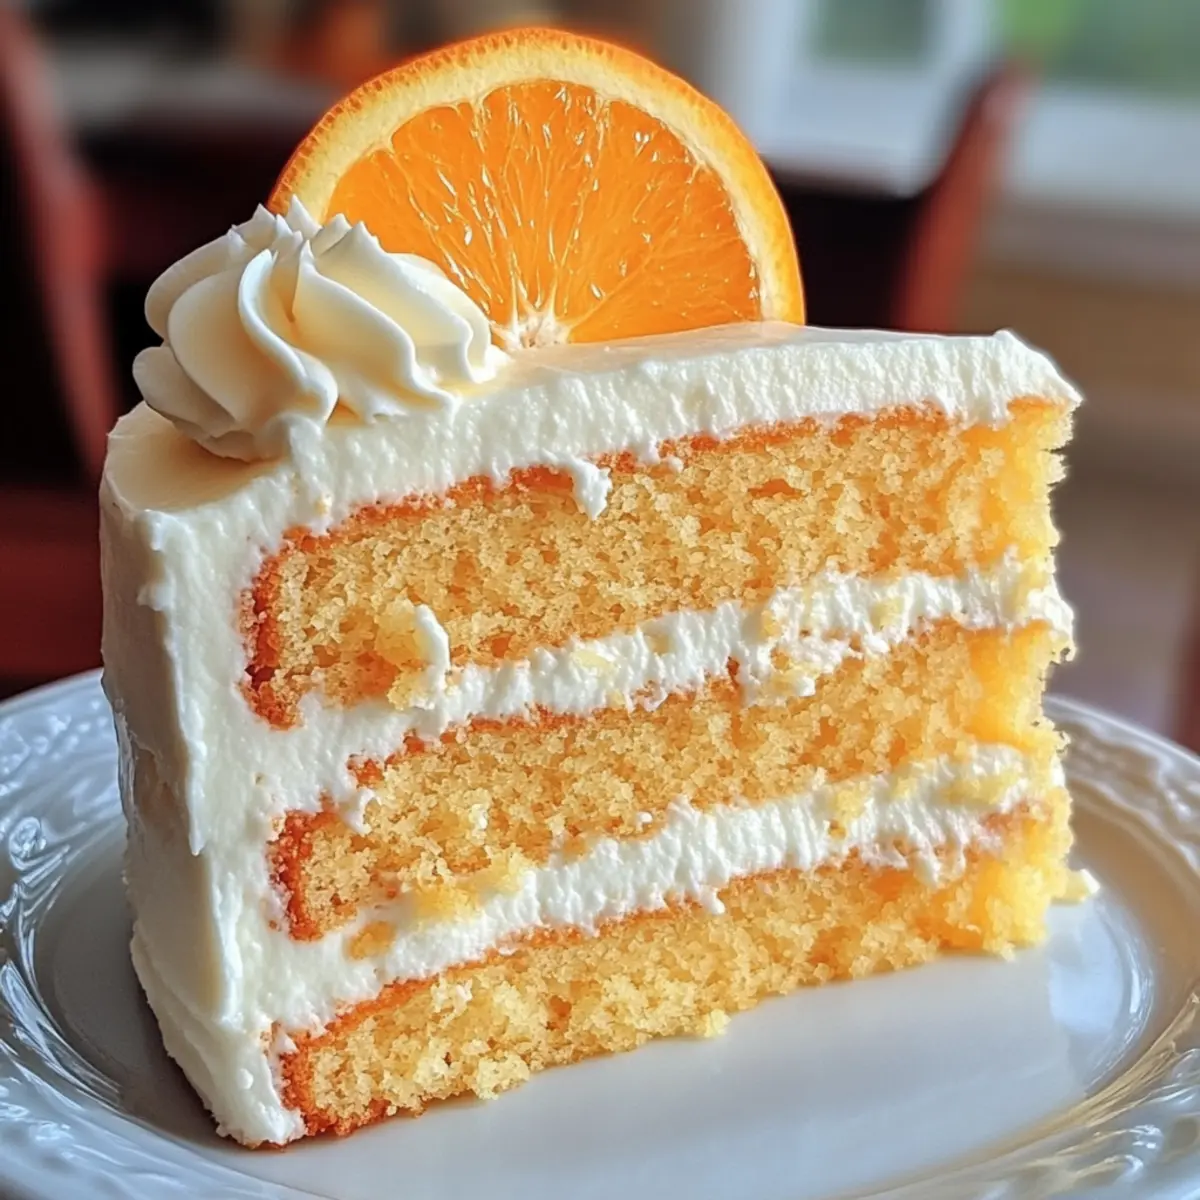
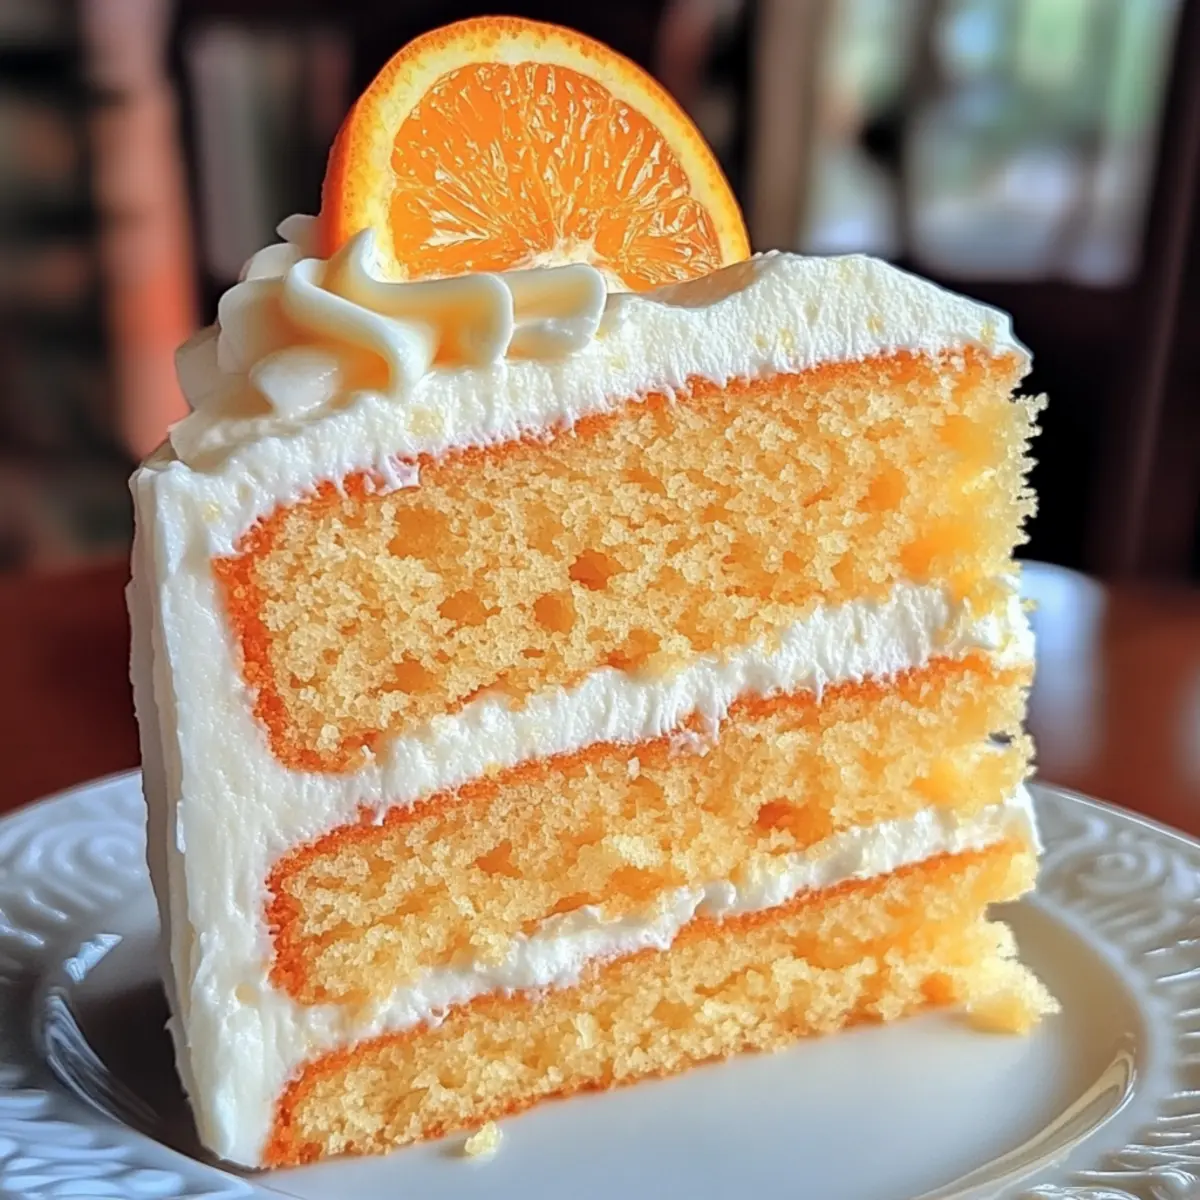
As I sifted through memories of summer afternoons spent indulging in ice cream treats, I stumbled upon a delightful idea: an Orange Creamsicle Cake that captures the essence of those sunny days. This moist cake combines the vibrant zing of fresh oranges with a creamy vanilla frosting, creating a nostalgic twist on a beloved dessert. Not only is this recipe a feast for the senses, but it’s also incredibly easy to customize—whether you need a gluten-free version or prefer a no-bake option. Plus, it’s a surefire crowd-pleaser for gatherings, bringing everyone together for a slice of sweet joy. Are you ready to awaken your inner baker and dive into this citrusy delight?
Why is this Orange Creamsicle Cake a Must-Try?
Nostalgic Delight: This cake evokes cherished summer memories, reminiscent of those beloved ice cream bars.
Customizable Options: Gluten-free or dairy-free? No problem! You can easily adapt this recipe to fit your dietary needs.
Easy to Make: Just a few simple steps transform basic ingredients into a show-stopping dessert.
Perfect for Gatherings: A crowd-pleaser that’s bound to gather friends and family around the table, eager for a slice!
Versatile Serving Suggestions: Pair it with whipped cream or candied orange slices for an elegant touch, allowing for delightful presentation at any event.
Try this Orange Creamsicle Cake and experience the joy it brings—just like those summer afternoons!
Orange Creamsicle Cake Ingredients
For the Cake
- All-purpose flour – Provides structure and texture; easily swapped with a gluten-free flour blend for a gluten-free version.
- Granulated sugar – Adds the perfect sweetness; brown sugar works for a richer flavor.
- Baking powder – Aids in leavening for a fluffy cake; ensure freshness for the best results.
- Salt – Enhances flavors; opt for kosher salt for a coarser texture.
- Eggs – Binds ingredients and adds moisture; substitute with unsweetened applesauce (¼ cup per egg) for an egg-free alternative.
- Buttermilk – Adds moisture and tang; sour cream can serve as a substitute.
- Fresh orange juice – Imparts a vibrant citrus flavor; fresh is best for a zesty taste.
- Zest of fresh oranges – Enhances the cake’s citrus profile; use a microplane for fine zesting.
- Unsalted butter – Provides richness; can be replaced with vegan butter for a dairy-free option.
- Vanilla extract – Offers a comforting flavor note; choose pure vanilla extract for the best taste.
For the Frosting
- Powdered sugar – Essential for the creamy frosting; granulated sugar can be blended into a fine powder if needed.
- Unsalted butter – Adds creaminess to your frosting; swap for vegan butter for a dairy-free treat.
- Orange zest – Intensifies the citrus flavor in the frosting; be generous for an extra zing.
Try this Orange Creamsicle Cake for a delicious summer dessert that is sure to impress!
Step‑by‑Step Instructions for Orange Creamsicle Cake
Step 1: Preheat the Oven
Begin by preheating your oven to 350°F (175°C). As the oven warms up, prepare two 9-inch round cake pans by lining the bottoms with parchment paper for easy removal. Grease the sides of the pans with butter or cooking spray, ensuring a smooth release when the cakes are baked.
Step 2: Mix the Dry Ingredients
In a large mixing bowl, whisk together 2 cups of all-purpose flour, 1 tablespoon of baking powder, and ½ teaspoon of salt until combined. Make sure the baking powder is fresh to achieve maximum fluffiness. Set this mixture aside while you prepare the wet ingredients, ensuring a light, airy Orange Creamsicle Cake.
Step 3: Cream the Butter and Sugar
In another bowl, use a hand mixer or stand mixer to beat ½ cup of unsalted butter and 1 cup of granulated sugar together until the mixture is fluffy and pale, about 3-4 minutes. This step is crucial as it helps incorporate air into the batter, which contributes to a light texture in the finished cake.
Step 4: Incorporate the Eggs and Wet Ingredients
Add 2 large eggs, or ½ cup of unsweetened applesauce for an egg-free version, to the butter-sugar mixture. Mix until fully combined. Then, pour in 1 cup of buttermilk, ½ cup of fresh orange juice, and 2 tablespoons of orange zest, mixing until smooth. This combination infuses the cake with that vibrant orange flavor.
Step 5: Combine Wet and Dry Mixtures
Gradually fold the dry ingredients into the wet mixture, using a spatula or wooden spoon. Mix gently until just combined, being careful not to overmix, which could lead to a dense cake. You’re aiming for a smooth batter with a few lumps of flour still visible, ensuring a moist Orange Creamsicle Cake.
Step 6: Pour and Bake
Divide the batter evenly between the prepared cake pans. Smooth the tops with a spatula and place them in the preheated oven. Bake for 25-30 minutes, or until a toothpick inserted into the center comes out clean. The cakes should be lightly golden on top and spring back when gently pressed.
Step 7: Cool the Cakes
Once baked, remove the pans from the oven and let them cool on a wire rack for about 10 minutes. Carefully run a knife around the edges, then turn the cakes out onto the racks to cool completely. It’s vital that the cakes cool entirely before frosting to ensure the frosting stays fluffy and doesn’t melt.
Step 8: Prepare the Frosting
In a mixing bowl, beat together 1 cup of unsalted butter and 4 cups of powdered sugar until creamy and smooth. Add 2 tablespoons of fresh orange zest and 1 teaspoon of vanilla extract, mixing until incorporated. The frosting should be spreadable and light, a perfect complement to the Orange Creamsicle Cake.
Step 9: Assemble the Cake
Once the cakes are completely cool, place one layer on a serving plate. Spread a generous layer of frosting on top. Place the second layer on top, and frost the top and sides of the cake. Feel free to decorate with additional orange zest or slices for an extra pop of color and flavor, making your Orange Creamsicle Cake a delightful centerpiece.
Expert Tips for the Best Orange Creamsicle Cake
-
Fresh Ingredients Matter: Use fresh orange juice and zest for the best flavor. Store-bought options often lack the vibrant citrus notes that make this cake special.
-
Avoid Overmixing: Gently fold the dry ingredients into the wet mixture. Overmixing can lead to a dense cake instead of the light, fluffy texture you desire in your Orange Creamsicle Cake.
-
Check Your Leavening Agent: Ensure your baking powder is fresh for effective leavening. Old baking powder will not provide the lift needed for a fluffy cake.
-
Egg Alternatives: To make an egg-free version, use ¼ cup of unsweetened applesauce per egg. This keeps the cake moist without compromising the texture.
-
Cool Completely Before Frosting: Always wait until the cakes are completely cool before applying frosting. This prevents the frosting from melting and ensures a beautifully layered presentation.
-
Store Properly: To keep the cake fresh, store it in an airtight container at room temperature for up to three days or refrigerate for longer enjoyment.
Make Ahead Options
This Orange Creamsicle Cake is perfect for busy home cooks who want to save time during hectic weeknights! You can bake the cake layers up to 3 days ahead of time. Once cooled, wrap each layer tightly in plastic wrap and store them in the refrigerator to retain moisture. Alternatively, freeze the layers for up to 3 months—just ensure they are well-wrapped to prevent freezer burn. When you’re ready to enjoy, simply thaw the layers overnight in the fridge, then frost with your creamy vanilla frosting. This make-ahead strategy ensures your cake stays just as delicious while providing you with more time to relax or entertain!
How to Store and Freeze Orange Creamsicle Cake
Room Temperature: Store the Orange Creamsicle Cake in an airtight container at room temperature for up to 3 days. This keeps the cake moist and fresh.
Fridge: If you need it to last longer, refrigerate the cake for up to a week, ensuring you cover it tightly with plastic wrap or foil to prevent it from drying out.
Freezer: For longer storage, freeze individual slices wrapped in plastic wrap and then aluminum foil for up to 3 months. Thaw overnight in the fridge before enjoying.
Reheating: If you want a warm slice, gently reheat it in the microwave for 10-15 seconds, being careful not to overheat and dry out the cake.
What to Serve with Orange Creamsicle Cake?
Indulging in a slice of this delightful cake opens the door to a world of delicious pairings that will elevate your dessert experience.
- Whipped Cream: A dollop of light, fluffy whipped cream balances the cake’s sweetness and adds a creamy texture.
- Candied Orange Slices: These sweet, tangy treats provide a beautiful garnish and enhance the citrus flavor, making each bite more festive.
- Fresh Berries: Juicy strawberries, blueberries, or raspberries create a vibrant contrast, adding a burst of freshness to your plate.
- Coconut Ice Cream: The creamy, tropical notes of coconut ice cream complement the orange flavor beautifully, ideal for a summer celebration.
- Mint Leaves: A sprinkle of fresh mint enhances presentation and adds a refreshing balance, making each bite feel lighter.
- Iced Tea: Serve with a chilled glass of sweetened iced tea for a classic summer pairing that ties in nicely with the cake’s citrus notes.
- Sparkling Water: A splash of lemon or orange in sparkling water refreshes the palate between bites, keeping the focus on the cake’s flavors.
- Chocolate Drizzle: A light drizzle of melted dark chocolate creates a rich contrast, appealing to both chocolate and citrus lovers.
- Fruit Salad: Bright, colorful fruit salads complement the cake’s citrus vibe, making the dessert feel even more refreshing and light.
- Lemon Sorbet: This light and zesty treat contrasts wonderfully with the dense sweetness of the cake, cleansing the palate with every bite.
Orange Creamsicle Cake Variations
Feel free to let your creative side shine and customize your Orange Creamsicle Cake with these delightful variations!
- Gluten-Free: Use a gluten-free flour blend in place of all-purpose flour for a cake that everyone can enjoy.
- Dairy-Free: Swap buttermilk with almond milk mixed with vinegar to create a lovely dairy-free version that doesn’t skimp on flavor.
- No-Bake Delight: Make a no-bake Orange Creamsicle cake using a crust of crushed vanilla cookies and a creamy orange-infused filling for ease and fun.
- Extra Citrus Punch: Add a splash of orange extract to your batter for an intensified orange flavor that truly pops with each bite.
- Banana Twist: For a fruitier twist, swap ¼ cup of applesauce with mashed bananas. It adds natural sweetness and a moist texture for a unique take.
- Frosting Variations: Mix in some crushed graham crackers or whipped cream into the frosting for added texture and a delightful surprise.
- Layered Flavor: Create a layered cake by incorporating a fruit compote or jam between the layers—try using berry compote for a colorful twist!
- Spicy Kick: Add a pinch of cayenne pepper to your batter for a subtle heat that pairs surprisingly well with the citrus sweetness.
With these variations, you can create a unique twist on the classic and enjoy servings that cater to everyone’s preferences. For more delightful ideas, don’t forget to check out Fried Strawberry Cheesecake or enjoy a delicious slice of our Coconut Cream Pancakes. Each variation will leave your guests raving about what you’ve whipped up!
Orange Creamsicle Cake Recipe FAQs
What type of oranges should I use for this cake?
I recommend using navel oranges for their sweet, juicy flesh and vibrant zest. Look for oranges that are firm and heavy for their size, and avoid any with dark spots or bruises to ensure the best flavor in your Orange Creamsicle Cake.
How should I store the Orange Creamsicle Cake?
Store the Orange Creamsicle Cake in an airtight container at room temperature for up to 3 days to maintain its moisture. If you need it to last longer, you can refrigerate it for up to a week, just make sure it’s tightly covered to prevent drying out.
Can I freeze the Orange Creamsicle Cake?
Absolutely! To freeze the cake, wrap individual slices in plastic wrap and then in aluminum foil. This way, they will stay fresh for up to 3 months. When you’re ready to enjoy, simply thaw in the fridge overnight. If you’d like a warm slice, reheat gently in the microwave for about 10-15 seconds.
What if my cake turns out dense?
If your Orange Creamsicle Cake comes out dense, it might be due to overmixing the batter. When combining wet and dry ingredients, mix only until just incorporated; a few small lumps are okay! Also, check that your baking powder is fresh, as expired leavening agents can affect the cake’s rise.
Are there any allergies I should consider?
Yes, keep dietary concerns in mind! For a gluten-free option, substitute all-purpose flour with a gluten-free blend. To make the cake dairy-free, replace buttermilk with almond milk mixed with vinegar or use coconut yogurt. And remember, you can use applesauce or mashed bananas as an egg replacement for an egg-free version.
Can I make this cake ahead of time?
Definitely! You can bake the Orange Creamsicle Cake layers in advance and freeze them, then frost when you’re ready to serve. Just make sure to wrap the layers well to avoid freezer burn. You can also prepare the frosting ahead of time, but store it in the fridge and bring it back to room temperature before spreading on the cake.

Deliciously Moist Orange Creamsicle Cake for Your Summer Bliss
Ingredients
Equipment
Method
- Preheat your oven to 350°F (175°C) and prepare two 9-inch round cake pans.
- In a large mixing bowl, whisk together flour, baking powder, and salt until combined.
- In another bowl, cream the butter and sugar together until fluffy, about 3-4 minutes.
- Add eggs or applesauce, mix well, then add buttermilk, orange juice, and orange zest.
- Gently fold the dry ingredients into the wet mixture until just combined.
- Divide the batter into prepared pans and bake for 25-30 minutes until a toothpick comes out clean.
- Let cakes cool on a wire rack for 10 minutes, then remove from pans to cool completely.
- Beat together butter and powdered sugar until creamy, then mix in orange zest and vanilla.
- Assemble the cake by adding frosting between layers and on top and sides of the cake.
Leave a Reply