
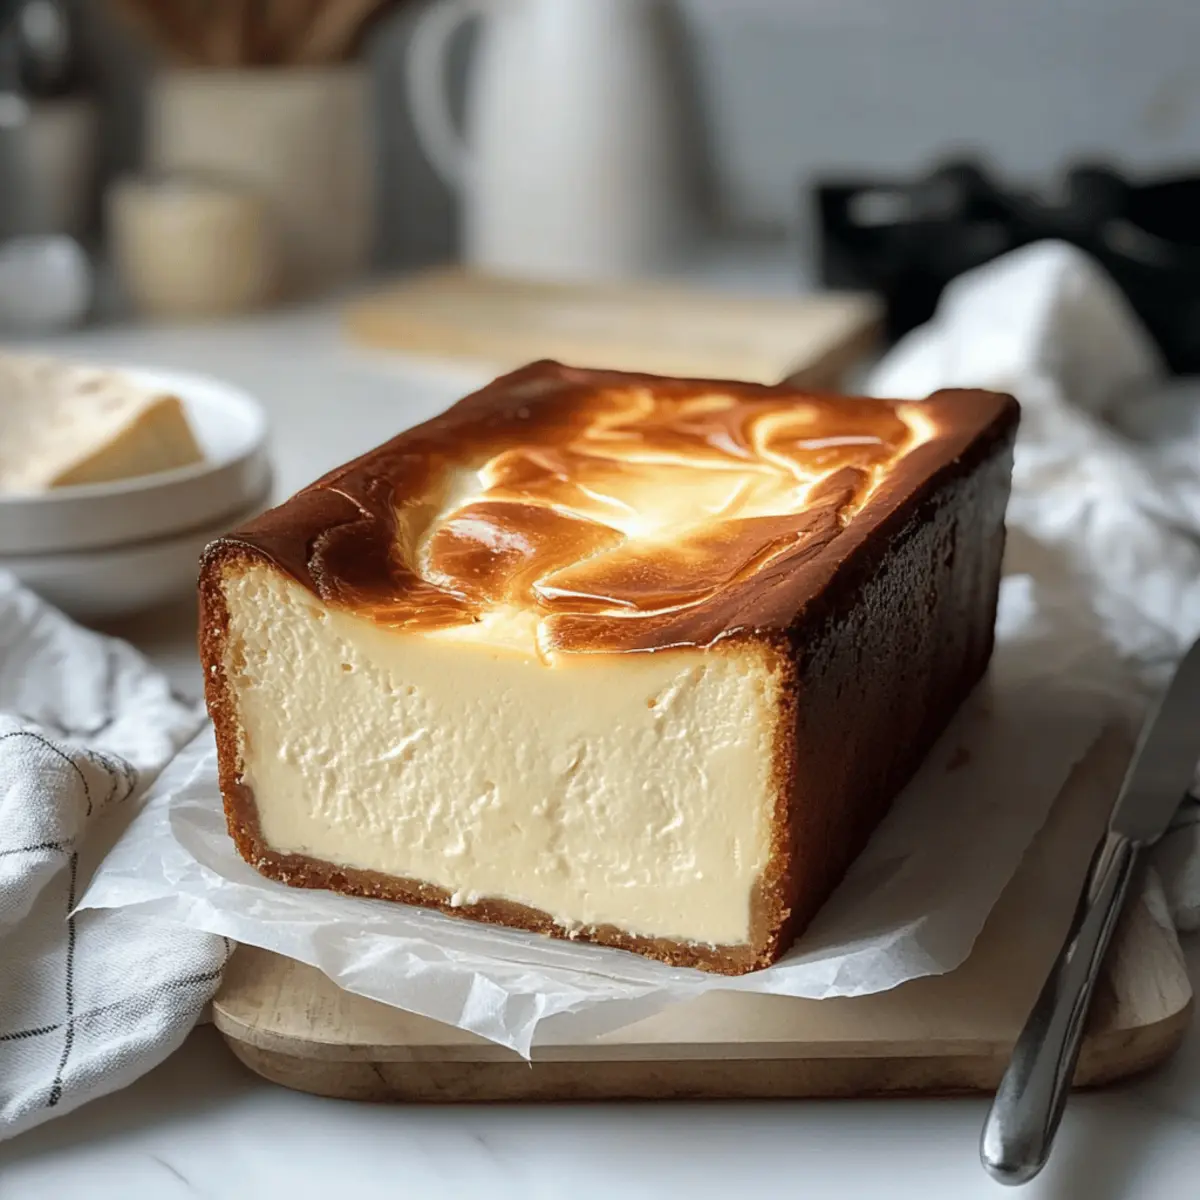
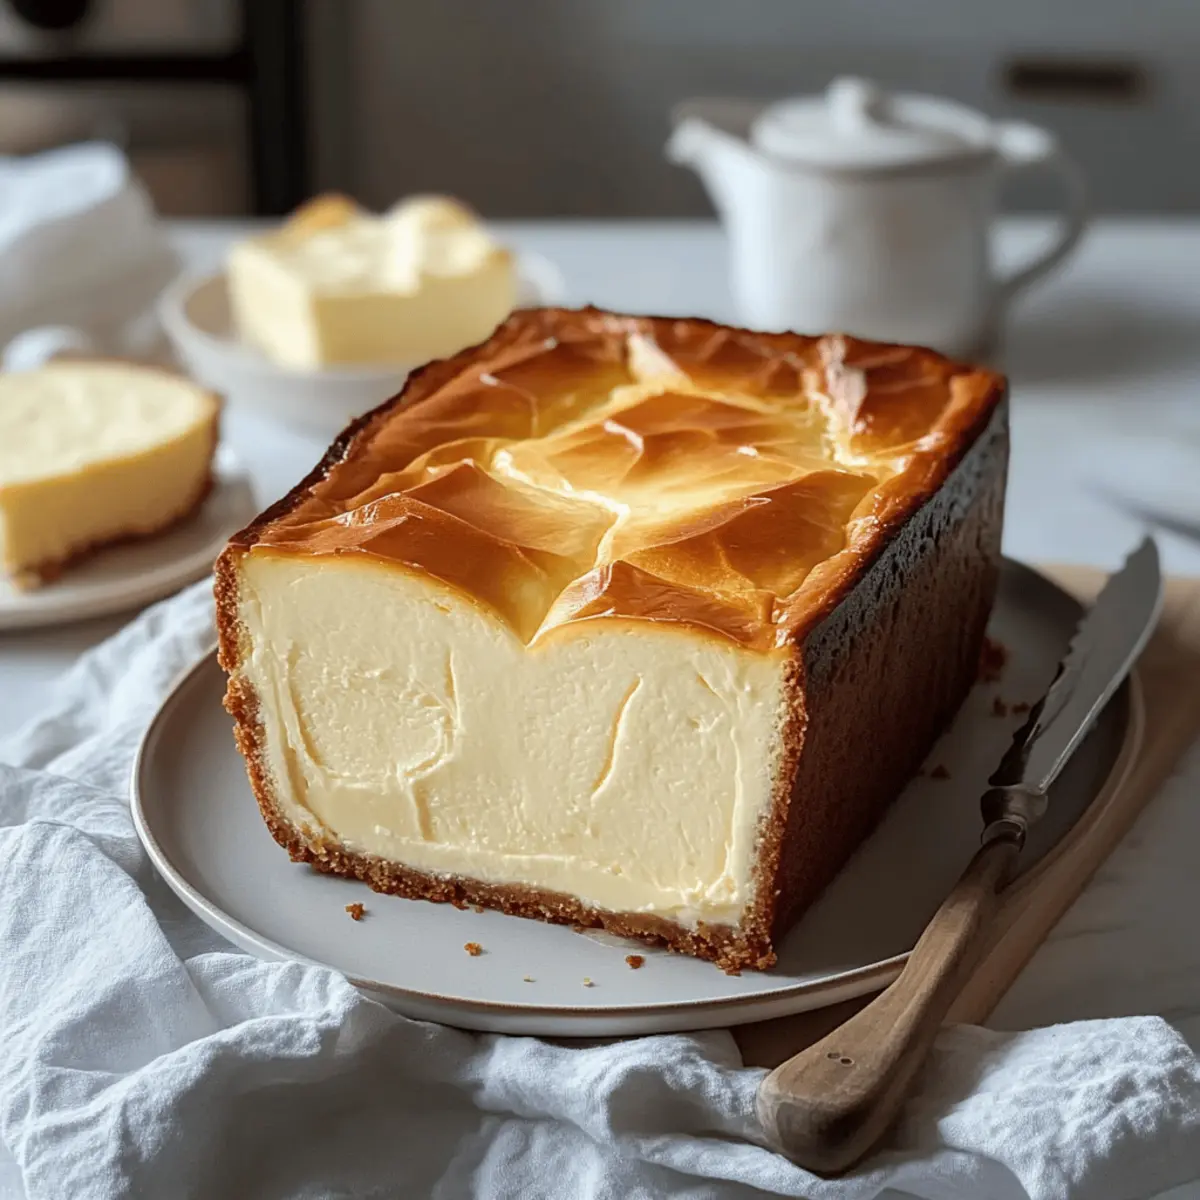
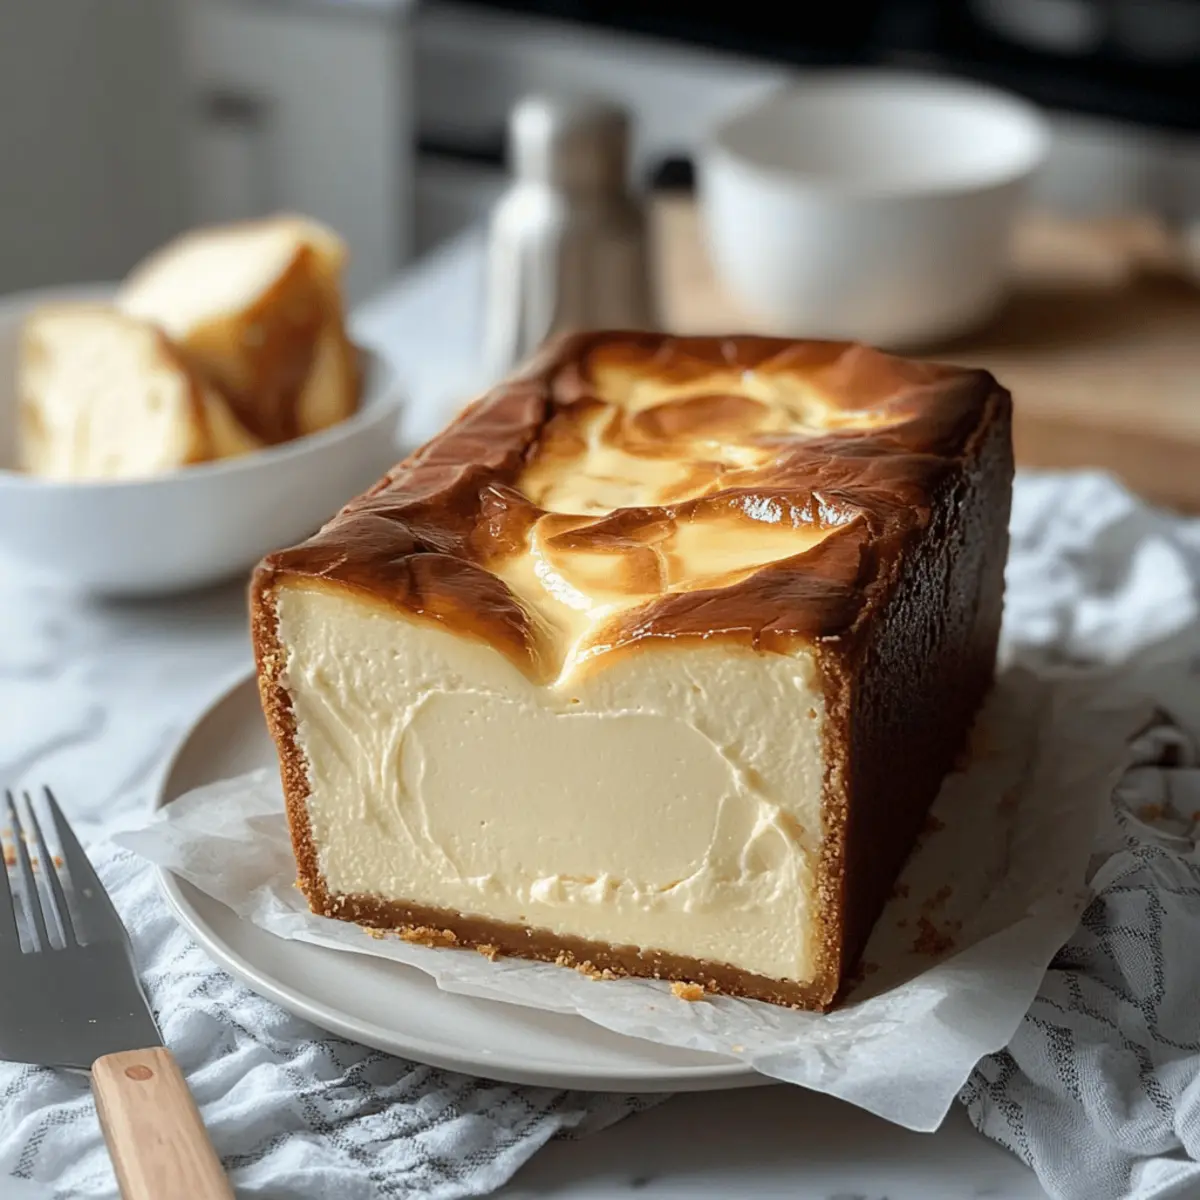
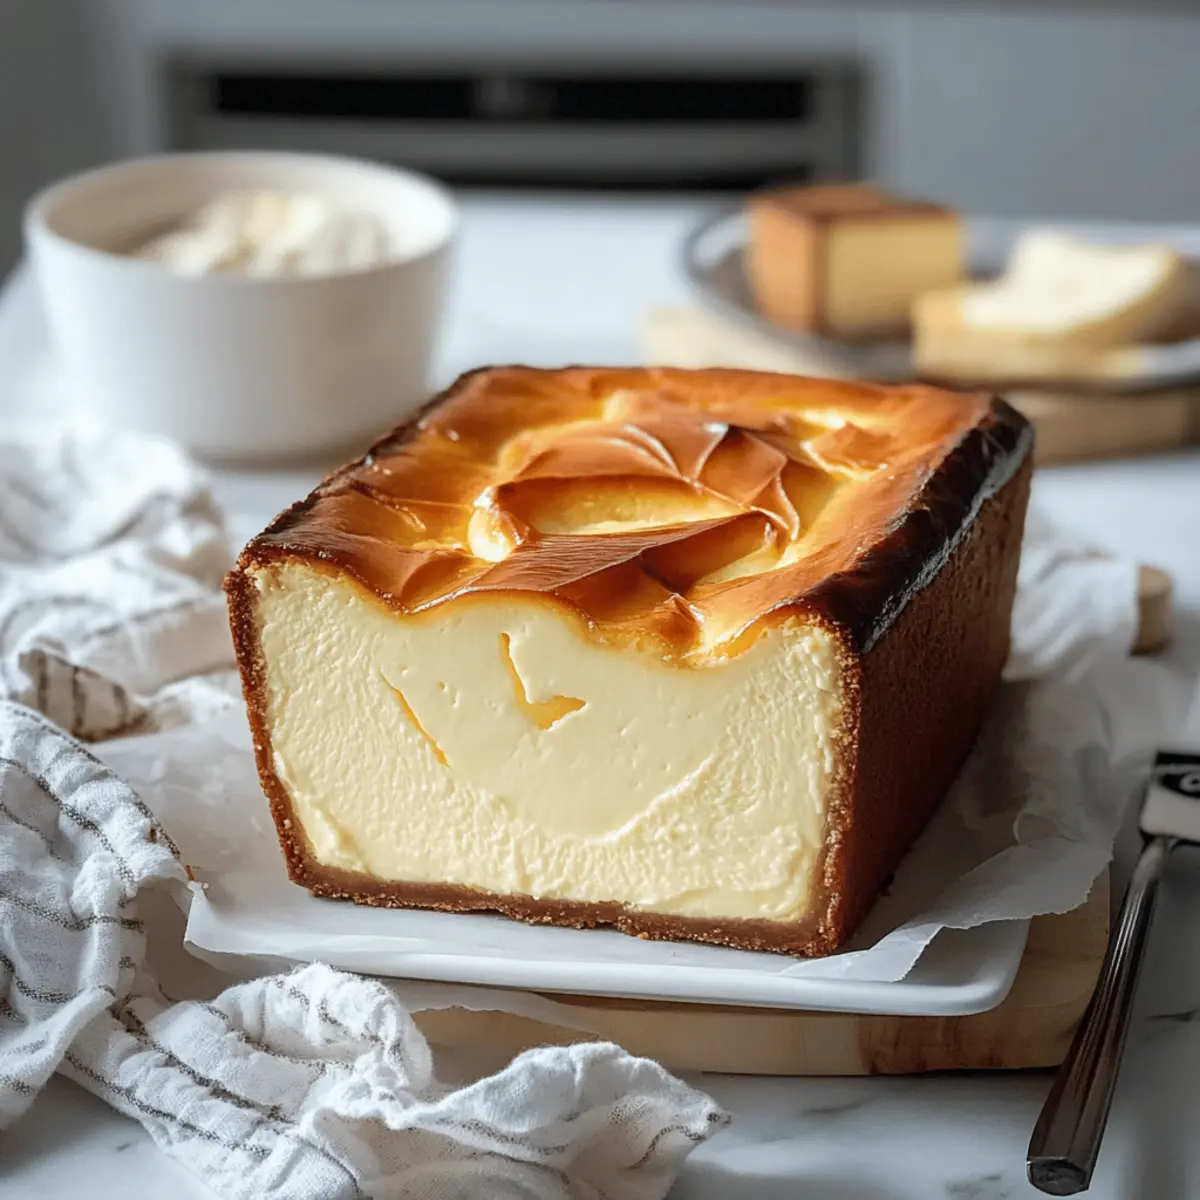
Under the golden glow of the kitchen lights, there’s something magical about baking a Burnt Basque Cheesecake. With its luxuriously creamy interior and a beautifully caramelized top, this crustless version crafted in a loaf pan provides the elegance you crave without the fuss. One of the best parts? You won’t have to worry about complex crusts or pesky water baths—just simple preparation that yields an impressive result. Perfect for a cozy night in or a gathering with friends, this cheesecake not only steals the show but also caters to vegetarian diets. Trust me, once you take your first bite, the rich, custardy texture will have you dreaming up creative variations, like hints of citrus or warm spices. Are you ready to impress your taste buds and your guests with this easy delight?
Why is Burnt Basque Cheesecake a Must-Try?
Simplicity at its finest: No complex crusts or water baths—just mix, pour, and bake!
Decadent creaminess: Each slice melts in your mouth with a luscious texture that you’ll crave again and again.
Versatile flavor options: Try adding hints of citrus zest or a dash of warm spices to personalize your dessert experience.
Crowd-pleaser: With its stunning appearance and delicious taste, this cake is sure to impress at any gathering.
Make-ahead friendly: Perfect for busy hosts, prepare it a day in advance for enhanced flavors that develop beautifully overnight.
Once you’ve mastered this recipe, consider trying out other indulgent treats like Fried Strawberry Cheesecake or even our delightful Chocolate Raspberry Cheesecake!
Burnt Basque Cheesecake Ingredients
For the Cheesecake Batter
- Full-Fat Cream Cheese – Ensures a rich and creamy base; avoid low-fat to prevent excess water in the cheesecake.
- Granulated Sugar – Adds sweetness and is essential for the beautifully caramelized top.
- Large Eggs – Binds the mixture together; remember to use room temperature eggs for a smooth blend.
- Heavy Cream – Creates a luscious and custardy texture; don’t substitute with half-and-half as it could affect consistency.
- Vanilla Extract (optional) – Adds a warm depth of flavor to enhance the overall taste.
- Salt – Balances out the sweetness for a well-rounded flavor profile.
- All-Purpose Flour – Provides the necessary structure; consider gluten-free flour blends for a different texture.
Optional Variations
- Citrus Zest – A delightful twist to brighten the flavor; lemon or orange zest works beautifully.
- Spices – Incorporate a pinch of cinnamon or nutmeg for a warm, spiced undertone.
- Chocolate – Fold in melted dark chocolate to create a marbled effect for added indulgence.
- Savory Elements – For a unique twist, use crumbled blue cheese with herbs for a savory cheesecake experience.
Step‑by‑Step Instructions for Burnt Basque Cheesecake
Step 1: Preheat the Oven
Begin by preheating your oven to 400°F (200°C). This high temperature is crucial for achieving that signature burnt top on your Burnt Basque Cheesecake while ensuring the inside remains wonderfully creamy. Let your oven fully warm up while you prepare the loaf pan and batter.
Step 2: Prepare the Loaf Pan
Line a 9×5-inch loaf pan with parchment paper, allowing the edges to hang over—this will make it much easier to remove your cheesecake later! Make sure to grease the pan lightly if needed, ensuring a clean release of the cake after baking.
Step 3: Mix Cream Cheese and Sugar
In a large mixing bowl, combine the softened full-fat cream cheese and granulated sugar. Using an electric mixer, beat the mixture on low to medium speed for about 5 minutes until it becomes smooth and creamy, with no lumps. This base is key to achieving the luscious texture of your Burnt Basque Cheesecake.
Step 4: Incorporate the Eggs
Next, add the large eggs to the cream cheese mixture, one at a time. Make sure to fully mix each egg in before adding the next; this ensures an even blend and prevents lumps. The mixture should become even more silky as you work, enhancing the cheesecake’s creamy body.
Step 5: Add Heavy Cream and Flavorings
Slowly stir in the heavy cream, along with optional vanilla extract and a pinch of salt. Mix until everything is just combined, ensuring a rich and velvety texture develops. This step contributes to the cheesecake’s custard-like consistency, making it incredibly indulgent!
Step 6: Fold in the Flour
Sift the all-purpose flour directly into the batter. With a spatula, gently fold the flour into the mixture, being careful not to over-mix. The batter should be smooth and slightly thick; this adds stability and structure to your Burnt Basque Cheesecake without compromising its creamy allure.
Step 7: Pour the Batter
Carefully pour the batter into the prepared loaf pan. Give the pan a gentle jiggle to help settle the mixture evenly, preventing any air pockets. To catch any potential overflow, place the loaf pan on a baking sheet, ready for the oven.
Step 8: Bake to Perfection
Place the cheesecake in the preheated oven and bake for 40-45 minutes. The edges should develop a deep, golden-brown hue while the center retains a slight jiggle. This contrast between the burnt top and creamy center is what makes the Burnt Basque Cheesecake so unique and delightful.
Step 9: Cool and Chill
Once baked, remove the cheesecake from the oven and let it cool completely on the counter. After cooling, transfer it to the refrigerator and allow it to chill for 2-4 hours, or preferably overnight. This cooling period enhances the flavors and texture, making it truly irresistible when sliced.
Expert Tips for Burnt Basque Cheesecake
-
Use Room Temperature Eggs: Ensure your eggs are at room temperature before mixing; this helps create a smoother batter and better texture in your Burnt Basque Cheesecake.
-
Don’t Overmix: When adding the flour, fold gently to avoid overmixing, which can lead to a denser texture. Aim for a smooth batter without lumps.
-
Perfectly Burnt Top: Keep an eye on the baking time. The cheesecake should reach a deep golden-brown on top; it’s normal for the center to still be jiggly as it firms up while cooling.
-
Chill for Flavor: For the best flavor, chill your cheesecake for at least 2-4 hours or overnight. This resting period allows the ingredients to meld beautifully.
-
Creative Variations: Don’t be afraid to experiment! Add zest or spices to your cheesecake batter for a unique twist that elevates your Burnt Basque Cheesecake experience.
How to Store and Freeze Burnt Basque Cheesecake
Fridge: Store any leftover Burnt Basque Cheesecake in an airtight container for up to 4 days. The flavors will intensify and improve as it sits, making each slice even more delicious!
Freezer: You can freeze the cheesecake for up to 2 months. Wrap individual slices tightly in plastic wrap, then place them in a freezer-safe container to maintain freshness.
Thawing: To enjoy frozen cheesecake, transfer it to the fridge and let it thaw overnight. For quicker results, allow slices to sit at room temperature for about 30 minutes before serving.
Reheating: If desired, gently warm the cheesecake in the microwave for 10-15 seconds for a softened texture, but it’s also delightful served cold!
Make Ahead Options
These Burnt Basque Cheesecake treats are perfect for meal prep enthusiasts looking to save time! You can make the cheesecake batter up to 24 hours in advance by preparing it and pouring it into the lined loaf pan. Cover it tightly with plastic wrap or foil and refrigerate until you’re ready to bake. After baking, allow it to cool completely, then chill the cheesecake for at least 2-4 hours or overnight before serving for that ideal creamy texture. A crucial tip for maintaining quality is to store it in an airtight container once chilled, ensuring each slice retains its deliciousness, making it an ideal dessert for busy weeknights or gatherings!
What to Serve with Burnt Basque Cheesecake?
Under the soft flicker of candlelight, a heavenly cheesecake deserves thoughtful companions that elevate the experience beyond indulgence.
- Fresh Berries: A mix of raspberries and blueberries adds a bright, tart contrast, enhancing sweetness while bringing vibrant color to your plate.
- Whipped Cream: Light and airy, a dollop of vanilla-scented whipped cream complements the cheesecake’s richness, creating a delightful texture balance.
- Chocolate Sauce: A drizzle of thick, luscious chocolate sauce introduces decadent sweetness and elegance—perfect for chocolate lovers!
- Espresso or Coffee: The bold richness of coffee pairs beautifully, cutting through creaminess while intensifying flavors, making each bite even more enjoyable.
- Citrus Zest Topping: Brighten your cheesecake by garnishing it with a sprinkle of fresh lemon or orange zest, adding a fresh, zesty aroma that complements the custardy goodness.
- Nutty Biscotti: Serve alongside crisp, almond-flavored biscotti for a delightful crunch that contrasts beautifully with the cheesecake’s smooth texture—perfect for dipping in coffee or espresso!
- Ice Cream: A scoop of creamy vanilla or caramel ice cream adds an extra level of decadence and a melty texture that pairs wonderfully with the cheesecake’s luxurious qualities.
- Sparkling Wine: For a festive touch, sip some sparkling wine or champagne; its effervescence perfectly cuts through the cheesecake’s richness, making for a celebratory pairing.
- Savory Cheese Plate: For a unique twist, serve with a selection of savory cheeses like blue cheese or aged cheddar to contrast the sweetness with umami notes, sparking culinary curiosity.
Burnt Basque Cheesecake Variations & Substitutions
Feel free to explore these delightful twists that will make your Burnt Basque Cheesecake even more amazing and uniquely yours!
-
Citrus Zest: Add lemon or orange zest for a refreshing burst of flavor that brightens each bite.
-
Spicy Twist: Include a pinch of cinnamon or nutmeg to warm up your cheesecake with cozy, spiced notes that awaken the senses.
-
Chocolate Swirl: Fold in melted dark chocolate into the batter for a rich, marbled effect that adds an extra layer of indulgence.
-
Savory Surprise: Reduce the sugar slightly and mix in crumbled blue cheese with fresh herbs for a daring savory cheesecake adventure that’s sure to impress!
-
Nutty Crunch: Top your cheesecake with chopped nuts or a nut-based crust for added texture and a delightful crunch with each mouthful.
-
Fruit Topping: Garnish with fresh berries or a berry compote for a sweet and tangy contrast, perfect for brightening the creamy cheesecake.
-
Alternative Sweeteners: Experiment with honey or maple syrup instead of sugar for a more natural sweetening option, giving your cheesecake a unique flavor profile.
-
Dairy-Free: Swap in vegan cream cheese and coconut cream for a delicious dairy-free version that retains the lusciousness of the original.
Once you’ve enjoyed this classic, don’t forget to check out our Fried Strawberry Cheesecake or our luscious Chocolate Raspberry Cheesecake for more creative inspiration!
Burnt Basque Cheesecake Recipe FAQs
What type of cream cheese should I use for the Burnt Basque Cheesecake?
I absolutely recommend using full-fat cream cheese for this recipe! It provides the rich, creamy base you want for a delicious cheesecake. Low-fat cream cheese can result in a watery texture, ruining that luscious mouthfeel. Trust me, the full-fat version will give you the best results!
How should I store my leftover cheesecake?
To keep your Burnt Basque Cheesecake fresh, store any leftovers in an airtight container in the fridge for up to 4 days. You’ll notice that the flavors deepen over time, making each slice even more delightful! Just remember to let it come to room temperature before serving for the best taste.
Can I freeze Burnt Basque Cheesecake?
Absolutely! You can freeze your cheesecake for up to 2 months. Just wrap individual slices tightly in plastic wrap and place them in a freezer-safe container. To thaw, transfer the cheesecake to the fridge the night before you plan to enjoy it, or let slices sit out at room temperature for about 30 minutes.
What should I do if my cheesecake cracks while baking?
Cracks are perfectly normal and actually add to the rustic charm of a Burnt Basque Cheesecake! However, if you want to minimize cracking, make sure not to overmix when incorporating your flour. A smooth, gentle folding technique will help maintain a tender texture, leading to fewer cracks in the final product.
Can I make this cheesecake gluten-free?
Yes, you can! If you want to make a gluten-free version of the Burnt Basque Cheesecake, I recommend using a gluten-free all-purpose flour blend. Just keep in mind that the texture may vary slightly, but you’ll still get that deliciously creamy, crustless experience you crave! Just follow the same measuring guidelines and it’ll turn out great.
Burnt Basque Cheesecake: The Ultimate Crustless Treat
Ingredients
Equipment
Method
- Preheat the oven to 400°F (200°C).
- Line a 9x5-inch loaf pan with parchment paper, allowing edges to hang over.
- Combine softened cream cheese and sugar in a bowl and beat until smooth.
- Add eggs one at a time, mixing well.
- Stir in heavy cream, vanilla, and salt until combined.
- Sift flour into the batter and fold gently to combine.
- Pour the batter into the prepared loaf pan.
- Bake for 40-45 minutes until edges are golden-brown and center is slightly jiggly.
- Cool completely on the counter, then refrigerate for 2-4 hours or overnight.
Leave a Reply