
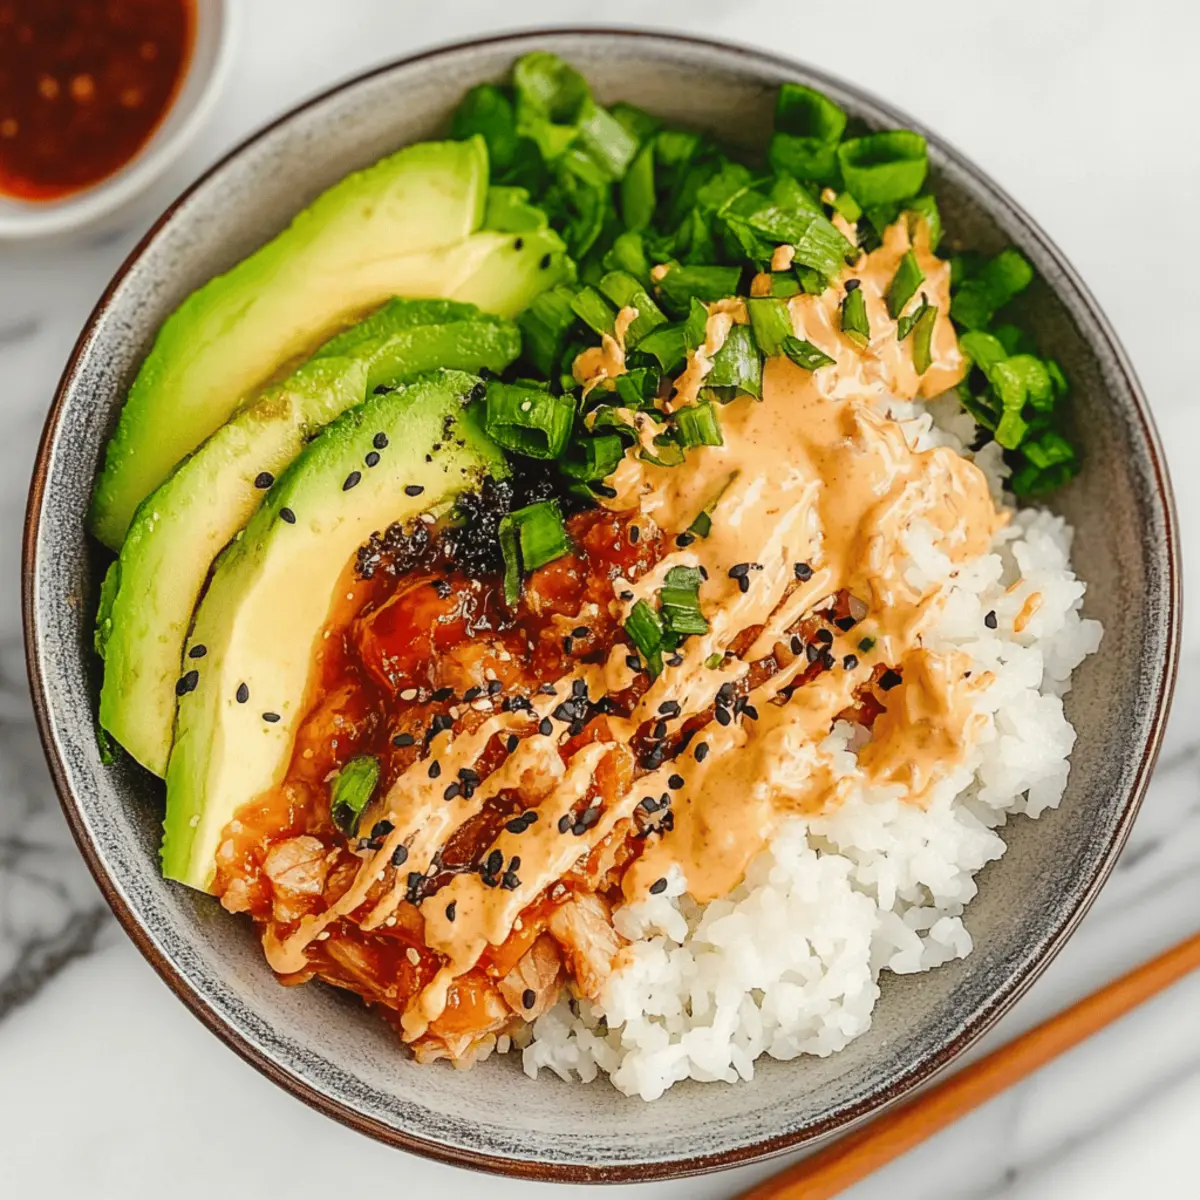
As I was blending flavors in my kitchen the other day, the thought hit me: why not embrace sushi without all the rolling fuss? That’s when this Canned Tuna Sushi Bowl came to life, marrying simplicity with taste in under 20 minutes. It’s a quick dinner solution that’s protein-packed and endlessly customizable, catering to both adults and picky kids. Picture a vibrant bowl filled with buttery avocado, crispy rice, and savory tuna, all drizzled with a zesty bang bang sauce. Each bite captures the essence of sushi while being exceptionally easy to assemble. Ready to try something new that won’t leave you frazzled? Let’s dive into this fun and satisfying dish!
Why Is Canned Tuna Sushi Bowl a Must-Try?
Quick dinners like this Canned Tuna Sushi Bowl are perfect for busy weeknights, allowing you to whip up a delicious meal in just 20 minutes. Protein-packed with flavorful tuna and creamy avocado, this dish keeps you satisfied without weighing you down. Customizable for any palate, feel free to switch ingredients like canned salmon or different rice varieties. Kid-approved, the vibrant colors and tasty bang bang sauce make it a family favorite. Plus, it’s a refreshing twist on traditional sushi that’s fun to assemble and share. If you love easy, healthy recipes, this one is a delightful addition to your weekly meal rotation!
Canned Tuna Sushi Bowl Ingredients
For the Rice Base
- Cooked Sushi Rice – This seasoned rice provides the authentic sushi flavor that anchors the bowl.
- Olive Oil – Perfect for pan-frying the rice to achieve a delightful crunch.
- Salt and Black Pepper – Essential for seasoning to taste.
For the Protein and Sauce
- Canned Tuna – The star of the bowl; opt for tuna in oil for extra flavor.
- Bang Bang Sauce – Adds a creamy, spicy kick; can be homemade or use spicy mayo instead.
- Sriracha Sauce – For an extra zesty kick; any preferred hot sauce works too.
For the Toppings
- Avocado – Adds creaminess and healthy fats; slice or dice for easy addition.
- Scallions – Chopped for a fresh garnish that brightens the dish.
- Furikake – This Japanese seasoning adds a nice finishing touch; substitute with nori if preferred.
This Canned Tuna Sushi Bowl not only reinvents traditional sushi but also combines convenience and nutrition into one delightful experience!
Step‑by‑Step Instructions for Canned Tuna Sushi Bowl
Step 1: Cook the Rice
If using uncooked sushi rice, rinse 1 cup until the water runs clear, then cook according to package instructions. Once cooked, gently fold in 2 tablespoons of rice wine vinegar, a drizzle of sesame oil, and a pinch of sugar. Allow the rice to cool slightly, fluffing it with a fork for that perfect sushi texture as you prepare your toppings.
Step 2: Prepare Toppings
While the rice cooks, drain one can of tuna thoroughly and mix it with 2-3 tablespoons of bang bang sauce until well combined. Slice one ripe avocado into thin pieces and chop a handful of scallions for freshness. If desired, prepare additional salads or vegetable sides to complement your Canned Tuna Sushi Bowl.
Step 3: Pan-Fry the Rice (Optional)
Heat 2 tablespoons of olive oil in a non-stick skillet over medium-high heat. Once hot, add the cooked sushi rice, spreading it evenly in the pan. Cook for about 3-5 minutes, stirring gently to achieve a golden-brown crust, and flip carefully to avoid damaging the rice. Remove from heat once crispy, allowing the rice to cool for a minute.
Step 4: Assemble the Bowl
In a vibrant serving bowl, add a generous scoop of the crispy rice as the base. Top it with the mixed bang bang tuna, arranging the slices of avocado artistically over the top. Sprinkle with furikake for that authentic sushi flavor, and drizzle with sriracha sauce to your taste. Your Canned Tuna Sushi Bowl is now beautifully assembled and ready to serve!
Make Ahead Options
These Canned Tuna Sushi Bowls are perfect for meal prep enthusiasts! You can prepare the sushi rice and cool it, then refrigerate it for up to 3 days. The bang bang sauce can also be mixed in advance and stored in the fridge for up to 2 days—this helps the flavors meld beautifully. Additionally, slice the avocado and chop the scallions right before serving to prevent browning. When you’re ready to enjoy, simply reheat the rice if you prefer it warm, assemble with the cold tuna and toppings, and you’ll have a delicious meal that’s just as satisfying as if it were made fresh!
Storage Tips for Canned Tuna Sushi Bowl
Fridge: Store any leftover components separately in airtight containers for up to 2 days to maintain freshness and texture in your Canned Tuna Sushi Bowl.
Freezer: While not ideal, you can freeze cooked sushi rice for up to 1 month. Thaw in the fridge overnight and reheat before assembling your bowl.
Reheating: To reheat leftover sushi rice, microwave for 30-60 seconds, adding a sprinkle of water to retain moisture. Refresh toppings separately for the best flavor.
Avocado: To keep avocado from browning, squeeze a bit of lemon juice on cut pieces and store them in an airtight container for the short term.
Canned Tuna Sushi Bowl Variations
Feel free to unleash your creativity and tailor the recipe to your taste buds with these fun and easy alternatives!
- Tuna Swap: Use canned salmon instead of tuna for a different protein flavor. This brings a rich taste that pairs beautifully with sushi rice.
- Rice Variety: Swap sushi rice for jasmine or brown rice for a unique twist that adds extra fiber and nutrients.
- Topping Bonanza: Top your bowl with pickled ginger, radishes, or even sesame seeds for an extra burst of flavor and crunch. A colorful array always adds excitement!
- Spicy Kick: For those who crave more heat, add kimchi on top or stir some sriracha directly into the tuna mixture. It offers a delicious, tangy bite!
- Creamy Delight: Consider using Greek yogurt instead of mayonnaise in the bang bang sauce for a healthier, creamy alternative that still packs flavor.
- Veggie Boost: Add shredded carrots, cucumber ribbons, or edamame for extra crunch and freshness in your bowl. These veggies complement the creamy tuna beautifully!
- Soy Sauce Drizzle: For a traditional touch, drizzle some soy sauce over your assembled bowl. This adds saltiness that enhances the overall sushi experience.
- Furikake Alternatives: If you can’t find furikake, crumbled nori or even toasted sesame seeds work well in its place, providing a lovely umami flavor.
These variations not only keep your meals delightful but also make them more exciting! If you’re in the mood for more inspiration, check out Spicy Salmon Sushi or try the Street Corn Bowl for more colorful and tasty ideas!
Expert Tips for Canned Tuna Sushi Bowl
- Perfectly Seasoned Rice: Always season your sushi rice while it’s warm for the best flavor absorption. This ensures your Canned Tuna Sushi Bowl is delicious from the base up.
- Crispy Rice Magic: For a delightful crunch, pan-fry the rice but keep a close eye to avoid burning. A golden crust adds texture to your bowl!
- Quality Tuna Matters: Use tuna packed in oil for richer flavor; just be sure to drain it well to prevent a soggy bowl.
- Customize with Ease: Feel free to swap out ingredients based on your preference; different cooked rice types or proteins can refresh the dish.
- Avocado Freshness: Choose ripe avocados to enhance creaminess; non-ripe avocados will ruin the texture and flavor of your bowl.
- Bang Bang Sauce Variation: Adjust the spiciness of the bang bang sauce according to your family’s taste; it’s all about making this Canned Tuna Sushi Bowl work for you!
What to Serve with Canned Tuna Sushi Bowl
Create a memorable meal by enhancing your Canned Tuna Sushi Bowl with delightful pairings that uplift every bite.
-
Asian Cucumber Salad: This refreshing side adds a crisp, tangy contrast, enhancing the sushi-inspired flavors with its cool crunch.
-
Steamed Edamame: A perfect, protein-packed snack that complements the tuna without overshadowing its flavor; easily seasoned with sea salt.
-
Miso Soup: Warm and comforting, this savory soup balances out the meal with its umami notes and pairs beautifully with sushi bowls.
-
Seaweed Salad: The slight brininess and chewy texture of seaweed salad provide a unique twist, elevating your sushi bowl experience.
-
Pickled Ginger: A zesty palate cleanser that pairs well, helping to refresh your taste buds between bites of the rich tuna and creamy avocado.
-
Rice Crackers: Offering a delightful crunch, these pair well as a side snack, mingling textures smoothly while keeping the Asian theme alive.
-
Matcha Green Tea: This light, antioxidant-rich drink not only complements the flavors but also adds a soothing element to your dining experience.
-
Mochi Ice Cream: For dessert, this cool, chewy treat is a sweet ending that ties the meal together, punctuating the flavors of the main dish beautifully.
Canned Tuna Sushi Bowl Recipe FAQs
How do I select the best canned tuna for my sushi bowl?
Absolutely! When choosing canned tuna, look for options packed in oil as it tends to have a richer flavor compared to tuna packed in water. Check the ingredient label to ensure it’s simply tuna, a little oil, and salt for the best taste.
What is the best way to store leftover Canned Tuna Sushi Bowl ingredients?
To maintain the freshness of your Canned Tuna Sushi Bowl, store components separately. Keep the sushi rice and other cooked ingredients in airtight containers in the fridge for up to 2 days. Ensure the avocado is stored with lemon juice to prevent browning. It’s all about keeping those flavors fresh!
Can I freeze cooked sushi rice for later use?
Certainly! You can freeze cooked sushi rice for up to 1 month. To do so, let it cool completely and then scoop it into a freezer-safe bag, squeezing out excess air. When you’re ready to enjoy it again, simply thaw it in the fridge overnight and reheat it gently in the microwave for 30-60 seconds, adding a sprinkle of water to keep it moist.
What should I do if my rice ends up too mushy?
Very common! If you find your sushi rice is too mushy, there are a couple of tricks to help salvage it. First, try pan-frying the rice for a few minutes in a skillet with a little olive oil; this will crisp it up. Just ensure you handle it gently to avoid turning it into a paste. If it’s extremely mushy and clumpy, it may be better to repurpose it into a rice fritter or sushi bake, incorporating it with eggs and veggies.
Can I adapt this recipe to accommodate allergies?
Definitely! If you’re catering to allergies, there are many ways to customize your Canned Tuna Sushi Bowl. For instance, you can replace the bang bang sauce with a dairy-free alternative or slightly adjust the ingredients to avoid known allergens. For those sensitive to gluten, make sure any sauces are gluten-free, and feel free to substitute the sushi rice with quinoa or cauliflower rice for a different take!
Canned Tuna Sushi Bowl: Quick, Tasty, and Kids-Approved!
Ingredients
Equipment
Method
- Rinse the sushi rice until the water runs clear, then cook according to package instructions. Fold in rice wine vinegar, sesame oil, and sugar once cooked.
- Drain the canned tuna and mix it with bang bang sauce. Slice the avocado and chop scallions.
- Heat olive oil in a non-stick skillet, add cooked sushi rice, and pan-fry for 3-5 minutes until crispy.
- In a bowl, add crispy rice, top with tuna mixture, avocado slices, sprinkle with furikake, and drizzle with sriracha.
Leave a Reply