
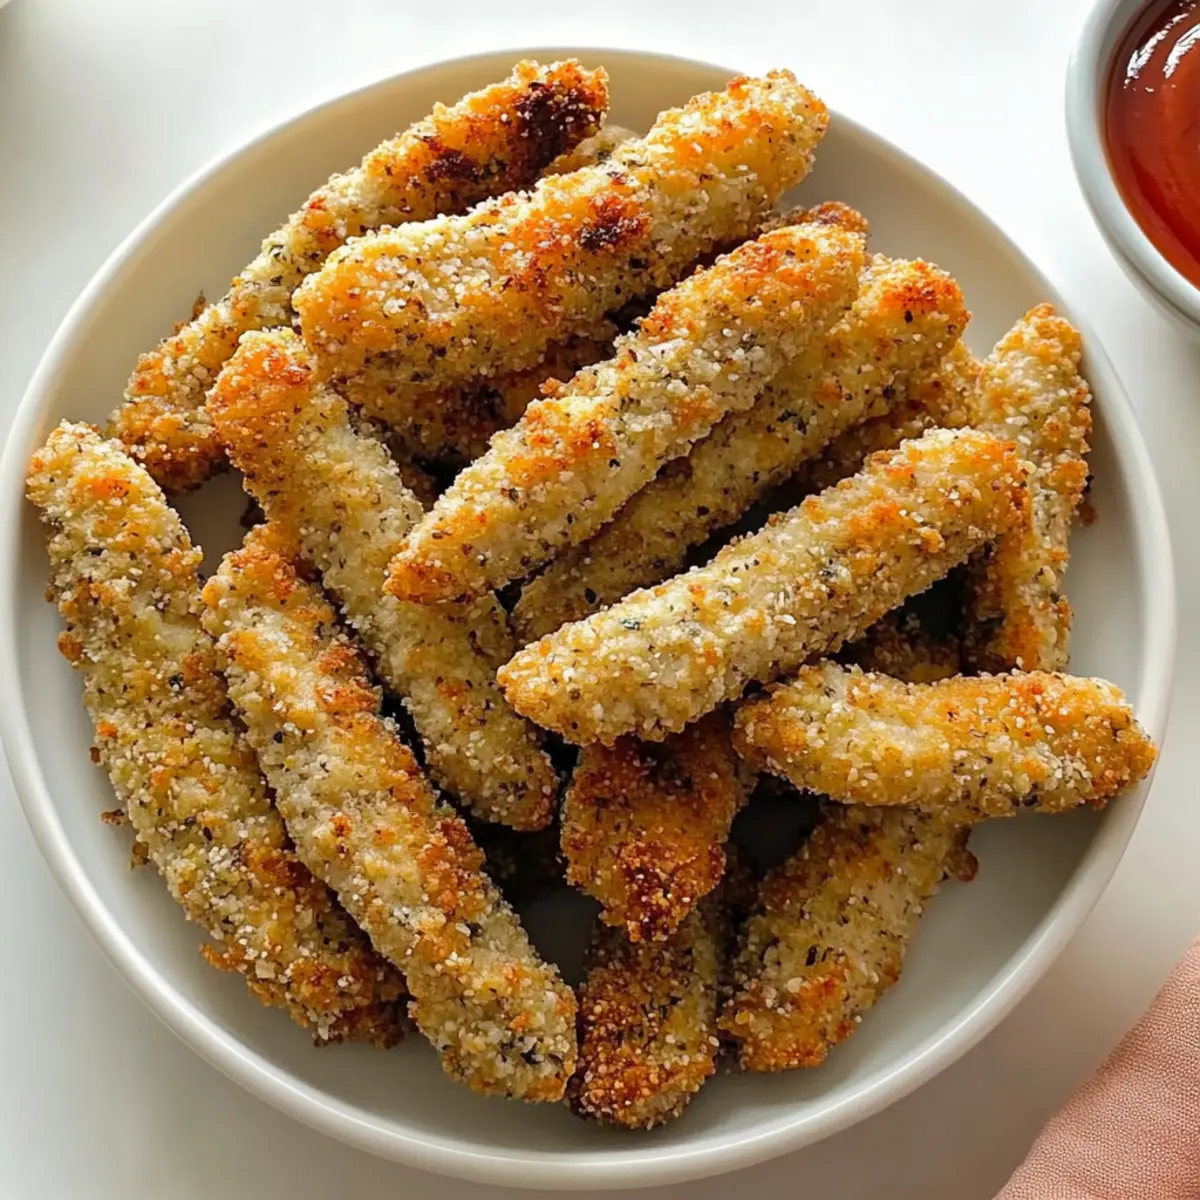
“Mom, I want chicken nuggets!” This familiar plea from my little ones always sends me into a mini crisis, especially when I’m trying to prioritize their health over fast food temptations. That’s why I decided to whip up these Vegetable Chicken Fingers for Babies and Toddlers. Not only are they a deliciously nutritious alternative to the takeout version, but they also sneak in some sneaky veggies, like zucchini and carrots, alongside protein-packed quinoa. The best part? They’re super quick and easy to prepare, making them a perfect choice for busy weeknights. Plus, they meet the picky eater test with flying colors! Are you ready to say goodbye to store-bought nuggets and hello to a homemade twist? Let’s dive into this kid-friendly recipe that’s bound to become a family favorite!
Why Choose Homemade Vegetable Chicken Fingers?
Healthier Alternative: These Vegetable Chicken Fingers are not just a yummy treat; they’re loaded with nutrition, making them a better choice than fast food.
Quick and Easy: Whip them up in no time, ideal for those hectic weeknights when you need something homemade yet simple.
Kid-Approved: With their crunchy exterior and soft interior, these fingers are a hit with toddlers and picky eaters alike.
Versatile Options: Customize them by adding your little ones’ favorite veggies or trying a vegetarian spin with ground turkey or tofu.
Meal Prep Friendly: Make a big batch and store extras for busy days, ensuring you always have a healthy option ready for your child.
Serve these tasty bites with dips like yogurt or BBQ sauce, and enjoy the smiles at mealtime while watching your kids embrace healthy eating!
Vegetable Chicken Fingers Ingredients
-
For the Chicken Mixture
• Ground Chicken – The key protein source that keeps these fingers tender; substitute with ground turkey or tofu for different flavors.
• Shredded Carrots – Brings a natural sweetness and vibrant color; use pre-shredded for convenience.
• Shredded Zucchini – Adds moisture and essential nutrients; can be replaced with finely grated squash for variety.
• Cooked Quinoa – Acts as a hearty binding agent, adding protein and fiber; swap for cooked brown rice if desired.
• Garlic – Boosts flavor wonderfully; can be omitted for a milder dish for little taste buds.
• Yellow Onion – Offers sweetness and depth of flavor; shallots can provide a tasty alternative.
• Dried Parsley – Infuses freshness into each bite; fresh herbs work great if available.
• Paprika – Adds a hint of smoky flavor and a lively color; consider Italian seasoning for a different twist.
• Salt and Pepper – Elevates the overall flavor; omit for a low-sodium option. -
For the Crunch
• Breadcrumbs (optional) – Adds that desired crispy texture; try gluten-free breadcrumbs or crushed oats for a healthier touch.
Step‑by‑Step Instructions for Vegetable Chicken Fingers For Babies and Toddlers
Step 1: Preheat the Oven
Begin by preheating your oven to 400°F (200°C). While it warms up, prepare a baking sheet by lining it with parchment paper, ensuring a non-stick surface for your Vegetable Chicken Fingers. This step is crucial to achieve that golden brown finish. Make sure the baking sheet is set aside and ready to go when you’re done mixing the ingredients.
Step 2: Cook the Quinoa
Next, cook the quinoa according to the package instructions, usually about 15 minutes. Use a ratio of 1 part quinoa to 2 parts water, bringing the water to a boil before adding the quinoa. Allow it to simmer until all the liquid is absorbed. Once cooked, fluff it with a fork and set it aside to cool; this will help it bind seamlessly in your finger mixture.
Step 3: Prepare the Vegetables
In the meantime, grab a food processor or a box grater to finely chop the zucchini, carrots, yellow onion, and garlic. Blend them until they’re uniform in texture, approximately 1-2 minutes in the processor. This ensures a smooth mixture, perfect for little mouths trying out solid foods. Have a mixing bowl ready to combine all these colorful veggies.
Step 4: Mix Ingredients Together
In a large mixing bowl, carefully combine the ground chicken, finely chopped vegetables, cooled quinoa, dried parsley, paprika, and a pinch of salt and pepper. Use your hands or a wooden spoon to mix everything thoroughly for about 2-3 minutes until all ingredients are well incorporated into a cohesive mixture. This is the base for your flavorful Vegetable Chicken Fingers.
Step 5: Shape the Chicken Fingers
Now, it’s time to shape your mixture! Lightly oil your hands to prevent sticking, then take small portions and form them into finger-sized pieces, approximately 2-3 inches long. Keep them uniform in size for even cooking. Arrange the shaped fingers on the parchment-lined baking sheet, ensuring they have space between them for optimal baking.
Step 6: Add Breadcrumbs (optional)
If you’re opting for added crunch, now is the time to sprinkle on some breadcrumbs. Lightly coat the formed chicken fingers with breadcrumbs, pressing them gently into the surface. This will create a delightful crispy layer during baking. For extra flavor, you could also spray the tops with cooking oil to help with browning.
Step 7: Bake to Perfection
Place the baking sheet in your preheated oven and bake the Vegetable Chicken Fingers for 15-20 minutes. Keep an eye on them and look for a golden brown color on the outside and ensure they’re thoroughly cooked through. The internal temperature should reach 165°F (75°C) for poultry. Halfway through, you can turn them for even browning if desired.
Step 8: Cool and Serve
Once they’re perfectly baked, take your Vegetable Chicken Fingers out of the oven and let them cool for a few minutes on the baking sheet. This allows them to firm up slightly, making them easier for little hands to grab. Serve them warm with your favorite dipping sauces like yogurt or BBQ, and enjoy watching your little ones relish these nutritious bites!

What to Serve with Vegetable Chicken Fingers for Babies and Toddlers
These delightful chicken fingers are just the start of a meal your little ones will adore, sparking imaginations at the dinner table!
- Creamy Yogurt Dip: A smooth dip that adds a tangy flavor, making it perfect for little hands to scoop and savor.
- Sweet Potato Fries: Crispy on the outside, fluffy within, these fries offer a nutritious and fun alternative, sweetening the dining experience.
- Fresh Veggie Sticks: Crunchy carrots, cucumber, and bell peppers provide a refreshing crunch alongside the fingers, promoting healthy snacking habits.
- Apple Slices with Nut Butter: Juicy and sweet, these apple slices, paired with a scoop of nut butter, balance the savory chicken fingers perfectly.
- Fruit Salad: A colorful array of seasonal fruits can brighten up the plate, delighting little eyes and taste buds with their natural sweetness.
- Mini Pasta Salad: Bite-sized pasta with cherry tomatoes and peas coated in a light dressing adds a fun twist and complements the textures of the chicken fingers.
- Cheesy Corn on the Cob: This sweet and savory side can be a delightful treat, creating smiles while providing wholesome goodness.
- Smoothies: A frosty blend of fruits and yogurt is the right drink to pair, making mealtime feel like a special occasion.
- Chocolate Avocado Pudding: For a sweet finish, this healthy dessert combines creaminess and richness, leaving little ones absolutely thrilled!
- Herbal Iced Tea: A refreshing, unsweetened drink option can cleanse the palate, encouraging the whole family to stay hydrated in a tasty way.
Make Ahead Options
These Vegetable Chicken Fingers for Babies and Toddlers are perfect for meal prep enthusiasts! You can prepare the chicken mixture up to 24 hours in advance. Simply combine the ground chicken, shredded vegetables, cooked quinoa, and spices, and store the mixture in an airtight container in the fridge. This not only saves you precious time on busy weeknights but allows the flavors to meld beautifully. When you’re ready to bake, shape the fingers and coat them with breadcrumbs, if desired. If you have leftovers, they can be refrigerated for up to 4 days or frozen for up to 3 months. Just reheat in the oven until warm to retain their delightful crunch, ensuring your little ones enjoy a meal that’s just as delicious as freshly made!
Vegetable Chicken Fingers Variations & Substitutions
Feel free to get creative and tailor the recipe to your family’s taste and dietary needs!
-
Gluten-Free: Use gluten-free breadcrumbs or crushed oats to maintain the crunch without gluten. This way, everyone can enjoy them worry-free!
-
Dairy-Free: Substitute cheese with nutritional yeast for a cheesy flavor without the dairy. It’s an excellent way to sneak in some added nutrients!
-
Spicy Kick: Add a pinch of cayenne pepper or red pepper flakes to the mixture for a little heat that older kids and adults will love. It’s a fun way to make these fingers more exciting!
-
Vegetable Variety: Switch up the vegetables by incorporating sweet potatoes or peas for a colorful twist. The versatility of this recipe allows for endless combinations!
-
Extra Crunch: Double-coat your chicken fingers with breadcrumbs for a more delightful crunch. This technique will make them irresistibly crispy and satisfying!
-
Baked vs. Air-Fried: For a quicker method, air-fry the chicken fingers at 375°F for about 10-12 minutes, flipping halfway. It’s an easy way to get them crispy without a lengthy baking time.
-
Protein Boost: Incorporate some finely chopped spinach or cooked ground turkey to enrich the protein content while adding some color. Your little ones won’t even know they’re there!
-
Herb Infusion: Experiment with herbs like basil or rosemary for a fresh twist on flavor. This adds depth while keeping the essence of your tasty vegetable chicken fingers intact.
These variations can help you craft the perfect bite every time, whether you end up making Hot Honey Chicken or a fresh take on Mediterranean Chicken Gyros. Enjoy exploring these options as you prepare a delicious meal for your little ones!
Expert Tips for Vegetable Chicken Fingers
-
Vegetable Prep: Use finely shredded vegetables: This ensures a smoother texture for younger babies, making it easier for them to chew and digest.
-
Breadcrumb Coating: Ensure even coverage: If using breadcrumbs, make sure each chicken finger is well-coated to achieve that irresistible crunch.
-
Spacing on the Sheet: Avoid overcrowding: Give each chicken finger some breathing room on the baking sheet to ensure they bake evenly and become crispy.
-
Check Temperature: Always measure internal heat: Use a meat thermometer to ensure the chicken fingers reach an internal temperature of 165°F (75°C) for safe consumption.
-
Make a Double Batch: Prep ahead: Consider doubling the recipe for quick snacks throughout the week, as these Vegetable Chicken Fingers freeze beautifully for later use.
-
Versatile Dip Options: Pair with favorite sauces: Serve these delicious chicken fingers with various dips, such as yogurt or BBQ sauce, to make mealtime even more enjoyable!
Storage Tips for Vegetable Chicken Fingers For Babies and Toddlers
Fridge: Store your Vegetable Chicken Fingers in an airtight container for up to 4 days. This keeps them fresh and ready for quick meals throughout the week.
Freezer: For longer storage, freeze them in freezer-safe bags or containers for up to 3 months. Lay them flat in the bags for easy stacking.
Reheating: When ready to enjoy, reheat in the oven at 375°F (190°C) for about 10-15 minutes until warmed through and crispy again. Avoid the microwave to maintain texture.
Make-Ahead: These can be made ahead of time; just prepare the batch, store, and enjoy healthy finger food whenever your little one craves a snack!
Vegetable Chicken Fingers for Babies and Toddlers Recipe FAQs
How do I choose ripe vegetables for this recipe?
Absolutely! When selecting zucchini and carrots, look for ones that are firm, bright in color, and free from dark spots or blemishes. For zucchini, pick ones that feel heavy for their size, indicating they are fresh and full of moisture. Carrots should have a bright orange hue and a smooth surface. Avoid any that are wrinkled, as they may be past their prime.
What are the best storage methods for leftovers?
Very! After preparing your Vegetable Chicken Fingers, allow them to cool completely before storing. Place them in an airtight container in the refrigerator, and they will stay fresh for up to 4 days. Ensure the container is tightly sealed to prevent moisture loss, which keeps them tastier for your little ones.
Can I freeze these chicken fingers?
Absolutely! To freeze your Vegetable Chicken Fingers, allow them to cool down first. Then, arrange them in a single layer on a baking sheet and freeze for 1-2 hours until solid. Once they are frozen, transfer them to freezer-safe bags or containers, making sure to remove excess air from the bags. This way, they can last up to 3 months in the freezer. When you’re ready to enjoy, simply reheat in the oven until warmed through.
What if the mixture is too wet or dry?
No problem! If you find the mixture is too wet, you can add a bit more cooked quinoa or breadcrumbs to help bind it together. Conversely, if it’s too dry, a splash of water or a bit of olive oil can help moisten it. Make sure to thoroughly mix in any additions to ensure consistent flavor and texture throughout.
Are these chicken fingers safe for my toddler with allergies?
Very! Since this recipe can be easily modified, you can easily make it allergy-friendly. For gluten-free options, simply use gluten-free breadcrumbs or skip them altogether. If your toddler has other specific allergies, like to eggs or dairy, rest assured, this recipe is egg-free and you can omit any cheese additions. Always check ingredient labels and consult with your pediatrician if you’re introducing new ingredients.
How can I ensure they cook evenly?
Definitely! To ensure even cooking, space the chicken fingers apart by placing them at least an inch apart on the baking sheet. This helps air circulate around them as they bake. Additionally, halfway through baking, feel free to flip them over gently with tongs or a spatula to promote even browning on both sides.
Crunchy Vegetable Chicken Fingers for Babies and Toddlers
Ingredients
Equipment
Method
- Preheat your oven to 400°F (200°C) and prepare a baking sheet lined with parchment paper.
- Cook the quinoa according to package instructions, approximately 15 minutes, then fluff and cool.
- Finely chop zucchini, carrots, yellow onion, and garlic using a food processor or box grater.
- In a large mixing bowl, combine ground chicken, chopped vegetables, cooled quinoa, parsley, paprika, salt, and pepper.
- Shape the mixture into finger-sized pieces, approximately 2-3 inches long, and arrange on the baking sheet.
- If using, sprinkle breadcrumbs over the formed chicken fingers and press gently.
- Bake for 15-20 minutes until golden brown and cooked through, checking internal temperature is 165°F (75°C).
- Allow to cool for a few minutes before serving with dipping sauces like yogurt or BBQ.
Leave a Reply