
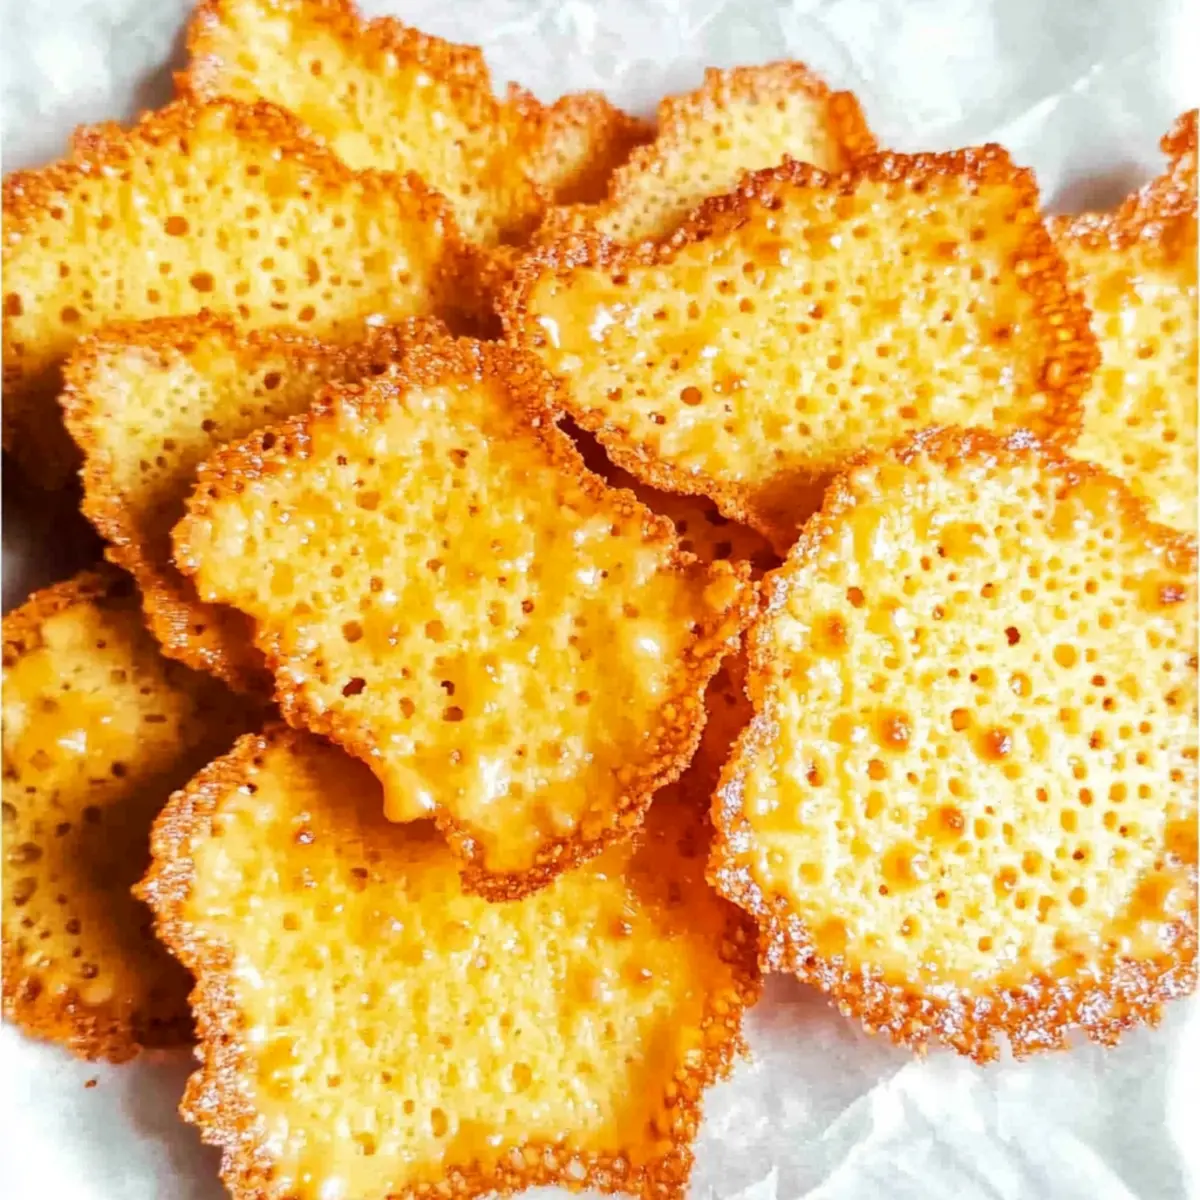
As I stood in my kitchen, the unmistakable aroma of melted cheese danced around me, promising a delightful snack in mere minutes. These Quick and Easy Baked Cheese Crisps are my go-to solution for those cravings that hit when I want something savory yet healthy. With only a handful of ingredients and just 10 minutes to spare, you can whip up a low-carb treat that satisfies without the guilt of traditional chips. What I love most is how easily customizable they are—try them with garlic, inspired by Italian flavors, or even add bacon for an irresistible twist. Perfect for entertaining or an afternoon nibble, these crisps are just waiting for your creative flair. Curious about how easy they are to make? Let’s dive in!

Why Are Baked Cheese Crisps Irresistible?
Convenience: These Baked Cheese Crisps come together in just 10 minutes, making them a quick snack solution for any occasion.
Low-Carb Delight: Enjoy a guilt-free indulgence that perfectly fits a low-carb lifestyle. Each serving is around 48 calories, letting you snack with ease.
Endless Customization: Transform your crisps with flavors like garlic, pizza-style, or even a savory bacon twist. There’s a variation to please every palate!
Perfect Crunch: The light, crispy texture is reminiscent of your favorite chips, making these great for dipping or solo enjoyment. For extra flavor, consider pairing them with your favorite dips, like sour cream or salsa.
Impressive Crowd-Pleaser: Whether you’re hosting or just snacking, these crisps are sure to be a hit, rivaling traditional snacks without the extra calories. So, why not make them today?
Baked Cheese Crisps Ingredients
• Create your own cheesy masterpiece with these essential ingredients!
For the Crisps
• Cheddar Cheese – Use block cheese and grate it yourself for a richer flavor and better texture.
• Garlic Powder – A great optional addition that enhances the overall taste; you can substitute with Italian seasoning for a different twist.
For Variations
• Pepper Jack Cheese – Swap cheddar for a spicy kick that’ll keep your taste buds dancing!
• Mozzarella – Perfect for pizza-style crisps; just add pepperoni for an enticing flavor.
• Cooked Bacon – Add these savory bits for a deliciously smoky twist.
Seasoning Suggestions
• Italian Herbs – Swap garlic powder for a mix of Italian herbs to give your crisps a Mediterranean flair!
• Chili Flakes – Sprinkle on some heat for a zesty upgrade to the basic recipes.
Enjoy experimenting with these Baked Cheese Crisps to find your favorite combination!
Step‑by‑Step Instructions for Baked Cheese Crisps
Step 1: Preheat and Prepare
Begin by preheating your oven to 350°F (175°C). While it warms up, line a baking sheet with parchment paper to prevent the cheese from sticking. This crucial step ensures that your Baked Cheese Crisps will come off the tray easily once they are baked.
Step 2: Portion the Cheese
Now, grab your block of cheddar cheese and grate it finely for the best texture. Using a measuring tablespoon, place heaping mounds of the grated cheese onto the prepared baking sheet, keeping them about two inches apart. This spacing allows the cheese to melt and expand without merging together while baking.
Step 3: Add Flavor
To elevate the taste of your Baked Cheese Crisps, sprinkle a pinch of garlic powder over each mound of cheese. This ingredient adds a savory depth that complements the cheddar beautifully. If you prefer a different flavor, consider substituting with Italian seasoning for a delightful twist.
Step 4: Bake to Perfection
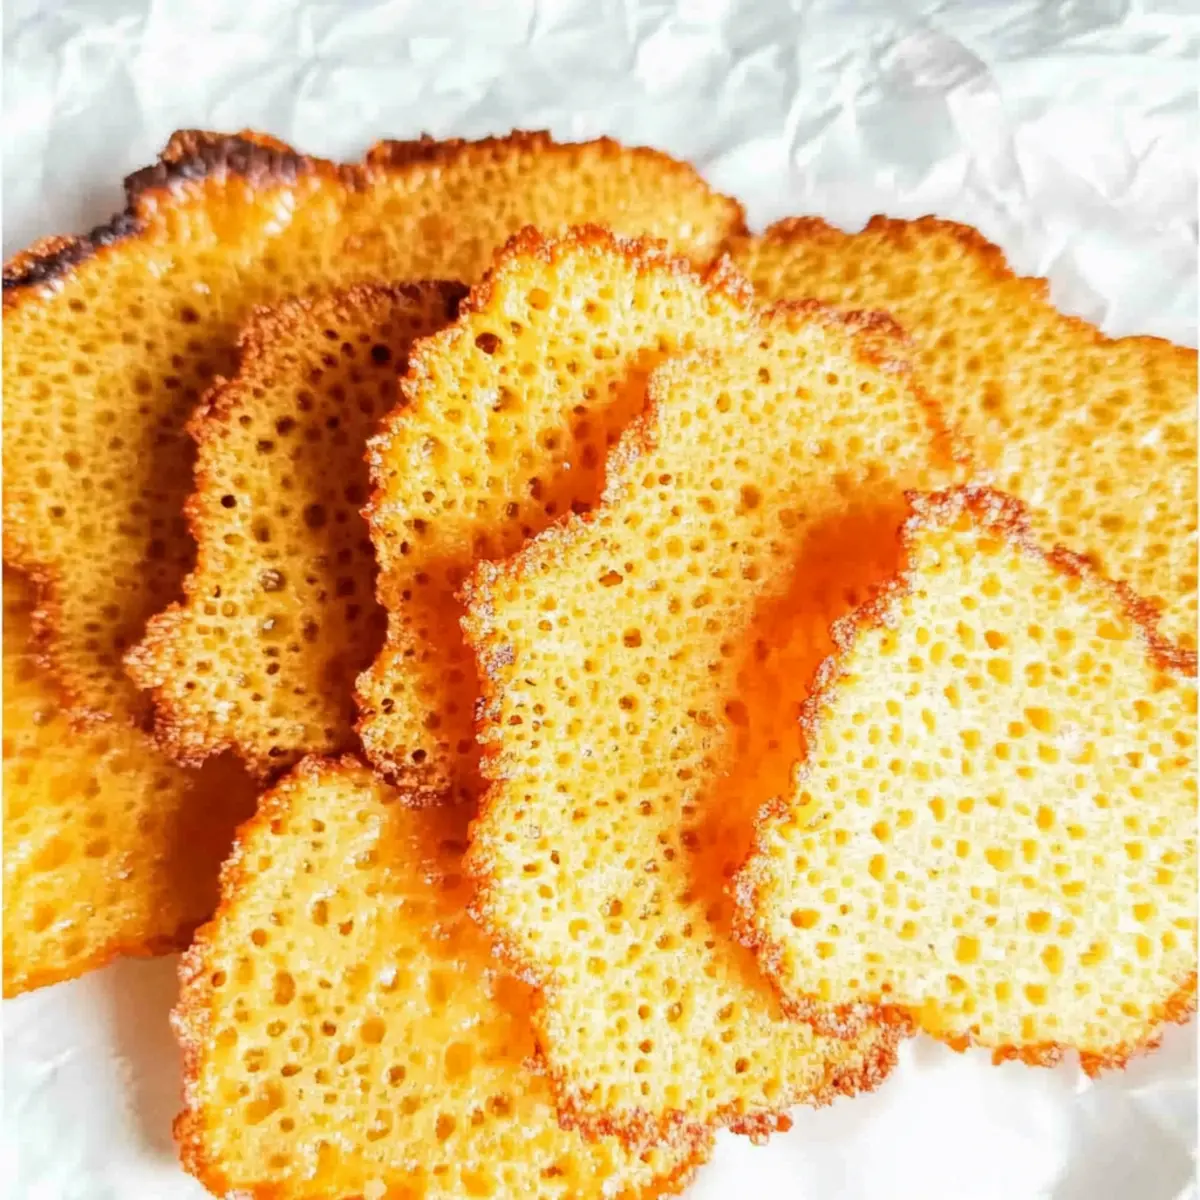
Carefully place the baking sheet in the preheated oven and bake the cheese mounds for about 5-8 minutes. Keep a watchful eye on them, as you’ll want to remove them when they turn a luscious golden brown. This color is your indicator that they are perfectly crispy and ready to be enjoyed.
Step 5: Cool and Crisp
Once the Baked Cheese Crisps are golden, take them out of the oven and carefully transfer the parchment paper to a cooling rack. This step is essential for allowing them to become crisp. To ensure maximum crunchiness, dab the tops of the crisps with a paper towel to absorb any excess grease.
Step 6: Serve and Savor
Now that your Baked Cheese Crisps are cool, it’s time to serve! Pair them with your favorite dips like sour cream, ranch dressing, or salsa for an enhanced snacking experience. Enjoy these crunchy delights straight away or store them for later—I guarantee they will be irresistible!
Make Ahead Options
These Baked Cheese Crisps are a fantastic option for busy home cooks looking to save time! You can prep the cheese mounds up to 24 hours in advance by placing them on the parchment-lined baking sheet, covering them with plastic wrap, and refrigerating. For best results, ensure they are tightly spaced (about two inches apart) to maintain their shape. When you’re ready to enjoy these delicious crisps, simply take them out of the fridge, sprinkle with garlic or your preferred seasonings, and bake as directed for 5-8 minutes. Doing this not only cuts down on prep time but also ensures you have a satisfying snack ready to go anytime the craving strikes!
Baked Cheese Crisps Variations & Substitutions
Feel free to let your culinary creativity shine as you explore different flavors and textures in these Baked Cheese Crisps!
-
Pepper Jack: Swap cheddar for pepper jack to ignite a spicy kick, adding personality to each bite.
-
Bacon Decadence: Stir in bits of cooked bacon to create a smoky, savory rendition that’s truly irresistible.
-
Mozzarella Magic: For a pizza-style treat, use mozzarella and top with sliced pepperoni for a snack that tastes like your favorite pie.
-
Italian Inspiration: Replace garlic with a blend of Italian herbs for a Mediterranean flair that brings sunshine to your snack.
-
Herbed Delight: Sprinkle in some fresh or dried herbs like rosemary or thyme to elevate the flavor profile and add an aromatic touch.
-
Chili Kick: Feel the heat by adding chili flakes on top before baking, giving your crisps a zesty spicy twist that will wake up your taste buds.
-
Cheesy Mix-Up: Combine different cheeses such as gouda or double Gloucester for a unique, complex flavor that will keep everyone guessing.
-
Garlic Parmesan: Try mixing in grated parmesan with your cheddar for that classic, rich Italian flavor, giving your crisps a sophisticated edge.
Discover even more snacking inspiration with these delightful options, and explore recipes like Baked Apple Cinnamon or Cottage Cheese Egg for your next kitchen adventure! Enjoy creating your very own perfect Baked Cheese Crisps!
Storage Tips for Baked Cheese Crisps
Room Temperature: Store cooled Baked Cheese Crisps in an airtight container at room temperature for up to 3 days for optimal freshness.
Fridge: If you need them to last longer, place them in the fridge in an airtight container for up to 1 week. This will help maintain their flavor but may slightly soften their crunch.
Freezer: Freeze your Baked Cheese Crisps in a freezer-safe bag or container for up to 6 months. To enjoy, simply thaw at room temperature and reheat in the oven for a few minutes to regain crispiness.
Reheating: If your crisps lose some crunch after storage, reheat them in a preheated oven at 350°F (175°C) for 3-5 minutes. This will help restore their delightful texture!
Expert Tips for Baked Cheese Crisps
• Choose Quality Cheese: Using high-quality block cheddar instead of pre-grated cheese ensures a richer flavor and better texture in your baked cheese crisps.
• Mind the Baking Time: Keep a close eye on the crisps as they bake; golden brown is the sweet spot. Overbaking can lead to bitterness, so check at the 5-minute mark.
• Avoid Sticky Situations: Always use parchment paper to line your baking sheet. This step is essential to preventing sticking and makes for easy cleanup after baking.
• Experiment with Flavors: Don’t hesitate to try different cheese varieties or seasonings! From spicy pepper jack to aromatic Italian herbs, customize your baked cheese crisps to your taste.
• Cool for Crunch: Allow the crisps to cool completely before serving. This cooling helps lock in their crunchiness that makes them so delightful.
What to Serve with Baked Cheese Crisps?
Savor the delightful crunch of cheese crisps while pairing them with these delicious accompaniments for a well-rounded snacking experience.
-
Creamy Guacamole: The smooth, rich texture of guacamole complements the crispy cheese perfectly, adding a burst of flavor to each bite.
-
Spicy Salsa: A fresh, zesty salsa brings a fiesta of flavors. The acidity cuts through the richness of the crisps, leaving your taste buds dancing.
-
Roasted Red Pepper Hummus: The smoky, earthy notes of hummus create a fantastic balance with the cheesy crunch. It’s a combo that’s hard to resist!
-
Garlic Aioli: A creamy aioli with a hint of garlic complements the intense cheese flavor. Dip away for an elevated snacking experience that feels gourmet.
-
Thinly Sliced Veggies: Fresh cucumber, bell peppers, or carrots provide a crisp, refreshing contrast. They add color and nutrition to your snack plate!
-
Charcuterie Board: Add your baked cheese crisps to a charcuterie platter filled with cured meats, olives, and assorted cheeses for a sophisticated touch that impresses guests.
-
Red Wine: A glass of light red or white wine beautifully enhances the cheese flavors, creating a cozy atmosphere for your snacking moment.
-
Chilled Iced Tea: For a refreshing palate cleanser, serve your cheese crisps with homemade iced tea. A sip of cool tea complements the warm, cheesy crunch perfectly!
-
Chocolate Dipped Strawberries: For a sweet ending, pair the salty cheese crisps with luscious chocolate-dipped strawberries. It’s a delightful balance of flavors that’ll make your mouth water!

Baked Cheese Crisps Recipe FAQs
What type of cheese should I use for the crisps?
I highly recommend using block cheddar cheese and grating it yourself for the best flavor and texture. Pre-grated cheese often contains anti-caking agents that can affect how well the crisps melt and hold their shape.
How can I store leftover Baked Cheese Crisps?
To keep your Baked Cheese Crisps fresh, store them in an airtight container at room temperature for up to 3 days. If you want to extend their life, you can refrigerate them for up to 1 week. Just keep in mind that they may lose some of their crispiness when stored in the fridge.
Can I freeze Baked Cheese Crisps? If so, how?
Absolutely! To freeze your Baked Cheese Crisps, place them in a single layer on a baking sheet and freeze until solid. Then, transfer them to a freezer-safe container or bag. They can be stored in the freezer for up to 6 months. When you’re ready to enjoy them, simply thaw at room temperature and reheat in a preheated oven at 350°F (175°C) for about 3-5 minutes to restore their crispiness.
What should I do if my cheese crisps are not crispy?
If your Baked Cheese Crisps are chewy, it could be due to excess grease. Make sure to dab the tops with a paper towel while they cool to remove any leftover oil. Also, be mindful of baking time and ensure they are golden brown, as overbaking can lead to bitterness while underbaking can result in a soft texture. Finally, letting them cool completely on a rack is crucial for achieving that irresistible crunch!
Can I make these cheese crisps for someone with dietary restrictions?
Certainly! Baked Cheese Crisps are naturally gluten-free, but if you’re catering to specific dietary needs, check for any allergies to the cheese. You can also experiment with dairy-free cheese alternatives, though the texture and flavor may vary. Just remember that quality cheese plays a big role in the outcome, so choose your substitutes wisely!
How can I enhance the flavor of my Baked Cheese Crisps?
You can customize your Baked Cheese Crisps in countless ways! For an extra punch, sprinkle on some chili flakes or opt for flavored cheeses like pepper jack. Italian herbs or even a bit of fresh basil can also add a delightful twist. Feel free to mix and match until you find your perfect combination!
Irresistible Baked Cheese Crisps for Quick Low-Carb Snacking
Ingredients
Equipment
Method
- Preheat your oven to 350°F (175°C) and line a baking sheet with parchment paper.
- Grate the cheddar cheese finely and place heaping mounds on the prepared baking sheet.
- Sprinkle garlic powder over each mound of cheese.
- Bake for 5-8 minutes until golden brown.
- Cool crisps on a rack and dab with paper towel to absorb excess grease.
- Serve with dips like sour cream or salsa.
Leave a Reply