
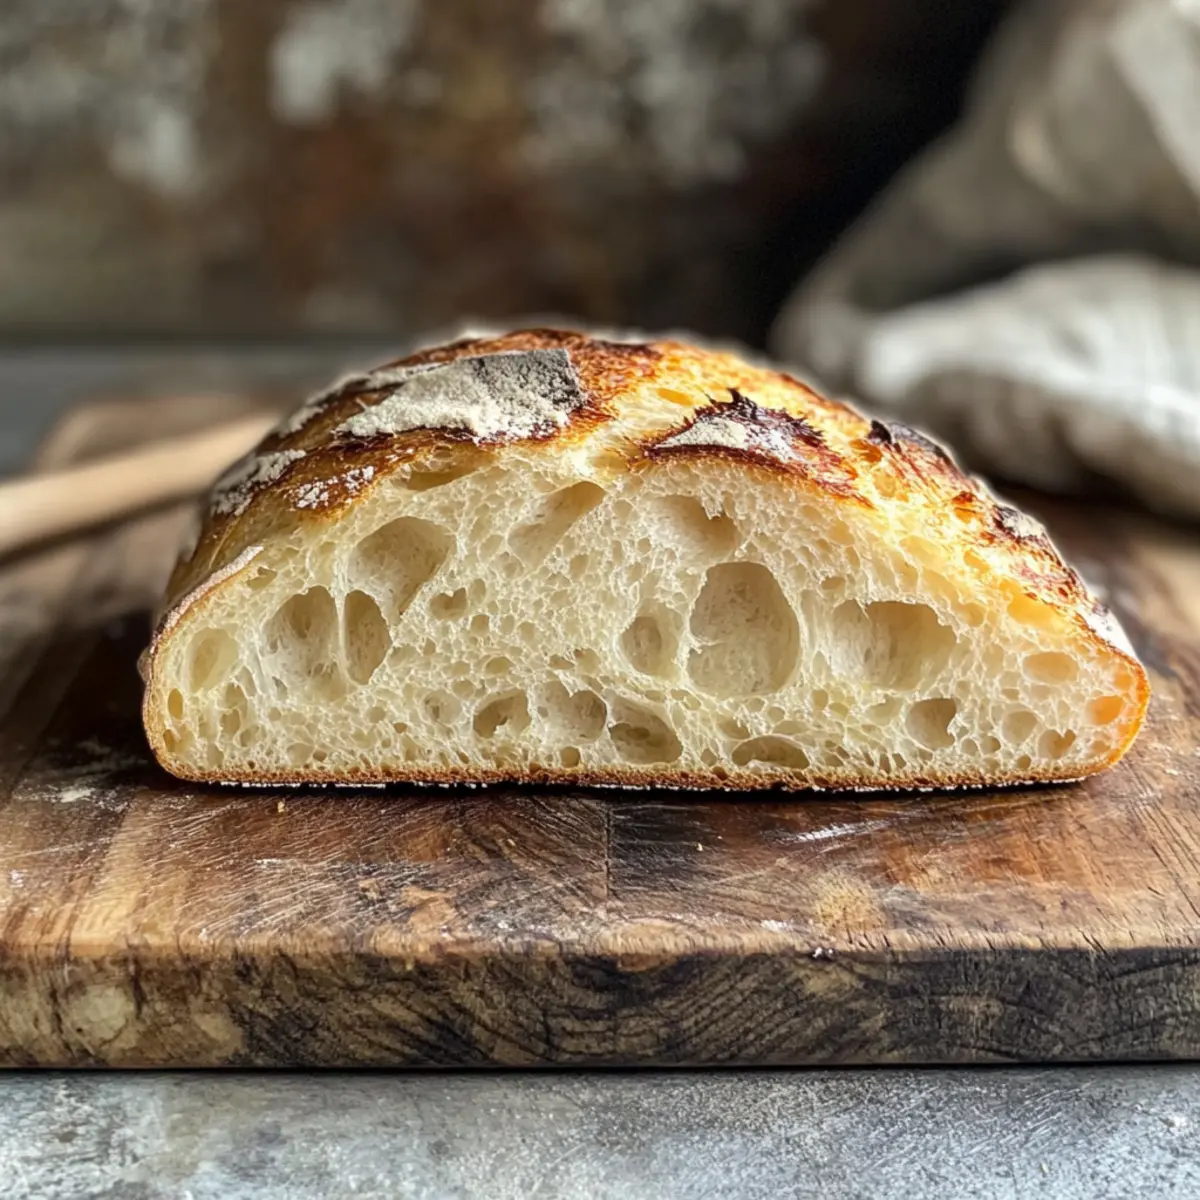
The moment that warm, crusty loaf of artisan bread comes out of the oven, it’s hard not to feel a wave of pride. With just four simple ingredients, this no-knead recipe transforms into something magical right in your kitchen. Imagine serving fresh, homemade bread that not only elevates your meals but requires minimal effort! And if you fancy a little fun in your baking, you can easily mix in some herbs, cheese, or seeds to make it your own. Whether enjoying a slice slathered in butter or pairing it with a hearty soup, this artisan bread is sure to become a staple in your home. Ready to experience the joy of baking with me? Let’s dive into the details of crafting this delightful loaf!
Why Is Artisan Bread So Special?
Simplicity: With just four ingredients, this no-knead artisan bread requires minimal effort, making it accessible for bakers of all levels.
Baking Joy: The satisfaction of pulling a golden, crusty loaf from your oven is unparalleled; it’s a moment that brings the whole family together.
Flavor Options: Customize your bread by adding herbs, cheese, or seeds, providing endless flavor combinations for every taste.
Versatility: This bread pairs perfectly with meals—enjoy it with soup, as toast, or simply with a pat of butter.
Time-Saving: Let it rise overnight with minimal supervision, giving you other time to focus on your day!
Whether you are a home chef or just someone looking to elevate your meals, this 4-Ingredient Artisan Bread recipe will bring joy to your kitchen!
Artisan Bread Ingredients
For the Dough
- All-Purpose Flour – A perfect base for the bread, giving it the necessary structure. Note: Substitute with bread flour for a chewier texture.
- Instant Yeast – Enables the dough to rise without the need for proofing, making this recipe quick and easy. Substitution: Active dry yeast can be used but requires proofing in warm water first.
- Salt – Essential for flavor enhancement and controlling yeast activity to ensure a perfect rise. Note: Measure accurately to avoid any issues with yeast performance.
- Water – Hydrates the dough and activates gluten, allowing the yeast to do its job effectively. Guidance: Use warm water (105-115°F) for best results.
For Mix-Ins
- Herbs – Adding 1-2 tablespoons of dried or fresh herbs will infuse your artisan bread with delightful flavors.
- Cheese – Incorporating up to ¾ cup of shredded cheese (like cheddar or Parmesan) enhances the richness of the bread.
- Seeds/Nuts – Mix in ¼ to ½ cup of seeds like sesame or sunflower, or chopped nuts for added texture and nutrients.
- Olives or Garlic – For a savory twist, include chopped olives or roasted garlic directly into the dough for an umami boost.
The beauty of this artisan bread lies not only in its simplicity but also in its potential for personalization. Enjoy experimenting with your favorite ingredients!
Step‑by‑Step Instructions for 4-Ingredient Artisan Bread
Step 1: Mix the Dry Ingredients
In a large mixing bowl, combine 3 cups of all-purpose flour, 1 teaspoon of salt, and 2 teaspoons of instant yeast. Use a whisk to ensure even distribution of the salt and yeast, which helps to activate the dough later on. This step sets the foundation for your artisan bread’s flavor and texture.
Step 2: Add Water
Gradually pour in 1 and ½ cups of warm water (between 105-115°F) into the dry mixture. Mix with a wooden spoon or spatula until a sticky, shaggy dough forms, making sure all flour is incorporated. The dough will be quite wet—this is normal and essential for the airy texture of the finished artisan bread.
Step 3: Let the Dough Rise
Cover the bowl with plastic wrap or a clean kitchen towel and let it rise at room temperature. Allow the dough to rest for 12-18 hours, until it’s bubbly and has roughly doubled in size. The long fermentation time develops flavor and ensures a beautiful crust when baked—a hallmark of artisan bread.
Step 4: Shape the Dough
Once risen, lightly flour a work surface and gently turn out the dough without deflating it too much. Dust the top with flour, fold the edges towards the center to shape it into a round loaf, and let it rest for 30 minutes. This short resting period allows the gluten to relax, making it easier to shape before baking.
Step 5: Preheat the Oven
While the dough is resting, preheat your oven to 450°F (232°C) with a Dutch oven inside. Allow the pot to heat up for at least 30 minutes. This step is crucial for achieving that crispy crust synonymous with artisan bread—make sure it’s piping hot before adding the dough.
Step 6: Bake the Bread
Carefully remove the hot Dutch oven from the oven. Gently place the shaped dough inside, cover it with the lid, and bake for 30 minutes. This initial covered baking ensures the bread steams, giving it a soft interior and achieving that sought-after artisan crust.
Step 7: Finish Baking
After 30 minutes, remove the lid from the Dutch oven and continue baking for an additional 15-20 minutes until the crust is deep golden brown. Keep an eye on it as the time approaches, and look for a crust that’s beautifully crackled. This step brings out the wonderful aroma of the freshly baked artisan bread.
Step 8: Cool Before Slicing
Once baked, carefully transfer the bread to a wire rack to cool for at least 30 minutes before slicing. Allowing it to cool helps to complete the cooking process and sets the texture. Cutting too soon may result in a gummy interior, so patience is key to savoring your homemade artisan bread.
How to Store and Freeze Artisan Bread
Room Temperature: Store your artisan bread at room temperature in a cloth bag or wrapped in a kitchen towel for up to 3 days to maintain its crusty exterior and soft interior.
Fridge: Avoid refrigerating your artisan bread, as this can dry it out. If needed, wrap it in plastic to keep it for a short period, but consume within 2 days for the best flavor and texture.
Freezer: For longer storage, slice the artisan bread and wrap each slice tightly in plastic wrap, then place all slices in a freezer bag. This can preserve the bread for up to 3 months without losing its delightful taste.
Reheating: When ready to enjoy frozen artisan bread, toast individual slices or reheat in a 350°F (175°C) oven for about 10 minutes to restore its freshness.
Make Ahead Options
These 4-Ingredient Artisan Bread loaves are perfect for busy home cooks looking to save time! You can prepare the dough up to 24 hours in advance by combining the flour, salt, and instant yeast, and then adding warm water. Cover the bowl and let it rise at room temperature. Alternatively, if you’re planning to enjoy this bread later in the week, allow the dough to rise, then refrigerate it for up to 3 days. When ready to bake, take the dough out, shape it, and let it rest for about 30 minutes before preheating your oven. This method maintains the bread’s delightful texture and flavor, ensuring you enjoy fresh artisan bread that’s just as delicious as if it were baked the same day!
What to Serve with 4-Ingredient Artisan Bread?
Transform your warm, crusty loaf into a delightful meal experience with these wonderful pairings that celebrate its flavors.
-
Creamy Tomato Soup: A classic pairing, the richness of tomato soup complements the bread’s texture perfectly, ideal for dipping. The warmth of the soup enhances each buttery bite, making every spoonful a cozy delight.
-
Savory Herb Butter: Melted herb-infused butter adds an aromatic touch and elevates your artisan bread with each spread. This simple addition brings freshness that will awaken your taste buds.
-
Fresh Garden Salad: A light salad with mixed greens and a zesty vinaigrette balances the heartiness of the bread. Its crispness and brightness provide a refreshing contrast, making your meal feel well-rounded.
-
Cheese Platter: Pair with a variety of cheeses like brie, aged cheddar, or tangy goat cheese. The creamy textures meld beautifully with the crusty bread while inviting a mix of flavors for a delightful experience.
-
Roasted Garlic: Spread roasted garlic on warm slices for an irresistible spread. Its buttery sweetness transforms every bite into a savory explosion, perfect for those who adore bold flavors.
-
Honey and Goat Cheese: A drizzle of honey over tangy goat cheese creates a sweet and savory combination. This pairing works wonderfully as an appetizer or an indulgent snack.
-
Crisp White Wine: A chilled Sauvignon Blanc or Pinot Grigio enhances the food pairings by adding a refreshing acidity. The brightness of the wine beautifully cuts through the bread’s rich flavors.
-
Olive Oil and Balsamic Vinegar: A dipping oil mixture brings together complex flavors that dance along with the artisan bread’s taste. Its simplicity illustrates how a few quality ingredients can shine together.
-
Fruit Spread: Sweet jams or fresh chutneys add a fruity layer on top of plain slices. This sweet-tart sensation contrasts nicely with the crusty artisan bread, catering to those craving something a bit sweeter.
Expert Tips for Artisan Bread
-
Stay Hydrated: Make sure to use the correct amount of warm water; it’s vital for achieving that airy texture unique to artisan bread.
-
Fresh Yeast: Always check your yeast’s expiration date. Fresh yeast will give your bread the right lift and fluffy interior.
-
Watch the Temperature: Adjust rising times based on your kitchen’s temperature; cooler rooms may prolong fermentation, leading to even better flavor development.
-
Avoid Overworking: Resist the urge to knead; this is a no-knead bread! Gently folding the dough helps maintain the airy structure.
-
Use a Dutch Oven: For a crispy crust, bake your artisan bread in a preheated Dutch oven. If you don’t have one, create steam with a metal pan in the oven.
-
Experiment with Flavors: Don’t hesitate to mix in herbs, cheeses, or seeds to personalize your artisan bread and enjoy varying flavor profiles.
Artisan Bread: Endless Possibilities
Feel free to unleash your creativity and make this artisan bread uniquely yours with these delightful variations!
-
Herb-Infused: Add 1-2 tablespoons of dried or fresh herbs like rosemary or thyme to the dry ingredients for an aromatic twist. Imagine the fragrant herbs wafting through your kitchen as the bread bakes!
-
Cheesy Goodness: Stir in up to ¾ cup of shredded cheese, such as sharp cheddar or Parmesan, for a rich and savory flavor boost. Picture slices of cheesy artisan bread melting in your mouth—it’s truly a treat!
-
Nutty Crunch: Incorporate ¼ to ½ cup of seeds like sesame or sunflower, or even chopped nuts for extra texture. This will create a delightful crunch that contrasts beautifully with the soft crumb of the bread.
-
Savory Surprise: Mix in chopped olives or roasted garlic to elevate the savoriness of your bread. Just imagine the delicious umami flavor that will greet you with every bite—perfect for dipping!
-
Seasonal Spice: Add a teaspoon of garlic powder or onion powder to the dry ingredients for a warm depth of flavor. These additions will create whispers of wonder in your kitchen as it fills with mouthwatering aromas!
-
Sweet Twist: For a hint of sweetness, mix in a couple of tablespoons of sugar or honey. This subtle sweetness pairs beautifully with butter or even jam for a special treat.
-
Spicy Kick: Want some heat? Add a pinch of red pepper flakes to the dry mix for a warming, spicy kick that can elevate your culinary creations to a new level!
As you experiment with different variations, don’t forget that this 4-Ingredient Artisan Bread serves as a canvas for your culinary creativity. Happy baking!
4-Ingredient Artisan Bread Recipe FAQs
How do I know if my ingredients are ripe and ready for use?
Absolutely! The freshness of your ingredients plays a huge role in the success of your artisan bread. Check the expiration date on your yeast; fresh yeast should be crumbly and not clumpy. For flour, give it a sniff; it should smell fresh and clean, not stale. When deciding on water, use it between 105-115°F. If it feels warm to the touch but not hot, you’re good to go!
What is the best way to store my artisan bread?
Very! To keep your artisan bread fresh, store it at room temperature in a cloth bag or wrapped in a kitchen towel for up to 3 days. This method helps maintain that delightful crust! Avoid plastic wraps as they can trap moisture and make the crust soggy. If you’re not finishing it in that time, consider freezing it.
Can I freeze artisan bread, and how should I do it properly?
Absolutely! To freeze your artisan bread, first slice it once it’s completely cooled. Wrap each slice tightly in plastic wrap to avoid freezer burn, then place all slices in a resealable freezer bag. This helps preserve the bread’s delightful taste for up to 3 months! When you’re ready to enjoy, simply pop a slice in the toaster or reheat it in a 350°F (175°C) oven for about 10 minutes.
What should I do if my dough isn’t rising?
Oh no! If your dough isn’t rising well, make sure your yeast is fresh. If you’re using active dry yeast instead of instant, remember you must proof it first in warm water to wake it up properly! Also, check if you let it rise in a warm environment, as cooler temperatures will slow the yeast’s activity. A good tip: if the kitchen is chilly, consider placing the dough in the oven with the light on to create a warm space for it to rise!
Are there any dietary considerations with this artisan bread recipe?
Very! While this artisan bread is simple, be aware of potential allergies, especially if you’re adding mix-ins like cheese or seeds. For a gluten-free option, you can substitute the all-purpose flour with a gluten-free flour blend, but make sure it contains xanthan gum for proper structure. Always double-check ingredient labels for any allergens, particularly if serving to guests or family members with dietary restrictions.
What can I do with leftover artisan bread?
The more the merrier! If you find yourself with leftover bread, consider making croutons or bread crumbs for future recipes. Simply cut the bread into small cubes, toss with olive oil and seasonings, and bake until golden and crispy! Or, transform it into a delicious bread pudding or French toast the next morning—what a delightful way to enjoy your artisan bread again!
Discover Easy Artisan Bread: Your No-Knead Baking Adventure
Ingredients
Equipment
Method
- In a large mixing bowl, combine 3 cups of all-purpose flour, 1 teaspoon of salt, and 2 teaspoons of instant yeast. Use a whisk to ensure even distribution of the salt and yeast.
- Gradually pour in 1 and ½ cups of warm water into the dry mixture. Mix until a sticky, shaggy dough forms.
- Cover the bowl with plastic wrap or a clean kitchen towel and let it rise at room temperature for 12-18 hours.
- Lightly flour a work surface and gently turn out the dough. Dust the top with flour, fold the edges towards the center to shape it into a round loaf, and let it rest for 30 minutes.
- Preheat your oven to 450°F with a Dutch oven inside, allowing it to heat up for at least 30 minutes.
- Gently place the shaped dough inside the hot Dutch oven, cover it with the lid, and bake for 30 minutes.
- Remove the lid and continue baking for an additional 15-20 minutes until the crust is deep golden brown.
- Transfer the bread to a wire rack to cool for at least 30 minutes before slicing.
Leave a Reply