
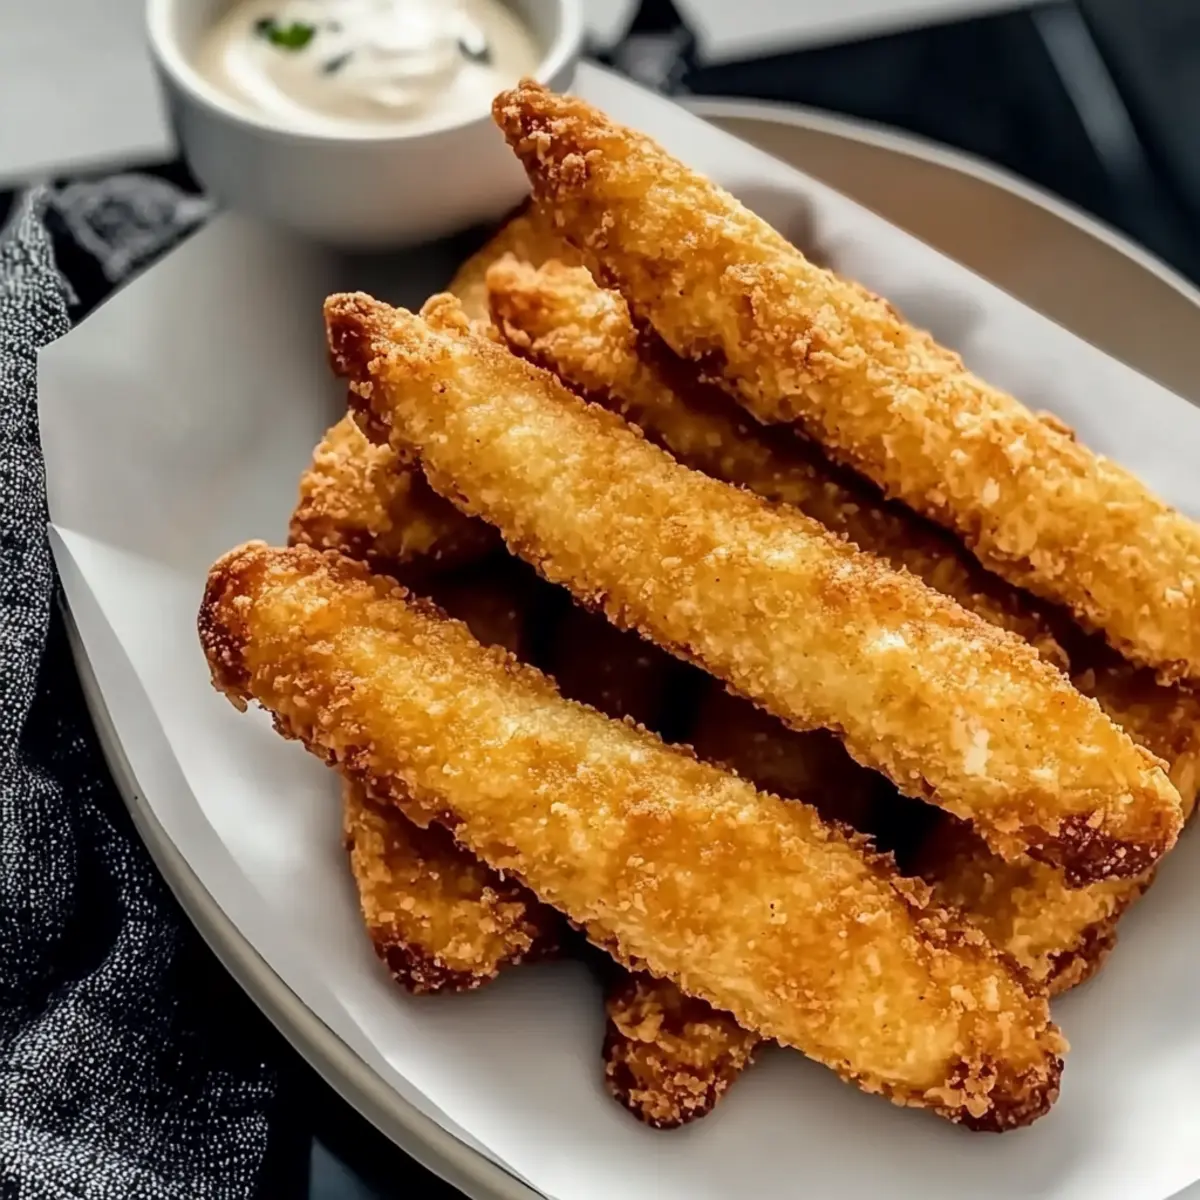
In the midst of a hectic week, there’s something magical about transforming pantry staples into a delightful meal. Enter my Crispy Baked Canned Tuna Fish Sticks—an effortless dish that brings a touch of joy to your dinner table. Not only are these bites crispy on the outside and tender on the inside, but they’re also a fantastic way to get the kids excited about tuna! With a budget-friendly recipe that takes mere minutes to prepare, you can easily whip these up even on the busiest of nights. Plus, the versatility of adding your favorite seasonings or dips means you’ll never tire of them! Are you ready to discover how this simple recipe can elevate your canned tuna game?

Why are baked tuna fish sticks a hit?
Kid-Friendly: These Crispy Baked Canned Tuna Fish Sticks are a surefire way to get children excited about seafood!
Quick Preparation: With minimal prep time, you can have a delicious meal ready in just 30 minutes.
Versatile Options: Customize with various spices or switch coatings for a new twist each time!
Budget-Friendly: Made from pantry staples, this recipe keeps your wallet happy while satisfying hungry tummies.
Crowd-Pleasing Flavor: Each bite combines crunch and savory flavors that appeal to kids and adults alike.
Pair them with your favorite dips like ranch or spicy mayo for an extra kick! If you’re looking for more budget-friendly options, check out these Fish Tacos Cilantro or Baked Feta Eggs for versatility in your meal planning.
Baked Canned Tuna Fish Sticks Ingredients
For the Fish Sticks
• Canned Tuna – Choose tuna packed in water, well-drained for the perfect texture.
• Shredded Cheddar Cheese – A tasty binding agent; feel free to swap it with mozzarella for a milder taste.
• Egg – Essential for binding; stick with it for the best results.
• Seasonings – Personalize the flavor with salt, pepper, or your favorite spices—don’t be shy!
• Crushed Pork Rinds – Gives a delightful crunch; can replace with crushed potato chips for a unique twist.
For Serving
• Dipping Sauces – Think ranch, tartar sauce, or spicy mayo to enhance your perfect Baked Canned Tuna Fish Sticks experience!
• Fresh Veggies – Pair with a side of crisp salad or roasted vegetables for a wholesome meal.
Step‑by‑Step Instructions for Baked Canned Tuna Fish Sticks
Step 1: Preheat the Oven
Begin by preheating your oven to 400°F (200°C). This ensures that your Crispy Baked Canned Tuna Fish Sticks will bake evenly and become golden brown. While the oven heats up, gather your baking sheet and line it with parchment paper for easy cleanup and to prevent sticking.
Step 2: Prepare the Tuna Mixture
In a large mixing bowl, combine the drained canned tuna, shredded cheddar cheese, and egg. Add your favorite seasonings to enhance the flavor—don’t hold back! Mix everything thoroughly until you achieve a sticky consistency. This step is crucial for helping your tuna sticks hold together when baked.
Step 3: Shape the Fish Sticks
With clean hands, take portions of the mixture and shape them into fry-like sticks, ensuring they are of uniform size for even cooking. Aim for a thickness similar to traditional fish sticks. Placing them all the same size will promote a consistent bake, helping your Baked Canned Tuna Fish Sticks come out perfectly without any raw spots.
Step 4: Arrange on the Baking Sheet
Next, carefully place the shaped fish sticks onto your prepared parchment-lined baking sheet. Leave some space between each stick, as this will allow the hot air to circulate properly and create that desired crispiness. Take a moment to admire your handiwork before heading to the oven!
Step 5: Bake Until Golden Brown
Slide the baking sheet into the preheated oven and bake for about 20 minutes. Keep an eye on them as they bake, and look for a golden brown color and a firm texture for doneness. This is the magic moment where your Baked Canned Tuna Fish Sticks will transform into crispy bites that are perfect for munching.
Step 6: Let Cool and Serve
Once baked to perfection, remove your fish sticks from the oven and let them cool for a few minutes on the baking sheet. This brief cooling period will help them firm up a bit more. Now, arrange the crispy Baked Canned Tuna Fish Sticks on a serving platter alongside your favorite dipping sauces, ready to delight your family.
Storage Tips for Baked Canned Tuna Fish Sticks
Fridge: Store leftover Baked Canned Tuna Fish Sticks in an airtight container in the fridge for up to 3 days to maintain their freshness and taste.
Freezer: For longer storage, freeze the baked fish sticks in a freezer-safe container, adding parchment paper between layers to prevent sticking. They can last up to 2 months.
Reheating: To restore the crispy texture, reheat in an air fryer or bake in the oven at 350°F (175°C) for about 10-12 minutes, making sure they’re heated through.
Thawing: If frozen, it’s best to thaw the tuna sticks in the refrigerator overnight before reheating, ensuring even cooking when warmed up.
Variations & Substitutions for Baked Canned Tuna Fish Sticks
Feel free to get creative with your Baked Canned Tuna Fish Sticks by incorporating these variations that bring new flavors and textures to your table!
-
Cheese Swap: Substitute cheddar cheese with mozzarella or pepper jack for a spicy kick. The options will keep every bite exciting!
-
Coating Twist: Use crushed potato chips or seasoned breadcrumbs instead of pork rinds for a unique texture. Each choice adds a delightful crunch that’s hard to resist.
-
Veggie Boost: Mix in finely chopped vegetables like bell peppers, carrots, or zucchini for added nutrition. It’s a wonderful way to sneak in more veggies without compromising flavor!
-
Herb Infusion: Add fresh or dried herbs like dill, parsley, or basil into the mixture for an aromatic twist. Each bite will sing with fresh taste!
-
Gluten-Free Option: Opt for gluten-free breadcrumbs or crushed cornflakes as a coating for those with dietary restrictions. Everyone deserves to enjoy this crispy treat!
-
Spice It Up: Incorporate a dash of cayenne or red pepper flakes for an extra kick. It’s an exciting way to spice up your dinner!
-
Crispy Air-Fryer Version: For a healthier alternative, try cooking your fish sticks in an air fryer. You’ll achieve the same crispy outside with less oil.
Top these delightful sticks with your favorite dips like ranch or spicy mayo for an added burst of flavor. If you’re in the mood for more creative family meals, you might also enjoy these Fish Tacos Cilantro or Baked Feta Eggs that are sure to please any palate!
Expert Tips for Baked Canned Tuna Fish Sticks
-
Drain Well: Ensure the canned tuna is thoroughly drained and patted dry; excess moisture can make your sticks soggy and cause them to fall apart when cooked.
-
Mix Properly: Combine all ingredients until you reach a sticky consistency. This helps the sticks hold their shape, preventing crumbling during baking.
-
Uniform Size: Shape your fish sticks evenly for consistent cooking. Too thick or too thin can result in uneven browning, so aim for uniformity!
-
Don’t Overcrowd: Arrange the sticks with space on the baking sheet. This allows hot air to circulate, ensuring every stick turns crispy—no one wants soggy fish sticks!
-
Experiment with Dips: Elevate your meal by serving the Baked Canned Tuna Fish Sticks with a mix of dips like tartar sauce or spicy mayo for extra flavor and excitement!
Make Ahead Options
These Crispy Baked Canned Tuna Fish Sticks are a wonderful meal prep option for busy weeknights! You can prepare the tuna mixture and shape the sticks up to 24 hours in advance; simply cover them tightly with plastic wrap and keep them in the refrigerator to prevent drying out. When you’re ready to serve, just bake them from refrigerated, following the original instructions for about 20 minutes. Alternatively, you can fully bake the fish sticks and store them in an airtight container for up to 3 days in the fridge. To reheat, pop them in the oven or air fryer for restored crispiness. This way, you’ll have delicious homemade fish sticks ready in no time!
What to Serve with Crispy Baked Canned Tuna Fish Sticks
Imagine gathering around the dinner table, sharing delicious bites and vibrant flavors that spark joy for everyone.
-
Creamy Coleslaw: The crunch of coleslaw pairs perfectly with the crispy fish sticks, adding a refreshing tang to each bite. It’s a classic side that offers a nice contrast in texture.
-
Zesty Dipping Sauces: Ranch, tartar, or spicy mayo create an exciting flavor experience. These sauces elevate each crispy bite, making the meal fun and interactive for everyone.
-
Roasted Vegetables: Seasoned carrots, zucchini, and bell peppers bring warmth and color to the plate. Their natural sweetness complements the savory notes of the tuna sticks beautifully.
-
Garden Salad: A fresh salad filled with greens, tomatoes, and cucumbers adds a light crunch. Drizzle with a lemon vinaigrette for a zesty twist that pairs wonderfully with the fish sticks.
-
Sweet Potato Fries: Their natural sweetness is an excellent match for the savory fish sticks. The contrasting textures of crunchy fries and cozy tuna bites create delightful harmony.
-
Fruit Salad: A medley of vibrant fruits adds a refreshing sweetness that balances the savory nature of the meal. It’s a healthy, light companion that the whole family will enjoy.
-
Sparkling Water or Lemonade: A light, fizzy drink enhances the dining experience. The refreshing bubbles cleanse the palate beautifully between bites of the crispy tuna.
Baked Canned Tuna Fish Sticks Recipe FAQs
What type of canned tuna should I use?
Absolutely! I recommend using tuna packed in water, as it tends to be less oily and provides the perfect texture for these Baked Canned Tuna Fish Sticks. Be sure to drain it well to avoid any extra moisture, which can make the sticks soggy.
How long can I store the cooked tuna fish sticks?
You can store leftover Baked Canned Tuna Fish Sticks in an airtight container in the fridge for up to 3 days. To maintain their crispiness, it’s best to reheat them in an air fryer or oven rather than the microwave.
Can I freeze the fish sticks, and how do I do it?
Yes, you can freeze the fish sticks for longer storage! To do this, place them in a single layer on a baking sheet and flash freeze them for about 1 hour. Once frozen, transfer the sticks to a freezer-safe container with parchment paper between the layers to prevent sticking. They can last for up to 2 months in the freezer.
What should I do if my fish sticks are falling apart?
If your tuna sticks are crumbling, ensure you mix the contents thoroughly until they reach a sticky consistency before shaping them. Also, letting the mixture rest in the refrigerator for at least 15 minutes can help with binding before cooking. If they’re still delicate, try adding a bit more cheese or using a larger egg to give them extra hold.
Are these fish sticks suitable for those with allergies?
Great question! This recipe contains fish and dairy (cheddar cheese), so if anyone has allergies to these ingredients, it’s best to find alternatives. You can experiment with plant-based cheeses or substitute the tuna with a different protein. Always keep an eye on potential cross-contamination if someone is highly allergic.
What dips pair well with Baked Canned Tuna Fish Sticks?
The more, the merrier! These fish sticks are delightful with various dips. Classic options include tartar sauce, ranch dressing, or even spicy mayo to add a kick. You can also try serving them with homemade yogurt dip or a zesty lemon aioli for something refreshing!
Crispy Baked Canned Tuna Fish Sticks That Kids Will Love
Ingredients
Equipment
Method
- Preheat your oven to 400°F (200°C) and line a baking sheet with parchment paper.
- In a large mixing bowl, combine drained canned tuna, shredded cheddar cheese, and egg. Mix in your favorite seasonings until sticky.
- Shape the mixture into fry-like sticks of uniform size.
- Place the shaped fish sticks onto the prepared baking sheet, leaving space between each.
- Bake for about 20 minutes or until golden brown and firm.
- Let cool for a few minutes before serving with dipping sauces.
Leave a Reply