
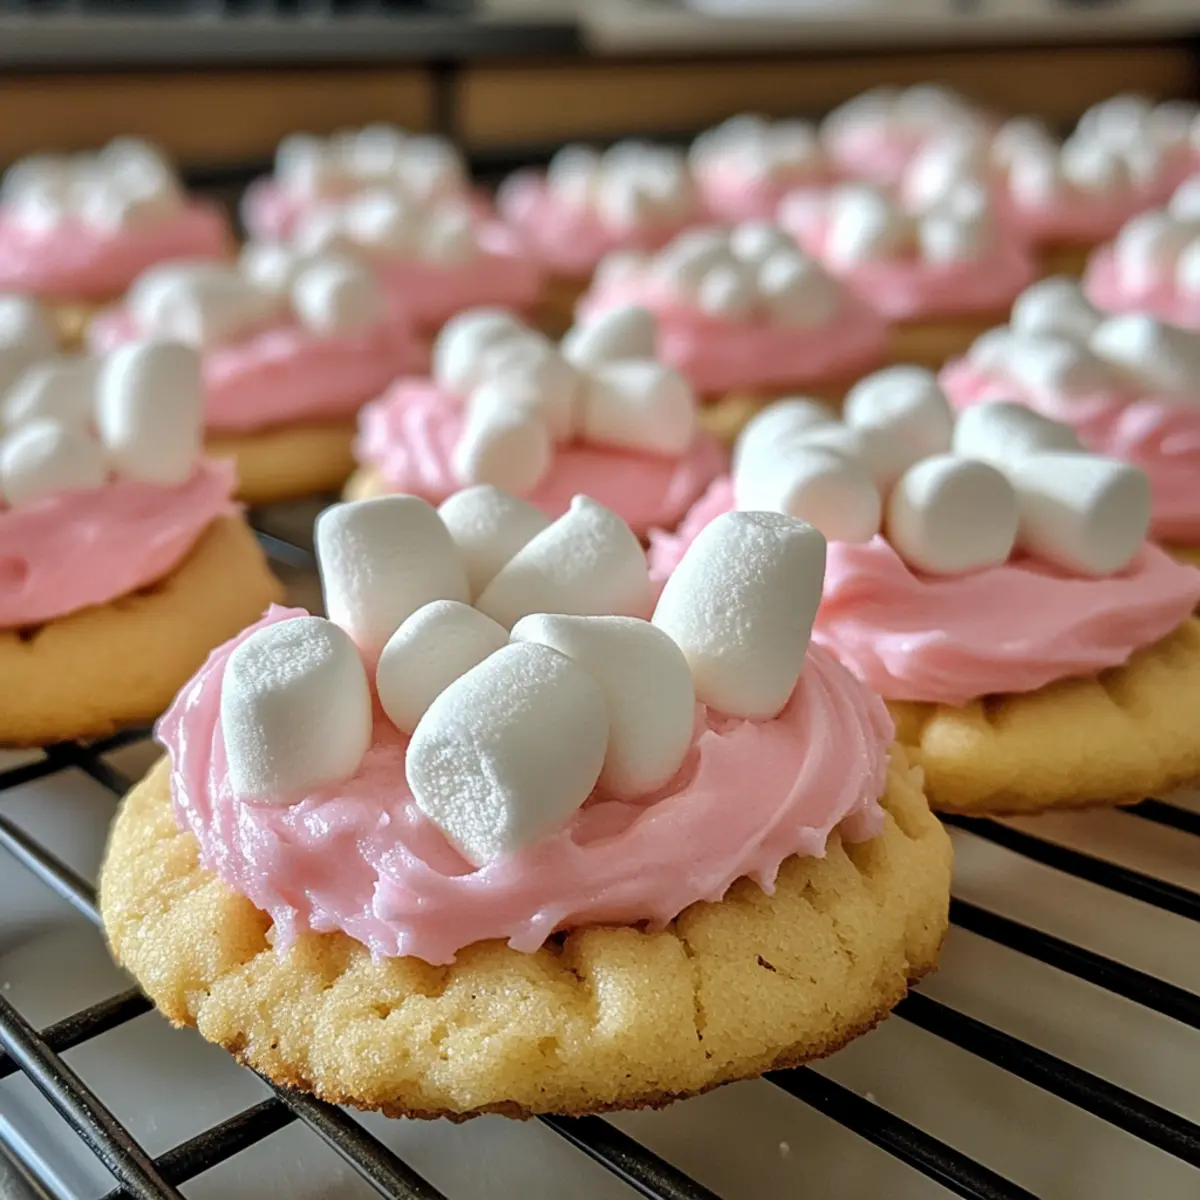
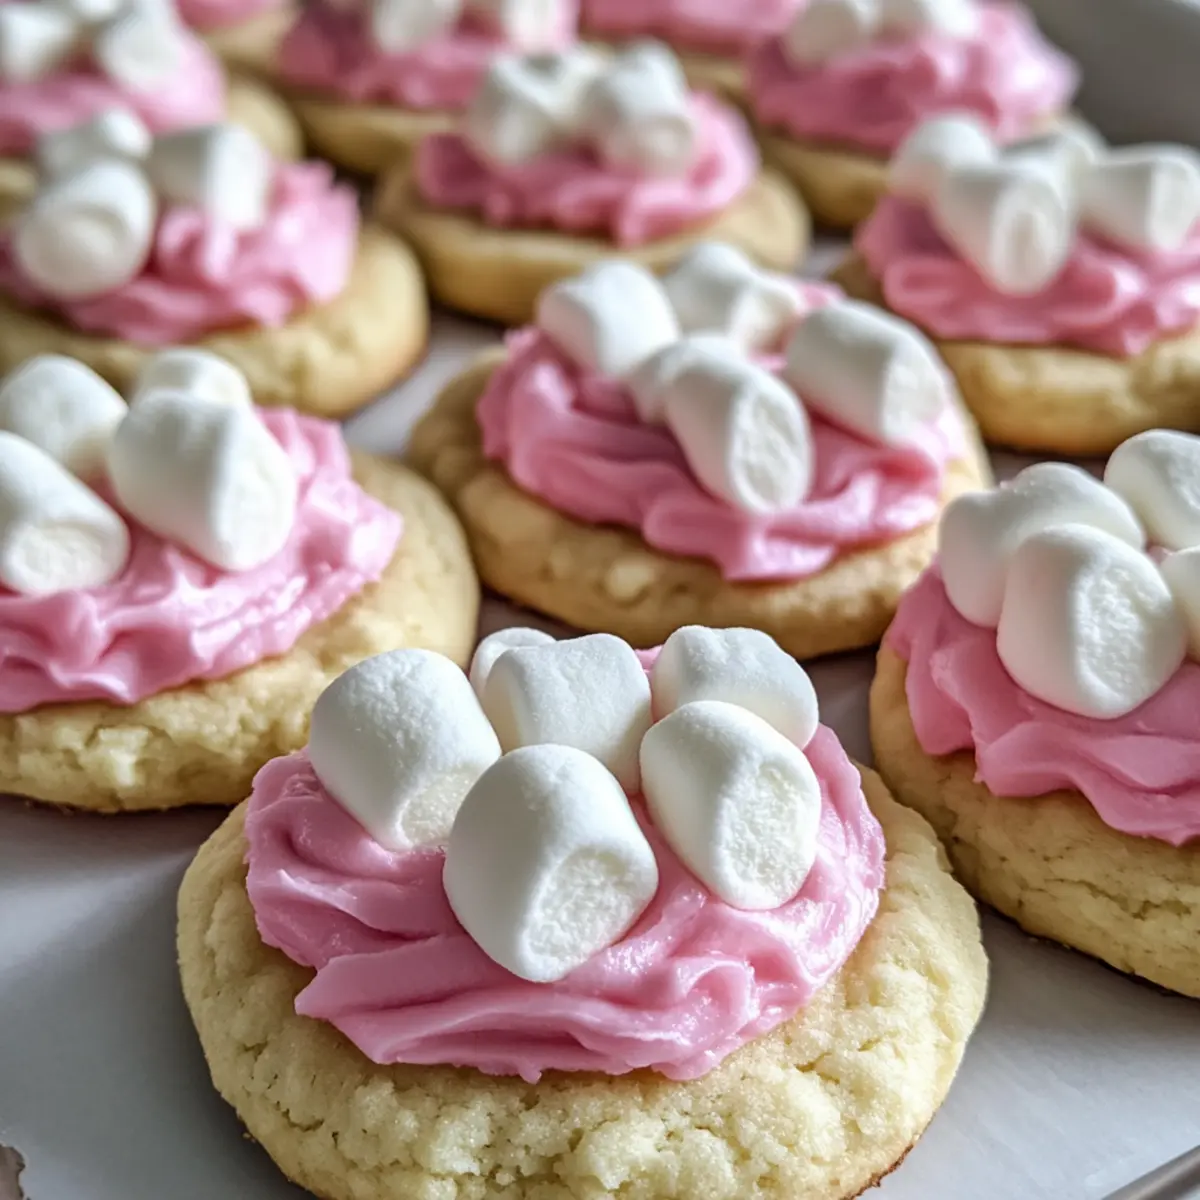
As I flipped through a cherished cookbook, one Easter-inspired recipe caught my eye, beckoning me with its charm: Bunny Butt Cookies. These delightful treats are not just a feast for the eyes; they are quick and easy enough for a spontaneous bake-off with the kids, all while spreading giggles and joy. Each cookie is frosted to perfection, boasting adorable bunny paws and a fluffy marshmallow tail that makes them irresistibly cute. Perfect for family gatherings or festive celebrations, these cookies promise to be the highlight of your Easter spread. Are you ready to hop into the kitchen and create these whimsical goodies? Let’s get started!
Why Will You Adore Bunny Butt Cookies?
Delightful Presentation: Each cookie is a whimsical creation, showcasing adorable bunny paws and a fluffy tail that kids will love.
Easy to Make: No culinary skills are required! These cookies come together quickly, making them perfect for spontaneous family baking sessions.
Kid-Friendly Fun: Let your little ones help decorate and assemble! It’s a fantastic way to engage their creativity while making tasty treats.
Festive Appeal: With their charming design, Bunny Butt Cookies are guaranteed to be a conversation starter at any Easter gathering.
Customizable Sweetness: Use different colored frostings or themed candies to personalize each cookie, making them even more special. Plus, they pair perfectly with a glass of milk or a festive drink!
Bunny Butt Cookies Ingredients
• Get ready to create these adorable treats!
For the Cookies
- Round Cookies – Serve as the delightful base; store-bought options can save time.
For the Frosting
- Pink Frosting – Adds a pop of color for bunny feet; using store-bought frosting is a great shortcut.
- White Frosting – A sweet layer on each cookie; ensures a beautiful base for decoration.
For the Bunny Features
- Regular Size Marshmallows – Cut in half to create cute bunny paws; fondant shapes can be used as a fun alternative.
- Mini Marshmallows – These fluffy morsels act as the bunny’s tail; feel free to swap with other small candies for a unique twist.
For the Finishing Touch
- Sanding Sugar Sprinkles – Adds a sparkling finish to your cookies; regular sprinkles can easily replace them for simplicity.
Step‑by‑Step Instructions for Bunny Butt Cookies
Step 1: Frost the Cookies
Begin by spreading a thin layer of white frosting over the top of each round cookie. Aim for a smooth, even coating, making sure to cover the entire surface. This step should take about 10 minutes, and the frosting should appear glossy and inviting once applied.
Step 2: Coat with Sanding Sugar
Pour sanding sugar onto separate plates, creating a colorful display. Gently press the frosted side of each cookie into the sanding sugar, ensuring an even coating. Allow the sugar to stick for a few seconds before lifting the cookie. The sugar should shimmer and add a sprinkle of sparkle to your Bunny Butt Cookies.
Step 3: Prepare the Piping Bag
Take a zip-top bag and place the pink frosting in one corner. Snip off the very tip of the corner to create a makeshift piping bag. This will allow for precision when adding details to your Bunny Butt Cookies. Make sure the frosting is easily squeezable but not too runny—test it on a plate.
Step 4: Create Bunny Paws
Cut regular-size marshmallows in half using kitchen scissors for a clean cut. You’ll be using these halves for the bunny paws. Each half should show a sticky side that will hold decorations well, giving your cookies their adorable bunny feet. Set them aside on a clean plate ready for decorating.
Step 5: Add Bunny Feet Details
Using the pink frosting in your piping bag, pipe small dots or “toes” onto the non-stick side of the marshmallow halves. This step is great fun for kids to help with, allowing them to express their creativity while getting all the details just right on the Bunny Butt Cookies.
Step 6: Attach the Paws
Apply a dot of white frosting onto the sticky side of each marshmallow half, which will act as glue. Gently press the marshmallow paws onto the cookies, ensuring they adhere firmly. After attaching all the paws, take a moment to admire the whimsical look of your Bunny Butt Cookies as they come to life.
Step 7: Create the Bunny Tail
For the finishing touches, take a mini marshmallow and apply a small dollop of frosting on its sticky side. Press this marshmallow into the center of each cookie to form the bunny tail. This step brings the cookies together and enhances their playful design, completing your adorable Bunny Butt Cookies!
Step 8: Set and Store
To ensure the frosting sets well, place your decorated Bunny Butt Cookies in the refrigerator for about 15-20 minutes. Cover them with plastic wrap to keep them fresh and prevent any sticking. Once set, enjoy your delightful cookies now or store them for upcoming festivities!
How to Store and Freeze Bunny Butt Cookies
-
Room Temperature: If you plan to serve these delightful Bunny Butt Cookies within a day or two, store them in an airtight container at room temperature for up to 2 days.
-
Fridge: For longer-lasting freshness, keep the cookies in the refrigerator wrapped in plastic wrap or placed in an airtight container for up to a week.
-
Freezer: For extended storage, freeze the unadorned cookies in a single layer. Wrap them well in plastic wrap and place them in an airtight container for up to 3 months.
-
Reheating: If you’ve frozen them, let the cookies thaw at room temperature before decorating. For soft cookies, microwave them for about 10 seconds to warm slightly before enjoying.
Make Ahead Options
These Bunny Butt Cookies are ideal for busy home cooks looking to save time during festive preparations! You can prepare the round cookies up to 3 days in advance; just keep them stored in an airtight container at room temperature. Additionally, the frosting can be made ahead and stored in the refrigerator for up to 5 days in a sealed container. When you’re ready to assemble, simply frost the cookies and add the marshmallows as directed, ensuring they look just as adorable and delicious as if made fresh. This way, you can enjoy a seamless baking session, leaving more time for family fun during your Easter celebrations!
Bunny Butt Cookies: Creative Twists Await
Feel free to make these Bunny Butt Cookies your own with exciting variations and substitutions that will spark joy in your kitchen!
-
Colorful Frostings: Use vibrant food colors in your frostings to create a rainbow of bunny paws and tails for a festive touch. Kids will love seeing the variety!
-
Flavored Frostings: Experiment with flavored frosting, like vanilla, lemon, or even strawberry for a delicious twist that adds an unexpected zing.
-
Fondant Features: Swap out the marshmallows for fondant shapes for a smoother texture, allowing more intricate designs on your bunny feet.
-
Cookie Alternatives: Try using flavored sugar cookies or shortbread as the cookie base. The different flavors will enhance the overall experience and charm of your Bunny Butt Cookies.
-
Nut-Free Versions: For nut allergies, use sunflower seed butter instead of traditional nut-based cookies or frosting; this substitution keeps the cookies safe for everyone.
-
Healthier Options: Create a guilt-free version with whole wheat flour cookies and Greek yogurt-based frosting for a delicious treat that’s better for you.
-
Chocolate Treats: Incorporate chocolate chips into the cookies or create bunny features from chocolate candies. It’s an indulgent addition that transforms the recipe!
-
Spice it Up: Elevate your Bunny Butt Cookies with a hint of cinnamon or nutmeg in the cookie dough for a warm, comforting flavor, reminiscent of holiday baking.
And while you’re in the mood for adorable baking, why not check out these delightful recipes? You could whip up some Pumpkin Smores Cookies or indulge in the rich taste of Fudgy Brownie Cookies. Happy baking!
Expert Tips for Bunny Butt Cookies
-
Frosting Consistency: Ensure the frosting is smooth and spreadable. A too-thick frosting can lead to uneven coatings; a thin layer works best.
-
Scissors for Marshmallows: Using kitchen scissors to cut marshmallows prevents tearing. This creates cleaner, more appealing bunny paws for your Bunny Butt Cookies.
-
Setting Time: Allow your cookies to chill in the refrigerator after decorating. This helps firm up the frosting and makes them easier to handle when serving.
-
Sanding Sugar Alternatives: If you can’t find sanding sugar, regular sprinkles can be used instead. Just know the shine won’t be as prominent!
-
Creative Decorating: Feel free to let the kids experiment with colors and shapes. Different frosting hues or candies can personalize each Bunny Butt Cookie!
What to Serve with Bunny Butt Cookies?
Elevate your Easter celebration with delightful pairings that enhance the whimsy and flavor of these charming treats.
- Cold Milk: A classic pairing that perfectly balances the sweetness of the cookies, making each bite even more enjoyable.
- Fruit Punch: Add a festive flair with colorful, fruity drinks that will delight kids and adults alike at your gathering.
- Carrot Sticks: For a crunchy and healthy contrast, serve fresh carrot sticks that resonate with the Easter bunny theme.
- Spring Salad: A light, crisp salad with seasonal greens and vibrant veggies pairs beautifully, adding freshness to your dessert spread.
- Chocolate Milk: Indulge your sweet tooth with rich, creamy chocolate milk that complements the frosting in every cookie bite.
- Marshmallow Fruit Dip: Create a fun dessert table with a fluffy marshmallow dip, perfect for serving alongside fresh fruit.
- Cupcakes: Explore additional sweet options by serving colorful Easter-themed cupcakes, adding to the festive atmosphere.
- Ice Cream: Offer bowls of vanilla or fruity ice cream to create sandwich-style Bunny Butt Cookies that will be a hit with everyone.
- Sparkling Water: Refresh guests with bubbly drinks infused with lemons or limes, cutting through the sweetness with a light, fizzy touch.
Bunny Butt Cookies Recipe FAQs
What type of cookies work best for Bunny Butt Cookies?
I recommend using round sugar cookies as the base for these treats. They provide a sturdy structure and sweetness needed for decoration. If you’re short on time, converting store-bought cookies works perfectly too!
How should I store Bunny Butt Cookies?
For cookies that you’ll enjoy within a day or two, an airtight container at room temperature will keep them fresh. If you’re looking to store them longer, pop them in the fridge covered with plastic wrap for up to a week. This way, they stay soft and delicious!
Can Bunny Butt Cookies be frozen?
Absolutely! To freeze, lay the unadorned cookies in a single layer on a baking sheet until solid. Then, wrap each cookie in plastic wrap and store them in an airtight container for up to 3 months. When you’re ready to enjoy them, simply thaw at room temperature before decorating.
How do I ensure the frosting is easy to spread?
Consistency is key! If your frosting seems too thick, you can add a teaspoon of milk or water to thin it out. Mix well until it’s smooth and spreadable. This helps avoid uneven coatings on your Bunny Butt Cookies, ensuring they look delightful.
Are there any dietary considerations for Bunny Butt Cookies?
Yes! If you’re considering dietary needs, you can use sugar-free frosting or avoid sprinkles to lower the sugar content. Additionally, check for allergies, especially with marshmallows; some brands may contain gelatin derived from animal sources, which may not be suitable for vegetarians.
What if I cannot find sanding sugar?
If sanding sugar isn’t available, don’t worry! Regular sprinkles are a great substitute. They won’t provide the same shimmer, but they’ll add color and excitement to your Bunny Butt Cookies just as well!
Bunny Butt Cookies: Fun Frosted Treats for Easter Joy
Ingredients
Equipment
Method
- Frost the Cookies: Spread a thin layer of white frosting over the top of each round cookie.
- Coat with Sanding Sugar: Press the frosted side of each cookie into sanding sugar for an even coating.
- Prepare the Piping Bag: Place pink frosting in a zip-top bag and snip off the corner to create a piping bag.
- Create Bunny Paws: Cut regular-size marshmallows in half for the bunny paws, sticky side up.
- Add Bunny Feet Details: Pipe small dots or 'toes' on the non-stick side of the marshmallow halves with pink frosting.
- Attach the Paws: Use white frosting to attach the marshmallow paws to the cookies.
- Create the Bunny Tail: Add a mini marshmallow with a dollop of frosting in the center of each cookie.
- Set and Store: Refrigerate cookies for 15-20 minutes to set the frosting.
Leave a Reply