
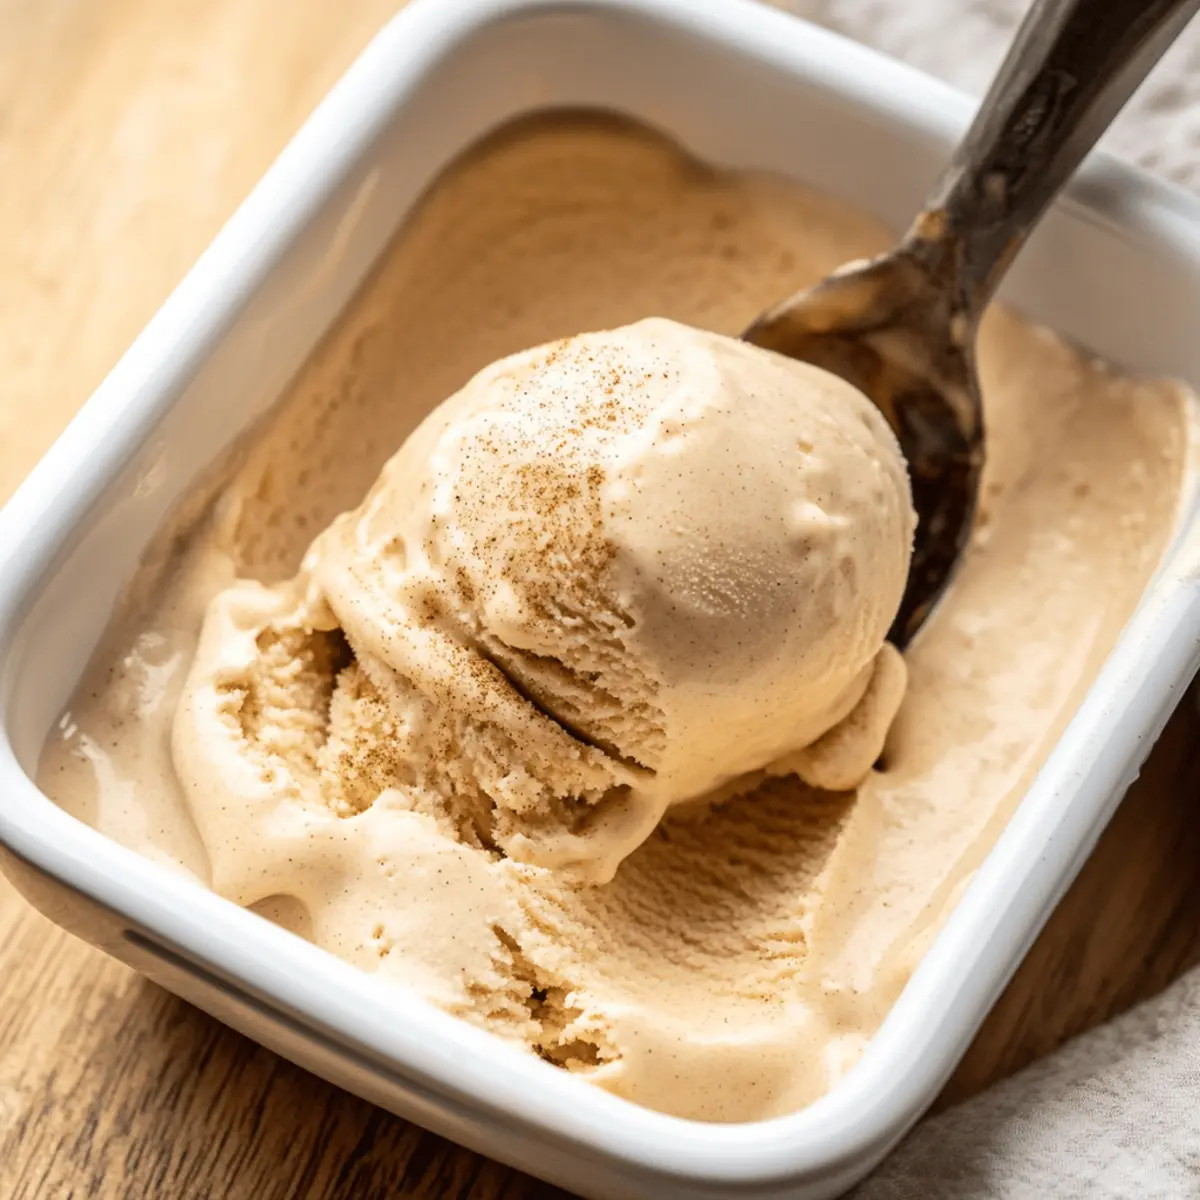
You won’t believe how easy it is to create your own creamy Caramelized Banana Ice Cream at home! The sweet aroma of caramelized bananas fills the air, making it impossible to resist this delightful dessert. What I love most about this eggless recipe is that it not only provides a refreshing treat perfect for warm days, but it also uses simple ingredients that come together quickly. The gentle touch of cinnamon enhances the rich caramel notes, giving you a scoop that feels indulgent yet satisfying. Plus, you can customize it with your favorite nuts or spices, making every batch a unique masterpiece. Ready to transform ripe bananas into a creamy delight? Let’s dive into this delicious adventure together!
Why is This Ice Cream Recipe a Must-Try?
Simplicity at Its Core: This Caramelized Banana Ice Cream requires no eggs and minimal effort, making it accessible for everyone, from novice bakers to seasoned chefs.
Irresistible Flavor: With the rich sweetness of caramelized bananas and a hint of cinnamon, every bite is a delightful explosion of taste that’ll leave you craving more.
Customizable Delight: Want to switch things up? Add your favorite nuts or experiment with spices for a unique touch, just like in the Sweet Coconut Cream Pancakes.
Perfect for Warm Days: This refreshing dessert is ideal for hot summer afternoons, ensuring that you enjoy a cool treat that’s both satisfying and indulgent.
Crowd-Pleasing Treat: Whether you’re serving it at a family gathering or enjoying a quiet night in, this creamy delight is sure to impress everyone around you!
Caramelized Banana Ice Cream Ingredients
For the Ice Cream Base
• Fully Ripe Bananas – The key ingredient for the creamy texture and natural sweetness; opt for bananas with no green or brown spots.
• Turbinado Sugar – Ideal for caramelizing the bananas; it adds a rich depth of flavor that regular granulated sugar can’t match.
• Heavy Cream – Essential for that rich creaminess, giving your Caramelized Banana Ice Cream a luscious body.
• Whole Milk – Balances the richness of the cream; it ensures the ice cream isn’t too heavy.
• Cinnamon – A delightful addition to enhance the banana flavor; you can skip it if you prefer a cleaner banana taste.
• Kosher Salt – Elevates the flavors; using Diamond Crystal coarse kosher salt is recommended for better results.
Storage & Serving
• Airtight Container – Store your ice cream properly to avoid freezer burn and maintain its creamy texture.
• Additional Toppings – Consider bananas or a drizzle of chocolate sauce for an indulgent serving experience!
Step‑by‑Step Instructions for Caramelized Banana Ice Cream
Step 1: Caramelize Bananas
In a large skillet over medium heat, add sliced ripe bananas along with turbinado sugar. Cook for about 5-7 minutes, stirring occasionally until the bananas soften and the sugar turns a rich golden color. This step releases the natural sweetness of the bananas and creates a beautiful caramel flavor that will shine through in your Caramelized Banana Ice Cream.
Step 2: Blend Ingredients
Once your bananas are beautifully caramelized, transfer them to a blender. Add in the heavy cream, whole milk, cinnamon, and kosher salt. Blend everything together on high speed until the mixture is completely smooth and creamy, resembling a luscious custard base. This silky consistency is crucial for achieving the perfect texture in your ice cream.
Step 3: Chill Base
After blending, it’s time to chill the mixture for the best results. Pour the banana mixture into a container, cover it, and refrigerate for at least 1-2 hours, or until very cold, preferably below 40°F (4°C). Chilling helps the flavors meld together and prepares the base for churning into creamy Caramelized Banana Ice Cream.
Step 4: Churn
Once chilled, take your ice cream maker out of the freezer and pour the cold banana mixture into the machine. Churn according to the manufacturer’s instructions, usually for about 20-30 minutes, until the ice cream reaches a soft-serve consistency. This step is where the magic happens, turning your delicious mixture into creamy ice cream.
Step 5: Freeze
After churning, transfer the soft ice cream into an airtight container. Spread it evenly, smoothing the top with a spatula. Cover with a lid and place it in the freezer for at least 4 hours, or until firm. This step ensures that your Caramelized Banana Ice Cream sets properly, resulting in a scoopable and delightfully indulgent dessert.
Expert Tips for Caramelized Banana Ice Cream
-
Choose Perfect Bananas: Use fully ripe bananas with no green or brown spots for the best sweetness and creaminess in your Caramelized Banana Ice Cream.
-
Chill Thoroughly: Ensure your ice cream base is below 40°F (4°C) before churning; this step is key to achieving a smooth, creamy texture.
-
Pre-Chill the Maker: For optimal results, pre-chill your ice cream maker for at least 24 hours before use; this helps maintain the ideal temperature during churning.
-
Avoid Ice Crystals: Store your ice cream in an airtight container and consume it within 1-2 weeks to minimize ice crystal formation and maintain flavor integrity.
-
Customize Wisely: Feel free to experiment with adding nuts or spices, but ensure they are well-balanced so they complement the rich, caramelized flavors without overpowering them.
Caramelized Banana Ice Cream Variations
Feel free to get creative with your Caramelized Banana Ice Cream by trying out these delightful twists!
-
Nutty Addition: Stir in crushed walnuts or pecans during the churning process for a crunch that complements the creaminess. The added texture creates a wonderful contrast you won’t want to miss!
-
Spice It Up: Swap out cinnamon for nutmeg or add a splash of vanilla extract for a different flavor experience. This small change can elevate your ice cream to new heights and provide an unexpected taste sensation.
-
Chocolate Swirl: Fold in melted dark or milk chocolate right before the ice cream goes into the freezer. The luscious ribbons of chocolate will meld beautifully with the caramelized bananas, offering a rich, indulgent twist.
-
Dairy-Free Option: Substitute coconut cream and almond milk for a delicious vegan version. The coconut adds a delightful tropical flavor that pairs wonderfully with the bananas.
-
Fruity Fun: Mix in a handful of berries or mango chunks during the churning process for a fruity explosion. The brightness of the fruit balances the sweetness perfectly, creating a refreshing contrast.
-
Coffee Kicker: Add a shot of espresso or some coffee grounds for a caffeine boost and a complex flavor profile. This gives a grown-up flair to your dessert, making it perfect for afternoon cravings.
-
Caramel Sensation: Drizzle extra caramel sauce into the ice cream before freezing for an extra caramel impact. The gooey caramel swirls will make each bite even more decadent.
For even more sweet inspiration, why not serve your Caramelized Banana Ice Cream alongside some warm brownies for a heavenly experience? After all, nothing quite compares to that delightful combination of rich chocolate and sweet banana!
How to Store and Freeze Caramelized Banana Ice Cream
Airtight Container: Store your Caramelized Banana Ice Cream in an airtight container to prevent freezer burn and maintain its creamy texture.
Freezer: It’s best to freeze the ice cream for at least 4 hours after churning to allow it to set properly, getting that perfect scoopable texture.
Consumption Timeframe: Enjoy your homemade ice cream within 1-2 weeks for the best flavor and freshness, as it can lose its taste over time.
Softening Before Serving: Allow the ice cream to sit at room temperature for 5-10 minutes before scooping to make serving easier and enhance the overall experience.
What to Serve with Creamy Caramelized Banana Ice Cream?
Indulging in this luscious treat opens up a world of delightful pairings to elevate your dessert experience.
-
Chocolate Sauce: A rich drizzle adds a decadent touch, enhancing the sweetness of the caramelized bananas beautifully.
-
Salted Caramel Sauce: The blend of sweet and salty takes your ice cream to the next level, offering a gourmet twist that’s hard to resist.
-
Fresh Berries: Juicy strawberries or tart raspberries provide a refreshing contrast, balancing the creaminess with their vibrant flavors. Imagine the burst of fruit that compliments each bite!
-
Crushed Nuts: Almonds or walnuts add a satisfying crunch and layer of nutty flavor, making every scoop even more delightful. The texture variation is simply perfect!
-
Cinnamon Sugar Cookies: Serve alongside these warm cookies to indulge your senses, pairing the creamy ice cream with a comforting crunch.
-
Coffee or Espresso: A cup of coffee pairs splendidly with the sweet, rich flavors, creating an irresistible combination perfect for winding down after a meal.
-
Whipped Cream: Light and fluffy, a dollop of whipped cream adds a creamy richness that complements the smooth texture of the ice cream beautifully.
-
Mint Leaves: For an aromatic refreshment, garnish with fresh mint; the coolness enhances the flavors of the caramelized bananas while adding a pop of color.
Make Ahead Options
These Creamy Caramelized Banana Ice Creams are ideal for busy weeknights and meal prep enthusiasts! You can caramelize the bananas up to 24 hours in advance; simply store them in an airtight container in the refrigerator after cooling to preserve their rich flavor. Additionally, you can blend the ice cream base (caramelized bananas, heavy cream, whole milk, cinnamon, and salt) a day beforehand and refrigerate it until you’re ready to churn. Just ensure it’s well chilled (preferably below 40°F or 4°C) before use. When you’re ready to enjoy this heavenly treat, simply churn the base and freeze it until firm; you’ll have a delicious homemade dessert with minimal effort!
Caramelized Banana Ice Cream Recipe FAQs
What bananas should I use for this recipe?
You should use fully ripe bananas with no green or brown spots for the best flavor and creaminess in your Caramelized Banana Ice Cream. Ripe bananas are naturally sweeter, allowing you to achieve that delightful taste without needing added sugars.
How long can I store Caramelized Banana Ice Cream?
Store your Caramelized Banana Ice Cream in an airtight container to keep it fresh. It’s best to consume it within 1-2 weeks for optimal flavor, as homemade ice creams often lose their taste and texture over time if left too long in the freezer.
Can I freeze Caramelized Banana Ice Cream?
Absolutely! After churning, transfer your ice cream to an airtight container and freeze it for at least 4 hours to allow it to firm up. For best quality, consume within 1-2 weeks; if you plan on keeping it longer, consider labeling the container with the date it was made.
Why didn’t my ice cream churn properly?
If your ice cream didn’t churn properly, it could be because the base wasn’t cold enough before starting; it should be below 40°F (4°C). Ensure the ice cream maker is pre-chilled for at least 24 hours too. If the mixture is still too warm, it won’t achieve that smooth, creamy texture.
Is this Caramelized Banana Ice Cream friendly for allergies?
This recipe is eggless, making it suitable for those with egg allergies. However, if you’re catering to nut allergies, be cautious when adding nuts during the churning process. Always check ingredient labels for allergens and consult with guests about any dietary restrictions.
Can I make variations of this recipe?
Very much so! You can easily customize your Caramelized Banana Ice Cream by adding nuts, spices like nutmeg, or even a splash of vanilla extract. Just be sure any additions enhance rather than overpower the delightful flavors of the caramelized bananas.
Indulge in Creamy Caramelized Banana Ice Cream (Eggless)
Ingredients
Equipment
Method
- In a large skillet over medium heat, add sliced ripe bananas along with turbinado sugar. Cook for about 5-7 minutes until the bananas soften and the sugar turns a golden color.
- Transfer the caramelized bananas to a blender. Add in heavy cream, whole milk, cinnamon, and kosher salt. Blend until completely smooth and creamy.
- Pour the banana mixture into a container, cover, and refrigerate for at least 1-2 hours, or until very cold.
- Once chilled, pour the mixture into the ice cream maker and churn according to the manufacturer's instructions for about 20-30 minutes.
- Transfer the soft ice cream into an airtight container, spread evenly, cover, and freeze for at least 4 hours, or until firm.
Leave a Reply