
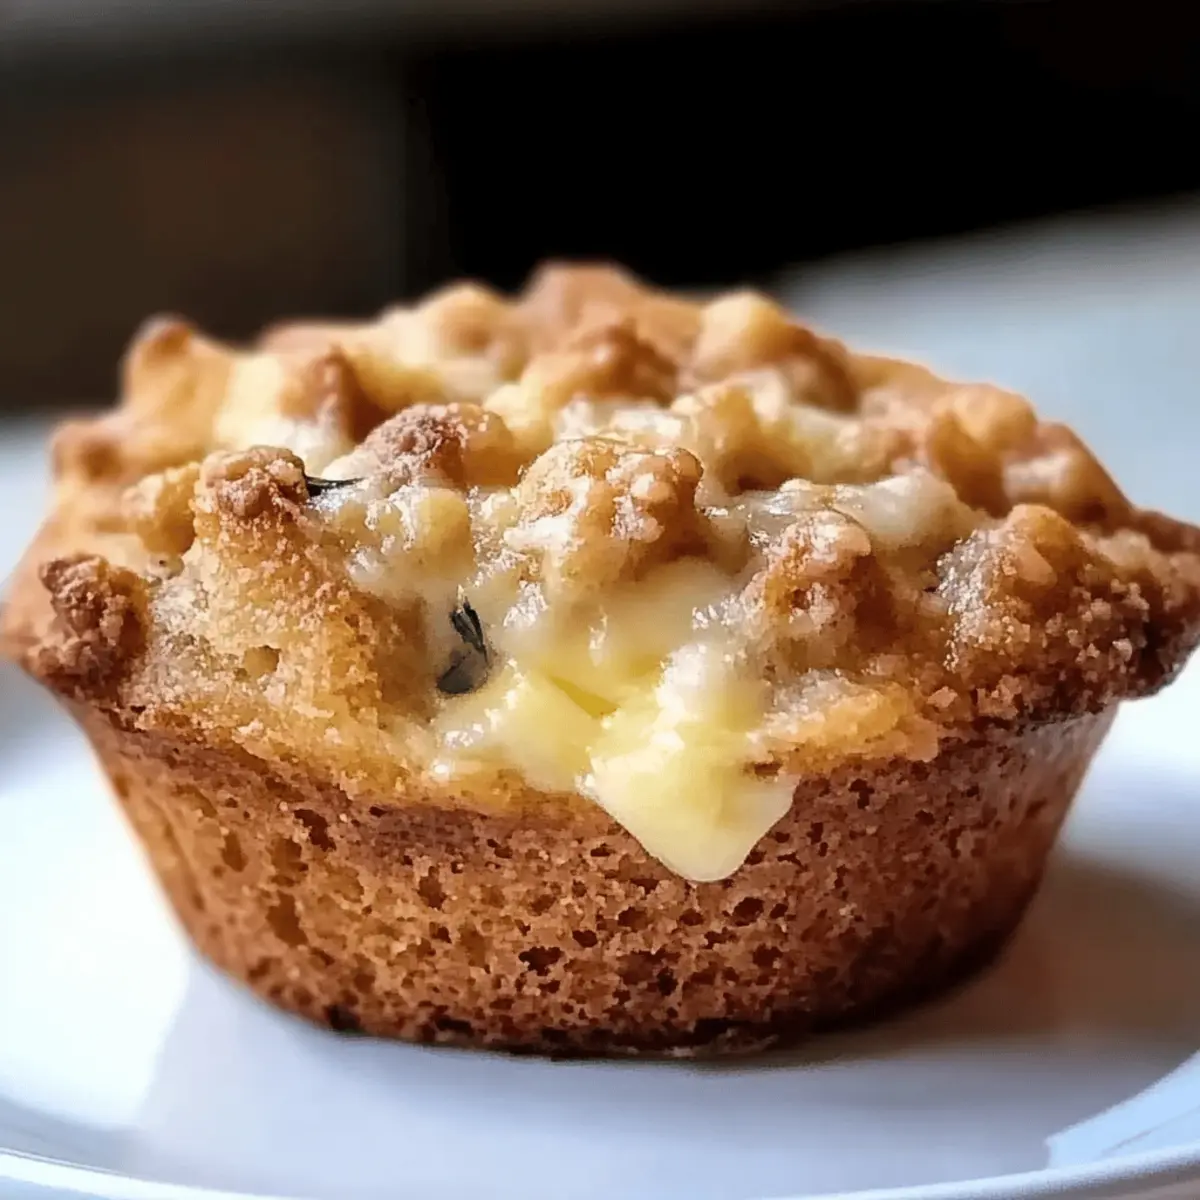
The savory scent of garlic wafting through your kitchen can transform any ordinary day into a delightful culinary adventure. When I first discovered the magic of Cheese-Stuffed Garlic Herb Bread, I knew I had stumbled upon a treasure that would quickly become the star of my gatherings. This mouthwatering recipe not only boasts an irresistibly crispy crust but also features a gooey, cheesy center that’s hard to resist. It’s perfect for sharing at parties or enjoying as an indulgent side to your favorite soups and salads. Plus, the best part? You can whip it up in no time, making it an easy, crowd-pleasing addition to any meal. Are you ready to dive into creating this cheesy masterpiece? Let’s get started!
Why Is This Garlic Bread So Special?
Irresistible Aroma: The moment this bread bakes, your kitchen transforms into a cozy haven with the heavenly scent of garlic and herbs.
Customizable Goodness: With options to mix and match cheeses and herbs, each loaf can be uniquely yours, ensuring it suits even the pickiest eaters.
Simple Preparation: You’ll appreciate how easy this recipe is—no fancy skills required! Perfect for a quick snack or last-minute party indulgence.
Perfect for Sharing: This dish doesn’t just fill bellies; it fills hearts! Great for gatherings or cozy dinners, it’s sure to impress your loved ones.
As a delightful accompaniment, don’t forget to try pairing it with a warm bowl of marinara sauce or even pesto. If you’re in the mood for more comforting flavors, check out Apple Cinnamon Oatmeal or prepare some delicious Cinnamon Roll Muffins for a complete feast!
Cheese-Stuffed Garlic Herb Bread Ingredients
For the Bread
• Bread Dough – This forms the structure; feel free to use store-bought for convenience or try your hand at homemade!
• Garlic – Fresh minced garlic brings a punch of flavor; roasted garlic will give a milder, sweeter taste if preferred.
• Butter – Adds richness; swap for olive oil to create a delicious dairy-free alternative.
For the Filling
• Cheese – Choose creamy mozzarella for that delightful stretch or sharp cheddar for a bolder flavor; mix different cheeses for an extra tasty twist!
• Herbs (parsley, oregano) – Fresh herbs enhance the flavor; while dried herbs can work in a pinch, fresh produces a vibrant taste.
Make this Cheese-Stuffed Garlic Herb Bread your own by customizing with your favorite ingredients!
Step‑by‑Step Instructions for Easy Cheese-Stuffed Garlic Herb Bread
Step 1: Prepare the Dough
Begin by preheating your oven to 375°F (190°C). On a lightly floured surface, roll out your bread dough to about half an inch thick, ensuring the shape is even. If you’re using store-bought dough, this step will make it easy to work with. You want a nice, flat surface that will cradle the delicious fillings of your Cheese-Stuffed Garlic Herb Bread.
Step 2: Mix the Garlic Herb Butter
In a medium bowl, combine minced garlic with melted butter and your choice of freshly chopped herbs, like parsley and oregano. Stir until evenly mixed, creating a fragrant garlic herb butter. This mixture will not only coat the dough but will infuse the Cheese-Stuffed Garlic Herb Bread with aromatic flavors as it bakes, so don’t skip this step!
Step 3: Layer the Cheese and Seasoning
Place your choice of cheese down the center of the rolled-out dough—mozzarella for that gooey stretch or cheddar for a sharper taste are both excellent options. Next, drizzle your prepared garlic herb butter generously over the cheese, ensuring it’s evenly distributed. This is where the flavors meld together to create that mouthwatering center in your tasty bread!
Step 4: Shape the Bread
Carefully fold the dough over the cheese filling, pinching the edges to seal it tightly and prevent any delicious filling from oozing out as it bakes. Make sure to press firmly, securing the ends and creating a beautiful pocket filled with cheesy goodness. This step ensures a perfect shape for your Cheese-Stuffed Garlic Herb Bread!
Step 5: Bake the Bread
Transfer your stuffed dough onto a baking sheet lined with parchment paper. Brush the top with any remaining garlic herb butter for an extra touch of flavor. Bake in the preheated oven for 20-25 minutes, or until the bread is golden brown and crispy. Keep an eye on it; your kitchen will soon fill with an irresistible aroma!
Step 6: Cool and Serve
Once baked, remove the bread from the oven and let it cool for about 5 minutes on a wire rack. This cooling time allows the cheese to set a little, making it easier to slice. Serve warm alongside marinara sauce, if desired, and enjoy the delightful, gooey goodness of your Cheese-Stuffed Garlic Herb Bread that’s sure to impress everyone!
Make Ahead Options
These Cheese-Stuffed Garlic Herb Bread are perfect for meal prep enthusiasts! You can prepare the garlic herb butter and cheese filling up to 24 hours in advance, storing them separately in the refrigerator. Additionally, you can roll the dough and shape the bread, then cover it tightly with plastic wrap and refrigerate for up to 3 days. To maintain quality, ensure the dough is well sealed to prevent it from drying out. When ready to bake, simply preheat your oven, brush the top with any remaining garlic herb butter, and bake it as directed. This way, you’ll enjoy fresh, gooey cheese-stuffed goodness on even the busiest of weeknights!
Expert Tips for Cheese-Stuffed Garlic Herb Bread
• Seal It Well: Ensure your dough edges are properly pinched shut to prevent cheese leakage during baking. A well-sealed bread keeps all that gooey goodness inside!
• Chop Fresh: While dried herbs can work, fresh herbs significantly elevate the flavor profile of this Cheese-Stuffed Garlic Herb Bread. Don’t skip them if you can!
• Pizza Cutter Magic: For cleaner, more professional-looking slices, use a pizza cutter instead of a knife. This simple switch ensures every piece is just as perfect as the last.
• Flavor Boost: For extra garlic oomph, consider brushing the top with garlic butter halfway through baking. This not only enhances the flavor but also gives a beautiful golden sheen.
• Customize Your Cheese: Don’t be afraid to mix different cheeses to create your ideal filling. Combining mozzarella with sharp cheddar can add nice depth and flavor to your bread.
Variations & Substitutions for Cheese-Stuffed Garlic Herb Bread
Feel free to get creative with this recipe and make it your own while delighting in heavenly flavors!
-
Spicy Twist: Replace mozzarella with pepper jack for a cheesy, spicy kick that will awaken your taste buds. The heat adds excitement to every bite.
-
Veggie Boost: Add in cooked spinach or sun-dried tomatoes to the filling for extra nutrition and flavor. This twist not only brightens up the taste but also packs in delicious greens.
-
Herb Swap: Experiment with different fresh herbs like thyme or basil instead of parsley and oregano. Each herb brings its unique essence, allowing you to discover new flavor profiles.
-
Cheese Medley: Mix different cheeses such as gouda or feta for an enchanting cheese blend that elevates the dish. Combining flavors adds depth and complexity—pure bliss!
-
Whole Wheat Dough: For a healthier option, use whole wheat bread dough to create a heartier bread that’s still delightful. Your taste buds won’t even notice the difference!
-
Garlic Infusion: Infuse your melted butter with garlic cloves or roasted garlic for an extra rich, buttery flavor. This is perfect for garlic lovers looking to take it up a notch!
-
Gluten-Free: Substitute with a gluten-free bread dough recipe for a delicious gluten-free option everyone can enjoy. It opens the doors to those with dietary restrictions without sacrificing flavor.
As you savor your creation, consider pairing this warm, cheesy bread with a bowl of marinara sauce or even a refreshing pesto dip for an added burst of flavor. If you’re looking for more deliciousness, try the heartwarming Apple Cinnamon Oatmeal or treat yourself to some delightful Cinnamon Roll Muffins. Enjoy the journey of flavors!
What to Serve with Cheese-Stuffed Garlic Herb Bread?
The hearty and cheesy flavors of this garlic bread open the door to endless meal options that are sure to tantalize your taste buds.
- Creamy Tomato Soup: A classic companion, its acidity offsets the richness of the cheese, creating a harmonious balance of flavors.
- Fresh Garden Salad: Crisp greens with a zesty vinaigrette add brightness, enhancing the overall experience with fresh textures and flavors.
- Garlic Butter Shrimp: Juicy shrimp sautéed in garlic butter pair beautifully, making every bite a savory adventure.
For a cozy touch, try serving your Cheese-Stuffed Garlic Herb Bread alongside a warm bowl of butternut squash soup—the creamy sweetness blends wonderfully with the savory notes of the bread.
- Stuffed Mushrooms: Earthy, umami flavors from these bites elevate the simple pleasure of your cheese bread, creating a delightful variety of tastes.
- Pesto Dipping Sauce: This vibrant, herby sauce is perfect for drizzling or dipping and adds layers of flavor that complement the bread’s garlic and cheese.
- Red Wine: A light, fruity Merlot enhances the dish without overwhelming it, creating a lovely pairing that elevates the entire meal.
With these pairings, your Cheese-Stuffed Garlic Herb Bread will shine as a star in any spread, making it a cherished choice for every dining occasion!
How to Store and Freeze Cheese-Stuffed Garlic Herb Bread
Room Temperature: Store any leftovers in a cool, dry place in an airtight container for up to 2 days to maintain freshness.
Fridge: For longer storage, wrap the Cheese-Stuffed Garlic Herb Bread in foil or plastic wrap and refrigerate for up to 1 week.
Freezer: If you want to save it for later, freeze the bread wrapped tightly in plastic wrap and then in foil for up to 3 months.
Reheating: To enjoy the bread again, reheat in the oven at 350°F (175°C) for about 10-15 minutes to restore its crispy crust.
Cheese-Stuffed Garlic Herb Bread Recipe FAQs
How do I choose the right garlic for my Cheese-Stuffed Garlic Herb Bread?
Absolutely! For the best flavor, opt for fresh garlic cloves. They provide a robust taste that really elevates the dish. If you’re looking for something milder, roasted garlic is a fantastic choice—just roast it until soft and sweet for about 30 minutes wrapped in foil at 400°F (200°C) before mixing it into your butter.
What’s the best way to store leftover Cheese-Stuffed Garlic Herb Bread?
Very! If you have any leftovers, store them in an airtight container at room temperature for up to 2 days. If you want to keep it longer, wrap it well in foil or plastic wrap and refrigerate for up to a week to maintain moisture and flavor.
Can I freeze Cheese-Stuffed Garlic Herb Bread, and how should I do it?
Yes! To freeze, first let the bread cool completely. Then, wrap it tightly in plastic wrap, ensuring no air gets in, followed by a layer of aluminum foil to protect against freezer burn. You can store it in the freezer for up to 3 months. When you’re ready to enjoy it, thaw overnight in the refrigerator and reheat in the oven at 350°F (175°C) for about 10-15 minutes to get that crispy crust back.
Why did my Cheese-Stuffed Garlic Herb Bread leak cheese while baking?
Oh no! The most common culprit is not sealing the dough edges properly. Make sure to pinch them tightly to avoid any cheesy goodness oozing out. This will ensure you have a beautiful stuffed bread with all the flavors contained. If cheese does leak, it may burn, so keep an eye on it.
Are there any dietary considerations I should keep in mind?
Absolutely! This recipe is vegetarian-friendly, but if you’re tailoring it for specific dietary needs, consider using dairy-free alternatives for butter and cheese. Always check for allergies, especially with cheese, as some may be sensitive to dairy. If you’re making it for pets, avoid any cheese or garlic, as these can be harmful to them.
Deliciously Healthy Banana Oatmeal Muffins to Savor Every Bite
Ingredients
Equipment
Method
- Preheat your oven to 350°F (175°C) and grease a muffin pan.
- In a large mixing bowl, combine rolled oats, mashed bananas, honey, milk, Greek yogurt, and eggs.
- In another bowl, whisk together baking powder, baking soda, salt, and cinnamon.
- Gradually add the dry ingredients to the wet ingredients, stirring until just combined.
- Fold in chopped nuts or chocolate chips if desired.
- Scoop the batter into the prepared muffin pan, filling each cup about 2/3 full.
- Bake for 18-20 minutes or until a toothpick inserted into the center comes out clean.
- Allow the muffins to cool for a few minutes in the pan, then transfer to a wire rack to cool completely.
Leave a Reply