
“Are we really going to eat all of that?” I overheard my friend exclaim as we set down the plate of irresistible Chocolate Cream Pie Bars at a recent gathering. Slowly, I smiled because I knew I had nailed the dessert of the night. These no-bake beauties are a modern twist on the classic chocolate cream pie, transforming nostalgia into an easy treat that’s perfect for anyone tired of fast food. With a crispy Oreo crust and layered with a rich, creamy filling that’s just begging for a scoop of whipped cream on top, you’ll be in dessert heaven. Plus, they’re easy to make ahead, offering the convenience of being prepped the day before any event, and there’s a gluten-free option for those who need it. Ready to impress your friends and family? Let’s dive deeper into this simple yet indulgent recipe!
Why are these Chocolate Cream Pie Bars irresistible?
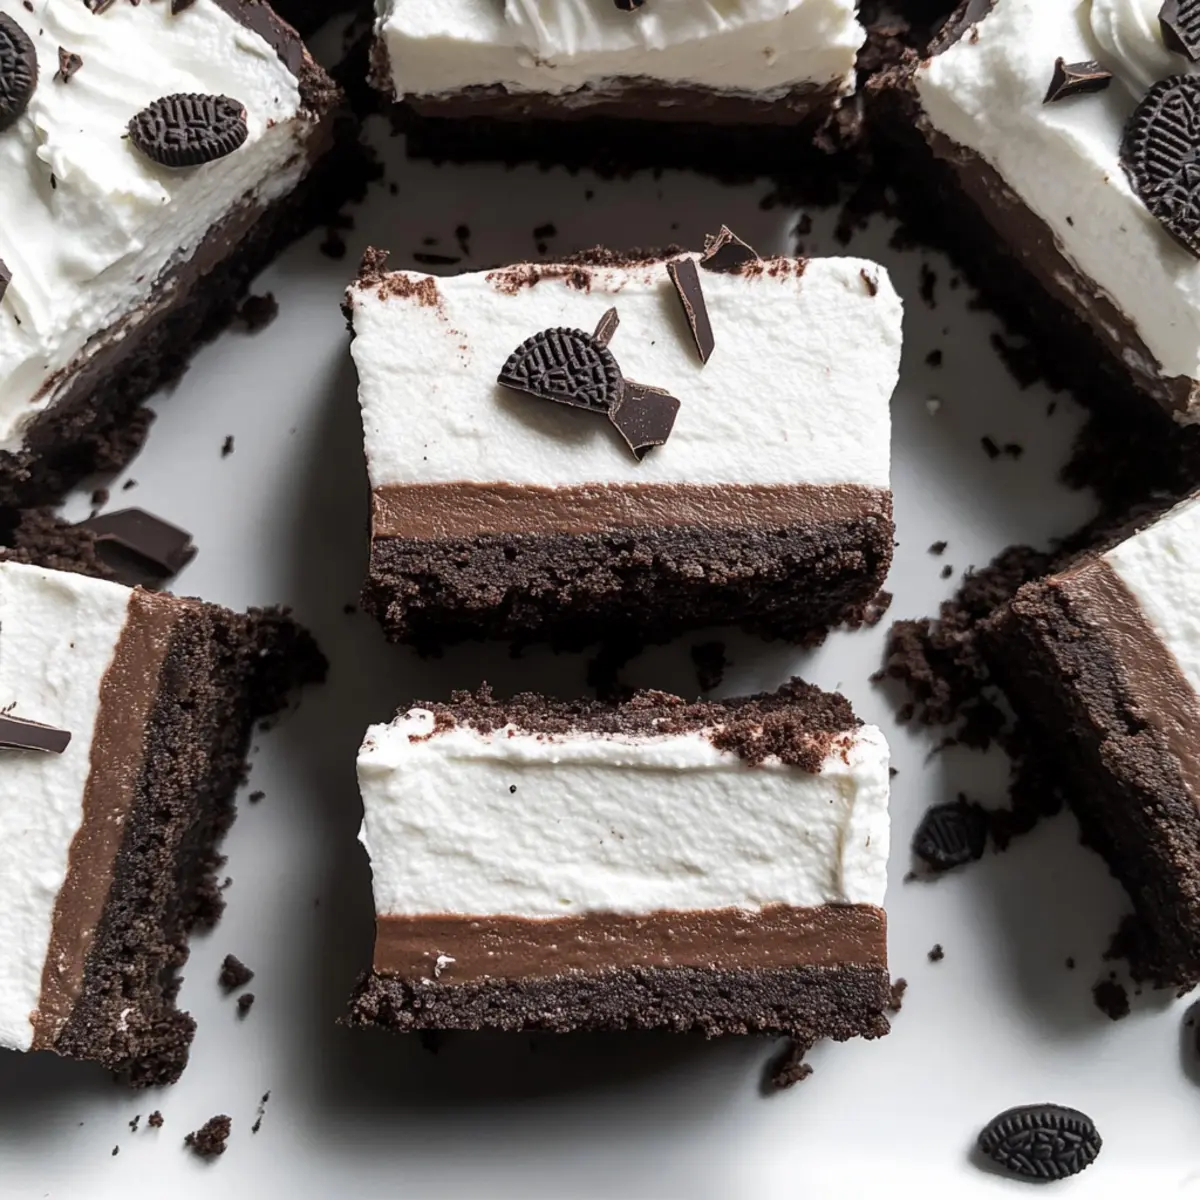
Decadence in Every Bite: These bars elevate the classic dessert by layering rich chocolate filling and a crunchy Oreo crust—pure indulgence!
No-Bake Simplicity: Perfect for busy days, this recipe requires minimal effort and no baking, making it a breeze for both novice and seasoned cooks.
Make-Ahead Convenience: Prep these creamy delights a day in advance and chill, freeing up your time for other event preparations.
Gluten-Free Adaptation: Need a gluten-free option? Simply swap in gluten-free Oreos without sacrificing flavor or texture.
Crowd-Pleasing Appeal: Whether it’s a dinner party, potluck, or family gathering, these bars are sure to be a hit, ensuring everyone will be coming back for seconds!
Dive into these addictive Chocolate Cream Pie Bars and check out the Cookies Cream Dessert for another delightful treat!
Chocolate Cream Pie Bars Ingredients
For the Crust
• Oreo cookie crumbs – Provides the crispy base for the dessert. Substitute with gluten-free Oreos for a gluten-free version.
• Unsalted butter (5 tbsp) – Binds the cookie crumbs together, creating a solid crust. Use vegan butter for a dairy-free option.
For the Filling
• Heavy whipping cream (1 cup) – Adds richness to the filling and is used for the whipped topping. Dairy alternatives can be used for a non-dairy option.
• Semi-sweet chocolate chips (5 oz) – Key ingredient for the chocolate flavor; use high-quality brands for better taste. Dark chocolate can be substituted for a richer flavor.
• Full-fat cream cheese (6 oz) – Adds creaminess and a slight tang to the filling. Neufchâtel cheese can be used as a lighter option.
• Powdered sugar (1 ½ cups) – Sweetens the filling; can be reduced for less sweetness or substituted with a sugar alternative.
• Unsweetened cocoa powder (⅓ cup) – Enhances chocolate flavor and contributes to the filling’s richness. Dutch-processed cocoa can be used for a milder flavor.
• Vanilla extract (2 tsp) – Adds depth of flavor; ensure it’s pure for the best taste.
• Salt (½ tsp) – Enhances sweetness and balances flavors.
For Serving
• Additional heavy cream (for topping) – Whipped and spread on top adds a delightful finish. Use a bit of sugar to sweeten the whipped cream if desired.
• Chocolate shavings – A beautiful garnish that elevates the presentation.
These irresistible Chocolate Cream Pie Bars are sure to become your new favorite dessert! Enjoy their creamy, chocolatey goodness while savoring every delicious bite.
Step‑by‑Step Instructions for Chocolate Cream Pie Bars
Step 1: Preheat and Prepare
Begin by preheating your oven to 350°F (175°C). While the oven heats, line an 8×8 inch baking pan with parchment paper, allowing some overhang for easy removal later. This will be the home for your delicious Chocolate Cream Pie Bars, ensuring they release smoothly once set.
Step 2: Make the Crust
In a food processor, pulse Oreo cookies into fine crumbs until they resemble sand. Melt 5 tablespoons of unsalted butter and combine it with the crumb mixture in a mixing bowl, stirring until evenly moistened. Firmly press this mixture into the bottom of the prepared pan, creating a solid crust. Bake for 10 minutes, then remove and let cool completely.
Step 3: Whip the Cream
In a stand mixer, combine 1 cup of heavy whipping cream with 1 cup of powdered sugar. Beat on medium-high speed until firm peaks form, which will take about 3-5 minutes. Chill the whipped cream in the refrigerator while you prepare the filling, ensuring it stays light and fluffy for the topping.
Step 4: Melt Chocolate and Butter
Using a double boiler, melt 5 ounces of semi-sweet chocolate chips along with 2 tablespoons of unsalted butter over simmering water. Stir occasionally until the mixture is smooth and silky, then let it cool for approximately 10 minutes. This step is crucial for creating the rich filling for your Chocolate Cream Pie Bars.
Step 5: Prepare the Filling
In a large mixing bowl, beat 6 ounces of full-fat cream cheese until creamy and smooth. Gradually add in 1½ cups of powdered sugar, ⅓ cup of cocoa powder, 2 teaspoons of vanilla extract, and ½ teaspoon of salt, mixing well until combined. Once smooth, gently fold in the cooled chocolate mixture until no streaks remain.
Step 6: Combine Whipped Cream and Filling
Carefully fold half of the chilled whipped cream into the chocolate filling, incorporating it until just combined. Then, gently fold in the remaining whipped cream, taking care not to deflate the mixture. This creates a light, airy filling that will elevate your Chocolate Cream Pie Bars.
Step 7: Assemble the Bars
Spread the chocolate filling evenly over the cooled Oreo crust in the prepared pan, smoothing the top with a spatula. Level the mixture to ensure uniformity and a nice presentation once cut. This rich layer will be the highlight of your indulgent bars.
Step 8: Chill to Set
Cover the pan with plastic wrap and refrigerate the Chocolate Cream Pie Bars for at least 3 hours, but preferably overnight. This chilling period allows the filling to firm up beautifully, ensuring clean slices and a deliciously set texture.
Step 9: Add the Topping
Before serving, whip another cup of heavy cream with a bit of sugar until soft peaks form. Spread this whipped cream over the chilled chocolate layer, creating an enticing, fluffy topping. For a festive touch, finish with chocolate shavings or other desired garnishes to elevate your dessert.
Step 10: Slice and Serve
Using the parchment overhang, carefully lift the set Chocolate Cream Pie Bars from the pan. Use a sharp knife warmed in hot water to slice into squares. Serve them cold, and watch as everyone devours these decadently rich dessert bars!
Make Ahead Options
These Chocolate Cream Pie Bars are perfect for busy home cooks looking to save time during hectic weeks! You can prepare the crust and filling up to 24 hours in advance. Simply make the Oreo crust and refrigerate it, then store the chocolate filling in an airtight container to keep it fresh. To maintain the quality, chill everything properly, ensuring it doesn’t sit out at room temperature for too long. When you’re ready to serve, simply layer the chilled filling over the crust and allow the bars to set in the refrigerator for at least 3 hours or overnight. Before serving, whip the additional heavy cream, spread it on top, and add chocolate shavings for a delightful finish. Enjoy the convenience of having these indulgent bars ready to impress your guests!
Chocolate Cream Pie Bars Variations
Feel free to get creative and customize these delightful bars to suit your taste!
-
Graham Cracker Crust: Substitute Oreos with graham cracker crumbs for a classic twist. The sweet, buttery flavor will remind you of beach bonfires!
-
Dairy-Free Delight: Use coconut cream and vegan butter to make these bars entirely dairy-free. You’ll still enjoy every chocolatey bite!
-
Mocha Madness: Mix in a teaspoon of espresso powder for a coffee-infused chocolate filling. This variation will awaken your taste buds and add a unique depth.
-
Nutty Crunch: Add chopped nuts, like pecans or walnuts, to the crust for an added crunch. Sweet and savory together create a delightful texture!
-
Different Chocolate Types: Swap semi-sweet chocolate chips for dark or milk chocolate to amplify or mellow the sweetness to your preference. Each has its own delicious charm!
These variations keep things interesting and ensure there’s something for everyone. Don’t forget to enjoy with a scoop of ice cream, like with these Sweet Coconut Cream Pancakes, or treat yourself with a side of Salted Honey Pie for a stunning dessert table!
Expert Tips for Chocolate Cream Pie Bars
-
Choose Quality Chocolate: Using high-quality chocolate chips, like Ghirardelli, will significantly enhance the flavor of your chocolate cream pie bars, making them richer and more indulgent.
-
Keep Ingredients Cool: To ensure a firm filling, keep the chocolate and cream cheese mixture cool during preparation. Don’t let it sit out at room temperature, as this can lead to a soupy filling.
-
Precise Slicing: For perfectly clean slices, chill the bars overnight in the fridge. Use a hot knife—dipping it in hot water and wiping it dry—to cut through smoothly without smashing the bars.
-
Consider Dairy Alternatives: If you need a non-dairy option, you can substitute heavy cream with coconut cream and use vegan butter. It won’t compromise the deliciousness of these bars!
-
Avoid Overmixing: When folding the whipped cream into the filling, do this gently to maintain the light, airy texture that makes your chocolate cream pie bars so delightful.
-
Experiment with Flavors: Don’t hesitate to personalize your bars by adding espresso powder for a mocha twist or trying different types of chocolate. Enjoy the process!
What to Serve with Decadent No-Bake Chocolate Cream Pie Bars
Looking to complete your dessert spread? Pairing delectable sides can transform your Chocolate Cream Pie Bars into an unforgettable feast.
-
Fresh Berries: The tartness of strawberries or raspberries contrasts beautifully with the rich chocolate, adding a refreshing touch. These vibrant fruits not only enhance the presentation but also balance the sweetness of the bars.
-
Vanilla Ice Cream: A scoop of creamy vanilla ice cream provides a delightful temperature contrast, melting slightly into the chocolate filling for an indulgent experience.
-
Coffee or Espresso: A cup of freshly brewed coffee or a shot of espresso highlights the chocolate flavors, making each bite more satisfying. This combination elevates the chocolate experience, especially after dinner.
-
Mint Leaves: Sprinkling fresh mint leaves on top of the bars or serving them alongside offers a burst of freshness. It cleanses the palate between bites and adds an aromatic element to the dessert.
-
Homemade Whipped Cream: Elevate your bars further by serving them with a dollop of freshly whipped cream sweetened lightly with vanilla. This light, fluffy addition adds an extra layer of texture.
-
Chocolate Shavings: Garnishing your bars with dark or white chocolate shavings can create an elegant presentation while adding a bit of extra richness. The shavings melt in your mouth, enhancing the chocolate experience even more.
-
Sparkling Water or Champagne: For a festive touch, pair your dessert with a glass of sparkling water or champagne. The bubbles cleanse the palate and make for a wonderfully celebratory experience.
Indulging in these complementary favorites will surely make your gathering memorable, giving your dessert the spotlight it deserves!
How to Store and Freeze Chocolate Cream Pie Bars
Fridge: Store the bars in an airtight container in the refrigerator for up to 4 days. Keeping them chilled helps maintain their creamy texture and flavor.
Freezer: If you want to save some for later, wrap individual slices tightly in plastic wrap and place them in a freezer-safe container. They can be frozen for up to 2 months.
Thawing: To enjoy your frozen Chocolate Cream Pie Bars, transfer them to the fridge a few hours before serving. This allows them to thaw gradually while maintaining their texture.
Reheating: These bars are best served chilled; avoid reheating, as it may alter the texture and richness of the filling.
Chocolate Cream Pie Bars Recipe FAQs
What type of Oreos should I use for the crust?
Absolutely! Regular Oreos work perfectly, but if you need a gluten-free version, simply use gluten-free Oreos. They provide the same delightful crunch and flavor, ensuring nobody feels left out at dessert time!
How should I store the Chocolate Cream Pie Bars?
Store your bars in an airtight container in the refrigerator for up to 4 days. This keeps them fresh and maintains their creamy texture, making them just as delicious on day four as on day one.
Can I freeze Chocolate Cream Pie Bars?
Yes, you can! For the best results, wrap each slice tightly in plastic wrap before placing them in a freezer-safe container. They can be frozen for up to 2 months. When you’re ready to indulge, thaw them in the refrigerator for a few hours before serving.
What if my filling is too runny?
If your filling doesn’t seem to set properly, ensure that your melted chocolate mixture is completely cooled before combining it with the cream cheese. If you’ve already mixed it and it’s still too runny, try chilling it for an additional 30 minutes. If needed, you can fold in more whipped cream or a pinch of extra cocoa powder to thicken it!
Are there any dietary considerations I should keep in mind?
Definitely! Not only can you easily make these bars gluten-free by choosing the right Oreos, but you can also opt for dairy-free ingredients. Using vegan butter and coconut cream will keep the dessert delicious while accommodating dietary restrictions. Always double-check ingredient labels for allergens!
Can I make these Chocolate Cream Pie Bars ahead of time?
Very! These bars are perfect for make-ahead gatherings. You can prepare them a day or two in advance, chilling them in the fridge until you’re ready to serve. This makes them an excellent choice for parties or family dinners, allowing you to enjoy your time with guests without worrying about dessert!
Irresistible Chocolate Cream Pie Bars You'll Want to Share
Ingredients
Equipment
Method
- Preheat your oven to 350°F (175°C) and line an 8x8 inch baking pan with parchment paper.
- Pulse Oreo cookies into fine crumbs, mix with melted butter, and press into the pan. Bake for 10 minutes and let cool.
- Whip heavy cream with powdered sugar until firm peaks form and chill.
- Melt chocolate chips with butter over a double boiler until smooth; let cool.
- Beat cream cheese until smooth, then mix in powdered sugar, cocoa powder, vanilla, and salt. Fold in the cooled chocolate.
- Gently fold half of the whipped cream into the chocolate mixture, then fold in the remaining whipped cream.
- Spread the filling over the cooled crust and smooth the top.
- Refrigerate for at least 3 hours or overnight to set.
- Whip additional cream with sugar and spread over the chilled bars before garnishing with chocolate shavings.
- Lift the bars from the pan using parchment, slice with a hot knife, and serve cold.
Leave a Reply