
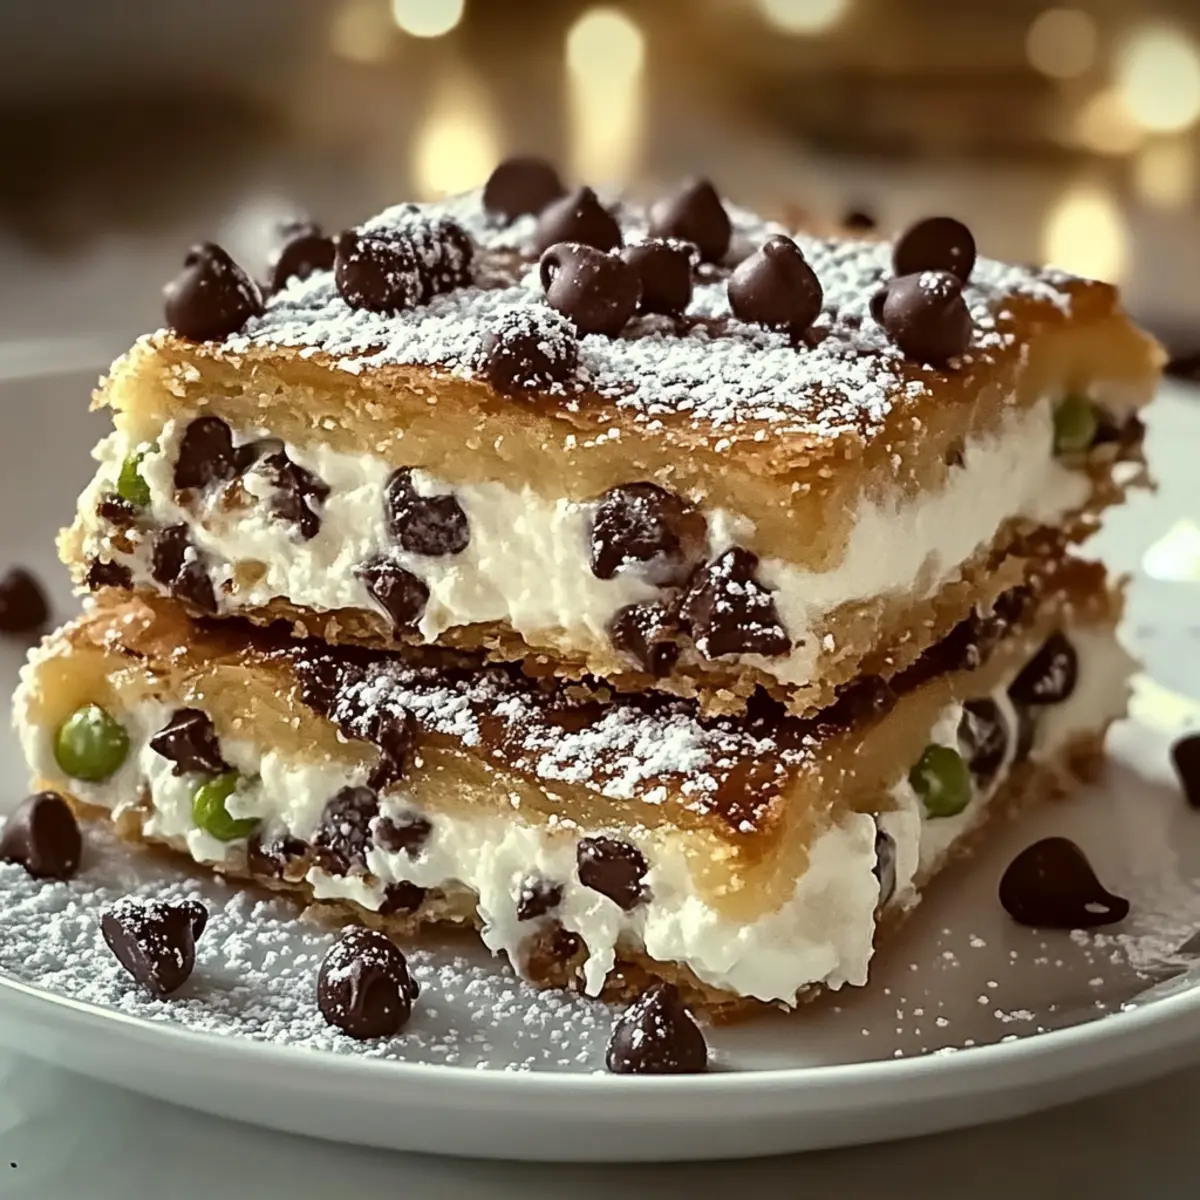
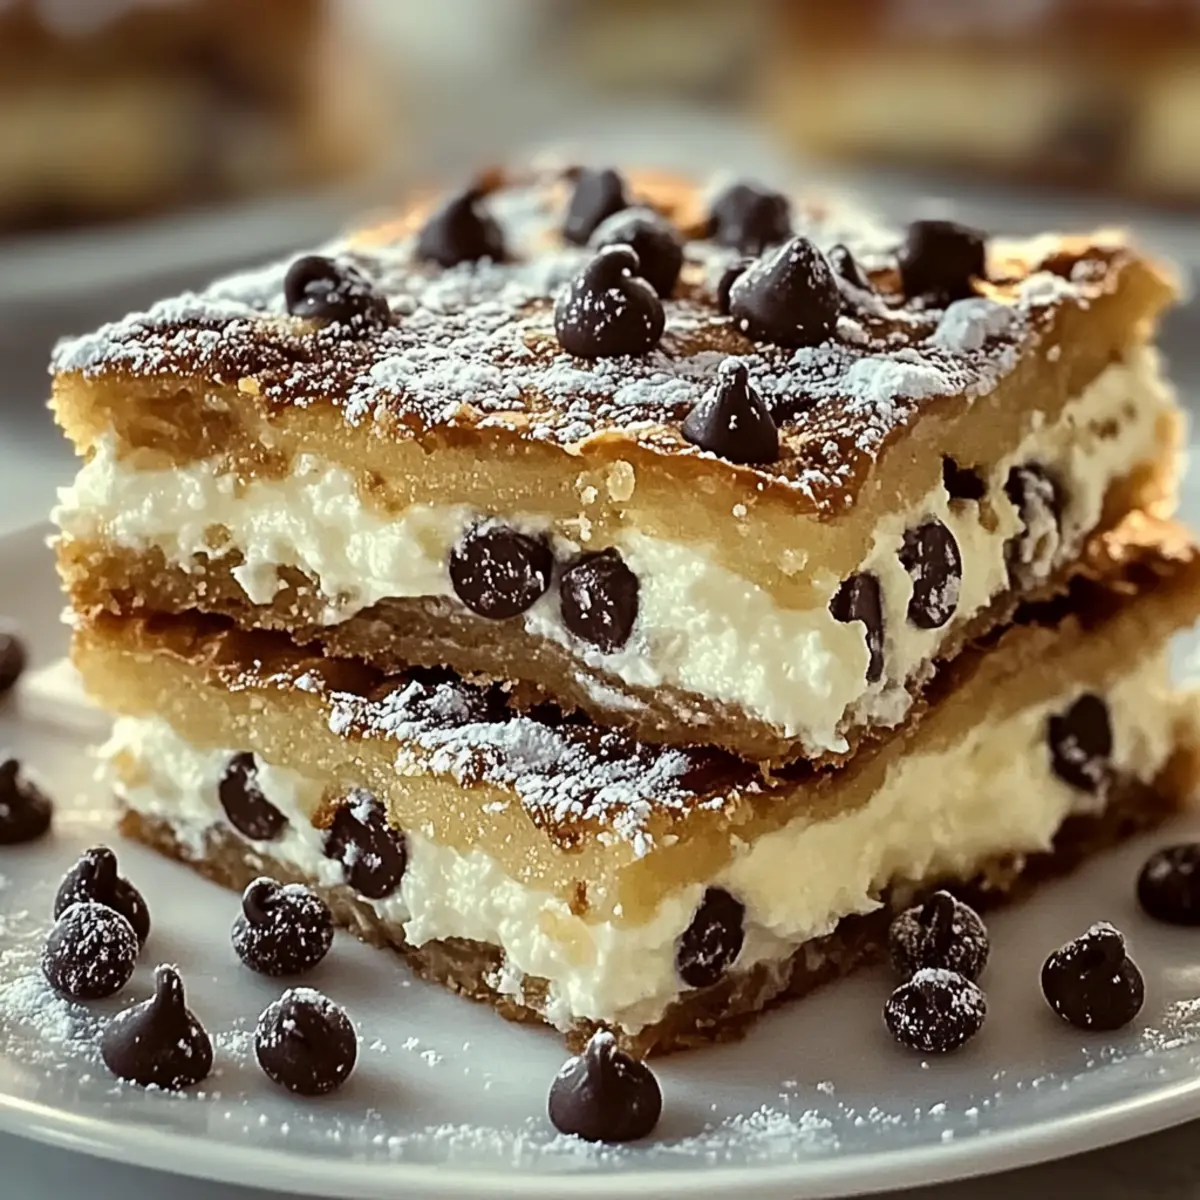
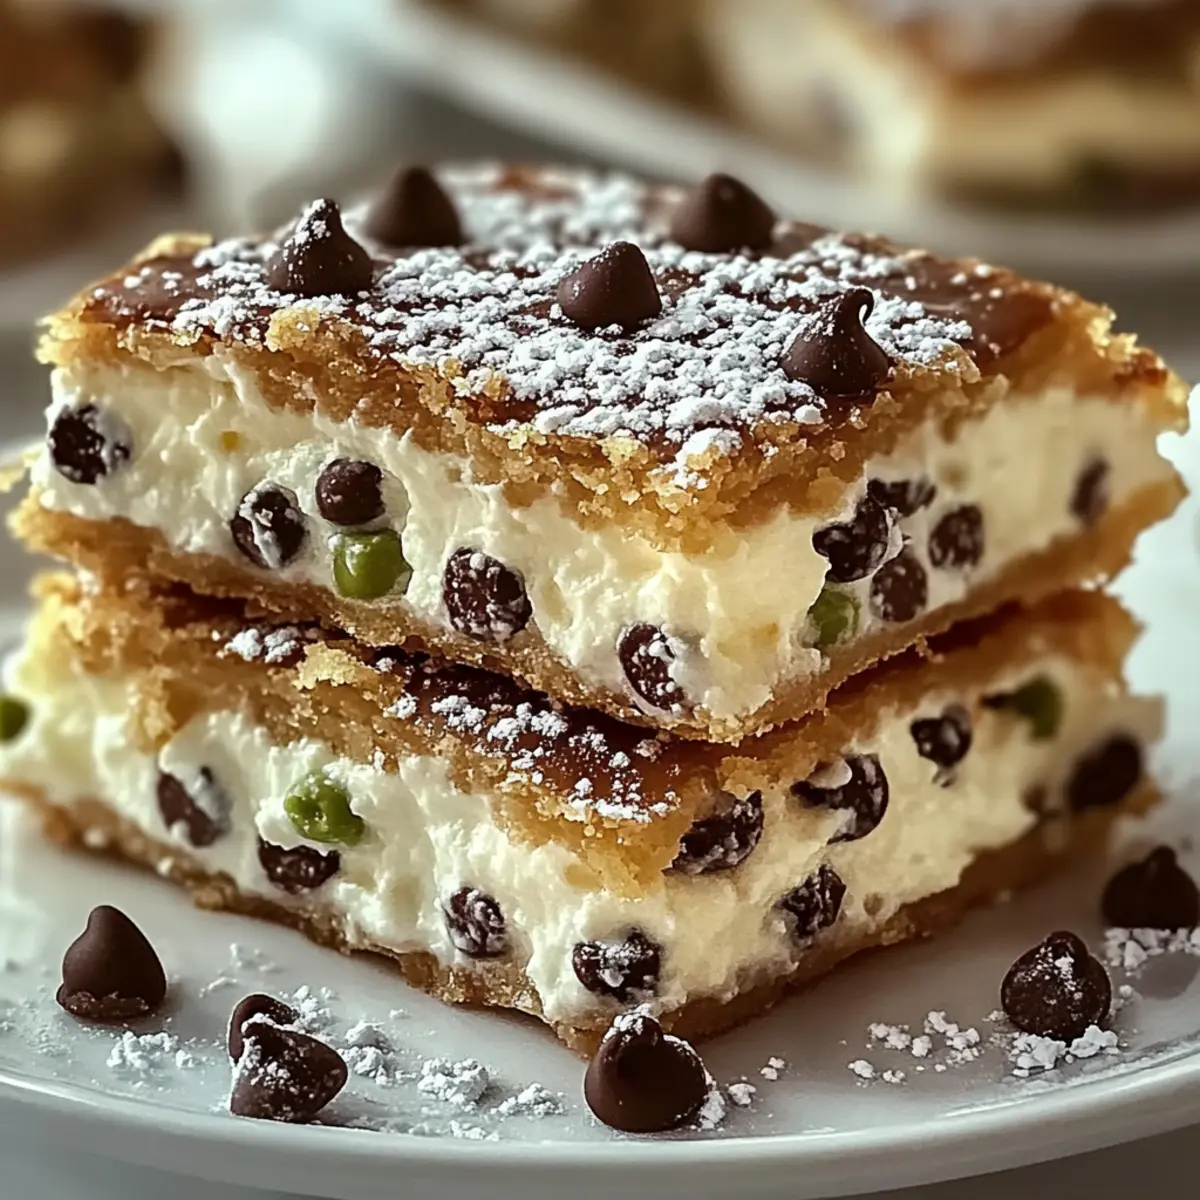
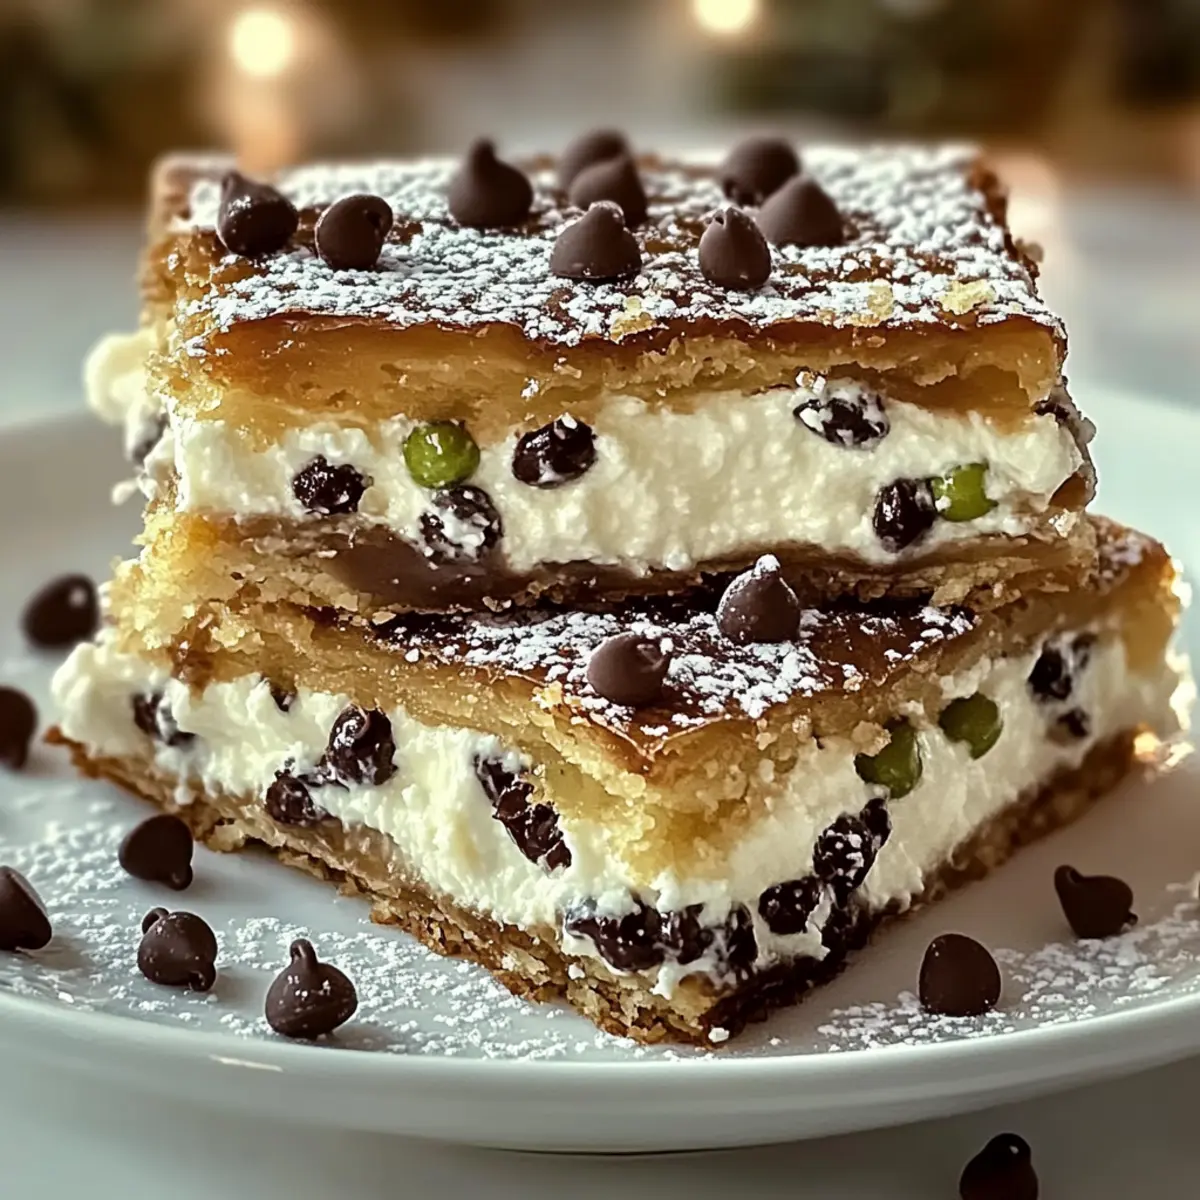
There’s something wonderfully nostalgic about the first bite of a homemade dessert. As I lifted a warm square of Classic Cannoli Squares from the baking dish, the aroma of sweet ricotta and hints of cinnamon took me back to Italian family gatherings filled with laughter and joy. This treat smartly combines the beloved classic cannoli in an easy-to-make, shareable form that is sure to impress your friends and family. What makes these squares unbeatable is their incredibly simple preparation and versatility—perfect for busy home chefs looking to elevate their dessert game! Whether you’re gluten-free or craving a dairy-free option, I’ve got you covered with delicious substitutions that keep the charm intact. Ready to savor a slice of Italy? Let’s dive into how to make these delightful squares that will wow your taste buds!
Why are Classic Cannoli Squares a Must-Try?
Simplified Delight: These Classic Cannoli Squares provide all the flavor of traditional cannoli without the fuss, making them perfect for even the busiest cooks.
Flavorful Indulgence: With a rich ricotta filling mixed with sweet hints of cinnamon and chocolate chips, every bite will transport you to Italy.
Customization Galore: Tailor your squares to suit any dietary need! Whether you’re looking for gluten-free or dairy-free options, these are incredibly versatile. Try adding lemon zest or nuts for a personal touch!
Perfect for Sharing: Great for gatherings, they cut easily into squares and please crowds of all ages. Pair them with a rich gelato or fresh berries for a show-stopping dessert!
Make-Ahead Friendly: Prep these squares in advance, as they hold up beautifully in the fridge or freezer. Ideal for inviting friends over or enjoying a cozy night in!
Classic Cannoli Squares Ingredients
For the Filling
- Ricotta Cheese – Provides the creamy filling; use whole milk for a richer texture.
- Powdered Sugar – Adds sweetness; substitute with coconut sugar for a healthier option.
- Vanilla Extract – Enhances flavor; opting for pure vanilla yields the best taste.
- Cinnamon – Offers warm spice notes; omit for a more classic cannoli flavor.
- Mini Chocolate Chips – Adds a delightful chocolate element that enhances richness.
For the Crust
- Pre-made Pie Crusts – Forms the base and top crust; homemade crust works brilliantly too.
- Egg – Used for egg wash to give the crust a glossy finish.
- Sugar – Sprinkled on top for added sweetness and crunch.
For the Garnish (Optional)
- Chopped Pistachios – Adds a crunchy texture and colorful flair.
- Maraschino Cherries – Provides a pop of sweetness and decorative touch.
- Extra Chocolate Chips – Perfect for those who love an extra layer of chocolate flavor.
With these Classic Cannoli Squares ingredients, you’re just a whisk and a few minutes away from a delightful dessert that will wow your taste buds!
Step‑by‑Step Instructions for Classic Cannoli Squares That Will Wow Your Taste Buds
Step 1: Prepare the Filling
In a large mixing bowl, enhance the taste of your Classic Cannoli Squares by blending together 15 ounces of ricotta cheese, 1 cup of powdered sugar, 1 teaspoon of vanilla extract, ½ teaspoon of cinnamon (if using), and ½ cup of mini chocolate chips. Use a hand mixer or whisk to achieve a smooth, creamy texture that looks irresistible. Set this delightful mixture aside as you move on to the next step.
Step 2: Preheat the Oven
Set your oven to preheat at 375°F (190°C), allowing it to reach the perfect baking temperature while you prepare the crust. This step is crucial for ensuring that the Classic Cannoli Squares bake evenly and develop a beautiful golden-brown crust. In the meantime, gather your baking dish and be ready to assemble your dessert.
Step 3: Roll Out the Pie Crust
Carefully fit one pre-made pie crust into a 9×9-inch baking dish, pressing it gently against the bottom and sides. Take a moment to ensure there are no cracks or gaps, as this will keep the filling safe and secure. If using homemade crust, roll it out to a similar thickness. Add a simple finish by pruning the edges if needed for a more polished look.
Step 4: Add the Filling
Evenly spoon the prepared ricotta mixture over the crust, leaving about a ½-inch border at the edges. Spread it gently with a spatula to create a smooth, delectable layer, guaranteeing each square will be filled with creamy flavor. The enticing filling should fill your kitchen with delightful aromas as you progress to the next step.
Step 5: Prepare the Top Crust
Place the second pie crust over the filling, carefully sealing the edges to lock in that creamy goodness. Use a fork to crimp the edges for an elegant touch, while also creating a small slits in the top crust to allow steam to escape. Brush the top crust with a beaten egg for a glossy finish, then sprinkle with sugar for added sweetness and a slight crunch.
Step 6: Bake
Slide your dish into the preheated oven and bake for 30-35 minutes. Keep a watchful eye on your Classic Cannoli Squares as they transform; the crust will turn golden brown and the filling should bubble slightly, indicating it’s perfectly cooked. The enticing aroma will fill your home, making it hard to wait for the next step!
Step 7: Cool and Serve
Once baked to perfection, carefully remove the dish from the oven and allow your Classic Cannoli Squares to cool for at least 30 minutes. This cooling time helps the filling set up for clean slicing. When ready, cut them into squares and serve your masterpiece warm or chilled, garnished with chopped pistachios or maraschino cherries if desired.
Make Ahead Options
These Classic Cannoli Squares are perfect for meal prep enthusiasts! You can prepare the filling up to 24 hours in advance. Simply mix the ricotta, powdered sugar, vanilla, cinnamon, and mini chocolate chips, then refrigerate it in an airtight container. The pie crusts can also be assembled and packed in the baking dish with the filling, ready for baking. When you’re ready to serve, just preheat the oven, add the top crust, brush it with egg wash, and sprinkle with sugar before baking for 30-35 minutes. This way, you’ll enjoy the same delicious flavor and golden crust without the last-minute rush, making it a true lifesaver for busy weeknights!
Classic Cannoli Squares Variations
There are countless ways to personalize your Classic Cannoli Squares, making them uniquely yours and even more delightful!
-
Dairy-Free Option: Replace ricotta with silken tofu blended smooth, and add nutritional yeast for a flavor boost.
-
Gluten-Free Option: Use gluten-free pie crusts; there are many great pre-made varieties available that work wonderfully.
-
Zesty Addition: Add freshly grated lemon zest to the filling for a brightness that lifts the rich creaminess, adding a refreshing twist.
-
Flavor Boost: Enhance the filling’s deliciousness by adding a teaspoon of almond extract, resulting in a deeper, nutty flavor.
-
Nutty Variation: Stir in finely chopped nuts, like pistachios or walnuts, for an extra crunchy texture and delightful taste without losing the essence of the dish.
-
Spicy Sweet Twist: For unexpected heat, sprinkle a pinch of cayenne or chili powder into the filling—it contrasts beautifully with the sweetness!
-
Chocolate Lovers’ Choice: Mix mini chocolate chips with crushed chocolate-covered espresso beans for an extra level of richness and an aromatic kick perfect for coffee lovers.
Feel free to explore combinations or adjustments based on your preferences or dietary needs! These Classic Cannoli Squares can be something new every time, just like love—always adapting, always exciting. If you’re interested in more mouth-watering options, check out my recipes for Dynamite Chicken Buns or Cajun Chicken Pasta for delightful dishes sure to impress at your next gathering!
What to Serve with Classic Cannoli Squares
There’s nothing quite like wrapping up a delicious meal with a sweet kick that transports you straight to a sun-kissed Italian piazza.
- Rich Gelato: A scoop of velvety gelato perfectly complements the creamy filling, adding an indulgent touch to every bite.
- Fresh Berries: Tart raspberries or sweet strawberries provide a lively contrast, balancing the sweetness of the cannoli squares beautifully.
- Espresso: A strong shot of espresso elevates the whole dessert experience, enhancing the flavors and rounding out a classic Italian meal.
- Italian Ricotta Cheesecake: Continue the cannoli theme by serving with a slice of ricotta cheesecake for a delightful dessert duo that will leave everyone smiling.
- Chocolate Sauce Drizzle: A warm drizzle of chocolate sauce adds an extra layer of richness, making your Classic Cannoli Squares even more irresistible.
- Chopped Nuts: Sprinkle some pistachios or hazelnuts on top for a crunchy texture that complements the squares’ creaminess while adding a nutty flavor.
- Candied Fruit: For a festive touch, consider serving with candied orange or lemon peel for a zesty contrast that brightens the dessert.
- Mint Tea: A refreshing cup of mint tea clears the palate and balances the richness of the squares, making for a perfectly rounded meal.
How to Store and Freeze Classic Cannoli Squares
Fridge: Store leftovers in an airtight container for up to 3 days. This keeps your Classic Cannoli Squares fresh and ready to enjoy!
Freezer: Wrap individual squares in plastic wrap and then place them in a freezer-safe bag. They can be frozen for up to 2 months for a tasty treat later.
Thawing: To enjoy after freezing, simply place the squares in the fridge overnight to thaw. Reheat in the oven at 350°F (175°C) for 10-15 minutes if you prefer them warm.
Make-Ahead: These delightful squares can be prepared a day in advance, making them perfect for gatherings—just store them in the fridge!
Expert Tips for Classic Cannoli Squares
-
Use Quality Ingredients: Opt for high-quality ricotta cheese to enhance the flavors of your Classic Cannoli Squares. Fresh ingredients make a noticeable difference!
-
Drain the Ricotta: Drain excess moisture from the ricotta before mixing to achieve a thicker filling that holds its shape well, avoiding a soggy dessert.
-
Don’t Rush Cooling: Allow your squares to cool for at least 30 minutes before slicing. This helps the filling set properly for clean, beautiful pieces.
-
Monitor Baking Time: Keep an eye on the squares as they bake to prevent over-browning. Every oven is different, so check for a golden crust around the 30-minute mark.
-
Customize with Ease: Feel free to experiment with flavors! Add lemon zest or nuts to the filling for a personal twist that enhances your Classic Cannoli Squares.
Classic Cannoli Squares Recipe FAQs
How do I choose the right ricotta cheese?
Absolutely! For the best flavor and texture, opt for whole milk ricotta cheese. Look for a smooth and creamy consistency without excess liquid. If there are dark spots or excessive moisture, consider draining the ricotta through a fine mesh sieve or cheesecloth for at least 30 minutes before using to achieve a thicker filling.
What is the best way to store leftover cannoli squares?
Very! To keep your Classic Cannoli Squares fresh, store them in an airtight container in the refrigerator for up to 3 days. If you have a large batch, separate the squares with parchment paper to prevent sticking. This will help maintain their delicious texture!
Can I freeze Classic Cannoli Squares?
Absolutely! For freezing, wrap each square individually in plastic wrap, then place them in a freezer-safe bag. They can be kept frozen for up to 2 months. To enjoy, simply thaw the squares in the fridge overnight and reheat in the oven at 350°F (175°C) for 10-15 minutes to restore that freshly-baked goodness.
What if my filling is too runny?
No worries! If you find your filling is too runny, try draining the ricotta cheese more thoroughly next time. You can also mix in a tablespoon of cornstarch or flour to help it set firmer. Just be cautious not to overmix, as this can make the filling dense.
Can I make Classic Cannoli Squares dairy-free?
Definitely! For a dairy-free option, use blended silken tofu in place of ricotta cheese, adding a bit of nutritional yeast for that savory flavor. This alternative keeps the creamy texture while making it suitable for lactose intolerance, and you won’t miss the traditional flavors!
What dietary options can I incorporate into the recipe?
Absolutely! These Classic Cannoli Squares can easily be customized to fit various dietary needs. For gluten-free options, swap out the pre-made pie crust for gluten-free pastry alternatives. You can also explore omitting sugar or using natural sweeteners like coconut sugar for healthier variations without sacrificing taste.
Classic Cannoli Squares That Will Wow Your Taste Buds Today
Ingredients
Equipment
Method
- In a large mixing bowl, blend together the ricotta, powdered sugar, vanilla extract, cinnamon, and mini chocolate chips until smooth.
- Preheat your oven to 375°F (190°C).
- Fit one pie crust into a 9x9-inch baking dish, ensuring no cracks.
- Spoon the ricotta mixture over the crust, leaving a ½-inch border.
- Place the second pie crust over the filling and crimp the edges. Brush with beaten egg and sprinkle with sugar.
- Bake in the preheated oven for 30-35 minutes until golden brown.
- Allow to cool for at least 30 minutes, then slice into squares and serve warm or chilled with garnish.
Leave a Reply