
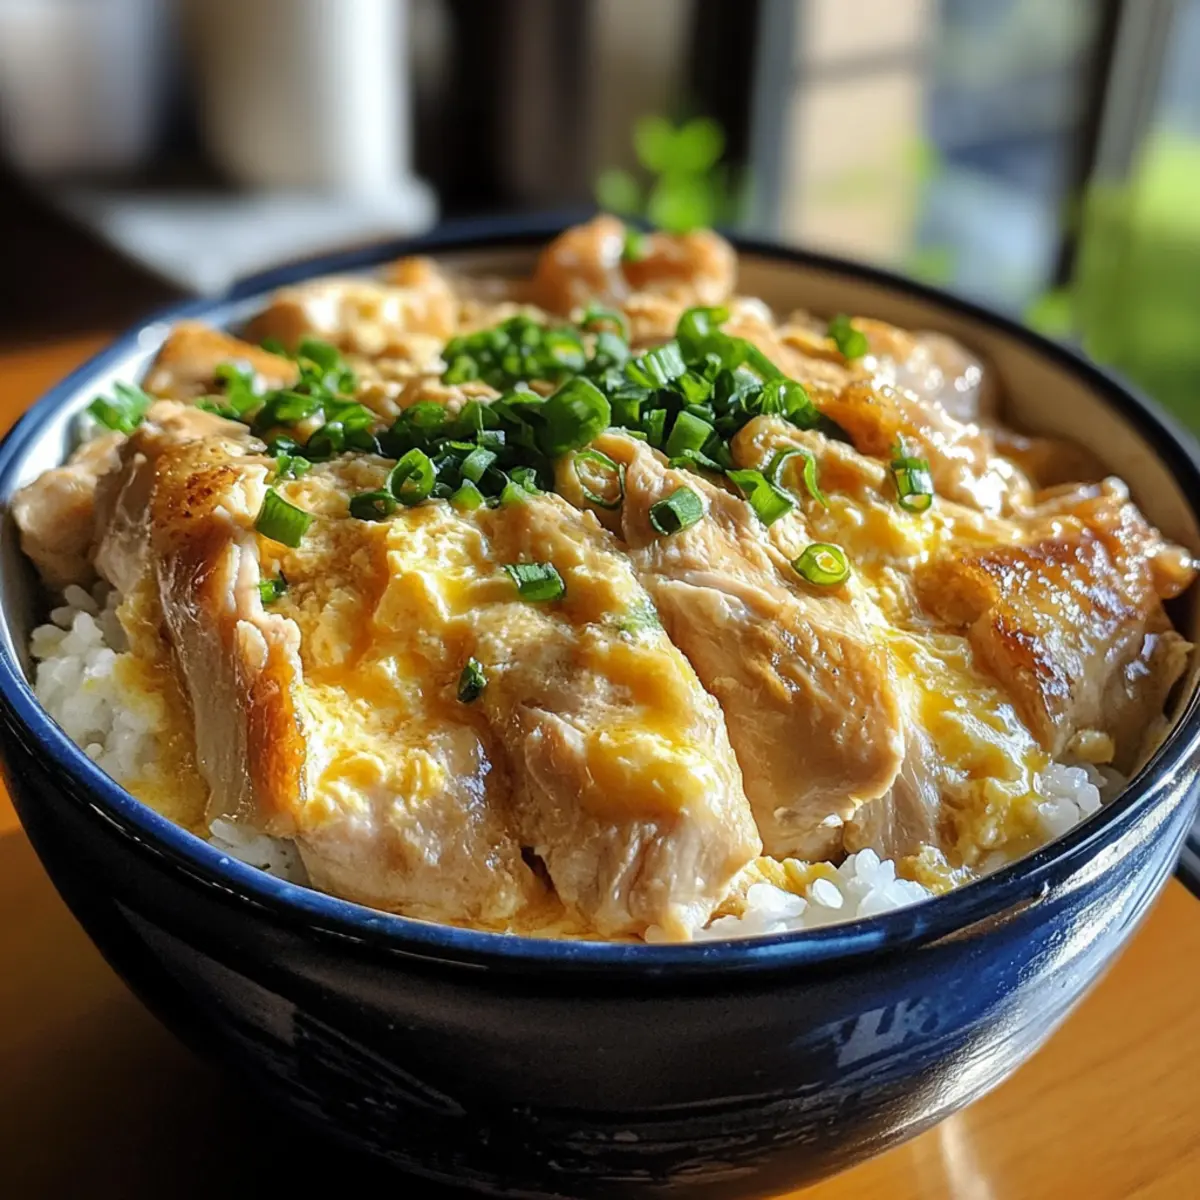
As I stood in my kitchen, the comforting aroma of soy sauce mingled with the sound of sizzling chicken brought back memories of cozy family dinners. Oyakodon, or Japanese Chicken & Egg Rice Bowl, is a quick and easy dish that I love to whip up on busy weekdays—it packs a delightful punch of flavors while being astonishingly simple to prepare. In just 15 minutes, this delightful one-pan meal comes together, featuring tender chicken simmered in a sweet, savory broth and enveloped in a creamy egg scramble over rice. Not only is it a comforting dish perfect for the whole family, but it also leaves minimal cleanup—just one pan is all you need! Curious what makes this delicious bowl a must-try for your next meal? Let’s dive in!
What makes Oyakodon a must-try?
Simplicity: This recipe shines with its straightforward steps, making it perfect for anyone, even if you’re a novice in the kitchen.
Flavor Explosion: Each bite is a delightful mix of tender chicken, sweet mirin, and savory broth, all wrapped in creamy eggs—comfort food at its finest!
One-Pan Wonder: Enjoy the ease of minimal cleanup. You only need one pan to create this meal, giving you more time to savor it.
Rapid Cooking: Coming together in just 15 minutes, it’s ideal for busy evenings!
Customization: Feel free to personalize your bowl with optional garnishes like green onions or sesame oil.
If you love wholesome meals that don’t compromise on flavor, this Oyakodon will undoubtedly become a staple alongside other favorites like Corn Chicken Rice and Bang Chicken Bowl.
Japanese Chicken & Egg Rice Bowl Ingredients
For the Chicken and Broth
• Skinless Boneless Chicken Thighs – Tender and flavorful; a great main protein.
• Onion – Adds natural sweetness and depth; can substitute with yellow onions or shallots.
• Chicken Stock or Dashi – Provides umami flavor as a broth base; swap for vegetable stock for a vegetarian option.
• Soy Sauce – Key for savory seasoning; adjust to your taste.
• Mirin – Adds a sweet complexity; replace with rice vinegar if mirin is not available.
• Sugar – Balances flavors but can be reduced or omitted for less sweetness.
For the Egg and Base
• Large Eggs – Creates a creamy scramble that envelops the chicken; no substitutes recommended.
• Cooked Rice – The perfect base for your bowl; freshly steamed is best for this Japanese Chicken & Egg Rice Bowl.
For Garnishing
• Optional Garnishes – Green onions, sesame oil, nori, or togarashi can add extra flavor and texture, personalizing your meal.
Step‑by‑Step Instructions for Japanese Chicken & Egg Rice Bowl
Step 1: Marinate the Chicken
Begin by marinating the skinless boneless chicken thighs. In a bowl, combine soy sauce, mirin, and sugar, adding the chicken pieces to coat them evenly. Let the chicken sit for 5 to 10 minutes, allowing the flavors to penetrate while you prepare the next steps. You’ll know it’s ready when the chicken absorbs the rich, savory marinade.
Step 2: Beat the Eggs
In a separate bowl, crack the large eggs and lightly beat them using a fork or whisk until the yolks and whites are mostly combined, but not completely mixed. Aim for a silky texture, as this helps create a creamy finish in your Japanese Chicken & Egg Rice Bowl. Set the egg mixture aside while you focus on cooking the chicken.
Step 3: Prepare the Broth
Heat a large skillet over medium heat and pour in the chicken stock or dashi. Allow it to come to a gentle boil, which should take about 2-3 minutes. The hot broth will provide the flavorful base for your dish, so keep an eye on it to prevent it from boiling over. You’ll notice a comforting aroma filling your kitchen as the stock heats up.
Step 4: Sauté the Onions
Once the chicken stock is simmering, add the sliced onions to the skillet. Sauté the onions for about 1 minute until they become aromatic and start to soften. This step enhances the depth of flavor in your broth, and you’ll see the onions turn translucent, blending beautifully with the stock. Stir occasionally to ensure they don’t stick.
Step 5: Cook the Marinated Chicken
Next, add the marinated chicken pieces into the skillet with the onions. Cook for 1-2 minutes, stirring gently, until the chicken is nearly cooked through and turns a lovely golden color. This quick cooking step helps the chicken absorb the broth’s flavors, creating the base for your comforting Oyakodon.
Step 6: Add the Egg Mixture
Carefully pour the beaten egg mixture evenly over the chicken and onions in the skillet. Allow it to cook undisturbed for a minute, until the edges of the eggs start to set, appearing firm yet still slightly runny in the center. This visual cue indicates that your ingredients are coming together beautifully for the Japanese Chicken & Egg Rice Bowl.
Step 7: Scramble the Eggs
Gently stir and scramble the eggs with a spatula, cooking until they achieve your desired doneness—preferably still slightly runny for that custardy texture. This step should take about 1-2 minutes as the eggs finish cooking, enveloping the tender chicken in a creamy blanket. You’ll know it’s ready when the eggs are softly set.
Step 8: Serve with Warm Rice
Finally, serve your warm Japanese Chicken & Egg Rice Bowl over a generous scoop of freshly steamed rice. Spoon some of the savory broth and chicken mixture over the rice, allowing the flavors to meld. For an extra burst of flavor, garnish with optional toppings like chopped green onions or a drizzle of sesame oil, personalizing your delightful meal!
Expert Tips for Japanese Chicken & Egg Rice Bowl
-
Egg Technique: Whisk the eggs only until 70-80% combined for a silkier, creamier texture in your Oyakodon.
-
Rice Consistency: Use slightly less water when cooking rice to absorb the savory broth better, enhancing the overall flavor.
-
Ingredient Balance: Adjust the soy sauce to your taste; not all brands are equal in saltiness, so start with less and add more if needed.
-
Add Nutrition: Boost the dish’s nutrition by incorporating pre-cooked vegetables or mushrooms; they’ll add flavor and texture without extra cooking time.
-
Garnish Wisely: Experiment with optional toppings like green onions or sesame oil for added flavor, making your Japanese Chicken & Egg Rice Bowl uniquely yours.
How to Store and Freeze Japanese Chicken & Egg Rice Bowl
Fridge: Store leftovers in an airtight container for up to 2 days. Keep the broth separate if possible to maintain the texture of the eggs.
Freezer: Not recommended for freezing. The texture of the scrambled eggs and chicken may become unappealing when thawed and reheated.
Reheating: If you have leftover components, reheat in a skillet over medium heat, adding a splash of broth to restore moisture before serving over fresh rice.
Make Ahead Options
These Oyakodon preparations are perfect for busy weeknights! You can marinate the chicken thighs in the soy sauce, mirin, and sugar mixture up to 24 hours in advance; simply refrigerate them in an airtight container. You can also slice the onions ahead of time, keeping them stored in the fridge for up to 3 days. When you’re ready to enjoy your Japanese Chicken & Egg Rice Bowl, just sauté the onions, add the marinated chicken, and proceed with cooking the eggs as instructed. This way, the dish not only saves you time during a hectic dinner rush but also tastes just as delicious and comforting!
Japanese Chicken & Egg Rice Bowl Variations
Feel free to let your creativity shine with these delightful twists on this beloved dish!
- Dairy-Free: Swap any creaminess with coconut milk in place of mirin for a tropical taste and richness.
- Vegetable Boost: Add sautéed bell peppers or spinach for a vibrant color and added nutrition, enhancing the dish’s overall flavor profile.
- Spicy Touch: Introduce a kick by mixing in chili oil or fresh ginger during cooking, perfect for those who like it hot!
- Umami Enhancement: Stir in a spoonful of miso paste into the broth, bringing a deep savory flavor that truly elevates your bowl.
- Brown Rice Substitute: Replace white rice with brown rice for a chewier texture and extra nutrients, making your meal heartier and wholesome.
- Protein Alternatives: Go for beef or tofu instead of chicken, creating a delightful variation that still holds the dish’s comforting essence.
- Herb Infusion: Add fresh cilantro or basil after serving to bring a refreshing herbal note to your Japanese Chicken & Egg Rice Bowl.
- Noodle Version: Turn it into a cozy noodle dish by serving over ramen or soba for a twist that’s equally satisfying and memorable.
With these variations, your Oyakodon will shine even brighter on busy weekdays. For more comforting rice-inspired meals, you might enjoy Honey Chicken Bowl or the enticing Pot Chicken Rice. Happy cooking!
What to Serve with 15-Minute Oyakodon?
To elevate your Oyakodon experience, consider these delightful pairings that enhance both flavor and comfort.
-
Pickled Vegetables: A tangy, crisp side that cuts through the richness of the dish, offering a refreshing contrast.
-
Miso Soup: A warm, savory bowl of miso soup complements the earthy notes in the Oyakodon, creating a balanced meal.
-
Steamed Bok Choy: Crisp and tender, bok choy adds a fresh texture and a hint of bitterness that pairs beautifully with the savory broth.
-
Japanese Cucumber Salad: This cool and crunchy salad, dressed with sesame oil, provides a bright contrast and lively crunch to each bite.
-
Sesame Spinach Salad: Tender spinach sautéed with sesame oil brings nutty flavors to the table, enhancing the overall richness of the meal.
-
Sake: A glass of chilled or warm sake can bring out the umami flavors, enriching the comforting experience of your Oyakodon.
Enjoy each pairing to transform your Japanese Chicken & Egg Rice Bowl into a complete, satisfying meal that your family will love!
Japanese Chicken & Egg Rice Bowl Recipe FAQs
What type of chicken should I use for Oyakodon?
Absolutely! Skinless boneless chicken thighs are ideal as they are tender and flavorful, providing the best texture and taste. If you prefer a leaner option, feel free to use chicken breast instead—just be mindful that it may cook slightly faster, so adjust your cooking time accordingly.
How do I store leftovers of my Japanese Chicken & Egg Rice Bowl?
Very! Store any leftovers in an airtight container in the fridge for up to 2 days. For the best results, keep the broth separate from the eggs and rice to help maintain the delightful texture of the scrambled eggs. When you’re ready to enjoy your meal again, reheat the chicken and broth mixture gently in a skillet over medium heat.
Can I freeze Oyakodon for later?
Not recommended! Freezing your Japanese Chicken & Egg Rice Bowl isn’t the best option due to the delicate texture of the scrambled eggs. If you freeze it, the eggs could become rubbery and unpleasant when thawed. Instead, enjoy this dish fresh for the ultimate comfort food experience.
What should I do if the eggs cook too quickly or become overdone?
Don’t fret! If the eggs set too quickly, it means the heat was too high, so adjust accordingly on your next attempt—medium to low heat works best. If you want a creamier texture, remember to whisk the eggs until they are only 70-80% combined before adding them to the skillet. This technique will give you that luscious, silky texture that makes Oyakodon so comforting!
Are there any dietary considerations for Oyakodon?
Absolutely! If you have dietary restrictions, this recipe can be easily adapted. Use vegetable stock instead of chicken stock for a vegetarian version, or omit the sugar for a lower-sugar option. Just be cautious with soy sauce if you’re watching your sodium intake; opt for a low-sodium version if needed. Remember, it’s also best to check with friends or family members to ensure it fits any specific allergies they might have.
15-Minute Japanese Chicken & Egg Rice Bowl for Cozy Nights
Ingredients
Equipment
Method
- Marinate the chicken by combining soy sauce, mirin, and sugar in a bowl. Let it sit for 5 to 10 minutes.
- In a separate bowl, beat the large eggs until the yolks and whites are mostly combined.
- Heat the skillet over medium heat and add chicken stock or dashi. Bring to a gentle boil.
- Add sliced onions and sauté for about 1 minute until translucent.
- Add marinated chicken pieces and cook for 1-2 minutes until nearly cooked through.
- Pour the beaten egg mixture evenly over the chicken and onions. Cook undisturbed for 1 minute.
- Gently stir and scramble the eggs until they are softly set, about 1-2 minutes.
- Serve the chicken and egg mixture over freshly steamed rice, garnishing as desired.
Leave a Reply