
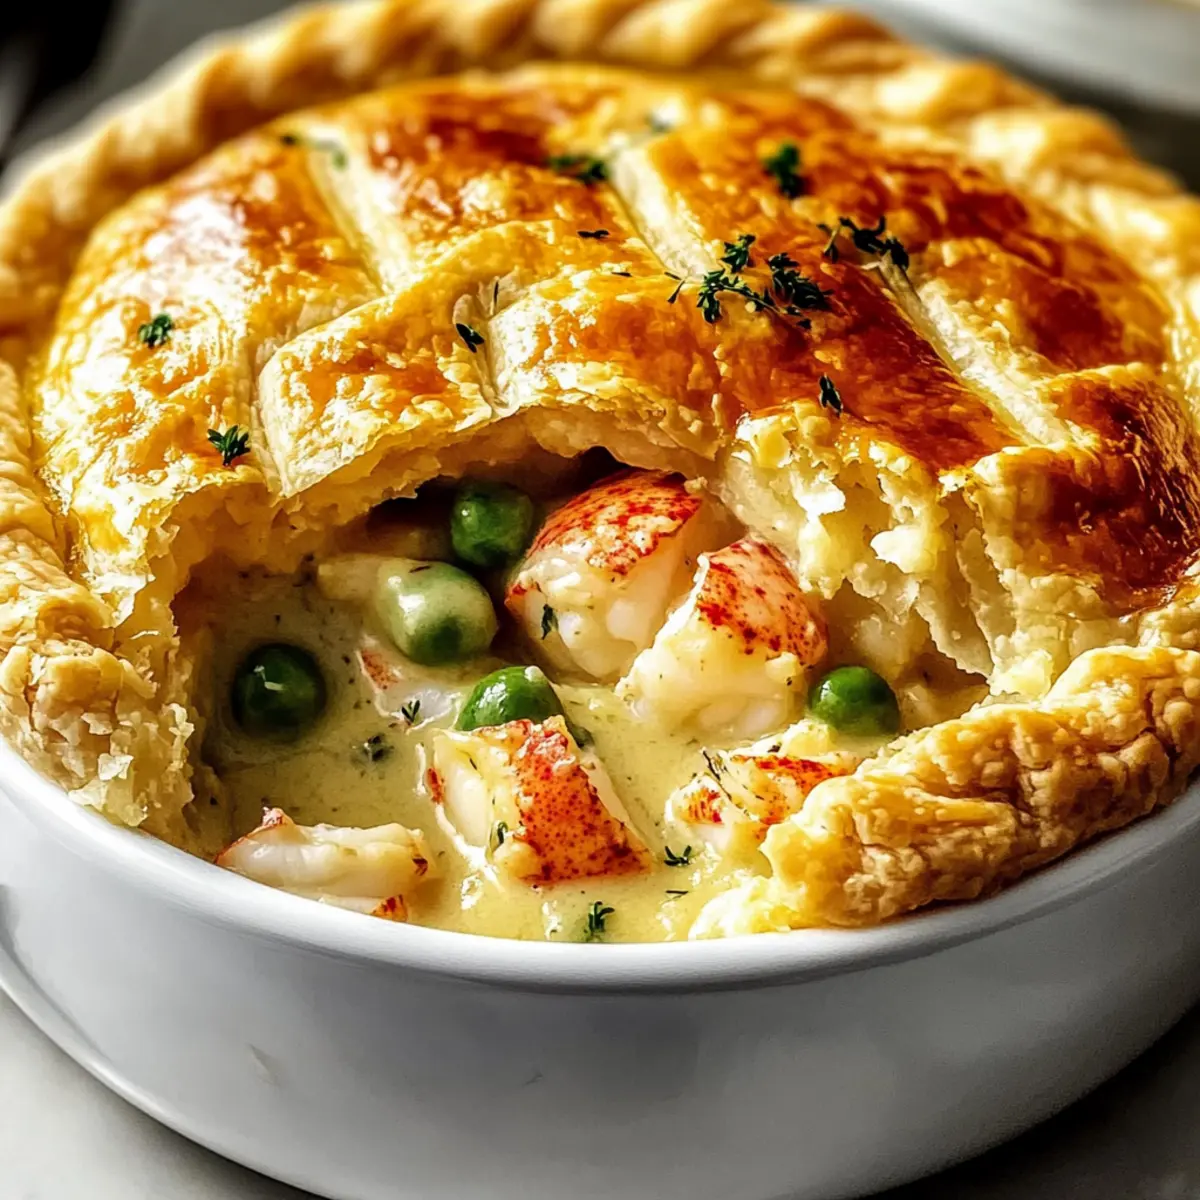
As I stood in my kitchen, the scent of sautéed onions and garlic wafted through the air, instantly transporting me to a seaside cottage where the waves crash harmoniously with the gentle whispers of a culinary masterpiece. This is the magic of my Lobster Pot Pie—a comforting seafood classic that wraps you in warmth with every sumptuous bite. The tender lobster meat, coated in a velvety creamy sauce, is cradled by a buttery, flaky crust that’s simply irresistible. What I love most about this seafood comfort food is its adaptability; whether you’re a lobster lover or prefer shrimp, there’s a delightful twist awaiting you. Plus, it’s perfect for those cozy evenings at home or festive gatherings with friends and family. Are you ready to dive into this fabulous dish and add a touch of coastal charm to your table?
Why is Lobster Pot Pie So Irresistible?
Comforting Delight: This Lobster Pot Pie is the ultimate cozy dish that wraps you in warmth with every luscious bite.
Versatile Options: You can easily customize it by swapping lobster for shrimp or your favorite seafood, offering endless variations.
Time-Saving Magic: With pre-made pie crusts, you save time without sacrificing flavor, making it a perfect weeknight indulgence.
Crowd-Pleasing Appeal: Whether it’s a family dinner or a gathering with friends, this dish is sure to impress and satisfy everyone at the table.
Make-Ahead Convenience: Prep it in advance and simply bake when you’re ready to enjoy a seafood feast, allowing you to spend more time with your guests.
Side Pairing Perfection: Serve with a crisp green salad or warm garlic bread for a well-rounded meal, just like you’ll find with my One Pot Chicken or Pumpkin Pie Tacos.
Lobster Pot Pie Ingredients
For the Filling
- Lobster Meat – Provides rich flavor and texture; swap with cooked shrimp or other seafood if desired.
- Heavy Cream – Adds creaminess and richness; can be replaced with unsweetened coconut milk for a dairy-free option.
- Chicken or Seafood Stock – Provides depth and enhances flavor; use homemade for the best results.
- Onion – Offers aromatic base and sweetness; diced onion ensures even cooking.
- Garlic – Enhances flavors with its aromatic essence; minced garlic cooks quickly and blends well.
- Carrots – Adds sweetness and vibrant color; diced for even dispersion in the filling.
- Celery – Provides crunch and additional flavor; diced to match other vegetables.
- Frozen Peas – Contributes sweetness and bright color; no preparation needed.
- Fresh Thyme – Infuses earthy aroma and flavor; double for more depth in your Lobster Pot Pie.
- Lemon Juice – Brightens flavors and adds zesty acidity; essential for a balanced filling.
- Salt – Enhances all flavors for a well-rounded dish.
- Black Pepper – Adds subtle heat and depth.
- Olive Oil – Used for sautéing vegetables to infuse richness.
For the Crust
- Pre-made Pie Crusts – Simplifies the recipe while delivering a flaky texture; homemade crust can add an extra touch.
- Egg (Beaten) – For brushing the pie crust to achieve a golden finish.
Step‑by‑Step Instructions for Lobster Pot Pie
Step 1: Preheat the Oven
Begin by preheating your oven to 400°F (204°C). This step is crucial, as it ensures even baking of the pie crust, leaving it beautifully golden and flaky. Take a moment to gather your ingredients and prep your workspace for a smooth cooking experience.
Step 2: Sauté Aromatics
In a large skillet, heat 2 tablespoons of olive oil over medium heat. Add 1 diced onion and 2 minced garlic cloves, cooking for about 4-5 minutes until the onion is translucent and fragrant. Stir occasionally to avoid burning and bring out the sweet aroma that will be the base of your delicious Lobster Pot Pie.
Step 3: Add Vegetables
Once the onions are nicely softened, stir in 1 cup of diced carrots and 1 cup of diced celery. Continue to sauté the mixture for another 5 minutes, allowing the vegetables to soften and release their natural sweetness. This colorful medley will enhance the flavor and texture of your filling.
Step 4: Create Creamy Base
Pour in 1 cup of heavy cream and 1 cup of chicken or seafood stock into the skillet. Bring the mixture to a gentle simmer, cooking until it thickens slightly—about 5-7 minutes. Stir frequently to incorporate the flavors and ensure a rich and creamy base for your Lobster Pot Pie without scorching the bottom.
Step 5: Fold in Lobster and Peas
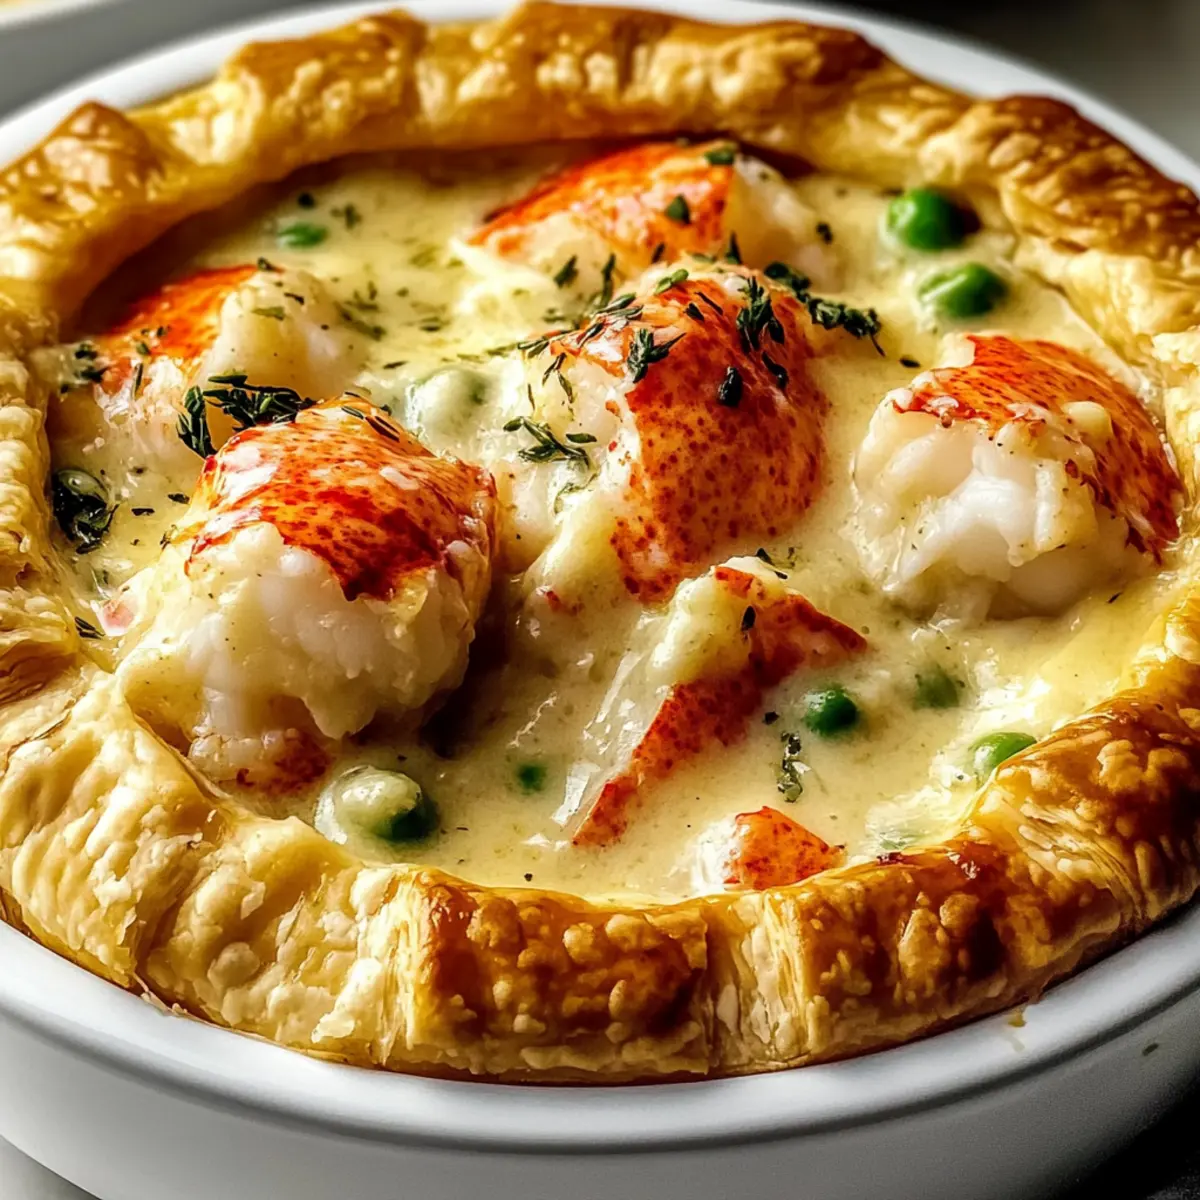
Carefully add 2 cups of cooked lobster meat and 1 cup of frozen peas to your creamy mixture. Stir gently for an additional 5 minutes, allowing the lobster to heat through and the flavors to meld. This step ensures the lobster remains tender while absorbing the delicious creaminess surrounding it.
Step 6: Season Filling
Now, season your filling with 1 tablespoon of fresh thyme, the juice of half a lemon, and a pinch of salt and black pepper to taste. Mix well to ensure all the ingredients are well combined, enhancing the overall flavor of your Lobster Pot Pie. This balance of seasoning is essential for a delightful experience.
Step 7: Assemble the Pie
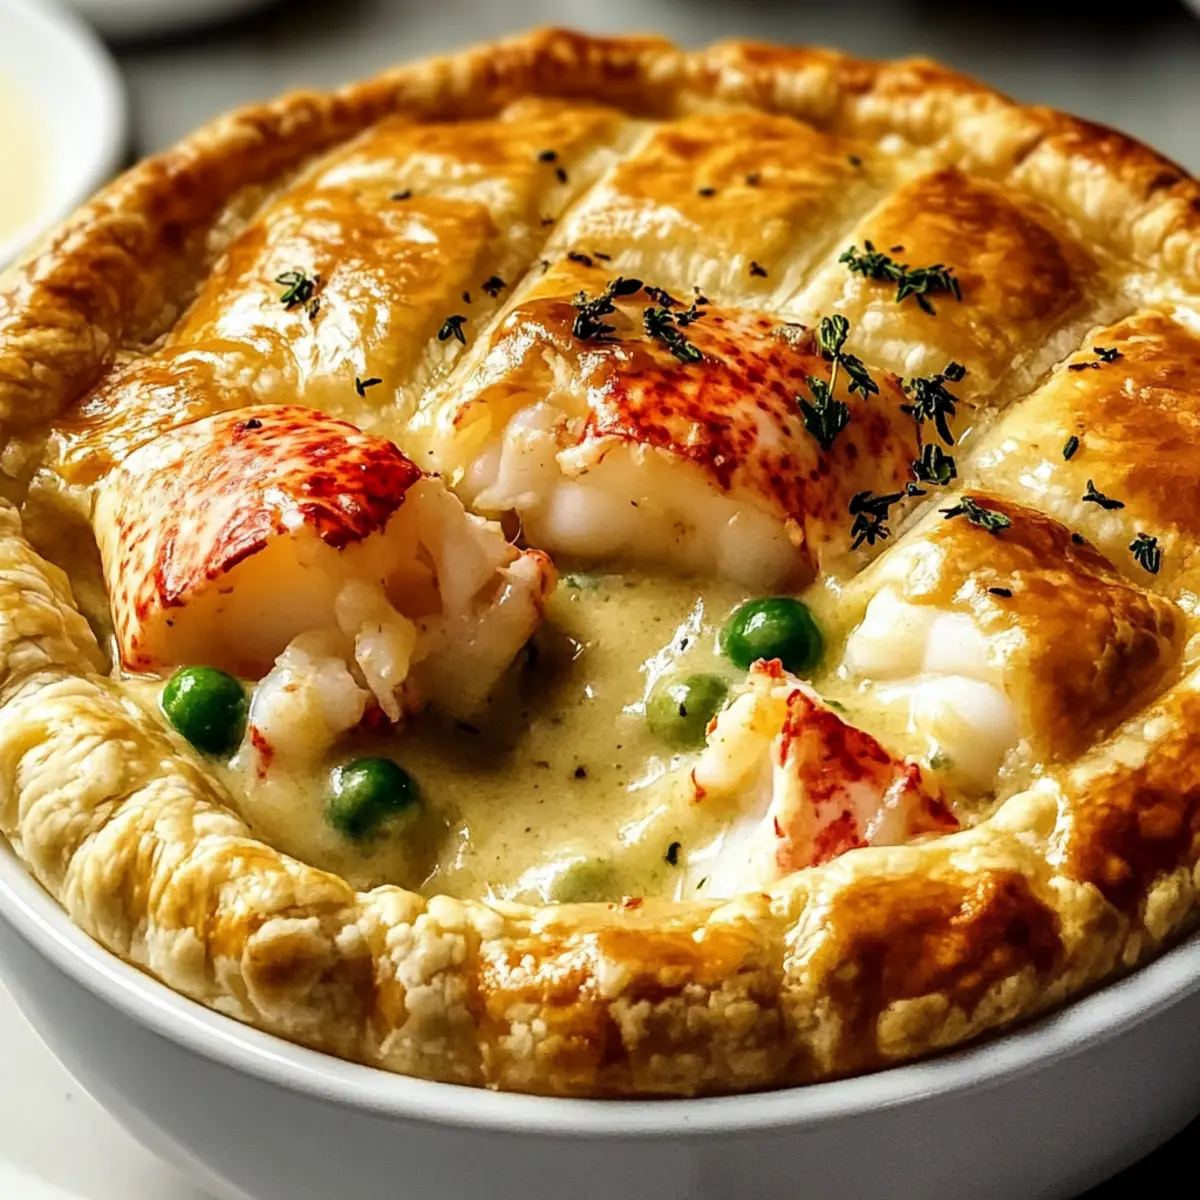
Roll out one pre-made pie crust and lay it into a 9-inch pie dish. Spoon the creamy lobster mixture into the crust, spreading it evenly. Cover it with the second pie crust, crimping the edges to seal in all the flavorful goodness. Cut a few steam vents on top to allow the filling to breathe during baking.
Step 8: Brush with Egg Wash
Using a beaten egg, brush the top crust lightly for that golden finish. This step is crucial, as it will give your Lobster Pot Pie a beautifully browned crust, making it visually appealing when it comes out of the oven. Don’t forget to decorate with optional slits or designs for an extra touch!
Step 9: Bake
Place the assembled pie in the preheated oven and bake for 30-35 minutes. Keep an eye on it until the crust is golden brown and the filling is bubbling through the steam vents. This visual cue indicates that your Lobster Pot Pie is ready to be taken out, cooling instantly fills the kitchen with cozy aromas.
Step 10: Rest Before Serving
Once baked, allow the Lobster Pot Pie to rest for 10-15 minutes before slicing. This resting period lets the filling set properly, making it easier to cut and serve. The warm, creamy goodness will be worth the wait, providing a delightful seafood comfort food experience for you and your loved ones.
Variations & Substitutions for Lobster Pot Pie
Feel free to explore countless delightful twists on your Lobster Pot Pie, enhancing flavors and textures to suit your palate!
-
Seafood Swap: Substitute lobster with cooked shrimp or mixed seafood; it’ll deliver a delightful twist.
-
Dairy-Free Delight: Use unsweetened coconut milk instead of heavy cream for a lighter, dairy-free option.
-
Seasonal Veggies: Swap out carrots for parsnips or incorporate sautéed leeks for a seasonal touch and extra flavor.
-
Herb Enhancements: Experiment with aromatic herbs like dill or parsley in place of thyme; they bring a fresh burst of flavor.
-
Spicy Kick: Add a pinch of red pepper flakes or a splash of hot sauce for an unexpected heat that excites the palate.
-
Textural Change: Top the pie with panko breadcrumbs before baking for a crispy, crunchy finish that contrasts beautifully with the creamy filling.
-
Umami Boost: Stir in a dash of Worcestershire sauce or soy sauce to deepen the savory notes of your filling, creating a more complex flavor experience.
For a cozy evening, don’t miss out on pairing your Lobster Pot Pie with a refreshing green salad or warm garlic bread that complements the seafood delight beautifully. If you’re looking for something different, consider checking out my One Pot Broccoli or Salted Honey Pie for more delicious options!
Make Ahead Options
These Lobster Pot Pies are perfect for busy home cooks looking to save time without sacrificing flavor! You can prepare the creamy lobster filling up to 3 days ahead of time, storing it in the refrigerator in an airtight container to maintain its quality. When ready to bake, simply spoon the chilled filling into your pre-made pie crusts, cover with the second crust, and brush with the egg wash. If you’re looking to prep further in advance, you can assemble the entire pot pie and freeze it unbaked for up to 3 months. Just be sure to wrap it tightly to prevent freezer burn. When it’s time for dinner, bake the frozen pie straight from the freezer, adding an extra 10-15 minutes to the baking time for golden, bubbling perfection.
Expert Tips for Lobster Pot Pie
-
Thaw Properly: Ensure frozen lobster is fully thawed before cooking. This prevents a rubbery texture and enhances flavor in your Lobster Pot Pie.
-
Pre-Bake Crust: To avoid a soggy bottom, consider pre-baking your bottom pie crust for 5-7 minutes before adding the filling. This helps maintain a flaky texture.
-
Season Generously: Don’t skimp on seasoning! A well-balanced mix of salt, pepper, and fresh herbs is key to amplifying the flavors in your seafood comfort food.
-
Let it Rest: Allow your Lobster Pot Pie to rest for 10-15 minutes after baking. This helps the filling set, making it easier to slice without spilling.
-
Experiment with Fillings: Feel free to mix it up! Swap lobster for shrimp or other seafood and play with seasonal veggies to tailor the Lobster Pot Pie to your taste.
-
Use Fresh Ingredients: Whenever possible, opt for fresh herbs and vegetables. They elevate the flavor and aroma, enhancing the overall quality of your comforting dish.
How to Store and Freeze Lobster Pot Pie
Fridge: Store cooled leftovers in an airtight container for up to 2 days, ensuring the pie remains fresh and flavorful.
Freezer: For longer storage, wrap the unbaked Lobster Pot Pie tightly in plastic wrap and freeze for up to 3 months.
Reheating: Bake refrigerated cooked pie at 350°F (175°C) for 25-30 minutes, or from frozen for 45-50 minutes until bubbly and heated through.
What to Serve with Ultimate Lobster Pot Pie
As you savor the warm, creamy goodness of lobster pot pie, consider these delightful companions to elevate your meal.
-
Crisp Green Salad: A refreshing salad with mixed greens, cherry tomatoes, and a light lemon vinaigrette balances the richness of the pie perfectly. The acidity brightens each bite, making every mouthful memorable.
-
Warm Garlic Bread: The buttery garlic bread delivers a crunchy texture that pairs beautifully with the soft filling of the pie, creating a comforting contrast that will leave you craving more.
-
Roasted Asparagus: Lightly seasoned with olive oil and a hint of lemon, roasted asparagus adds a vibrant flavor and fresh crunch that complements the seafood, making your plate visually appealing and wholesome.
-
Creamy Coleslaw: A tangy coleslaw brings both creaminess and crunch, offering a delightful contrast to the lobster pot pie’s texture; the flavors work brilliantly together, enhancing your dining experience.
-
Chilled White Wine: Serve your favorite chilled white wine, like a crisp Sauvignon Blanc, to create a harmonious pairing. Its acidity cuts through the richness, making every sip refreshing alongside the pie.
-
Decadent Chocolate Mousse: End your meal on a sweet note with a creamy chocolate mousse. The silky dessert leaves a luscious finish and a hint of indulgence that rounds out your comforting seafood feast.
Lobster Pot Pie Recipe FAQs
How do I select the best lobster meat?
Absolutely! When choosing lobster meat, look for freshness and quality. If you’re buying whole lobsters, opt for those with firm shells and no strong odor. For pre-cooked meat, ensure it’s a pearly white color with no dark spots. If substituting, go for cooked shrimp or crab meat for similar texture and flavor.
What’s the best way to store leftover Lobster Pot Pie?
Very! To store leftovers, let the pie cool completely and then transfer it to an airtight container. It should remain good for up to 2 days in the refrigerator. To keep the flavors intact, make sure it’s tightly sealed to prevent any odors from the fridge affecting the pie.
Can I freeze Lobster Pot Pie?
The more the merrier! To freeze, wrap the unbaked Lobster Pot Pie tightly in plastic wrap and then in aluminum foil to prevent freezer burn. It can be kept in the freezer for up to 3 months. When you’re ready to enjoy it, bake directly from frozen, adding about 10-15 extra minutes to the cooking time.
What should I do if my pie crust gets soggy?
Ensure a crispy base is essential! If you notice your bottom crust turning soggy, you can pre-bake it for 5-7 minutes at 400°F (204°C) before adding the filling. You could also use a baking sheet underneath to help distribute the heat more evenly while it bakes.
Are there dietary considerations I should be aware of?
Yes, indeed! If you or your guests have seafood allergies, you can easily adapt this recipe by using chicken or a vegetable filling instead. For those with dairy restrictions, substituting heavy cream with coconut milk can work wonderfully for a dairy-free option. Always check for allergies with guests before serving.
How do I prevent the filling from spilling out when I cut the pie?
To avoid a messy situation, it’s vital to let your Lobster Pot Pie rest for 10-15 minutes after baking. This resting time allows the filling to set, making it easier to slice cleanly without the filling oozing out. It may require some patience, but it’ll be worth it when serving!

Lobster Pot Pie: Cozy Comfort Food You'll Adore
Ingredients
Equipment
Method
- Preheat your oven to 400°F (204°C).
- In a large skillet, heat 2 tablespoons of olive oil over medium heat. Add 1 diced onion and 2 minced garlic cloves, cooking for about 4-5 minutes until the onion is translucent and fragrant.
- Stir in 1 cup of diced carrots and 1 cup of diced celery, sautéing for another 5 minutes until the vegetables soften.
- Pour in 1 cup of heavy cream and 1 cup of chicken or seafood stock. Simmer until it thickens slightly, about 5-7 minutes.
- Add 2 cups of cooked lobster meat and 1 cup of frozen peas to the mixture and stir gently for 5 minutes.
- Season your filling with 1 tablespoon of fresh thyme, the juice of half a lemon, salt, and black pepper. Mix well.
- Roll out one pie crust into a 9-inch pie dish. Spoon the lobster mixture into the crust and cover with the second crust, sealing the edges.
- Brush the top crust with a beaten egg for a golden finish and cut steam vents in the top.
- Bake in the preheated oven for 30-35 minutes until the crust is golden brown.
- Let the pie rest for 10-15 minutes before slicing and serving.
Leave a Reply