
As I flipped through a cherished recipe book, a tart little memory sparked joy—a dessert that could whisk anyone away to sun-soaked days. These Easy Mini No-Bake Lemon Cheesecake Tarts are your secret weapon for delighting family and friends without the fuss. With just 20 minutes of prep, you can create a tangy, creamy filling perched atop a buttery graham cracker crust, perfect for any occasion or whenever you need a sweet pick-me-up. Not only is this recipe a breeze to whip up, but it’s also a guilt-free treat, thanks to the option of a gluten-free crust. Are you ready to make a dessert that combines simplicity and irresistible flavor? Let’s dive in!

Why are these tarts a game-changer?
Simplicity at its finest: With just 20 minutes of prep time, you’ll have impressive desserts that don’t require any baking skills. Lemon Bliss: The bright, zesty lemon filling offers a refreshing contrast to the creamy, sweet base, creating a taste that dances on your palate. Flexible and adaptable: Want a gluten-free option? Simply swap in almond flour for the crust! Perfect for Any Occasion: From casual family dinners to elegant parties, these tarts are sure to be a hit. And if you’re in the mood for more fruity delights, check out these delectable Fried Strawberry Cheesecake options too!
Mini No-Bake Lemon Cheesecake Tarts Ingredients
For the Crust
- Graham Cracker Crumbs – The perfect base providing structure and crunch; can be swapped with almond flour for a gluten-free option.
- Unsalted Butter (melted) – Binds the crust together, adding a rich flavor to each bite.
- Granulated Sugar – Sweetens the crust, enhancing its delightful flavor.
For the Filling
- Cream Cheese (softened) – The creamy main component that makes this filling a delight!
- Powdered Sugar – Adds extra sweetness and a smooth texture for the filling.
- Heavy Whipping Cream – Whipped to fluffy peaks, lightening up the cream cheese filling for a decadent touch.
- Fresh Lemon Juice – Infuses the filling with refreshing tartness, balancing out the sweetness beautifully.
- Whole Lemon Zest – Intensifies that wonderful lemon flavor, adding an aromatic punch.
- Vanilla Extract – Enhances the overall flavor, bringing depth to each tart.
Step‑by‑Step Instructions for Mini No-Bake Lemon Cheesecake Tarts
Step 1: Prepare the Crust
In a mixing bowl, combine graham cracker crumbs, melted butter, and granulated sugar. Stir until the mixture resembles wet sand. Firmly press this mixture into the bottom and up the sides of miniature tart pans, ensuring an even thickness. Place the tart shells in the refrigerator for about 15 minutes to set, allowing them to hold their shape when filled.
Step 2: Make the Filling
In another bowl, beat the softened cream cheese with powdered sugar using an electric mixer on medium speed until smooth and creamy, about 2-3 minutes. Gradually add in freshly squeezed lemon juice, lemon zest, and vanilla extract, mixing until everything is fully combined and there are no lumps. The filling should be thick and creamy, perfect for your Mini No-Bake Lemon Cheesecake Tarts.
Step 3: Whip the Cream
In a separate chilled bowl, pour in your heavy whipping cream. Using an electric mixer, whip on high speed until stiff peaks form, which should take around 3-5 minutes. Be careful not to over-whip, as you want the cream to remain fluffy. This whipped cream will add a lightness to your filling, enhancing the overall texture of the tarts.
Step 4: Combine the Mixtures
Gently fold the whipped cream into the cream cheese mixture using a spatula, being careful to maintain the airy texture. Use a light hand to ensure the filling stays fluffy and creamy. This mixture will be the luscious filling for your Mini No-Bake Lemon Cheesecake Tarts, balancing sweetness and tanginess beautifully.
Step 5: Assemble the Tarts
Remove the chilled crusts from the refrigerator. Spoon the lemon cheesecake filling into each tart shell, smoothing the tops with a spatula to create an even surface. Ensure that the filling is mounded slightly at the center for an appealing presentation. Once filled, return the tarts to the refrigerator for at least 2 hours to allow them to set properly.
Step 6: Serve and Enjoy
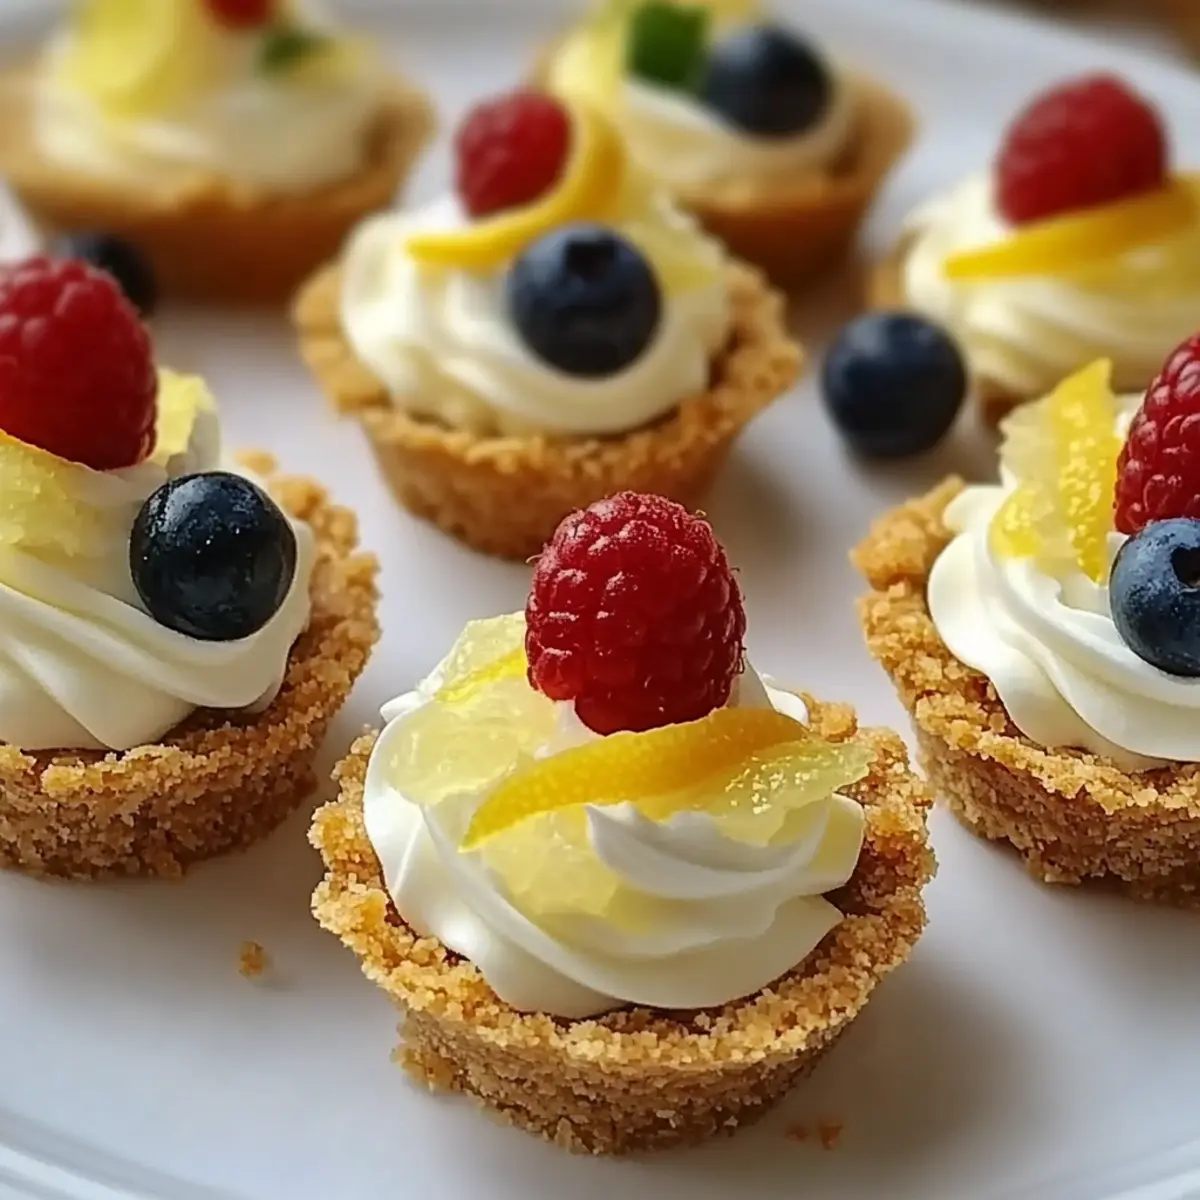
Once the tarts have set, carefully remove them from the tart pans. Garnish with additional lemon zest, fresh berries, or a dollop of whipped cream, as desired. Serve chilled for the best flavor experience. These Mini No-Bake Lemon Cheesecake Tarts are now ready to impress your friends and family while offering a delightfully refreshing dessert option!
Make Ahead Options
These Mini No-Bake Lemon Cheesecake Tarts are a fantastic choice for busy cooks looking to save time! You can prepare the graham cracker crust up to 24 hours in advance; simply press it into the tart pans and refrigerate. The creamy filling can also be made ahead and stored in the refrigerator for up to 3 days. To maintain the filling’s delightful fluffiness, refrigerate it in an airtight container. When you’re ready to assemble, just spoon the filling into the chilled crusts and let them set for at least 2 hours. This way, you’ll have a refreshing dessert ready to impress, with minimal last-minute effort!
Storage Tips for Mini No-Bake Lemon Cheesecake Tarts
Fridge: Store leftovers in an airtight container in the refrigerator for up to 3 days. Enjoy chilled for the best flavor and texture.
Freezer: These tarts do not freeze well, as the cream filling can become grainy upon thawing. It’s best to consume them fresh.
Serving Fresh: For the ultimate taste experience, serve the tarts directly from the fridge, garnished with extra lemon zest or berries just before enjoying.
Expert Tips for Mini No-Bake Lemon Cheesecake Tarts
- Soften Properly: Ensure your cream cheese is at room temperature to avoid any lumps in the filling, giving you a smooth and creamy texture.
- Gentle Folding: When combining the whipped cream with the cream cheese mixture, fold gently. This helps maintain the airy lightness in your Mini No-Bake Lemon Cheesecake Tarts.
- Chill Time Matters: For the best flavor, let your tarts chill for at least 2 hours. This allows the filling to set perfectly, enhancing the overall taste experience.
- Don’t Overwhip: While whipping the cream, stopping at stiff peaks is crucial. Overwhipping can lead to a grainy texture, which we definitely want to avoid!
- Serve Fresh: Enjoy these tarts within 3 days for optimal freshness. They don’t freeze well, so revel in their delightful taste while they last!
What to Serve with Mini No-Bake Lemon Cheesecake Tarts?
Elevate your dessert experience with delightful pairings that complement the vibrant flavors of these lemony tarts.
- Iced Tea: A refreshing, lightly sweetened iced tea balances the tartness of the lemon, making every bite sing.
- Fresh Berries: Juicy strawberries, raspberries, or blueberries not only add color but also an earthy sweetness that beautifully contrasts with the creamy filling.
- Coconut Whipped Cream: For a tropical twist, serve these tarts with a dollop of luscious coconut whipped cream, enhancing the dessert’s texture.
- Mint Leaves: A sprig of fresh mint provides a burst of freshness, cutting through the richness and elevating the overall flavor profile of the tarts.
Pair this dessert with light and fruity salads. Toss together mixed greens, citrus segments, and a light vinaigrette. The freshness of the salad creates a perfect palate cleanser while bringing a hint of brightness to your meal.
- Sparkling Water: An effervescent sparkling water with a slice of lemon brings a refreshing cleanse to your palate between bites of cheesecake tarts.
- Frozen Yogurt: A scoop of plain or lemon-infused frozen yogurt can add a creamy, tangy element, enhancing the overall experience.
Consider this variety of pairings that not only highlight the tarts’ flavors but provide a wonderful experience at your gathering.
Mini No-Bake Lemon Cheesecake Tarts Variations
I love how easy it is to make these delightful tarts your own—let your creative flair shine in the kitchen!
- Gluten-Free: Substitute graham cracker crumbs with almond flour and melted coconut oil for a delicious, gluten-free crust.
- Citrus Burst: For a refreshing twist, mix in lime or orange zest with the lemon for a vibrant flavor boost.
- Berry Swirl: Add a fruit puree like raspberry or strawberry into the filling for a delightful, colorful marbled effect.
- Chocolate Drizzle: Elevate the dessert with a drizzle of melted dark chocolate over the tarts just before serving for an indulgent touch.
- Nutty Crunch: Sprinkle chopped nuts, like pecans or almonds, on top of the filling for added texture and flavor contrast.
- Mini Versions: Use mini muffin tins for bite-sized tarts that are perfect for parties—just adjust the chilling time accordingly.
- Savory Twist: Add a pinch of sea salt to the filling for that sweet-and-salty combination everyone loves.
- Serving Suggestions: Pair these with a fresh Lemon Balsamic Lentil salad for a lovely complement to your meal!
Your taste buds will thank you for the creative journey!

Mini No-Bake Lemon Cheesecake Tarts Recipe FAQs
How do I select the right lemons for this recipe?
Absolutely! When choosing lemons, look for ones that are bright yellow and firm to the touch. They should feel heavy for their size, indicating juiciness. Avoid lemons that have dark spots or a dull color, as this can indicate overripeness. Fresh lemons will give you the tangy zest and juice that make these Mini No-Bake Lemon Cheesecake Tarts shine.
How should I store leftover tarts, and how long do they last?
You should store any leftover Mini No-Bake Lemon Cheesecake Tarts in an airtight container in your refrigerator. They will remain fresh for up to 3 days. For best flavor and texture, enjoy them chilled and avoid leaving them out at room temperature for extended periods.
Can I freeze these Mini No-Bake Lemon Cheesecake Tarts?
I do not recommend freezing these tarts as the creamy filling can become grainy when thawed. However, if you need to store them for later, you can freeze the crusts separately. To do this, prepare the crust, press it into your tart pans, and freeze. Once the crusts are frozen solid, wrap them tightly in plastic wrap and aluminum foil, and they can stay in the freezer for up to 3 months. Just refill with the fresh creamy filling when you’re ready to serve!
What do I do if my cream cheese mixture is lumpy?
No worries! If you find that your cream cheese mixture is lumpy, it’s important to ensure the cream cheese is softened properly before mixing. If lumps persist, you can use a hand mixer on low speed to cream the mixture more thoroughly. Alternatively, you can pass the filling through a fine-mesh sieve to remove any lumps, ensuring your Mini No-Bake Lemon Cheesecake Tarts have that silky smooth texture we all love.
Are these tarts suitable for gluten-sensitive diners?
Very! Simply swap the graham cracker crumbs in the crust with almond flour for a gluten-free option. This adjustment allows everyone to enjoy these delicious Mini No-Bake Lemon Cheesecake Tarts without compromising on flavor or texture, making it a delightful dessert for all your guests!

Mini No-Bake Lemon Cheesecake Tarts You'll Love Every Bite
Ingredients
Equipment
Method
- In a mixing bowl, combine graham cracker crumbs, melted butter, and granulated sugar. Stir until the mixture resembles wet sand. Firmly press this mixture into the bottom and up the sides of miniature tart pans, ensuring an even thickness. Place the tart shells in the refrigerator for about 15 minutes to set.
- In another bowl, beat the softened cream cheese with powdered sugar using an electric mixer on medium speed until smooth and creamy, about 2-3 minutes. Gradually add in freshly squeezed lemon juice, lemon zest, and vanilla extract, mixing until fully combined. The filling should be thick and creamy.
- In a separate chilled bowl, whip the heavy whipping cream until stiff peaks form, about 3-5 minutes. Be careful not to over-whip, as you want the cream to remain fluffy.
- Gently fold the whipped cream into the cream cheese mixture using a spatula, being careful to maintain the airy texture.
- Remove the chilled crusts from the refrigerator and spoon the lemon cheesecake filling into each tart shell, smoothing the tops. Return the tarts to the refrigerator for at least 2 hours to set.
- Once the tarts have set, carefully remove them from the pans. Garnish with additional lemon zest, fresh berries, or whipped cream before serving chilled.
Leave a Reply