
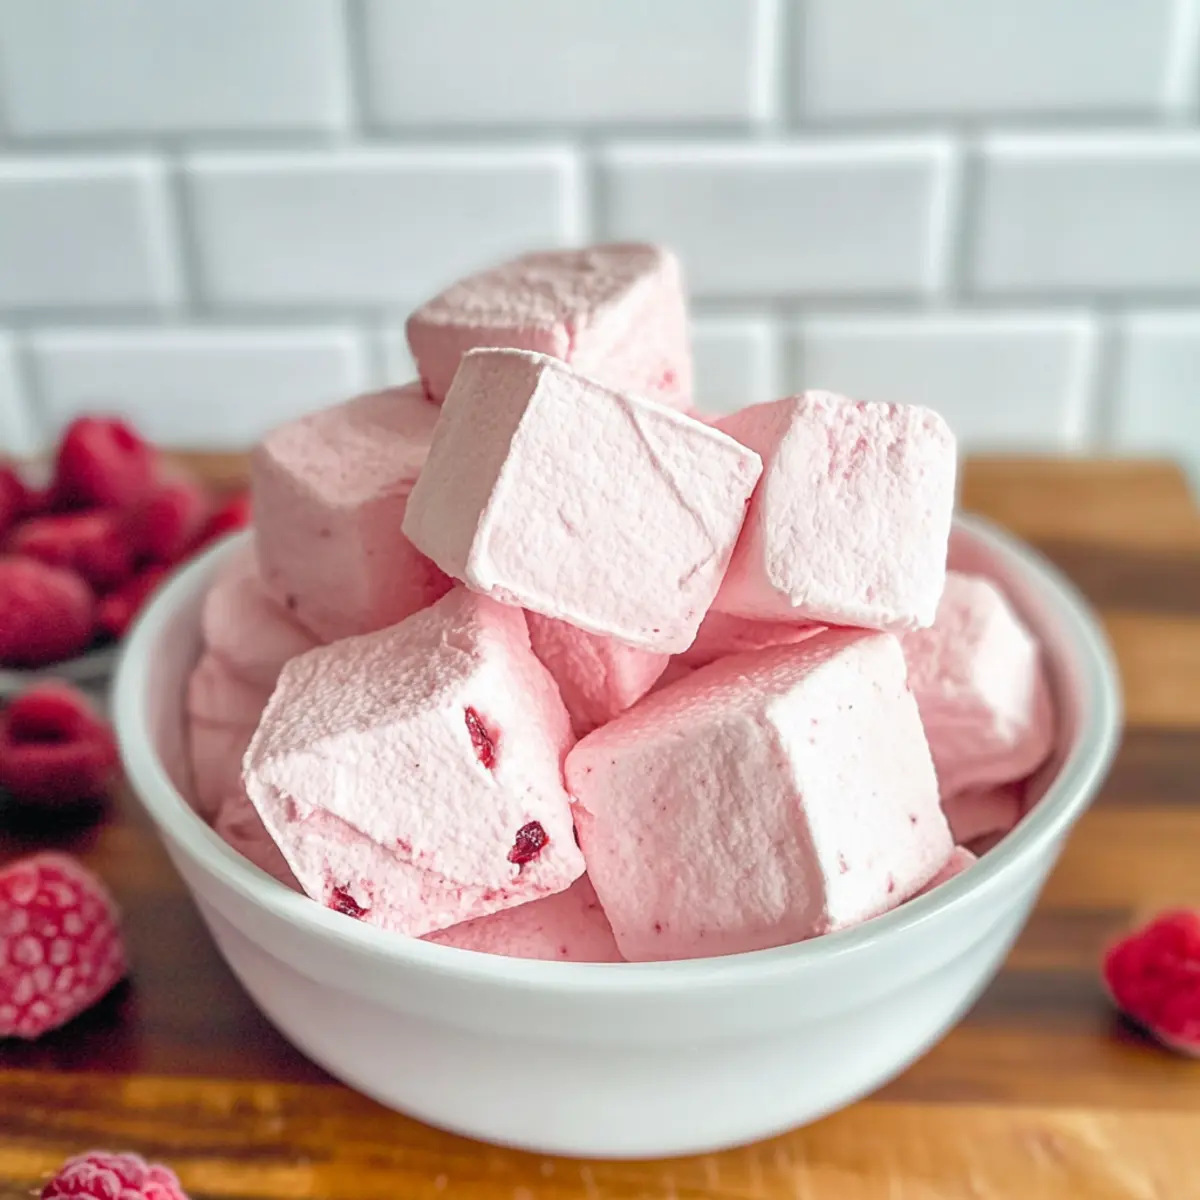
As I stood in my kitchen, the sweet scent of ripe raspberries filled the air, instantly transporting me to carefree summer days. Today, I’m excited to share my recipe for Homemade Raspberry Marshmallows, a delightful treat that’s as fun to make as it is to eat! These fluffy, corn syrup-free marshmallows are naturally sweetened with honey or maple syrup, making them a healthier option for cravings and a perfect addition to any dessert table. Not only do they whip up quickly with simple ingredients, but they’re also paleo and gluten-free, catering to those of us eager to indulge without the guilt. Whether popping them into a cup of hot cocoa or enjoying them on their own, these marshmallows will elevate your snacking game. Want to discover how to create this light and airy confection that’s sure to impress? Keep scrolling for the recipe!
Why Are Raspberry Marshmallows So Magical?
Delightfully Fluffy: These marshmallows are incredibly soft and airy, creating a melt-in-your-mouth experience. Wholesome Ingredients: Made with natural sweeteners and gluten-free alternatives, they’re a treat you can feel good about. Endless Versatility: Enjoy them alone, in hot cocoa, or as a topping on your desserts. Quick and Easy: With just a few minutes of prep, you can have a batch ready to enjoy! For an even more exciting treat, check out these White Chocolate Raspberry balls that pair wonderfully with marshmallows. Healthier Snacking: Enjoy a sweet treat that’s free from refined sugars and corn syrup—perfect for satisfying those cravings without the guilt!
Raspberry Marshmallow Ingredients
• Discover the ideal components for fluffy raspberry marshmallows!
For the Raspberry Puree
- Frozen Raspberries – Adds natural fruit flavor and moisture; fresh raspberries can be used but adjust water to maintain consistency.
- Freeze-Dried Raspberries – Intensifies the raspberry flavor without adding moisture; substitute with more frozen raspberries if needed.
For the Marshmallow Base
- Grass-Fed Gelatin – Provides structure and fluffiness; you can explore vegan substitutes, although the texture may vary.
- Vanilla Extract – Enhances the overall flavor; use pure vanilla for the best results.
- Water – Essential for dissolving ingredients and achieving the proper consistency.
For Sweetness
- Honey or Maple Syrup – Natural sweeteners that give flavor and moisture; agave syrup can be a vegan alternative.
This delightful combination creates the perfect recipe for raspberry marshmallows, making your homemade treats both healthier and tastier!
Step‑by‑Step Instructions for Raspberry Marshmallows
Step 1: Prepare the Pan
Begin by prepping a 9×9 inch baking pan. Line it with parchment paper, ensuring the paper extends over the edges for easy removal later. Next, generously spray the parchment with oil to prevent sticking, creating a perfect canvas for your raspberry marshmallows to set.
Step 2: Make Raspberry Puree
In a blender, combine 1/2 cup of water with frozen raspberries and freeze-dried raspberries. Blend the mixture until smooth, which should take about 1-2 minutes. Once blended, strain the puree through a fine sieve to remove seeds, ensuring a silky texture that adds delightful fruitiness to your marshmallows.
Step 3: Combine Gelatin and Flavors
In a stand mixer bowl, combine the raspberry puree with grass-fed gelatin and vanilla extract. Mix gently until well combined, then let the mixture sit for about 5-10 minutes to allow the gelatin to bloom. This step is crucial as it contributes to the fluffy texture of your raspberry marshmallows.
Step 4: Cook the Syrup
In a small pot, combine 1/2 cup of water with honey or maple syrup. Heat the mixture over medium-high heat, bringing it to a rolling boil. Monitor the temperature closely, aiming to reach between 220°F and 240°F, which should take around 10 minutes. Once the syrup bubbles vigorously, it’s ready for the next step.
Step 5: Incorporate Syrup into the Mixture
Carefully remove the syrup from the heat and slowly drizzle it into the bloomed raspberry mixture while whisking at low speed. Once all the syrup is added, increase the speed to high. Whisk for about 2-3 minutes, or until the mixture triples in size and becomes thick and glossy, resembling a fluffy cloud.
Step 6: Pour and Smooth
Pour the marshmallow mixture into the prepared pan, using a spatula to spread it evenly. If needed, lightly wet your hands to help smooth the surface without the mixture sticking. This step ensures even thickness, allowing the raspberry marshmallows to set uniformly.
Step 7: Let Marshmallows Set
Cover the pan with a clean kitchen towel or plastic wrap. Allow the marshmallows to sit at room temperature for 30-60 minutes, giving them time to firm up. This is the moment when the magic happens, transforming your mixture into delightfully soft raspberry marshmallows ready to be cut.
Step 8: Cut and Store
Once set, remove the marshmallow slab from the pan using the parchment paper. On a clean surface, use scissors or a sharp knife to cut the marshmallows into squares or desired shapes. Store your raspberry marshmallows in an airtight container at room temperature for up to 5 days, and enjoy this fluffy, sweet delight!
Expert Tips for Raspberry Marshmallows
-
Mixing Time Matters: Avoid over-mixing the marshmallow mixture—stop as soon as it triples in size and holds its shape to prevent a dense texture.
-
Cutting Technique: Use kitchen scissors instead of a knife for cutting marshmallows. This approach ensures clean edges and prevents sticking.
-
Adjust Water Carefully: If you’re omitting freeze-dried raspberries, adjust the water content accordingly to avoid excess liquid that could make your raspberry marshmallows too soft.
-
Flavor Variations: Feel free to experiment with other fruit purees or flavored extracts to create delightful twists and personal touches in your raspberry marshmallows.
-
Gelatin Alternatives: If opting for a vegan version, choose the right substitute for gelatin, such as agar-agar, but be prepared for potential texture differences.
-
Storage Tips: Keep your marshmallows in an airtight container at room temperature to maintain that fluffy texture; refrigeration isn’t necessary and can change their consistency.
Raspberry Marshmallows Variations & Substitutions
Feel free to get creative with these delightful marshmallows, making them your own with a few easy swaps!
- Fruit Flavor Swap: Substitute frozen raspberries with pureed strawberries or mangoes for a refreshing twist. The vibrant colors and flavors will make each batch uniquely delightful.
- Vegan Marshmallows: Use agar-agar instead of gelatin to create a vegan version. This swap will give you a chewy texture, perfect for those who prefer plant-based options!
- Sweetener Options: Replace honey or maple syrup with agave syrup for a vegan alternative that maintains the sweet and flavorful essence of your marshmallows. Taste buds will be happy!
- Flavor Boost: Experiment by adding infused extracts like almond, coconut, or mint to elevate the flavor profile of your marshmallows. Surprise your guests with unexpected flavor delights!
- Nut Butter Addition: Stir in a couple of tablespoons of almond or peanut butter for a creamy, nutty twist that adds richness and depth to the marshmallow experience.
- Chocolate Drizzle: Once your marshmallows are cut, drizzle melted dark chocolate over them for an indulgent treat that pairs beautifully with the fruity raspberry flavor.
- Chili Powder Kick: For adventurous eaters, add a small pinch of chili powder to the raspberry puree for a sweet-and-spicy marshmallow surprise that’s sure to spark interest!
- Caramel Layer: Create a gourmet experience by layering a thin caramel sauce between marshmallow rows before cutting. This gives an extra richness that pairs perfectly with the raspberry!
With these fun variations, you’ll discover endless possibilities to make your homemade marshmallows shine. For a truly delicious dessert, consider pairing these marshmallows with White Chocolate Raspberry bites that your family will adore!
What to Serve with Homemade Raspberry Marshmallows
These delightful marshmallows add a whimsical touch to any meal, creating an inviting atmosphere for family and friends.
- Creamy Hot Cocoa: The rich, velvety texture of hot cocoa is beautifully complemented by the lightness of raspberry marshmallows, making every sip a cozy delight.
- Rich Dark Chocolate: Dipping these marshmallows in melted dark chocolate provides a perfect balance of sweetness and indulgence, elevating your dessert experience to a whole new level.
- Fresh Berries: Adding a mix of fresh berries enhances the fruity flavor and provides a refreshing contrast to the soft marshmallows, making your plate as vibrant as it is delicious.
- Crunchy Graham Crackers: The crispiness of graham crackers creates a delightful textural contrast, making them a perfect companion for a homemade s’more experience with raspberry marshmallows.
- Berry Smoothie Bowl: Top a smoothie bowl with homemade marshmallows for a fun and sweet touch—this adds both flavor and a pop of color to your breakfast or snack.
- Herbal Iced Tea: A chilled herbal tea offers a refreshing accompaniment, balancing the sweetness of the raspberry marshmallows with its light and fragrant notes.
- Vanilla Ice Cream: Serving these marshmallows alongside a scoop of vanilla ice cream creates a heavenly combination, transforming a simple treat into an elegant dessert.
- Caramel Sauce: Drizzling warm caramel sauce over raspberry marshmallows offers an indulgent, sweet contrast, making each bite feel like a luxurious treat.
Make Ahead Options
These Homemade Raspberry Marshmallows are perfect for meal prep enthusiasts looking to save time during busy weeks! You can prepare the raspberry puree (1/2 cup of frozen raspberries and 1/2 cup of water) up to 24 hours in advance; just refrigerate it in an airtight container to maintain freshness. Additionally, the marshmallow mixture can be made and poured into the prepared pan, then allowed to set at room temperature for up to 3 days before cutting. Just cover the pan well to prevent drying out. When you’re ready to enjoy your marshmallows, simply cut them into squares and store them in an airtight container at room temperature for up to 5 days—perfect for satisfying your sweet cravings without the last-minute rush!
Storage Tips for Raspberry Marshmallows
-
Room Temperature: Keep your raspberry marshmallows in an airtight container at room temperature for up to 5 days. This helps maintain their fluffy texture and delightful flavor.
-
Avoid Refrigeration: While refrigeration is optional in warm climates, it’s best to store them at room temperature. Refrigeration can make them a bit chewy rather than soft and fluffy.
-
Freezing: If you’d like to store your marshmallows for longer, freeze them in an airtight container for up to 3 months. Thaw at room temperature before enjoying, preserving their delightful taste.
-
Reheating: If they become slightly hard over time, you can quickly revive them by placing them in a warm beverage or a microwave for a few seconds, enhancing the softness of your raspberry marshmallows.
Raspberry Marshmallows Recipe FAQs
What type of raspberries should I use for the best flavor?
Absolutely! For the brightest flavor, I recommend using frozen raspberries as they maintain their taste and texture. If you have fresh raspberries, they work too, but make sure to adjust the water by reducing it slightly to keep the consistency right since fresh raspberries can add extra moisture.
How long can I store homemade raspberry marshmallows?
You can keep your raspberry marshmallows in an airtight container at room temperature for up to 5 days. They’ll remain fluffy and delightful! If you live in a particularly warm climate, you might consider refrigerating them to keep them fresh, but remember that they taste best kept at room temperature.
Can I freeze raspberry marshmallows?
Yes, you can definitely freeze them! Place your raspberry marshmallows in an airtight container or a freezer bag, and they will last for up to 3 months. When you’re ready to enjoy, simply thaw them at room temperature for a few hours, and they should regain their delightful texture!
What if my marshmallow mixture doesn’t whip up properly?
If your marshmallow mixture isn’t reaching the fluffy, thick consistency, it may be due to not heating the syrup to the right temperature (220-240°F). Make sure to use a candy thermometer to check this. Also, ensure you don’t over-mix once it starts to thicken—just beat it until it triples in size!
Are these raspberry marshmallows safe for allergies or dietary restrictions?
Very! This recipe is gluten-free and can be made paleo-friendly. If you need a vegan option, you can use a vegan gelatin substitute like agar-agar, keeping in mind the texture may vary slightly. Always check ingredient labels for potential allergens, especially if you’re sharing these with friends or family with dietary sensitivities.
What are some alternative sweeteners I can use in this recipe?
You can experiment with different natural sweeteners such as agave syrup for a vegan option. I often like to try different flavors! Remember, if you’re switching sweeteners, the ratio might change slightly, so adjust liquid amounts accordingly to maintain consistency.
Fluffy Raspberry Marshmallows That Whisk You Away to Bliss
Ingredients
Equipment
Method
- Prepare a 9x9 inch baking pan by lining it with parchment paper and spraying with oil.
- In a blender, combine 1/2 cup of water with frozen raspberries and freeze-dried raspberries. Blend until smooth and strain through a fine sieve.
- In a stand mixer bowl, combine raspberry puree with grass-fed gelatin and vanilla extract. Let it sit for 5-10 minutes.
- In a small pot, combine 1/2 cup of water with honey or maple syrup. Heat over medium-high until it reaches between 220°F and 240°F.
- Slowly drizzle the syrup into the bloomed raspberry mixture while whisking. Whisk at high speed for 2-3 minutes until thick and glossy.
- Pour the marshmallow mixture into the prepared pan and smooth the surface. Let it set for 30-60 minutes.
- Once set, remove marshmallows from the pan and cut into squares using scissors.
- Store in an airtight container at room temperature for up to 5 days.
Leave a Reply