
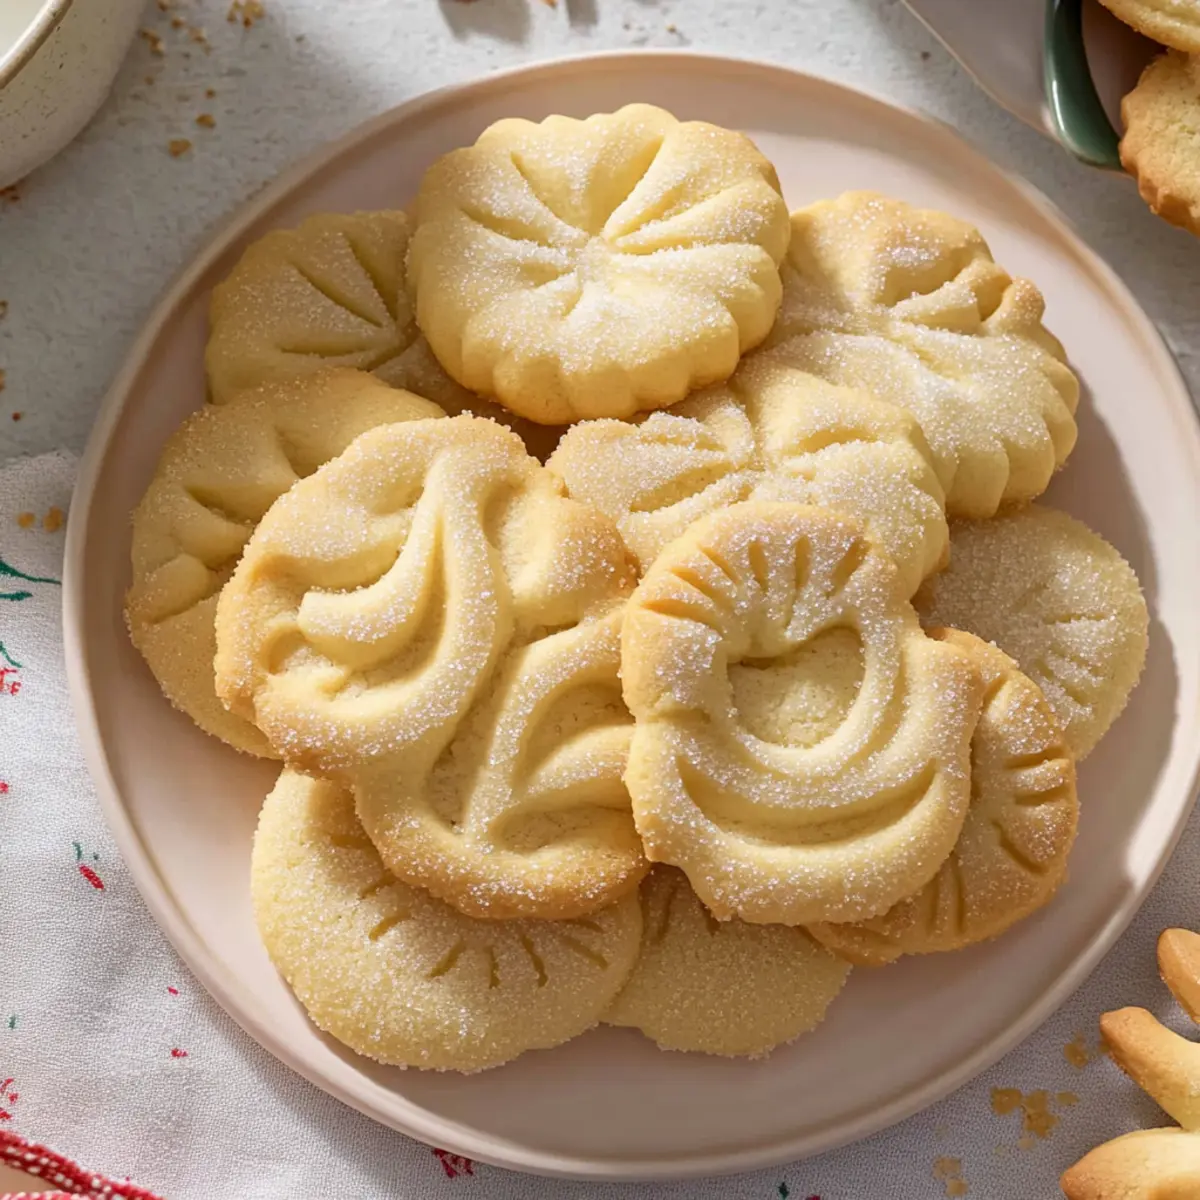
As I stood in my cozy kitchen, the scent of melting butter and sugar began to weave a tapestry of nostalgia. These Classic Melt-in-Your-Mouth Danish Butter Cookies bring to life cherished memories of holiday gatherings, where the simple joy of homemade treats reigns supreme. With just seven high-quality ingredients, this recipe promises quick prep time yet delivers a rich, buttery flavor that’s not overly sweet, making them perfect for gifting or enjoying with a hot cup of tea. You can easily customize them into delightful shapes or add festive toppings to suit any occasion. Are you ready to fill your home with the warm embrace of baking? Let’s dive into creating these irresistible cookies!
Why are Danish Butter Cookies so delightful?
Simplicity: With only seven quality ingredients, these cookies are incredibly easy to whip up, perfect for both novice and seasoned bakers.
Nostalgic: Each bite is a trip down memory lane, reminiscent of holiday gatherings filled with warmth and love.
Customizable: Shape them into festive forms or sprinkle with toppings like coarse sugar or nuts for a personal touch.
Perfect for Gifting: Their elegant appearance and delightful flavor make them an ideal homemade gift for friends and family.
Crowd-Pleasing: These cookies won’t last long at parties or tea gatherings, any sweet lover will keep coming back for more! Check out Cookies Cream Dessert for a tasty companion treat.
Danish Butter Cookies Ingredients
• Perfect for melt-in-your-mouth delight!
For the Dough
- European Salted Butter – Adds richness and flavor; feel free to substitute with unsalted butter and a pinch of salt.
- Granulated Sugar – Provides just the right amount of sweetness; no substitution is needed for this classic recipe.
- Salt – Enhances flavor balance; consider using kosher salt if you’re working with unsalted butter.
- Egg Yolks – Contributes to the cookies’ richness and moisture; ensure they are at room temperature for an even mix.
- Vanilla Extract – Infuses a lovely aromatic sweetness; using pure vanilla extract will give your Danish butter cookies the best flavor.
- Whole Milk – Adjusts dough consistency; add more if your dough feels a bit too thick.
- All-Purpose Flour & Cake Flour – Combining these flours achieves the perfect cookie texture, blending structure with tenderness. You can use all-purpose flour alone if needed.
Step‑by‑Step Instructions for Danish Butter Cookies
Step 1: Prepare Baking Area
Begin by making room in your refrigerator for a baking sheet. Preheat your oven to 350°F (175°C) while you line two baking sheets with parchment paper. This sets the stage for your Danish butter cookies, ensuring they bake perfectly once shaped.
Step 2: Cream the Butter
In a stand mixer, beat 1 cup of European salted butter until it’s smooth and creamy, about 2 minutes. Gradually add in ¾ cup of granulated sugar and ½ teaspoon of salt, mixing on medium speed until the mixture is light and fluffy, which typically takes another 2-3 minutes. This step creates the rich foundation for your cookies.
Step 3: Mix in Wet Ingredients
Next, add 2 large egg yolks, 1 teaspoon of pure vanilla extract, and 2 tablespoons of whole milk to the creamed butter. Mix on low speed until everything is well combined and smooth, ensuring the egg yolks are fully incorporated for that luscious texture.
Step 4: Combine the Flours
In a separate bowl, whisk together 1 cup of all-purpose flour and ½ cup of cake flour. Gradually add this flour mixture into your wet ingredients, mixing on low speed until no visible flour remains. If the dough feels too thick, add a splash more milk to reach your desired consistency.
Step 5: Pipe the Cookies
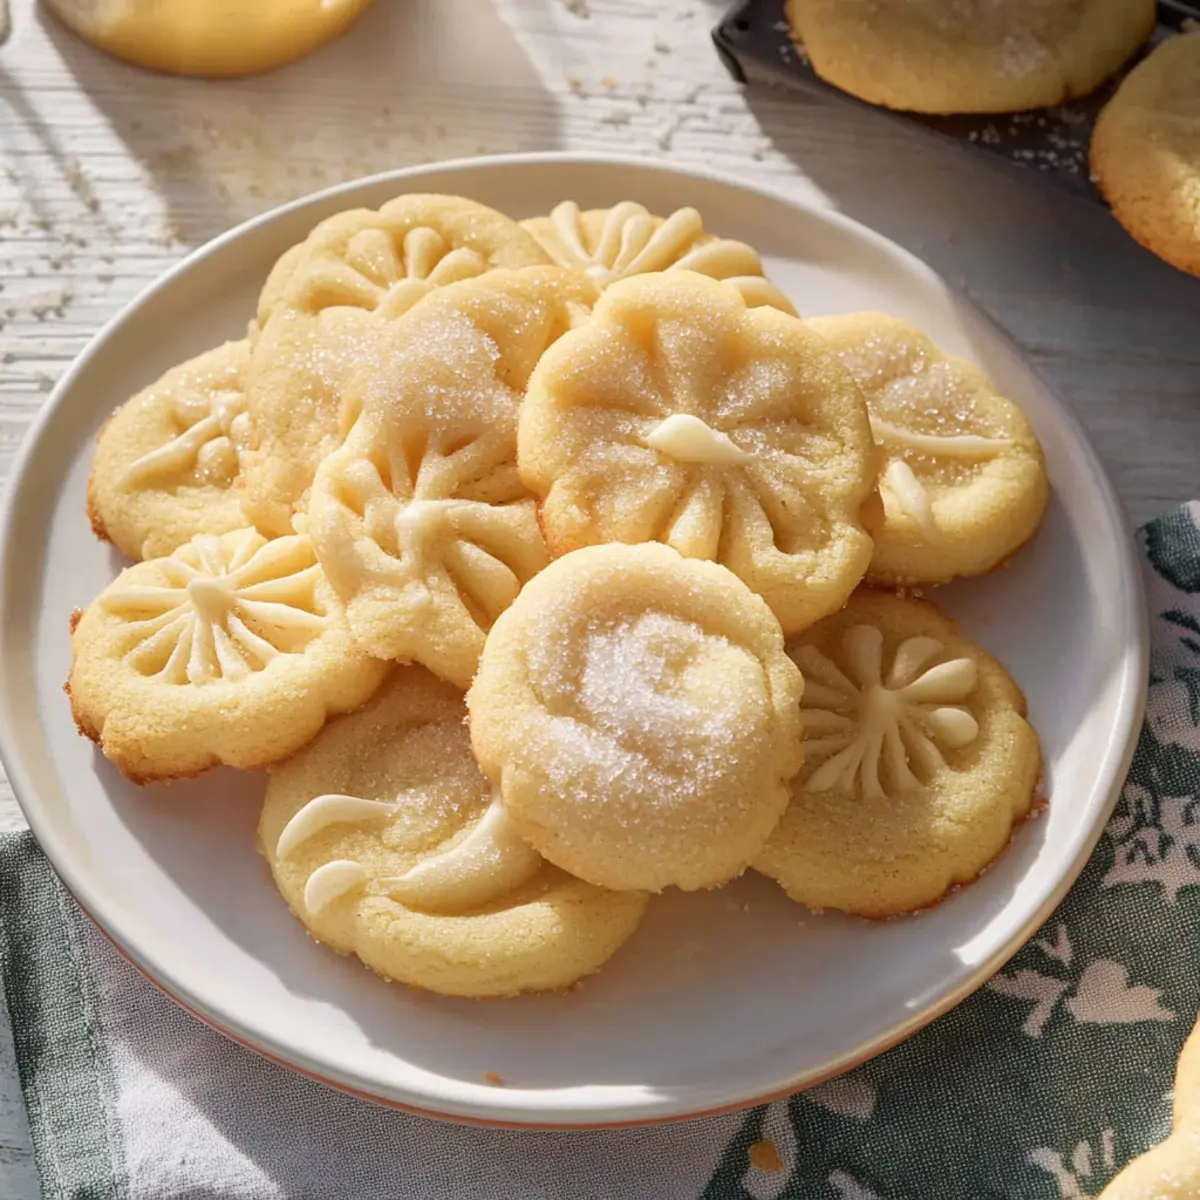
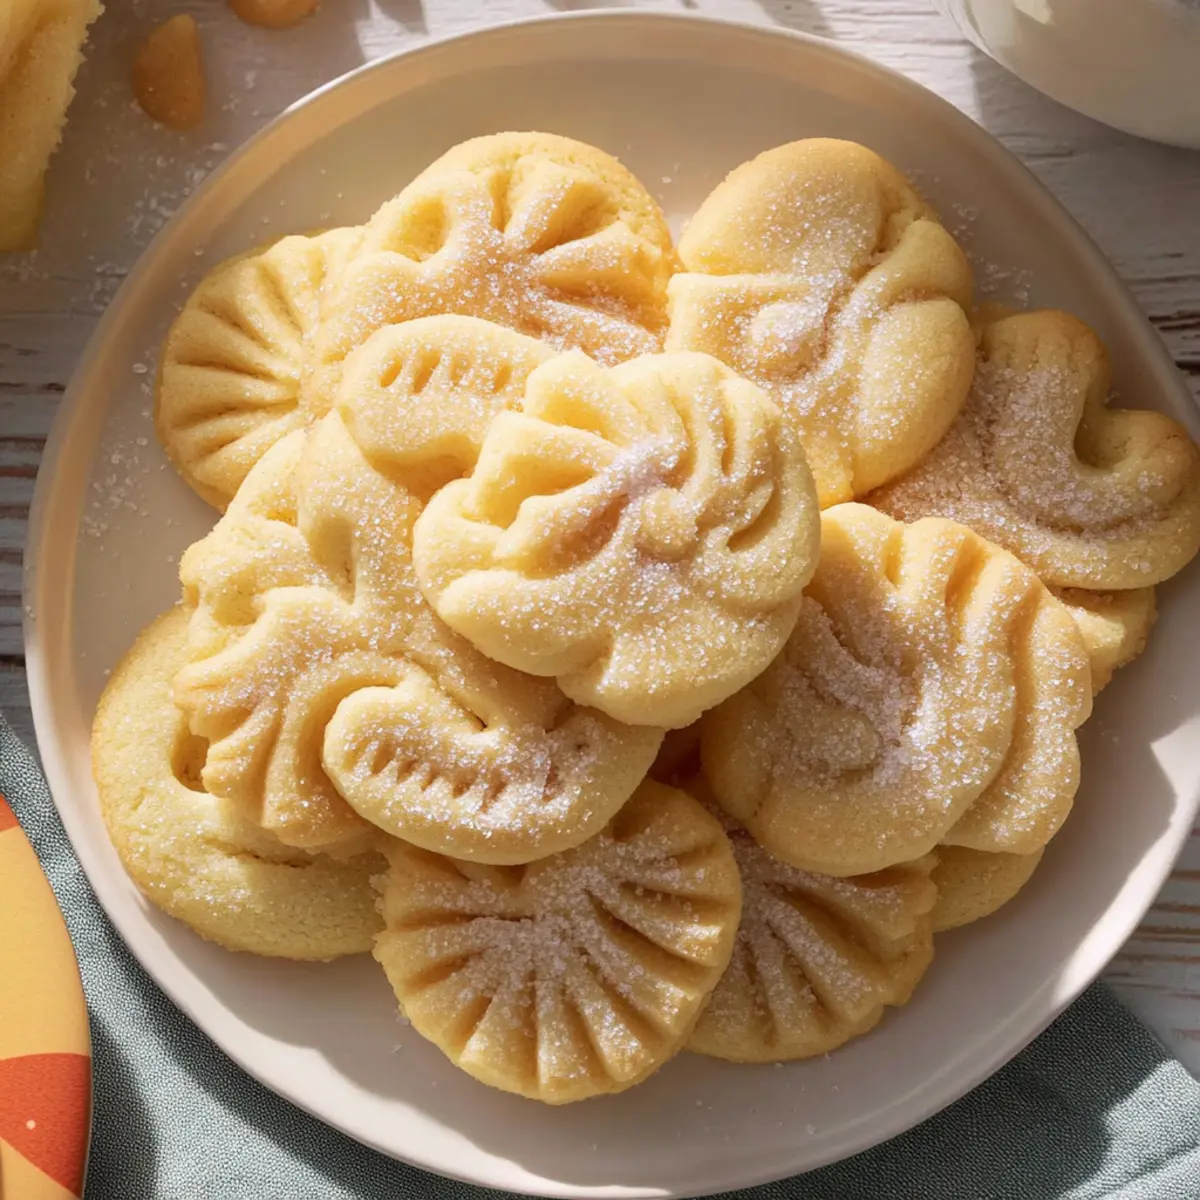
Transfer the cookie dough into a piping bag fitted with a star tip or your favorite shape cutter. On the prepared baking sheets, pipe the dough into desired shapes, ensuring you space them at least 2 inches apart to allow for spreading. For a festive touch, sprinkle the tops with coarse sugar.
Step 6: Chill the Cookies
Place the piped cookies in the refrigerator to chill for 20-30 minutes. This crucial step prevents the dough from spreading too much while baking, ensuring each Danish butter cookie maintains its beautiful shape and delicate texture.
Step 7: Bake the Cookies
Once chilled, place the baking sheets in the preheated oven. Bake for 10-15 minutes, watching closely as the edges turn just golden; this visual cue is key to achieving that melt-in-your-mouth texture.
Step 8: Cool and Serve
After baking, remove the sheets from the oven and let the cookies cool on the baking sheets for about 5 minutes. Then, carefully transfer them to wire racks to cool completely. Your Danish butter cookies will be light, delicate, and ready to delight!
Make Ahead Options
These Classic Melt-in-Your-Mouth Danish Butter Cookies are perfect for busy home cooks looking to save time! You can prepare the dough up to 3 days in advance by mixing it and then refrigerating it. Alternatively, pipe the cookies into shapes and chill them in the refrigerator for up to 24 hours before baking. For longer storage, freeze the unbaked piped cookies for up to 3 months; simply place them on a baking sheet, freeze until solid, then transfer to a freezer bag. When ready to bake, no need to thaw—just pop them in the oven straight from the freezer! This way, you’ll ensure your cookies remain just as delicious and fresh, ready to impress family and friends at a moment’s notice.
Danish Butter Cookies Variations & Substitutions
Feel free to let your creativity shine as you customize these buttery delights to suit your taste and occasion!
-
Shape Shifters: Pipe cookies into fun shapes like rosettes or pretzels for a festive presentation. Each shape brings a unique visual charm.
-
Nutty Delight: Fold in chopped nuts like almonds or walnuts into the dough for added crunch and flavor that elevates each bite. Nuts really add a lovely texture!
-
Citrus Zest: Incorporate a teaspoon of lemon or orange zest into the dough for a zesty twist that brightens the buttery richness. Citrus notes provide a refreshing lift.
-
Chocolate Drizzle: After cooling, drizzle melted dark or white chocolate over the cookies for a decadent touch. This adds a sweet and rich complement to the classic flavors.
-
Festive Sprinkles: Top the piped cookies with colorful sprinkles before baking to add a cheerful touch for holiday gatherings. Sprinkles make everything a little more special!
-
Spice It Up: Add a pinch of ground cinnamon or nutmeg into the dough for a cozy, spiced flavor reminiscent of holiday treats. This twist will warm hearts with every bite.
-
Coffee Infusion: Substitute some of the milk with brewed coffee for a delightful coffee-infused flavor that perfectly complements the buttery cookie base. Coffee lovers will adore this variant!
-
Gifting Presentation: Package cookies in decorative tins or wrap them in cellophane with a ribbon for a thoughtful gift. Beautifully presented, they make a perfect gift for loved ones. Enjoy experimenting with these variations, and for more sweet inspiration, check out my Greek Yogurt Peanut Butter Bites or try pairing these cookies with a comforting Homemade Butter Chicken for a delightful meal.
Storage Tips for Danish Butter Cookies
Room Temperature: Store cookies in an airtight container at room temperature for up to 5 days to maintain their delightful texture and flavor.
Fridge: If the weather is particularly warm, consider storing them in the refrigerator to keep them fresh. Just ensure they are in a sealed container.
Freezer: For longer storage, freeze the cookies for up to 3 months. Layer parchment paper between cookies to prevent sticking, and use a vacuum-sealed bag for best results.
Reheating: To enjoy thawed cookies, let them sit at room temperature for a few minutes or warm them briefly in the oven at 300°F (150°C) for about 5 minutes, refreshing their melt-in-your-mouth quality.
What to Serve with Classic Melt-in-Your-Mouth Danish Butter Cookies
As you indulge in these delightful cookies, consider adding a few complementary dishes that will enrich your gathering or cozy afternoon tea.
-
Rich Hot Chocolate: The creamy chocolate balances the buttery texture of the cookies, creating a comforting blend perfect for chilly days.
-
Fresh Berries: Vibrant raspberries or strawberries add a burst of tartness, cutting through the cookies’ richness and enhancing their delightful sweetness.
-
Whipped Cream: A dollop of lightly sweetened whipped cream creates a lovely creamy partner, turning your cookie experience into an indulgent delight.
-
Cup of Tea: A warm peppermint or chai tea offers fragrant spiciness that beautifully complements the buttery notes in each Danish butter cookie.
-
Cheese Platter: Pair with soft cheeses like brie or camembert; the creamy textures contrast wonderfully with the lightness of the cookies, creating an elegant tasting experience.
-
Classic Lemonade: A glass of freshly squeezed lemonade provides a zesty freshness that cleanses the palate, making each cookie even more enjoyable!
Enjoy experimenting with these pairings as you savor your melt-in-your-mouth Danish butter cookies!
Expert Tips for Danish Butter Cookies
-
Use Room Temperature Ingredients: Make sure your butter and egg yolks are at room temperature for a smooth dough; this creates the ideal consistency for Danish butter cookies.
-
Don’t Over-Mix: After adding the flour, mix just until combined. Over-mixing can lead to tough cookies instead of light and crumbly ones.
-
Chill for Best Results: Refrigerating the piped cookies for 20-30 minutes before baking helps them hold their shape and achieve that melt-in-your-mouth texture.
-
Watch Your Bake Time: Baking times can vary by oven; keep an eye on the edges and remove the cookies when they are just starting to turn golden.
-
Accurate Flour Measurement: Weighing your flour with a kitchen scale can ensure the right consistency, preventing overly dense or dry cookies.
Danish Butter Cookies Recipe FAQs
What type of butter should I use for Danish butter cookies?
Absolutely! I recommend using European salted butter for its rich flavor and higher fat content, which enhances that buttery taste. If you can only find unsalted butter, just add a pinch of salt to your dough—this will help maintain the balance of flavor.
How should I store Danish butter cookies for maximum freshness?
To keep your cookies delightful, store them in an airtight container at room temperature for up to 5 days. If you’re facing warmer weather, moving them to the refrigerator can help maintain their freshness. Just be sure they’re sealed well to prevent drying out.
Can I freeze Danish butter cookies?
Very! To freeze your delicious cookies, layer parchment paper between them to prevent sticking. Place the layered cookies in a vacuum-sealed bag or durable freezer-safe container. They can last up to 3 months in the freezer. When ready to enjoy, let them sit at room temperature for a few minutes or warm them briefly in the oven at 300°F (150°C) for about 5 minutes to regain their melt-in-your-mouth goodness.
What should I do if my cookie dough is too thick?
If your dough feels overly thick, just add a splash more whole milk to loosen it up. Start with a tablespoon, mixing until you reach your desired consistency. Remember, the goal is to have a dough that can be easily piped but still holds its shape when baked!
Are Danish butter cookies safe for pets or those with allergies?
While these cookies are delightful for humans, be cautious if you have pets. Ingredients like butter and sugar aren’t suitable for animals. Also, since this recipe uses egg yolks and dairy, anyone with allergies should check for sensitivities before indulging. Always consider alternatives for those with dietary restrictions.
Can I make Danish butter cookies ahead of time?
Absolutely! You can chill the shaped cookie dough in the refrigerator for up to 2 days before baking. Alternatively, freeze the unbaked dough in a sealed container for future baking—just thaw it in the fridge overnight before piping and baking. This makes it super easy to whip up fresh cookies anytime!

Danish Butter Cookies That Melt in Your Mouth with Love
Ingredients
Equipment
Method
- Prepare Baking Area: Preheat your oven to 350°F (175°C) and line two baking sheets with parchment paper.
- Cream the Butter: Beat 1 cup of European salted butter until smooth. Gradually add ¾ cup of granulated sugar and ½ teaspoon of salt, mixing until light and fluffy.
- Mix in Wet Ingredients: Add 2 egg yolks, 1 teaspoon of vanilla extract, and 2 tablespoons of whole milk to the butter mixture, mixing on low speed until well combined.
- Combine the Flours: Whisk together 1 cup of all-purpose flour and ½ cup of cake flour in a separate bowl. Gradually add to wet ingredients until no visible flour remains.
- Pipe the Cookies: Transfer dough to a piping bag and pipe onto prepared baking sheets, spacing them at least 2 inches apart.
- Chill the Cookies: Refrigerate the piped cookies for 20-30 minutes to maintain shape during baking.
- Bake the Cookies: Bake in preheated oven for 10-15 minutes until edges are just golden.
- Cool and Serve: Let cookies cool on baking sheets for 5 minutes before transferring to wire racks.
Leave a Reply