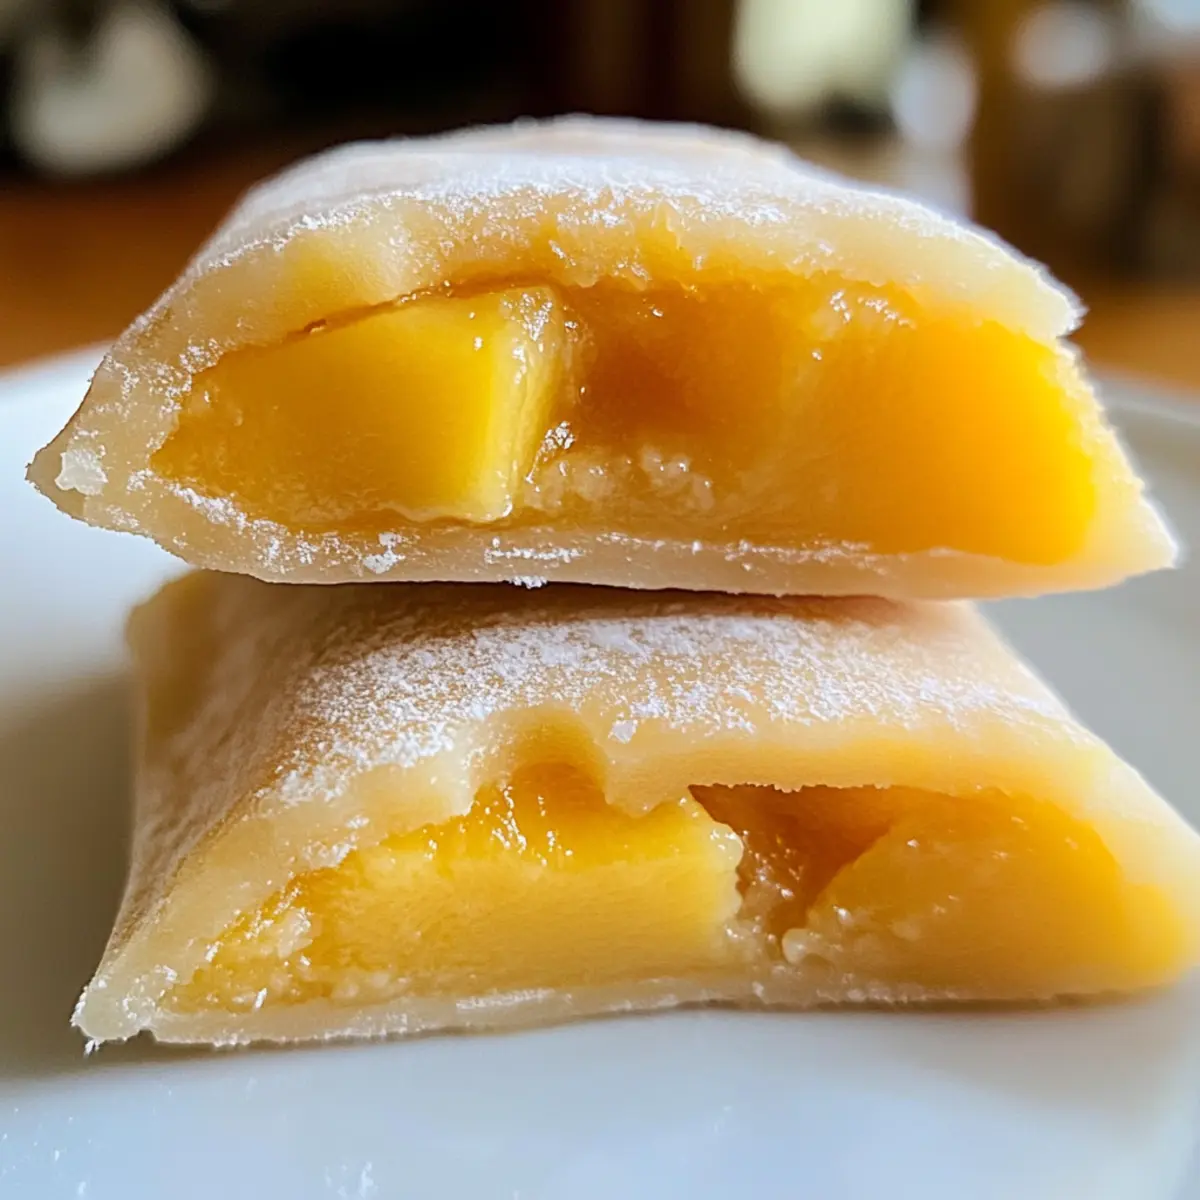
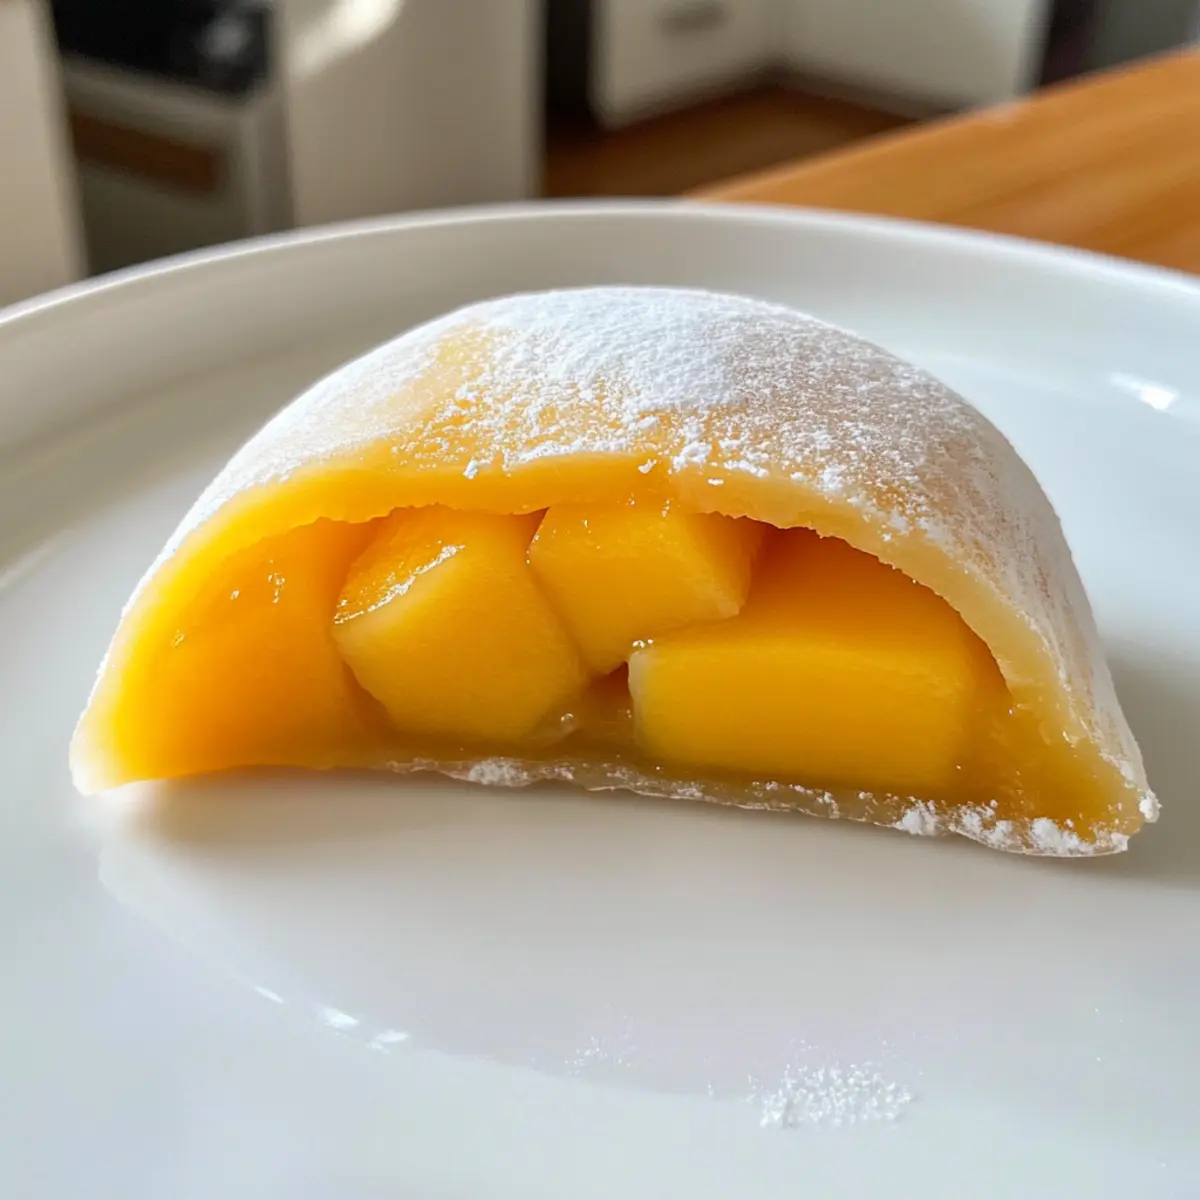
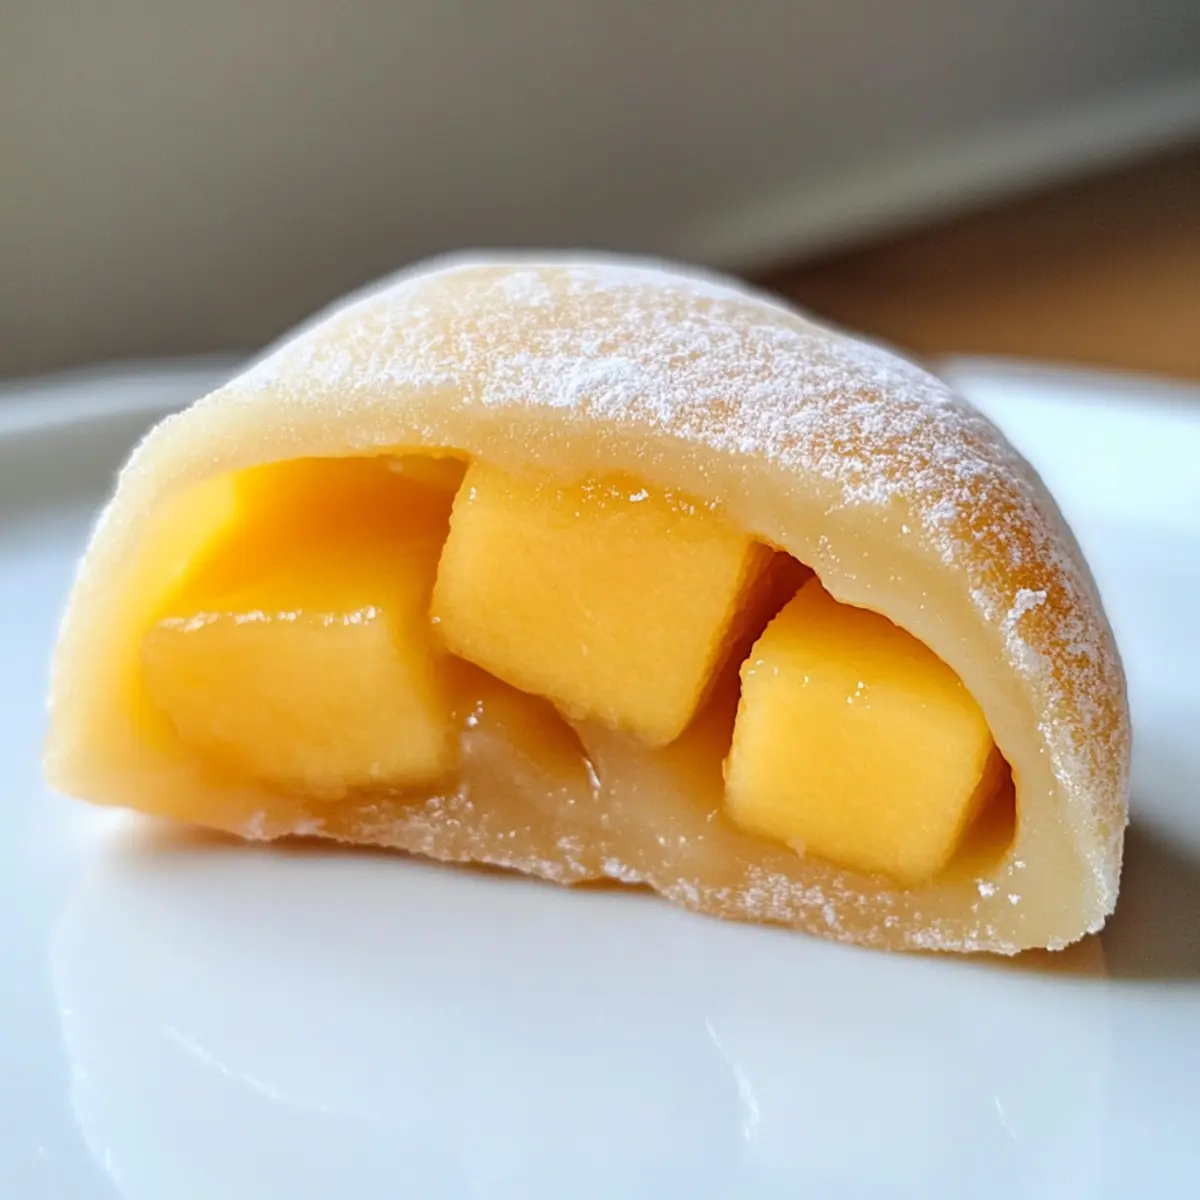
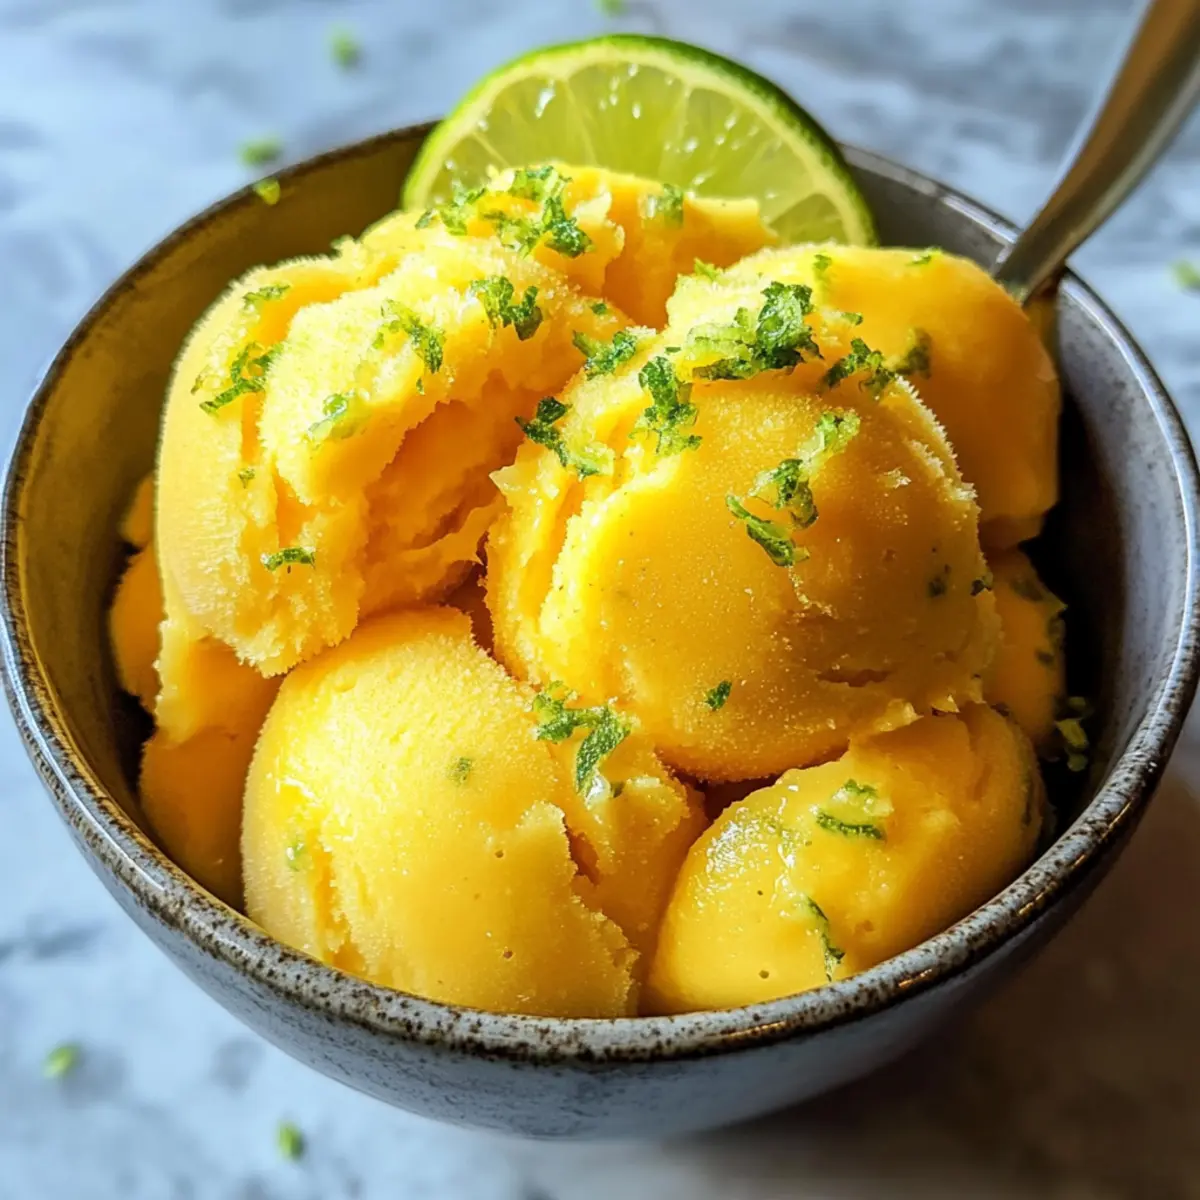
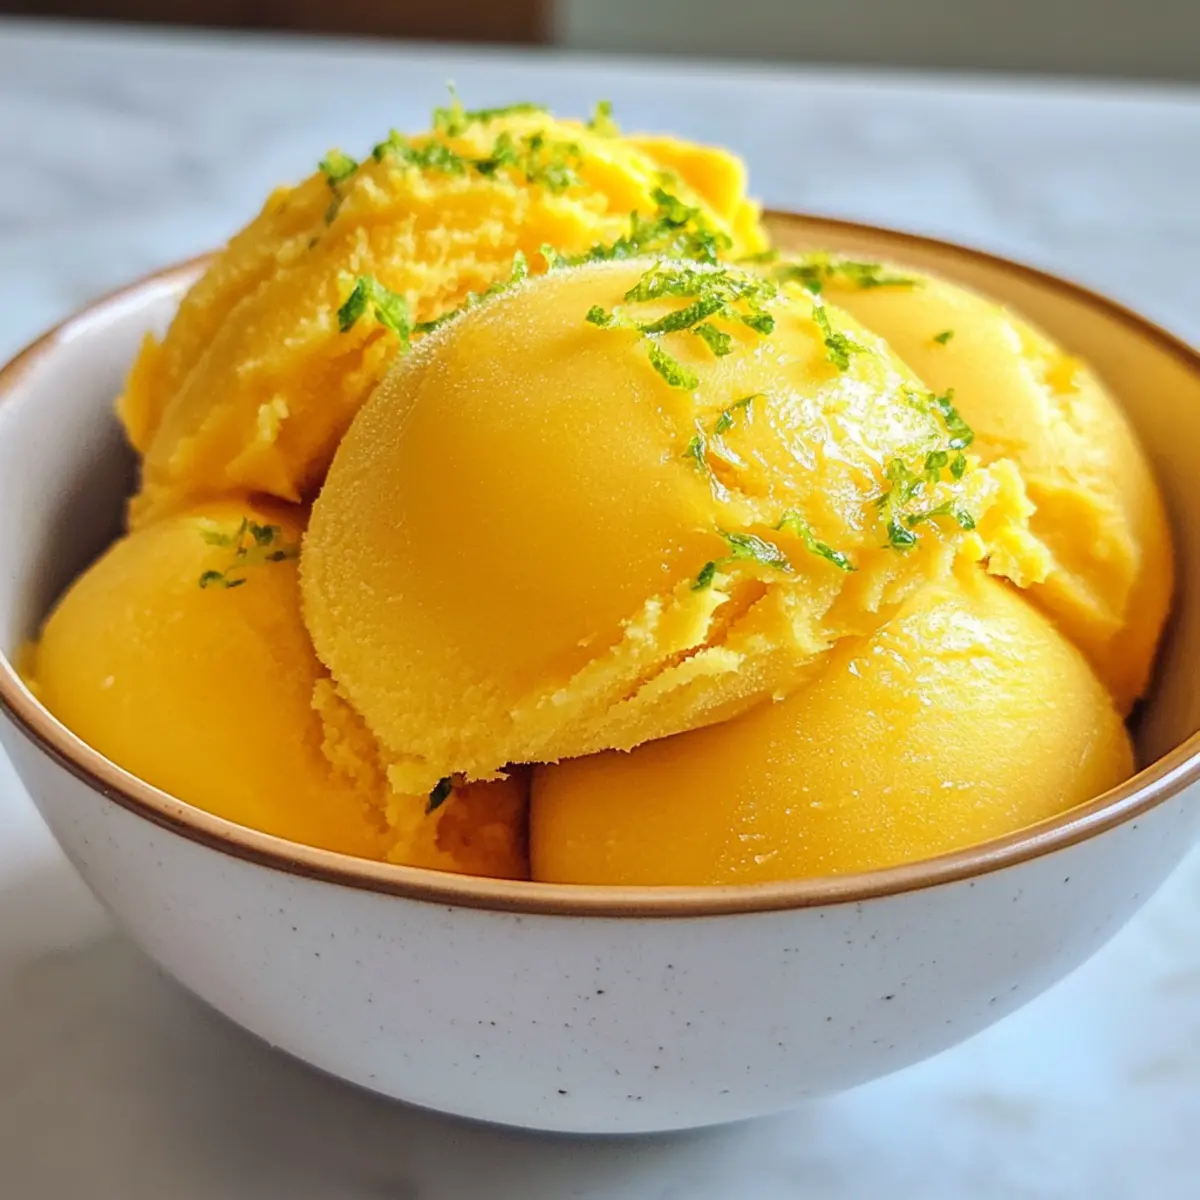
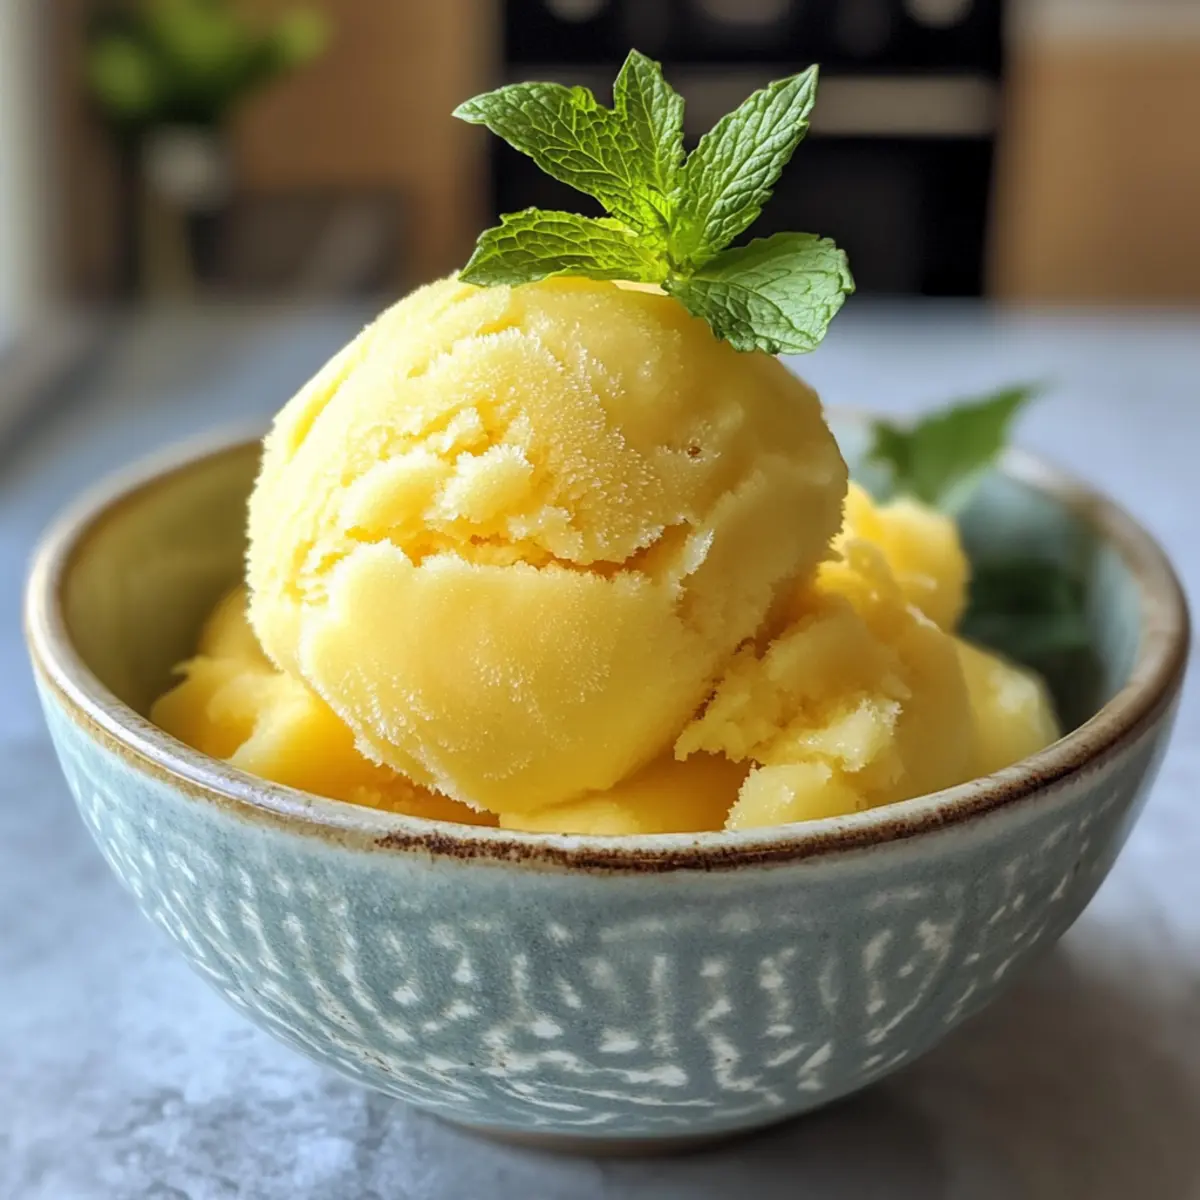
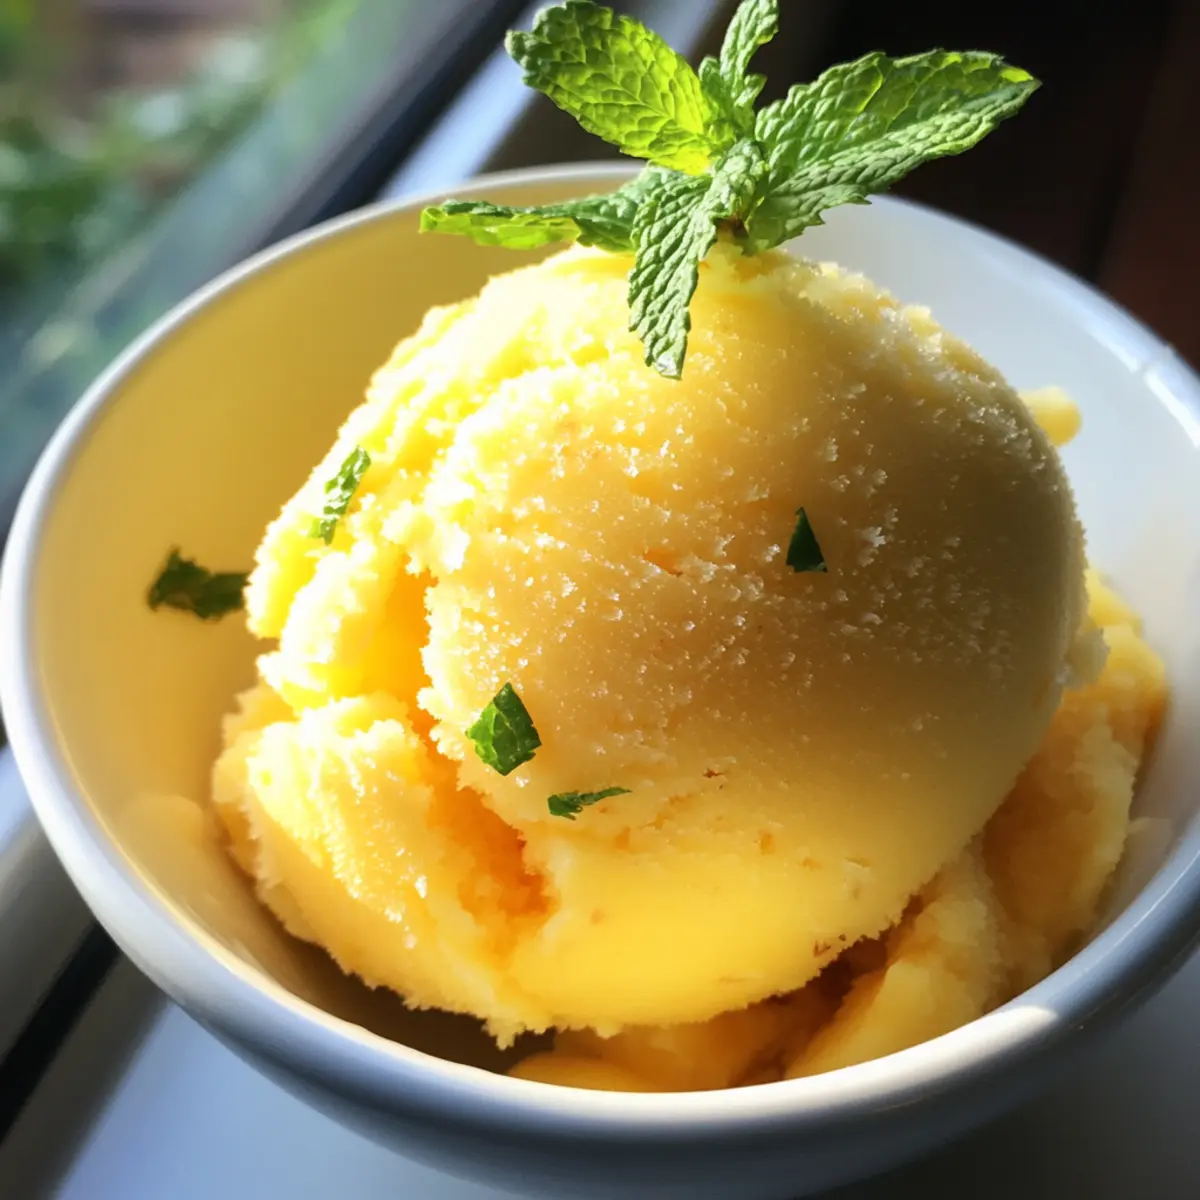
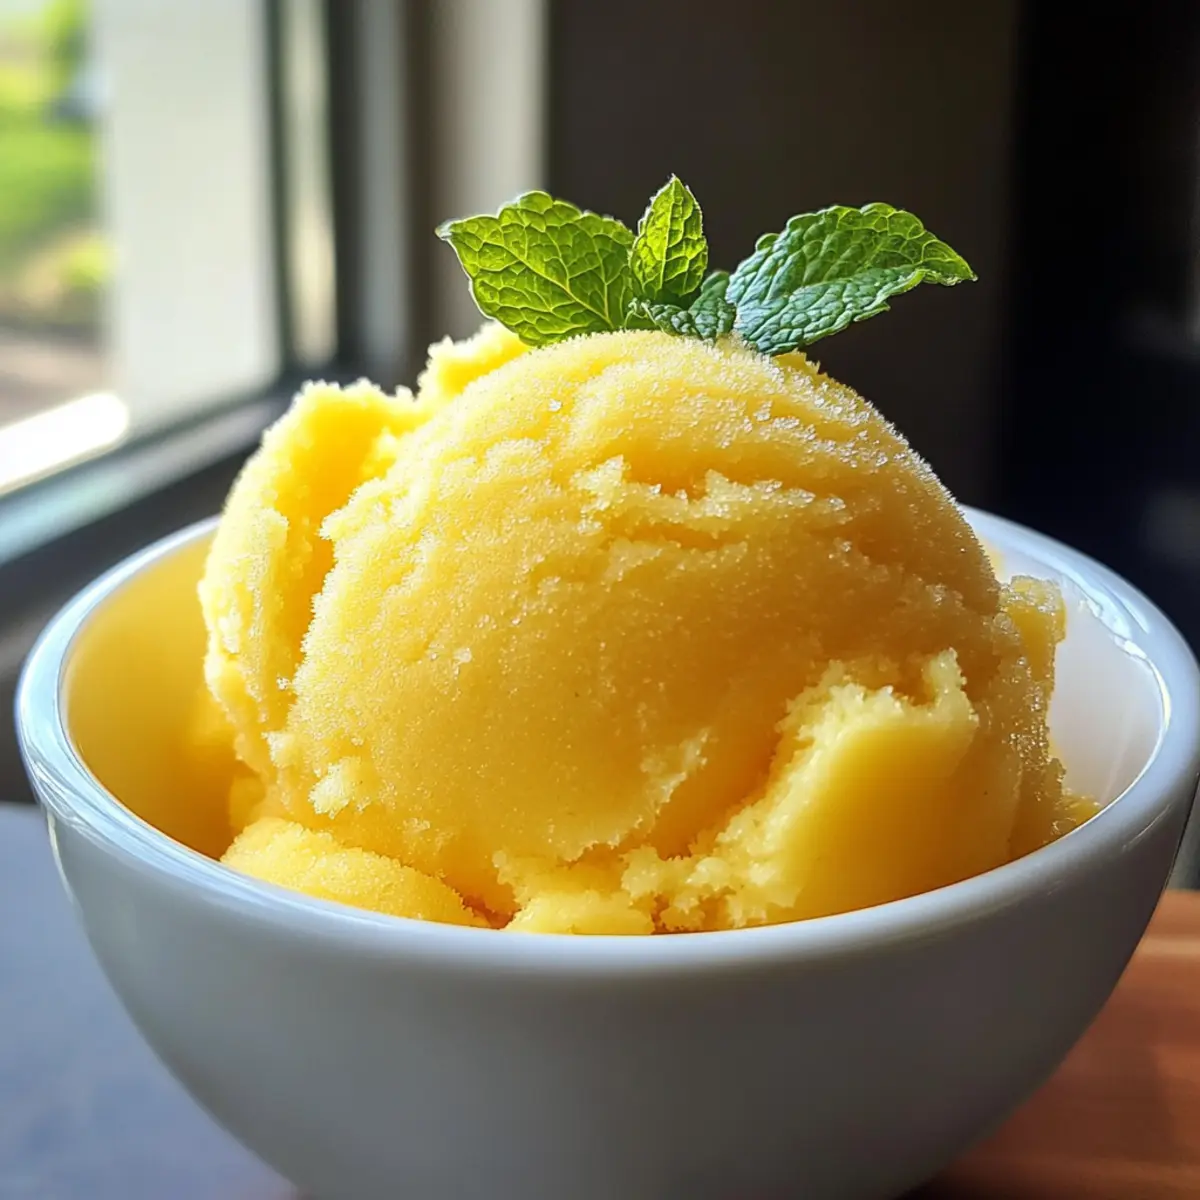
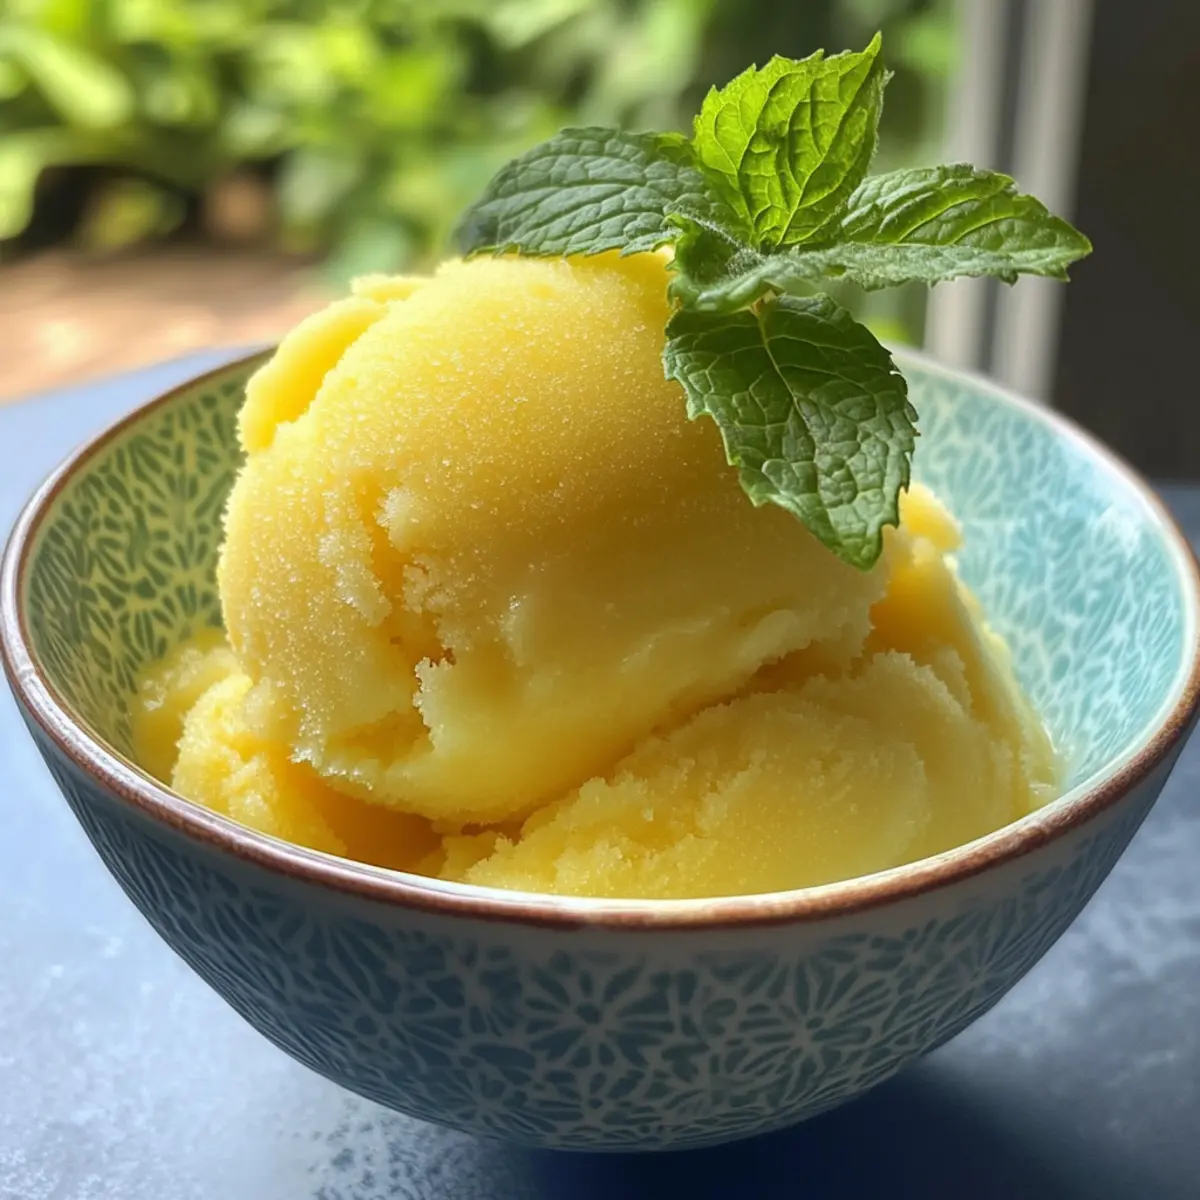
As I stood in my kitchen, the warm sun streaming through the window, I couldn’t help but hear the sweet whisper of summer calling me. That’s when the idea struck: a quick 15-minute Pineapple Sorbet to cool off the day! This vibrant treat marries the lusciousness of fresh pineapple with creamy coconut milk and a hint of zing from lime juice. The best part? This easy, vegan-friendly dessert can be made with minimal fuss, making it a godsend for busy afternoons or surprise guests. Plus, it’s the ultimate refreshing option to satisfy your sweet tooth without the guilt. Are you ready to scoop up some sunshine?
Why is Pineapple Sorbet the Perfect Dessert?
Quick Prep Time: Whip this up in just 15 minutes, making it a stress-free choice for dessert lovers.
Vegan Delight: With creamy coconut milk and fresh fruit, it’s a guilt-free treat everyone can enjoy.
Tropical Refreshment: The bright, zingy taste of pineapple combined with lime is a refreshing escape that screams summer.
Versatile Option: Swap in different fruits like mango or berries for a unique twist, or add shredded coconut for an extra crunch.
Ideal for Any Occasion: Perfect for warm days, family gatherings, or impromptu guests—this sorbet is sure to be a crowd-pleaser!
Elevate your dessert game with this easy, delightful recipe—it’s like sunshine in a bowl!
Pineapple Sorbet Ingredients
For the Sorbet
- Fresh pineapple chunks – Adds natural sweetness and flavor to the sorbet; you can also substitute with frozen pineapple for convenience.
- Sugar – Sweetens the sorbet and helps achieve a smooth texture; adjust to taste depending on the ripeness of the pineapple.
- Lime juice – Enhances flavor by adding acidity and freshness; it’s essential for that lively, refreshing taste.
- Coconut milk – Provides creaminess and tropical flavor; use full-fat for a richer texture or light coconut milk for a lighter version.
Optional Garnishes
- Fresh mint leaves – A beautiful and aromatic addition that complements the tropical flavors perfectly.
- Shredded coconut – Adds a crunchy texture and enhances the coconut flavor; consider adding it as an extra touch for a unique twist.
Enjoy your homemade Pineapple Sorbet as a light and refreshing dessert!
Step‑by‑Step Instructions for Pineapple Sorbet
Step 1: Blend Ingredients
Begin by placing fresh pineapple chunks, sugar, lime juice, and coconut milk in a high-speed blender. Blend all the ingredients on medium speed for about 30 seconds, or until the mixture reaches a smooth and creamy consistency. The vibrant yellow color of the pineapple should shine through, creating a luscious base for your Pineapple Sorbet.
Step 2: Initial Freezing
Pour the smooth pineapple mixture into a shallow dish, spreading it evenly to ensure even freezing. Place the dish in the freezer and let it chill for about 1 hour. Keep an eye on it; when it becomes slightly firm but still soft enough to scoop, you’re ready for the next step in our icy dessert journey.
Step 3: Fluff and Final Freeze
After 1 hour, remove the dish from the freezer and grab a fork. Fluff the sorbet mixture by scraping it with the fork, breaking it up into smaller, airy pieces. This step will create that delightful texture we love in Pineapple Sorbet. Once fluffed, return the sorbet to the freezer for an additional 30 minutes, allowing it to firm up perfectly for serving.
How to Store and Freeze Pineapple Sorbet
Fridge: Store any leftover pineapple sorbet in an airtight container for up to 3 days. Keep in mind that the texture may soften slightly.
Freezer: For longer storage, keep the sorbet in the freezer for up to a week. Ensure it’s tightly sealed to prevent freezer burn.
Reheating: If the sorbet becomes too hard, let it sit at room temperature for about 5-10 minutes to soften before scooping.
Texture Maintenance: Fluff the sorbet with a fork before serving again to restore its delightful, airy texture.
Pineapple Sorbet Variations & Substitutions
Feel free to get creative and personalize your Pineapple Sorbet with these delicious twists!
-
Mango Madness: Swap fresh pineapple for ripe mango chunks to create an exotic and sweet sorbet experience. Mango’s creamy richness pairs beautifully with lime!
-
Berry Bliss: Use mixed berries like strawberries or raspberries for a vibrant color and a burst of berry flavor. This variation will surprise your taste buds with its tartness!
-
Dairy-Free Creaminess: If you prefer a creamier texture, try using full-fat coconut cream instead of coconut milk. It’ll give your sorbet a luscious finish that feels indulgent!
-
Minty Fresh: Incorporate fresh mint leaves into the mix for a refreshing herbal note. Simply blend in a handful before freezing, and serve with mint leaves as a garnish for an extra touch.
-
Spicy Kick: For a little heat, add a pinch of ground ginger to the blend. It adds a zesty warmth that complements the sweetness of the pineapple beautifully.
-
Chocolate Drizzle: Drizzle melted dark chocolate over your sorbet right before serving for a decadent twist! It adds an unexpected flavor that takes your dessert to the next level.
-
Pineapple Coconut Chia: Mix in chia seeds for added nutrition and a bit of a fun texture. Just a couple of tablespoons will do the trick, and they will soak up some of the sorbet’s creaminess.
-
Sparkling Citrus: Add a splash of sparkling water or lemon-lime soda before serving for a fizzy twist that brightens every bite! The added bubbles make it feel like a special treat.
No matter which twist you choose, each variation will keep your summer refreshment exciting and delicious! For more cooling options, check out my easy berry sorbet recipe or dive into the world of homemade dairy-free desserts. Enjoy the adventure!
Make Ahead Options
These Pineapple Sorbet delights are perfect for meal prep enthusiasts! You can blend the pineapple, sugar, lime juice, and coconut milk up to 24 hours in advance, just refrigerate the mixture in an airtight container until you’re ready to freeze. This not only saves you time but also allows the flavors to marry beautifully. When you’re ready to serve, simply pour the mixture into a shallow dish, freeze for about 1 hour, fluff with a fork, and return to the freezer for another 30 minutes. Following this method ensures your sorbet has that light, creamy texture and refreshing taste, just as if you made it fresh!
What to Serve with Pineapple Sorbet
Elevate your dessert experience with delightful accompaniments that enhance the refreshing flavors of this tropical treat.
-
Coconut Macaroons: These chewy bites pair beautifully, adding texture and a hint of deeper coconut flavor that complements the sorbet perfectly.
-
Fresh Berries: A medley of strawberries, blueberries, and raspberries adds a burst of color and tartness, creating a refreshing contrast to the sweetness of the sorbet.
-
Mint-Infused Iced Tea: Cool, crisp iced tea with a hint of mint provides a refreshing and hydrating sip, balancing the sweetness and adding a touch of sophistication.
-
Grilled Tropical Fruits: Lightly charred pineapple or mango brings out the natural sugars and enhances the tropical vibe, creating a beautiful layer of flavor with the sorbet.
-
Dairy-Free Chocolate Sauce: Drizzle some on top for a rich complement that contrasts the pineapple’s sweetness while introducing an indulgent twist.
-
Coconut Whipped Cream: This light, airy topping enhances the creamy texture of the sorbet while adding a delightful coconut flavor that’s heavenly in every spoonful.
-
Cashew Cookies: These nutty, crunchy delights add a satisfying crumble and a beautifully nutty flavor that pairs well with the sorbet’s smoothness.
-
Key Lime Pie: Serve a small slice alongside for a delicious combination of citrus flavors that perfectly dances on the palate.
Expert Tips for Pineapple Sorbet
-
Choose Ripe Pineapple: Use sweet, ripe pineapple for the best flavor. Overripe fruit can lead to a mushy texture, while underripe can be too tart.
-
Sugar to Taste: Start with less sugar and gradually add more if needed. A perfectly balanced pineapple sorbet complements the fruit’s natural sweetness.
-
Texture Check: For the creamiest result, ensure the mixture is well-blended before the first freeze. This prevents ice crystals and ensures a smooth finish.
-
Storage Solution: Store any leftover sorbet in an airtight container to keep it from losing texture. Let it sit out for a few minutes before scooping to serve!
-
Creative Twists: Don’t hesitate to experiment! Add other fruits or a splash of rum for an adult treat. Pineapple sorbet is versatile, allowing you to make it uniquely yours.
Pineapple Sorbet Recipe FAQs
How do I choose ripe pineapples for this sorbet?
Absolutely! For the best flavor in your Pineapple Sorbet, select a ripe pineapple by checking for a sweet aroma and a slight softness when pressed. The skin should have a vibrant golden hue without dark spots, which can indicate overripeness. If you can’t find ripe pineapples, you can opt for frozen pineapple chunks—they’re a convenient alternative and can work beautifully in this recipe.
What’s the best way to store leftover Pineapple Sorbet?
Very! If you have any sorbet left, store it in an airtight container in the freezer. It will maintain its flavor and texture for up to a week. Just remember to let it sit out for about 5-10 minutes before serving, so it softens slightly for easy scooping. A quick fluff with a fork will also help restore that delightful, airy texture.
Can I freeze Pineapple Sorbet for longer storage?
Definitely! If you want to keep this refreshing dessert for a longer period, it can be frozen for up to 3 months. Just ensure it’s in a tightly sealed container to prevent freezer burn. When you’re ready to enjoy it again, take it out and let it sit at room temperature for about 10-15 minutes to soften before scooping and indulging!
What if my Pineapple Sorbet turns out too icy or hard?
Not to worry! If your sorbet ends up icy or hard, the key is to fluff the mixture well after the initial freeze. Use a fork to break up any icy pieces and create that delightful, soft texture. Additionally, if it’s still too hard after freezing, let it sit at room temperature for about 5-10 minutes before trying to scoop it again.
Is Pineapple Sorbet safe for those with allergies or dietary restrictions?
Yes, indeed! This Pineapple Sorbet is naturally vegan and free of dairy, making it a perfect option for those with lactose intolerance or who follow a vegan diet. However, always ensure that the ingredients used are free from allergens if you’re serving it to guests with specific dietary needs. If you’re concerned about added sugars, feel free to use a sweetener of your choice or adjust the sugar amount to suit your taste!
Can I add other ingredients or flavors to my Pineapple Sorbet?
Absolutely! Feel free to get creative with your Pineapple Sorbet. You can mix in shredded coconut for added texture or substitute the pineapple with other fruits like mango or berries for a different flavor profile. A splash of rum can also elevate this dessert for adult gatherings. The more the merrier in the world of sorbet experimentation!
Refreshing Pineapple Sorbet in Just 15 Minutes for Summer Bliss
Ingredients
Equipment
Method
- Begin by placing fresh pineapple chunks, sugar, lime juice, and coconut milk in a high-speed blender. Blend all until smooth.
- Pour the mixture into a shallow dish, spread it evenly, and freeze for about 1 hour until slightly firm.
- Fluff the mixture with a fork, then return to the freezer for an additional 30 minutes before serving.